Create connectors for Microsoft 365 Groups
With Microsoft Teams apps, you can add your existing connector for Microsoft 365 Groups or build a new one within Teams. For more information, see build your own connector.
See the following video to learn how to create an connectors for Microsoft 365 Groups:
Note
This topic reflects version 2.0.x of the Microsoft Teams JavaScript client library (TeamsJS). If you are using an earlier version, refer to the TeamsJS library overview for guidance on the differences between the latest TeamsJS and earlier versions.
Add a connector to Teams app
You can create a package and publish your connector as part of your AppSource submission. You can distribute your registered connector as part of your Teams app package. For information on entry points for Teams app, see capabilities. You can also provide the package directly to the users for uploading within Teams.
To distribute your connector, register it in the Connectors Developer Dashboard.
For a connector to work only in Teams, follow the instructions to submit connector in publish your app to the Microsoft Teams Store article. Otherwise, a registered connector works in all Microsoft 365 products that support applications, including Outlook and Teams.
Important
Your connector is registered after you select Save in the Connectors Developer Dashboard. If you want to publish your connector in AppSource, follow the instructions in publish your Microsoft Teams app to AppSource. If you do not want to publish your app in AppSource, distribute it directly to the organization. After publishing connectors for your organization, no further action is required on the Connector Dashboard.
Integrate the configuration experience
Users can complete the entire connector configuration experience without having to leave the Teams client. To get the experience, Teams can embed your configuration page directly within an iframe. The sequence of operations is as follows:
The user selects the connector to begin the configuration process.
The user interacts with the web experience to complete the configuration.
The user selects Save, which triggers a callback in code.
Note
- The code can process the save event by retrieving the webhook settings. Your code stores the webhook to post events later.
- The configuration experience is loaded inline within Teams.
You can reuse your existing web configuration experience or create a separate version to be hosted specifically in Teams. Your code must include the TeamsJS library. This gives your code access to the APIs to perform common operations, such as getting the current user, channel, or team context, and initiate authentication flows.
To integrate the configuration experience:
Note
Starting with TeamsJS library v.2.0.0, APIs in the settings namespace have been deprecated in favor of equivalent APIs in the pages namespace, including pages.getConfig() and other APIs in the pages.config sub-namespace. For more information, see What's new in TeamsJS version 2.x.x.
Initialize TeamsJS by calling
app.initialize().Call
pages.config.setValidityState(true)to enable Save.Note
You must call
microsoftTeams.pages.config.setValidityState(true)as a response to user selection or field update.Register
microsoftTeams.pages.config.registerOnSaveHandler()event handler, which is called when the user selects Save.Call
microsoftTeams.pages.config.setConfig()to save the connector settings. The saved settings are also shown in the configuration dialog if the user tries to update an existing configuration for your connector.Call
microsoftTeams.pages.getConfig()to fetch webhook properties, including the URL.Note
You must call
microsoftTeams.pages.getConfig()when your page is first loaded in case of reconfiguration.Register
microsoftTeams.pages.config.registerOnRemoveHandler()event handler, which is called when the user removes connector.
This event gives your service an opportunity to perform any cleanup actions.
The following code provides a sample HTML to create a connector configuration page without the customer service and support:
<h2>Send notifications when tasks are:</h2>
<div class="col-md-8">
    <section id="configSection">
        <form id="configForm">
            <input type="radio" name="notificationType" value="Create" onclick="onClick()"> Created
            <br>
            <br>
            <input type="radio" name="notificationType" value="Update" onclick="onClick()"> Updated
        </form>
    </section>
</div>

<script src="https://res.cdn.office.net/teams-js/2.2.0/js/MicrosoftTeams.min.js" integrity="sha384-Q2Z9S56exI6Oz/ThvYaV0SUn8j4HwS8BveGPmuwLXe4CvCUEGlL80qSzHMnvGqee" crossorigin="anonymous"></script>
<script src="/Scripts/jquery-1.10.2.js"></script>

<script>
        function onClick() {
            pages.config.setValidityState(true);
        }

        await microsoftTeams.app.initialize();
        pages.config.registerOnSaveHandler(function (saveEvent) {
            var radios = document.getElementsByName('notificationType');

            var eventType = '';
            if (radios[0].checked) {
                eventType = radios[0].value;
            } else {
                eventType = radios[1].value;
            }

            await pages.config.setConfig({
                entityId: eventType,
                contentUrl: "https://YourSite/Connector/Setup",
                removeUrl:"https://YourSite/Connector/Setup",
                configName: eventType
                });

            pages.getConfig().then(async (config) {
                // We get the Webhook URL from config.webhookUrl which needs to be saved.
                // This can be used later to send notification.
            });

            saveEvent.notifySuccess();
        });

        pages.config.registerOnRemoveHandler(function (removeEvent) {
            alert("Removed" + JSON.stringify(removeEvent));
        });

</script>
To authenticate the user as part of loading your page, see authentication flow for tabs to integrate sign in when your page is embedded.
Note
Prior to TeamsJS v.2.0.0, your code must call microsoftTeams.authentication.registerAuthenticationHandlers() with the URL and success or failure callback methods before calling authenticate() due to cross-client compatibility reasons. Starting with TeamsJS v.2.0.0, registerAuthenticationHandlers has been deprecated in favor of directly calling authenticate() with the required authentication parameters.
getConfig response properties
Note
The parameters returned by the getConfig call are different when you invoke this method from a tab and differ from those documented in the reference.
The following table provides the parameters and the details of getConfig response properties:
| Parameters | Details |
|---|---|
entityId |
The entity ID, as set by your code when calling setConfig(). |
configName |
The configuration name, as set by your code when calling setConfig(). |
contentUrl |
The URL of the configuration page, as set by your code when calling setConfig(). |
webhookUrl |
The webhook URL created for the connector. Use the webhook URL to POST structured JSON to send cards to the channel. The webhookUrl is returned only when the application returns data successfully. |
appType |
The values returned can be mail, groups, or teams corresponding to the Microsoft 365 Mail, Microsoft 365 Groups, or Teams. respectively. |
userObjectId |
The unique ID corresponding to the Microsoft 365 user who initiated the setup of the connector. It must be secured. This value can be used to associate the user in Microsoft 365, who has setup the configuration in your service. |
Handle edits
Your code must handle users who return to edit an existing connector configuration. To do this, call microsoftTeams.pages.config.setConfig() during the initial configuration with the following parameters:
entityIdis the custom ID that represents what the user has configured and understood by your service.configNameis a name that configuration code can retrieve.contentUrlis a custom URL that gets loaded when a user edits an existing connector configuration.
This call is made as part of your save event handler. Then, when the contentUrl is loaded, your code must call getConfig() to prepopulate any settings or forms in your configuration user interface.
Handle removals
You can execute an event handler when the user removes an existing connector configuration. You register this handler by calling microsoftTeams.pages.config.registerOnRemoveHandler(). This handler is used to perform cleanup operations, such as removing entries from a database.
Include the connector in your app manifest
Download the auto-generated app manifest (previously called Teams app manifest) from the Developer Portal (https://dev.teams.microsoft.com). Perform the following steps, before testing or publishing the app:
- Include two icons.
- Modify the
iconsportion in the app manifest file to include the file names of the icons instead of URLs.
The following manifest.json example contains the elements needed to test and submit the app:
Note
Replace id and connectorId in the following example with the GUID of the connector.
Example of manifest.json with connector
{
  "$schema": "https://developer.microsoft.com/json-schemas/teams/v1.8/MicrosoftTeams.schema.json",
  "manifestVersion": "1.5",
  "id": "e9343a03-0a5e-4c1f-95a8-263a565505a5",
  "version": "1.0",
  "developer": {
    "name": "Publisher",
    "websiteUrl": "https://www.microsoft.com",
    "privacyUrl": "https://www.microsoft.com",
    "termsOfUseUrl": "https://www.microsoft.com"
  },
  "description": {
    "full": "This is a small sample app we made for you! This app has samples of all capabilities Microsoft Teams supports.",
    "short": "This is a small sample app we made for you!"
  },
  "icons": {
    "outline": "sampleapp-outline.png",
    "color": "sampleapp-color.png"
  },
  "connectors": [
    {
      "connectorId": "e9343a03-0a5e-4c1f-95a8-263a565505a5",
      "scopes": [
        "team"
      ]
    }
  ],
  "name": {
    "short": "Sample App",
    "full": "Sample App"
  },
  "accentColor": "#FFFFFF",
  "needsIdentity": "true"
}
Test your connector
To test your connector, upload it to a team with any other app. You can create a .zip package using the app manifest file from the two icon files and Connectors Developer Dashboard, modified as directed in Include the connector in your app manifest.
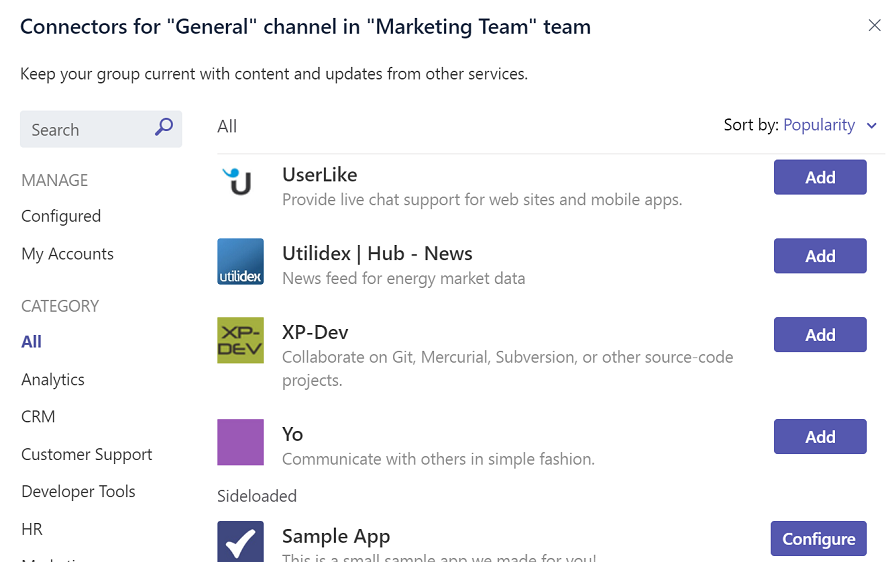
After you upload the app, open the connectors list from any channel. Scroll to the bottom to see your app in the Uploaded section.
Note
The flow occurs entirely within Teams as a hosted experience.
To verify that HttpPOST action is working correctly, send messages to your connector.
Follow the step-by-step guide to create and test the connectors in your Teams.
Distribute webhook and connector
Create Incoming Webhooks directly for your team.
Add a configuration page and publish your Incoming Webhook in a connector for Microsoft 365 Groups.
Package and publish your connector as part of your AppSource submission.
Code sample
The following table provides the sample name and its description:
| Sample name | Description | .NET | Node.js |
|---|---|---|---|
| Connector TODO notification | This sample shows a connector for Microsoft 365 Groups, which generates and sends notifications for Teams channel. | View | View |
| Generic connectors sample | This sample shows a generic connector that is easy to customize for any system that supports webhooks. | NA | View |
Step-by-step guide
Follow the step-by-step guide to build and test connector in Teams.
See also
Platform Docs
Feedback
Coming soon: Throughout 2024 we will be phasing out GitHub Issues as the feedback mechanism for content and replacing it with a new feedback system. For more information see: https://aka.ms/ContentUserFeedback.
Submit and view feedback for