Configure registration options and set up event passes
Dynamics 365 Customer Insights - Journeys offers a variety of registration options that you can configure and enable for your event. Advanced registration allows marketers to prepare for event and session capacity while ensuring that attendees have a spot reserved at the event or session that they want to attend.
Advanced registration features, including custom registration fields, event passes, and online payments can assist you in the planning and implementation of your onsite events.
Enable registration options
Event managers use registration records to evaluate how many resources they'll need to have available for a specified event. Managers often decide in advance which sessions will require larger rooms or even if a session should be canceled. Registration also enables attendees to be confident that their place is reserved for all sessions that they want to attend.
A variety of registration settings are available for you to enable and configure for your events. You can also add custom registration fields to the registration form to capture additional information about your registrants.
Registration options appear on the Website and form tab of an event. Key settings include the following registration options that you can configure:
Set registrations end date - Setting an end date for registrations is useful if you want a cutoff time to allow you to finalize your attendee list before the event starts. In this case, set the Registrations end date toggle to Yes to set a date and time after which contacts will no longer be able to register for the event. You can also include a Website message regarding the event registration stop date. Set the toggle to No to leave registration open until the start of the event.
Use marketing form for registration - If you want to host your event registration form on your own website or embed it in a landing page, set the toggle to Yes to use a previously prepared marketing form for event registration. When the toggle is set to Yes, a Marketing form option appears, allowing you to search for the marketing form that you want to use. If you select No, the event will use the default event marketing form. If you choose to use a marketing form for registration, after your event has gone live, your form will generate a script that you can use to add your form to a landing page or webpage of your choosing.
Enable CAPTCHA - Set to Yes to include a CAPTCHA field on the registration page. Set to No to hide it. This setting works for portal hosted and externally hosted event websites. If you've chosen to enable a CAPTCHA field, then the visitor must fill out the CAPTCHA field to continue after entering details about each registrant.
Multi-attendee registration - The registration can allow several people to be registered at once, or you can set it to allow only one attendee to be registered at a time. Set this option to Yes to allow users of the event website to register several attendees at once. Set the option to No to allow just one attendee registration.
Allow anonymous registrations - If you are hosting the event website on Microsoft Power Pages, set this option to No to require all visitors to create an event website account before they can register themselves or others for an event; set it to Yes to allow visitors to register without creating an event website account. One advantage of creating a registration account is that those contacts can sign in again to view their event schedules and to cancel registrations if needed. If you're hosting the event website on Power Pages, then visitors who use the site to create a registration account must do so by using an email address that doesn't belong to contacts that are already in your database. This setting has no effect if you are hosting your event website externally. For more information, see Event management web application overview.
For more information, see Set registration options and The Website and form tab.
Create custom registration fields
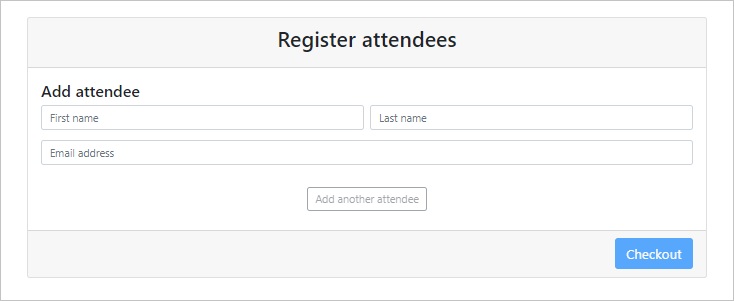
The default registration form that is presented by the event website includes fields for first name, last name, email address, and pass type (for paid events with at least one pass).
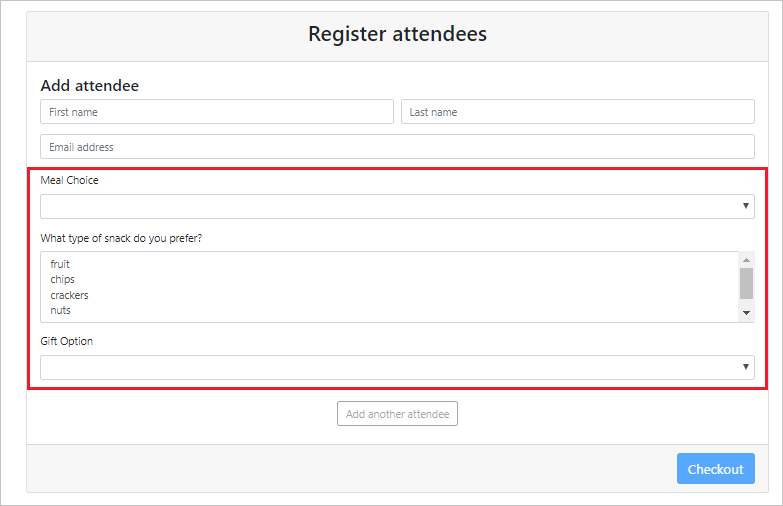
If you want to receive additional information from attendees, such as special needs, food allergies, or a gift preference, then you can add them as custom fields to your registration form. You can choose which custom fields to add to each event, and your registration records will include the values that are submitted by registrants.
To view custom registration fields in your system, go to the Events work area and then go to Event planning > Custom Registration Fields. This section shows all custom fields that are available for use with your various events. You can also create a new custom field by selecting + New on the command bar.
To add custom registration fields to an event, open the appropriate event and then go to the Website and form tab. In the Custom registration fields section, you can add custom fields that have already been created or create new ones directly from this section by selecting + New Event Custom Registration Field.
After the fields have been added, you can define how they appear on your registration form by updating the Order field on each of the custom registration fields accordingly.

You can also create and add custom registration fields when using a marketing event registration form instead of using the registration form that is presented in the event website. For more information, see Use marketing forms for event registration.
For more information, see Set up a custom registration field, Add a custom registration field to an event, and Read all custom fields values submitted for an event.
Set up event passes
An event pass is a ticket that you can sell or give away to grant access to your event, various sessions, or session tracks, and they can even be shown on the event website. For a simple event, you might set up a single pass type that grants access to all sessions for all types of attendees. For a complex event, you could set up passes for each of several tracks. You might even require specific pass types to access venue areas such as a lounge for journalists only. Because passes make sense only for physical attendees, you don't need to set up passes for webinar-only attendees, events, or sessions.
To view and create passes for an event, open the appropriate event record and go to the Registration and attendance tab, where you can view, edit, and create passes by working in the Passes section.
For each pass type, you can assign a category and an attendee, a speaker, a sponsor, and a journalist or someone similar. You also can set a price, give the number of available allocations, and provide other details.
Additionally, you can assign a collection of one or more sessions for the pass, which grants access to all sessions in that track, but not necessarily to all sessions at the event.

Pay attention to the Passes allocated field, which is where you set the number of available passes. Also, make sure that you monitor its related fields: Passes sold and Passes remaining. Each time that a pass is granted to an attendee, the Passes sold number automatically increases and the Passes remaining number decreases. When Passes remaining reaches zero, that pass will be shown on the event website as sold out and will no longer be available for purchase by prospective attendees.
If you set Passes allocated to zero, that pass won't be shown on the website at all. You might choose this approach for VIP passes or to keep a pass as a draft until you're ready to publish it by setting Passes allocated to a positive value.
After you have set up the pass, you can go to the record to identify the pass details, such as Eligible sessions. This parameter is important for a complex event where you might have passes for each of several session tracks.
To add sessions to a pass, first create and save it in the Passes section, and then open it for editing and use its Eligible sessions tab to add sessions to it.

For more information, see Set up event passes.
Set up online payment for events
If you have one or more events where contacts must purchase a pass, then your contacts will likely appreciate being able to pay for their passes online while they are registering for your event on the event website.
Note
The event portal doesn't come with an external payment provider. To enable an online payment for your events, you must make an agreement with an external payment provider who can authenticate and capture payment details.
After you have enabled an online payment with your payment provider, they'll supply you with details about how to implement their system. Typically, you would include additional code that they supplied to a webpage that is running on your event website. You'll also need to tell your provider the URL to request from Dynamics 365 Customer Insights - Journeys to indicate a successful payment.
When your new payment gateway is in place on your event website, you can configure your various events to use it, or assign it as the default for all new events.
The procedure for building and enabling a payment gateway depends on how you host your event website.
If you're hosting the event website on a Dynamics 365 portal, then see Create a payment gateway when hosting on Power Apps portal for instructions. This article will explain the steps for adding a payment page and confirmation when an attendee purchases an attendee pass.
If you're hosting the event website on an external server, then see Create a payment gateway when hosting on an external site for instructions.
Note
We recommend that you have a development resource assist you when configuring your external payment provider in your events portal.
For more information, see Set up online payments for events.
Automate the check-in process
Event staff can either manually check in registrants in Dynamics 365 Marketing or scan a QR code from the registrant on the day of the event.
As people register on the event portal, an event registration record is created. This record includes a registration ID that is stored as an alphanumeric code and as a machine-readable QR code. The QR code is a direct encoding of the registration ID, so on the day of the event, event workers can quickly scan the code by using a QR code scanner or smartphone app. To use this functionality, you'll need to create a scanning application to use on the day of the event. The scanning app could then query the registration database in Dynamics 365 Marketing to confirm validity or to register attendance.
Note
Custom development is needed to create the scanning app and implement the integration with your Dynamics 365 Customer Insights - Journeys system.
To check in an event attendee by using the QR code on their registration record, follow these steps:
Using your smart app, scan the attendee QR code from an email or a printed badge.
After you have scanned the selected QR code, the event attendee will be checked in for the event.
You can view the check-in by opening the event, going to the Registration and attendance tab, and then scrolling to the Event check-ins section.
For more information, see Event registration QR code elements.