Exercise - Configure a Playbook for a security event
Workflow Automations are created directly in the Defender for Cloud portal.
Important
You'll need a Microsoft 365 email account to use this specific set of instructions. If you don't have one, try changing the instructions below to use a different template, or create a blank Logic App.
Sign in to the Azure portal with the same account you used to activate the Azure Sandbox.
Search for and select Microsoft Defender for Cloud using the search box. The Overview pane for Defender for Cloud displays.
In the left menu pane, under Management, select Workflow automation.
In the top menu bar, select + Add workflow automation to create a new automation. The Add workflow automation pane displays.
Enter the following values for each setting:
Setting Value General Name RespondToMalwareAlert Subscription Concierge Subscription Resource group [Learn resource group] Trigger conditions Select Defender for Cloud data types Security alert Alert name contains Malware Alert severity All severities selected Under Actions, you can select an existing Azure Logic App or create a new one. Since we don't have one yet, select the visit the Logic Apps page link to build a new Logic App.
The Logic apps pane displays. Make sure you're still in the Microsoft Learn Sandbox directory before continuing.
In the top menu bar, select + Add. The Create Logic App pane displays.
On the Basics tab, enter the following values for each setting:
Setting Value Project details Subscription Concierge Subscription Resource group [Learn resource group] Instance details Logic app name RespondToMalwareAlert Plan type Consumption Note
You need a unique name for the Logic app. If the suggested name isn't available, modify it or select another name.
Accept the default values for the rest of the fields.
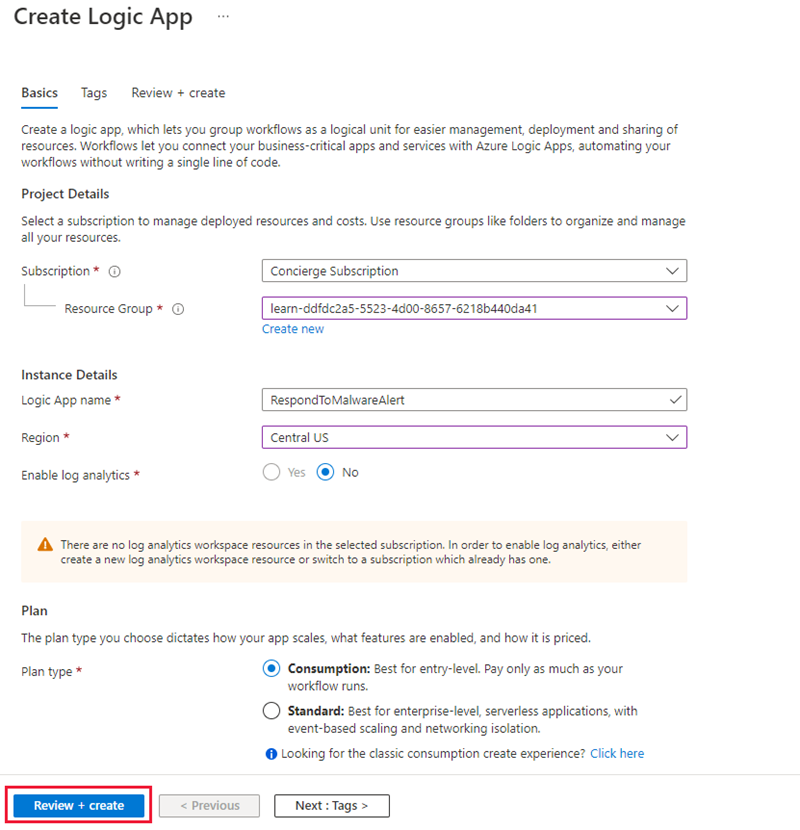
Select Review + create, then select Create. It takes a minute or two to create the app. You can monitor the creation through the Notifications icon or select Refresh to refresh the screen.
Once the Logic App has been created, select Go to resource.
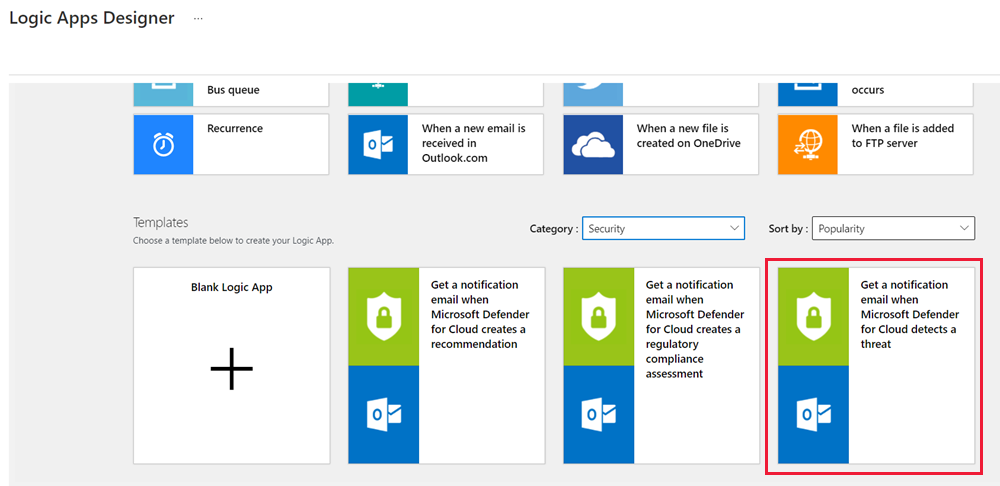
Select Logic app designer under Development Tools in the left menu.
Scroll down to the Templates section and select Security from the Category drop-down list.
Select Get a notification email when Defender for Cloud detects a threat, then select Use this template. You could also select Blank Logic App if you wanted to create some custom logic to run in response to an alert, or if you don't have a Microsoft 365-based email account.
Select the Sign in link in the Office 365 Outlook box. Provide credentials for Office 365 Outlook to connect your email account. Once validated, the owning email will be shown on the Office 365 Outlook connector.
Select Add New in the Connections box. This connects the logic app to Microsoft Defender for Cloud.
Note
If the pane doesn't refresh and show the next step, select Code view, and then select Designer.
Select Continue to move to the details page.
Specify a target email address to send the notification to.
On this screen, you can change the subject of the email and any details that will be included.
You can use the + New step button to create more logic steps in the flow. In this case, we don't need another step. Select Save from the top menu bar.
Switch back to the Defender for Cloud pane, or tab and select Refresh to select your newly created Logic App.
Select RespondToMalwareAlert (or whatever you named your logic app) from the list of Logic Apps.
Select Create to create the workflow automation.
Run a Workflow automation from Microsoft Defender for Cloud
You'd normally run playbooks from the workload protection dashboard using an existing alert.
Select Security alerts in Defender for Cloud left menu pane.
Here, you'd select an alert, select View full details , select Take action, select the Trigger automated response drop-down, and then select Trigger logic app.
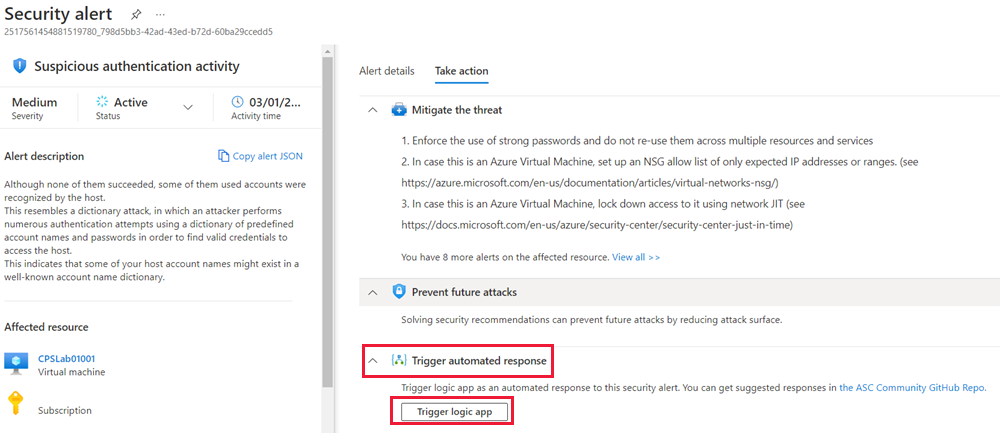
In this case, in the Azure Sandbox, you likely don't have any alerts, so you can't execute the playbook this way. However, you can test it through the Logic Apps panel.
Test a workflow automation from Logic Apps
Select Home from the left-corner sidebar. You should see your Logic App as a recently created resource. If not, try searching for it from the top search bar. Recall the name is RespondToMalwareAlert.
On the Overview pane, from the top menu bar, select the Run drop-down, then select Run.
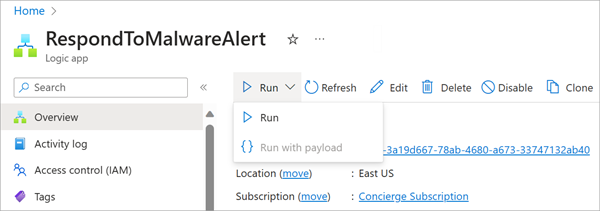
A new entry will show up under the Runs history tab in the Overview pane. You might need to select the Refresh button at the top of the screen. You can select that entry to drill into details. For example, you can drill into the inputs and outputs of the run:
Inputs
{
    "method": "post",
    "path": "/Mail",
    "host": {
        "connection": {
            "name": "/subscriptions/abcd/resourceGroups/abcd/providers/Microsoft.Web/connections/office365"
        }
    },
    "body": {
        "Body": "Microsoft Defender for Cloud has discovered a potential security threat in your environment. Details below:\n\nAlert name: \n\nDescription: \n\nDetection time: \n\nAttacked resource: \n\nDetected by: \n\nAlert ID: ",
        "Importance": "High",
        "Subject": "Microsoft Defender for Cloud has discovered a potential security threat in your environment",
        "To": "john@doe.com"
    }
}
Outputs
{
    "statusCode": 200,
    "headers": {
        "Pragma": "no-cache",
        "x-ms-request-id": "615f4430-7433-4fd3-aa2d-000e8a1a0db9",
        "Strict-Transport-Security": "max-age=31536000; includeSubDomains",
        "X-Content-Type-Options": "nosniff",
        "X-Frame-Options": "DENY",
        "Timing-Allow-Origin": "*",
        "x-ms-apihub-cached-response": "true",
        "Cache-Control": "no-store, no-cache",
        "Date": "Fri, 10 Oct 2019 09:17:32 GMT",
        "Set-Cookie": "ARRAffinity=9c9c847b5bd6c73a56d4f1afae4aecaa7f5b746d703be6c728afc87b6c50d7e3;Path=/;HttpOnly;Domain=office365-wus.azconn-wus.p.azurewebsites.net",
        "Content-Length": "0",
        "Expires": "-1"
    }
}
You should also receive an email at the email address you specified stating that Microsoft Defender for Cloud has discovered a potential security threat in your environment.
Congratulations! You've successfully configured a workflow automation.