Customize meeting invitations (IT admins)
You can customize Teams meeting invitations to meet your organization's needs. You can add your organization's logo and include helpful information, such as links to your support website and legal disclaimer, and a text-only footer.
Note
Logos added to a meeting theme override the logos you upload to meeting invitations. To learn more about meeting themes, see Create and manage meeting themes for Teams meetings.
Tips for creating a logo for meeting invitations
- Create an image that's no more than 188 pixels wide by 30 pixels tall (it's small).
- Save the image in JPG or PNG format.
- Store the image in a location that everyone receiving the invitation can access, such as a public website.
Now that you have your logo, you can customize your meeting invitations.
Customize your meeting invitations using the Teams admin center
Navigate to the Teams admin center
In the left navigation, go to Meetings > Meeting settings.
Under Email invitation, do the following:
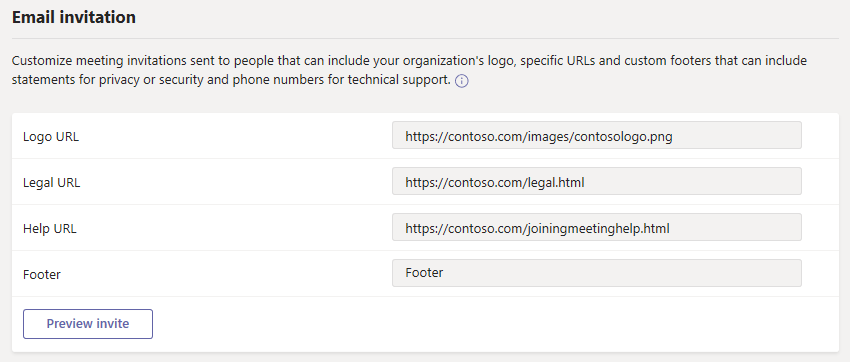
- Logo URL Enter the URL where your logo is stored.
- Legal URL If your organization has a legal website that you want people to go to for any legal concerns, enter the URL here.
- Help URL If your organization has a support website that you want people to go to if they run into issues, enter the URL here.
- Footer Enter text that you want to include as a footer.
Select Preview invite to see a preview of your meeting invitation.
When you're done, select Save.
Wait an hour or so for the changes to propagate and schedule a Teams meeting to see what the meeting invitation looks like.
Feedback
Coming soon: Throughout 2024 we will be phasing out GitHub Issues as the feedback mechanism for content and replacing it with a new feedback system. For more information see: https://aka.ms/ContentUserFeedback.
Submit and view feedback for