Tag documents
By tagging the documents you've uploaded, you're teaching your AI Builder model to extract the fields and tables you've specified.
To start tagging, select one of the collections on the right panel.
Tag fields
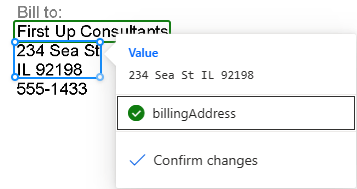
To tag a field, draw a rectangle around the field you're interested in and select the field name that it corresponds to.
At any time, you can resize to adjust your selection.
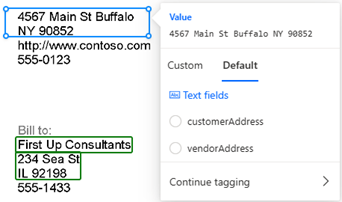
If a field ends on one line and begins on another line, you can tag it using the ‘Continue tagging’ option.
You can also use the Control key in Windows or Command ⌘ in macOS to tag multiple words at once. You can also use the Shift key to select the first and last word to tag all words between the two.
When you hover over words in your documents, light blue boxes may appear. These indicate that you can draw a rectangle around those words to select a field.
For the custom Invoices model only
You can override the behavior of a default field by redrawing an existing bounding box.
Invoice default fields that weren't automatically detected in your document are marked as 'Not in document'. You can change this to Available in document and manually tag it if it's present.
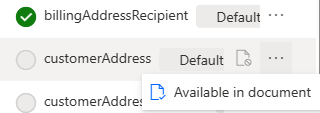
When tagging, select Custom to display the list of untagged fields you've added, and select Default to display the untagged default fields marked as 'Available in the document'.
Tag tables
Draw a rectangle around the table in the document you're interested in, and then select the table name that it corresponds to. The content of the panel on the right changes.
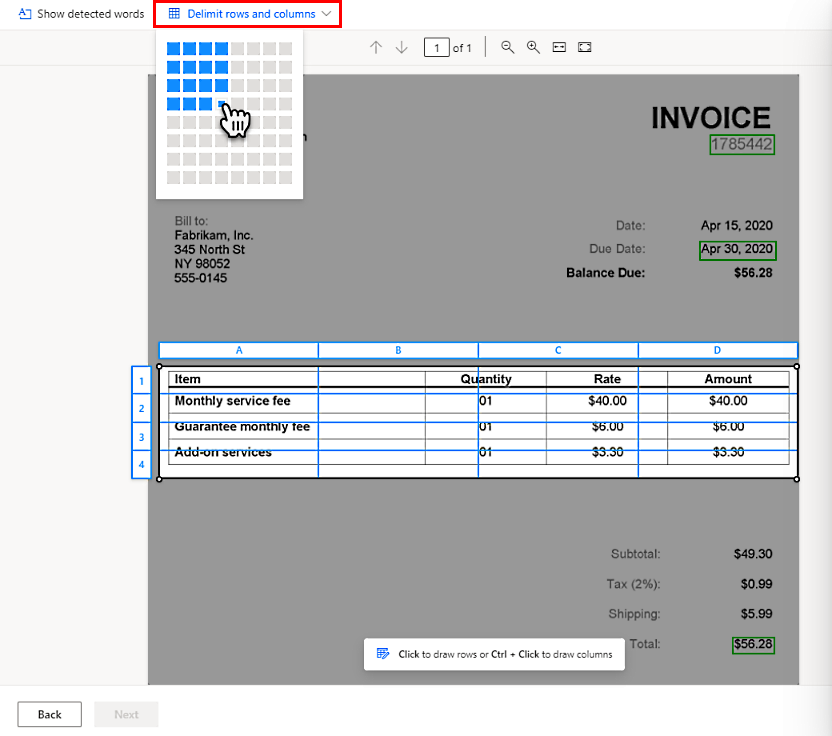
Draw rows by left-clicking between row separators.
Draw columns by pressing Ctrl + left-click.
Once the rows and columns have been set, assign the headers to extract by selecting the header column and mapping it to the desired one.
A preview of how the table will be extracted appears on the panel on the right.
If the header of the table has been tagged, select Ignore first row so the header of the table isn't extracted as the table content.
The following animation illustrates the process:

An alternative way to define the rows and columns for a table is by selecting Delimit rows and columns at the top of the screen.
Use the advanced tagging mode
Advanced tagging mode allows you to tag tables at the cell level. Use this mode for complex tables like:
- Tables that are skewed, where tagging with a grid isn't possible.
- When you need to extract nested items, like an item within a cell.
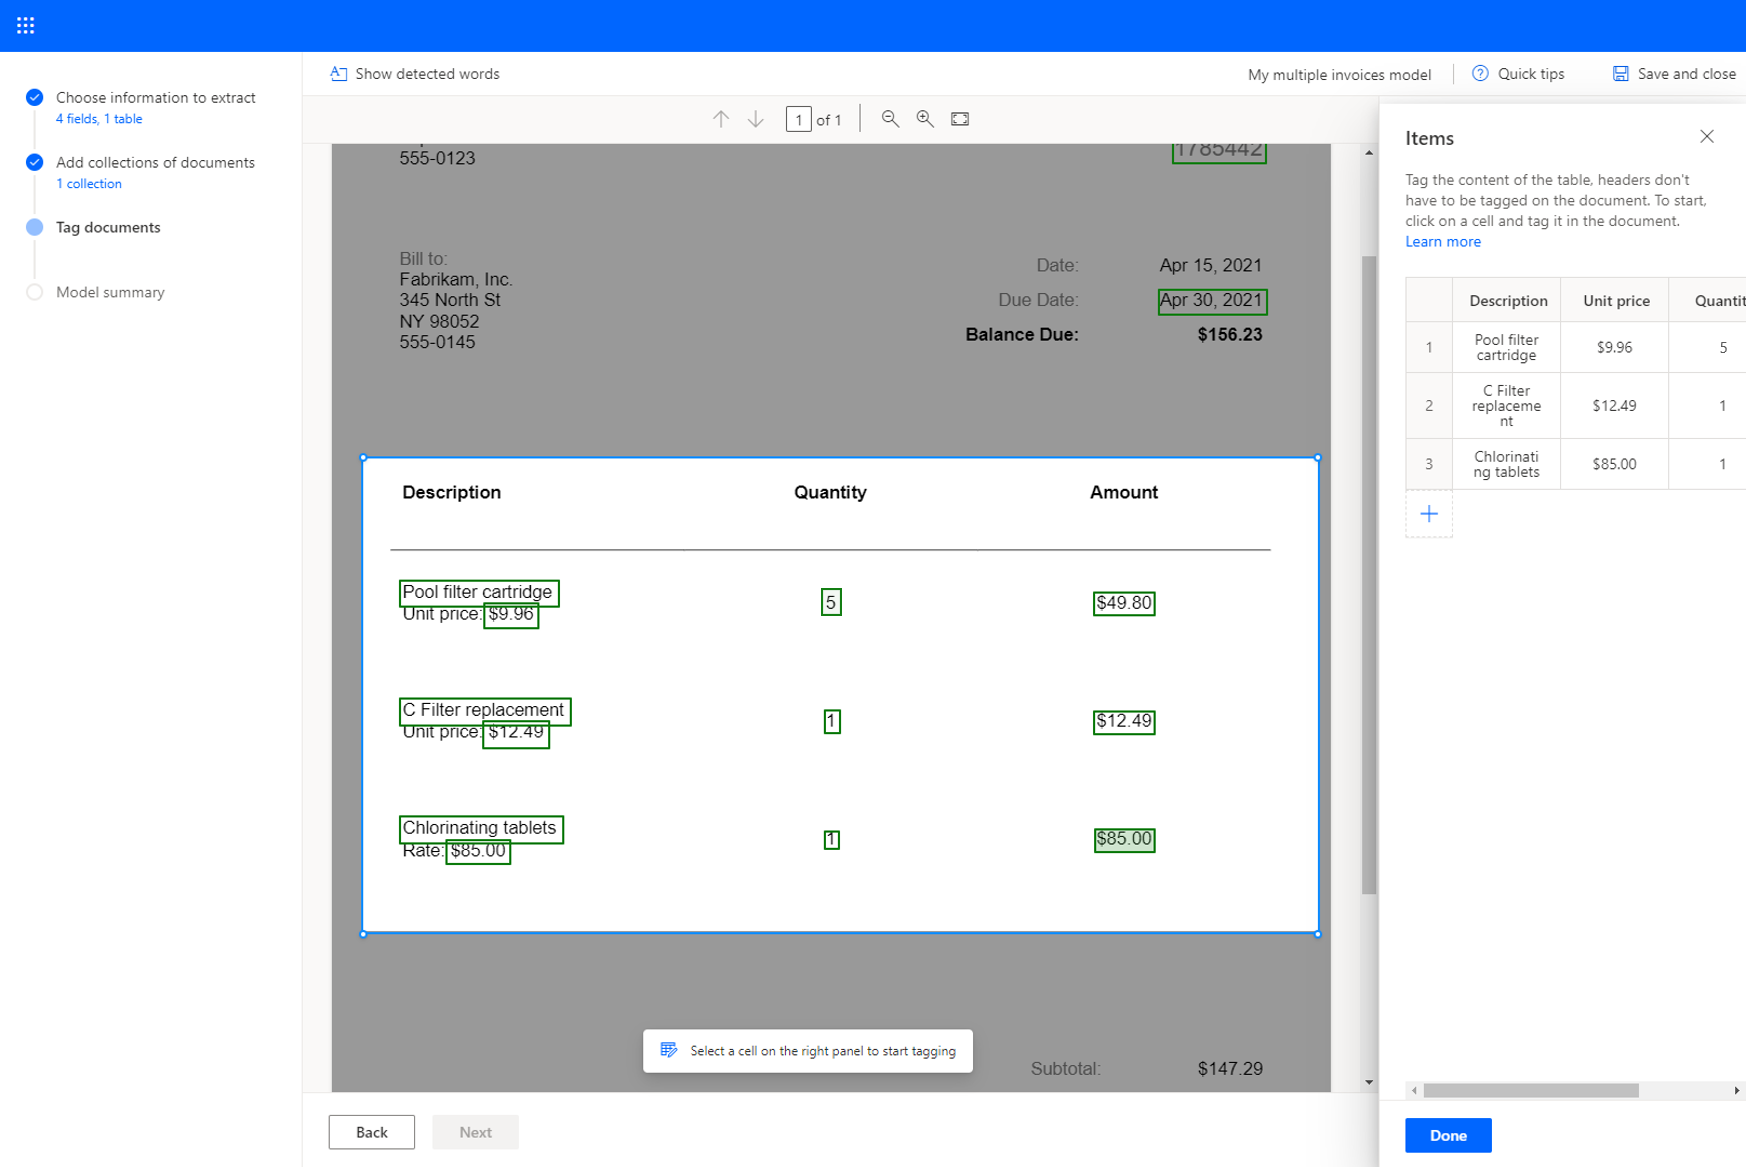
Given the table from the following example, to extract the unit price, we'll define it as a separate column on the Choose information to extract step. We define Description, Unit price, Quantity, and Amount each as a column of the table and tag them accordingly using advanced tagging mode. See the animation below.
You can start tagging in the default mode to quickly capture all rows and columns. Then switch to advanced mode to adjust each cell and tag nested items.
Nested items in tables
You can tag items that are nested within a row by defining these as columns. Given the table from the example below, to extract the unit price, define it as a separate column on the Choose information to extract step earlier in this topic. Define Description, Unit price, Quantity, and Amount each as a column of the table and then tag them accordingly.
Multipage tables
If a table spans across more than one page, make sure you tag it across all the pages. Once you've finished tagging the table on one page, select This table continues on next page and continue tagging the table on the following page. By doing this, you'll teach the model that the table can span across multiple pages.
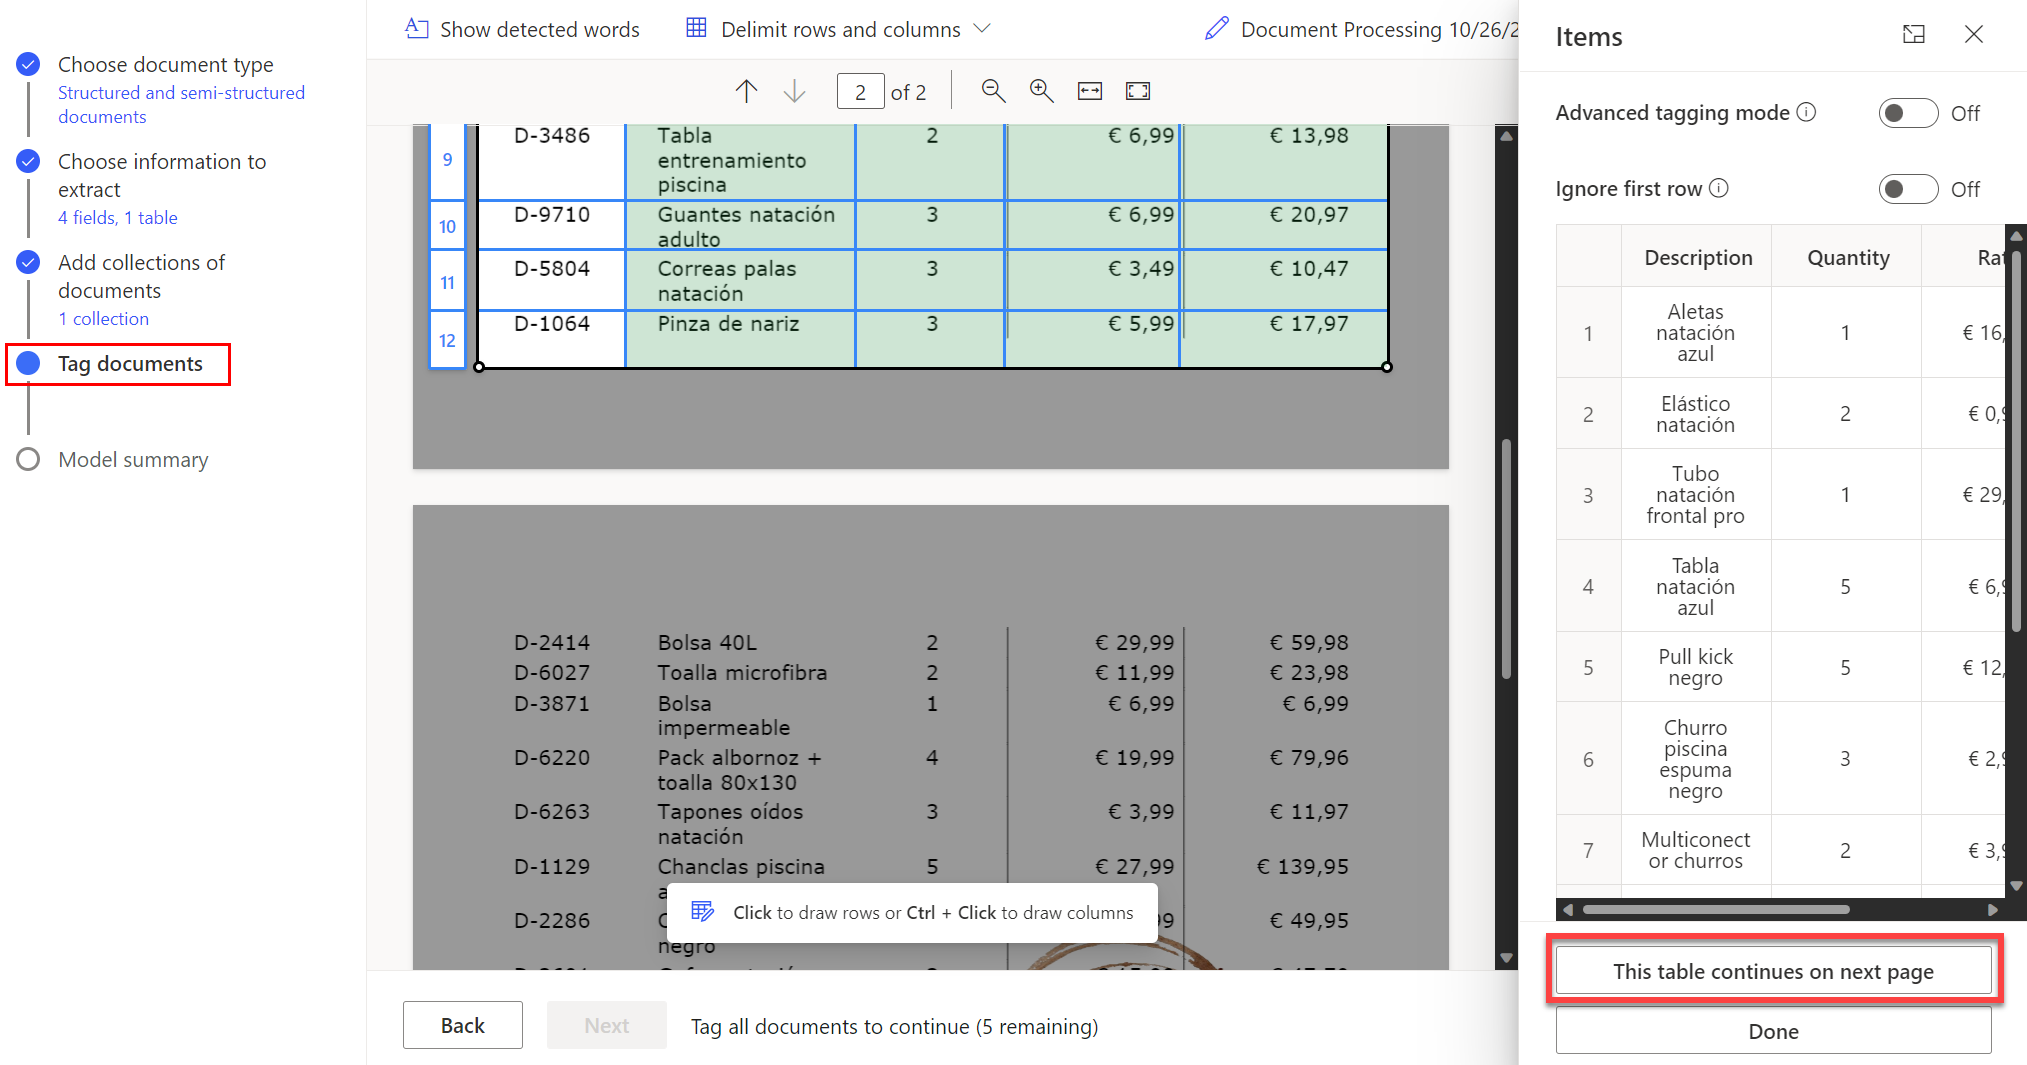
Once you have tagged all the pages where the table is present. Select Done to mark the table as fully tagged.
You can tag complex tables that have merged cells, nested items, borders or no borders, or even unexpected elements like a coffee stain, as shown in the following example.

Tip
As a best practice, ensure that you upload documents for training with expected variations. For example, include samples where the entire table is on a single page and where tables span two or more pages.
Tag checkboxes
To tag a checkbox, draw a rectangle around the checkbox you're interested in extracting and select the checkbox name that it corresponds to.
If the quality of the document is low, AI Builder might not be able to detect the checkbox. If you're unable to tag a checkbox, do the following:
On the panel on the right, select the three dots next to the checkbox you want to extract.
Select Not available in document.
AI Builder supports detection and extraction of selection marks such as checkboxes and radio buttons, with different markers to indicate whether the selection is marked or not.
Field, checkbox, table, not in document or not in collection
If a field, checkbox, or table isn't present in one of the documents or in collection you've uploaded for training, select Not available in document or Not available in collection on the panel to the right, next to a field, checkbox, or table.

Tag all documents across all collections
All the documents that you've uploaded are presented for you to tag. If you've created multiple collections, tag all documents across all the collections.
If fields can’t be tagged in your document, go to Fields couldn't be loaded for this document for possible resolutions.
Next step
See also
Feedback
Coming soon: Throughout 2024 we will be phasing out GitHub Issues as the feedback mechanism for content and replacing it with a new feedback system. For more information see: https://aka.ms/ContentUserFeedback.
Submit and view feedback for