Configuring Azure Active Directory Connect with an Exchange Resource Forest Topology
With the march to the cloud stronger than ever, more and more companies are doing the sensible thing and moving all or part of their messaging infrastructure to Office 365. I am not going to go into the reasons why you should absolutely be doing this, but let's just say you really should be. Up until fairly recently, there has been challenges around certain types of AD topology and the ability to sync identity to Azure AD. With the release of AAD Connect, all of our wildest dreams have now come true and we can pretty much cover most deployment scenarios.
This post is about using AAD Connect to synchronise your On-Premises Active Directory accounts to Azure AD when you have a resource forest topology, with Exchange in one forest (the resource) and identity (the user account) in another forest. By the end of it, we will have all our accounts sync'd to Azure AD, and we will be able to onboard a mailbox to Office 365, and log on to it with SSO. Pretty sweet.
Some things are outside the scope of this article, so I will not be telling you:
- How to configure ADFS for SSO
- How to set up your Office 365 tenant
- How to configure your on-premises Exchange environment
- How to run the Hybrid Configuration Wizard
There are some excellent resources already out there for all of the above, so get Binging if you're not quite there. I may add some bits another time.
So, with that said, you should have the following all working already:
- Exchange (I am using 2013, of course) deployed in a resource forest topology, with users all working properly.
- Fully functional ADFS environment, with an ADFS proxy (I am using WAP, of course)
- Fully configured Office 365 tenant, with domains verified, SSO enabled etc. It will have an empty directory, of course - we're going to populate that badboy in a while.
Right, shall we get on with it?
Oh, before we do - you are doing all this in a lab first, aren't you? :) Use test OU's and test accounts! Be Safe!
Firstly, download AAD Connect from here and copy it to your sync server. In my lab I used my DC. This server should be in the "accounts" forest, where the users identity is.
Fire up the MSI and you will be greeted with the welcome screen. Sign your life away and accept those T&C's..
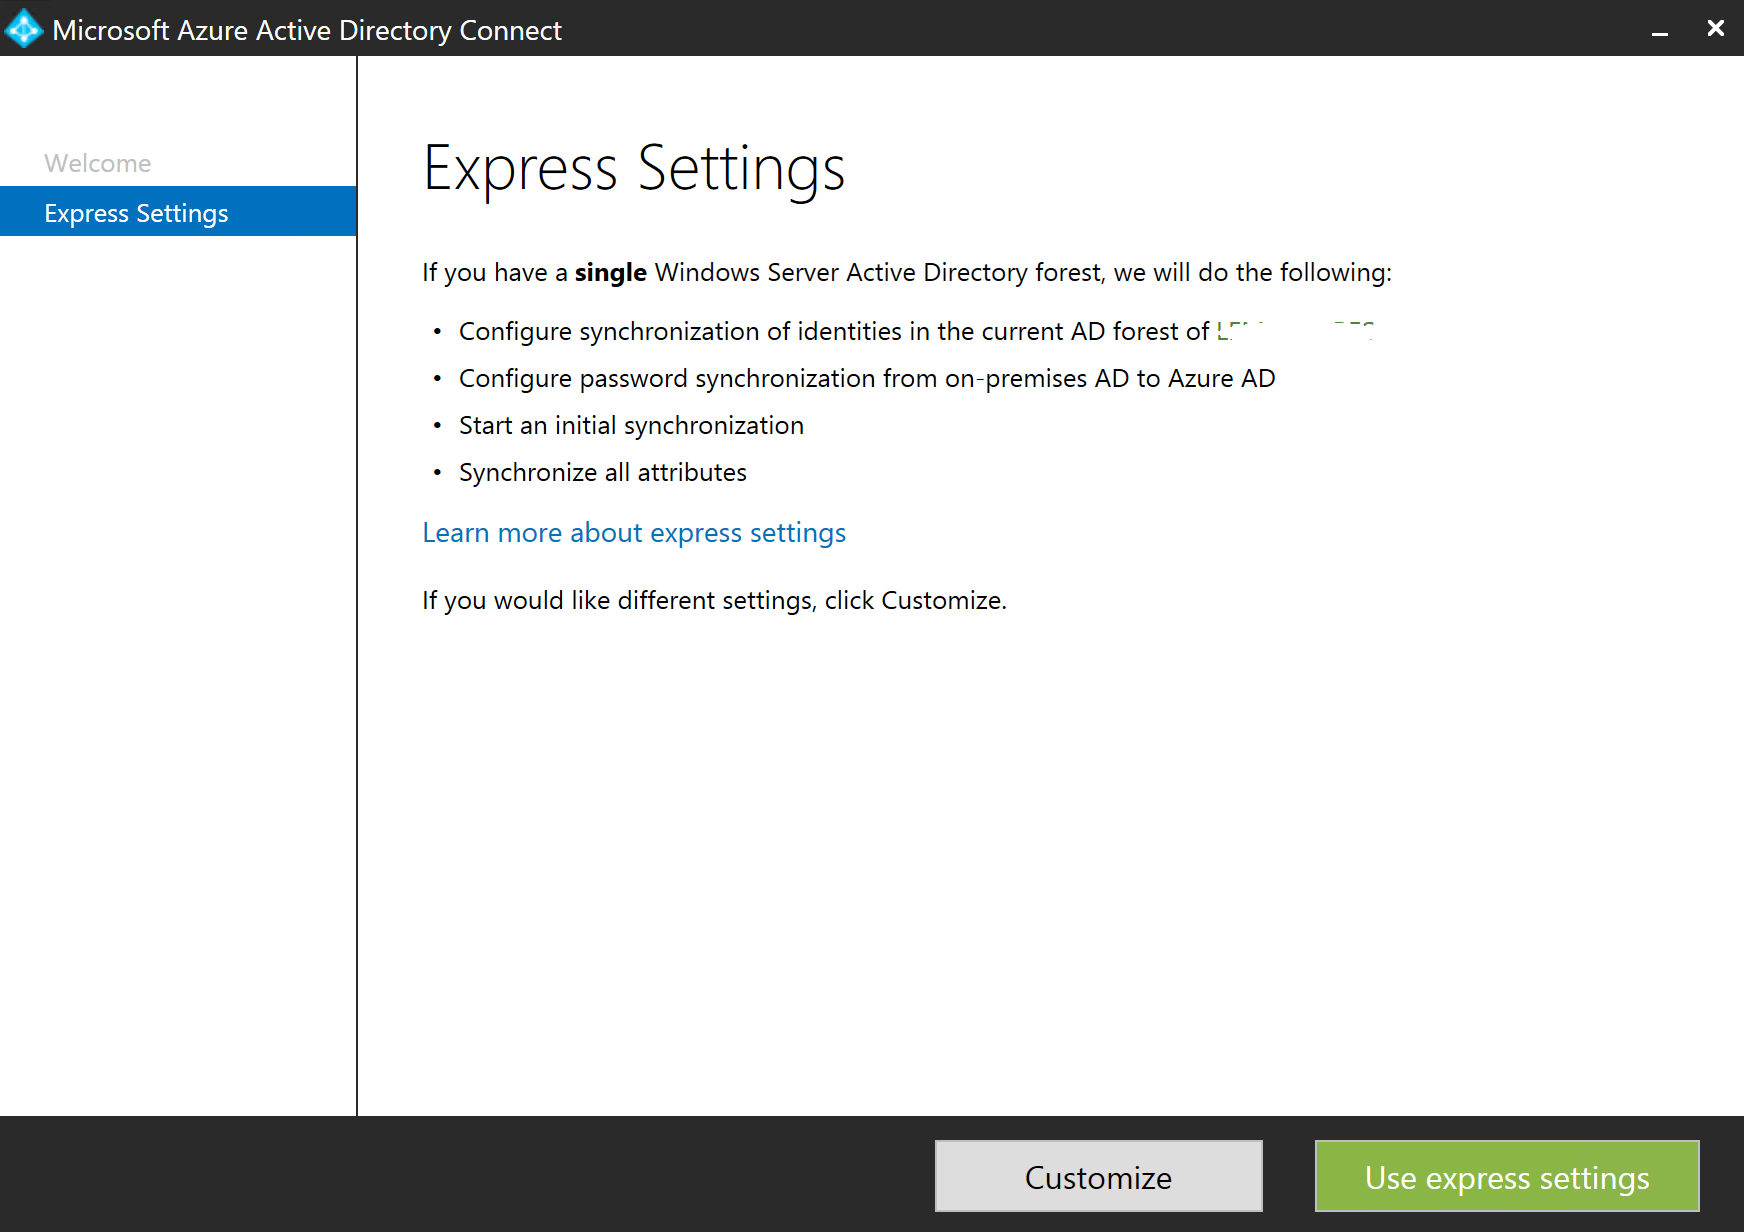
You should now see the below screen. As we do not have a single Windows Server Active Directory Forest, click Customize...
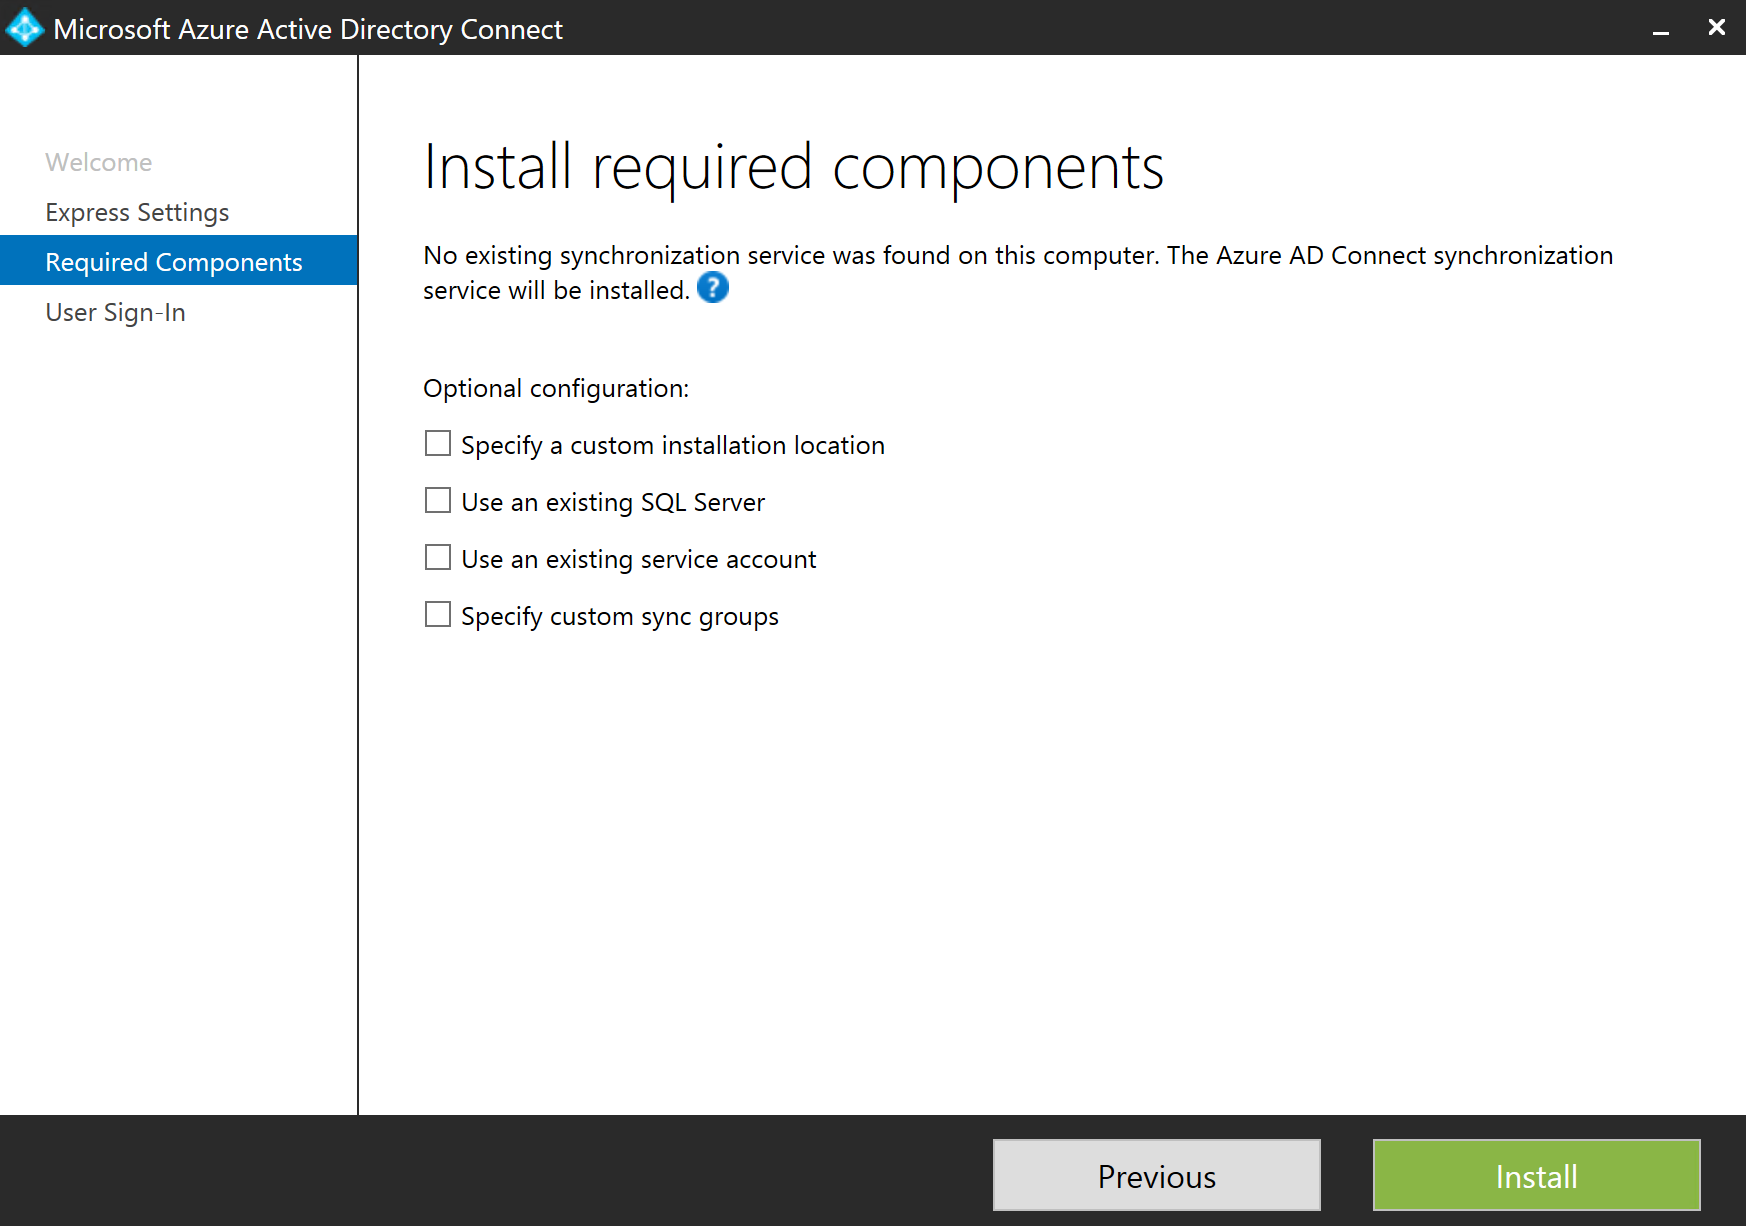
At the "Install Required Components" page, select a desired option if needed and/or click Next...
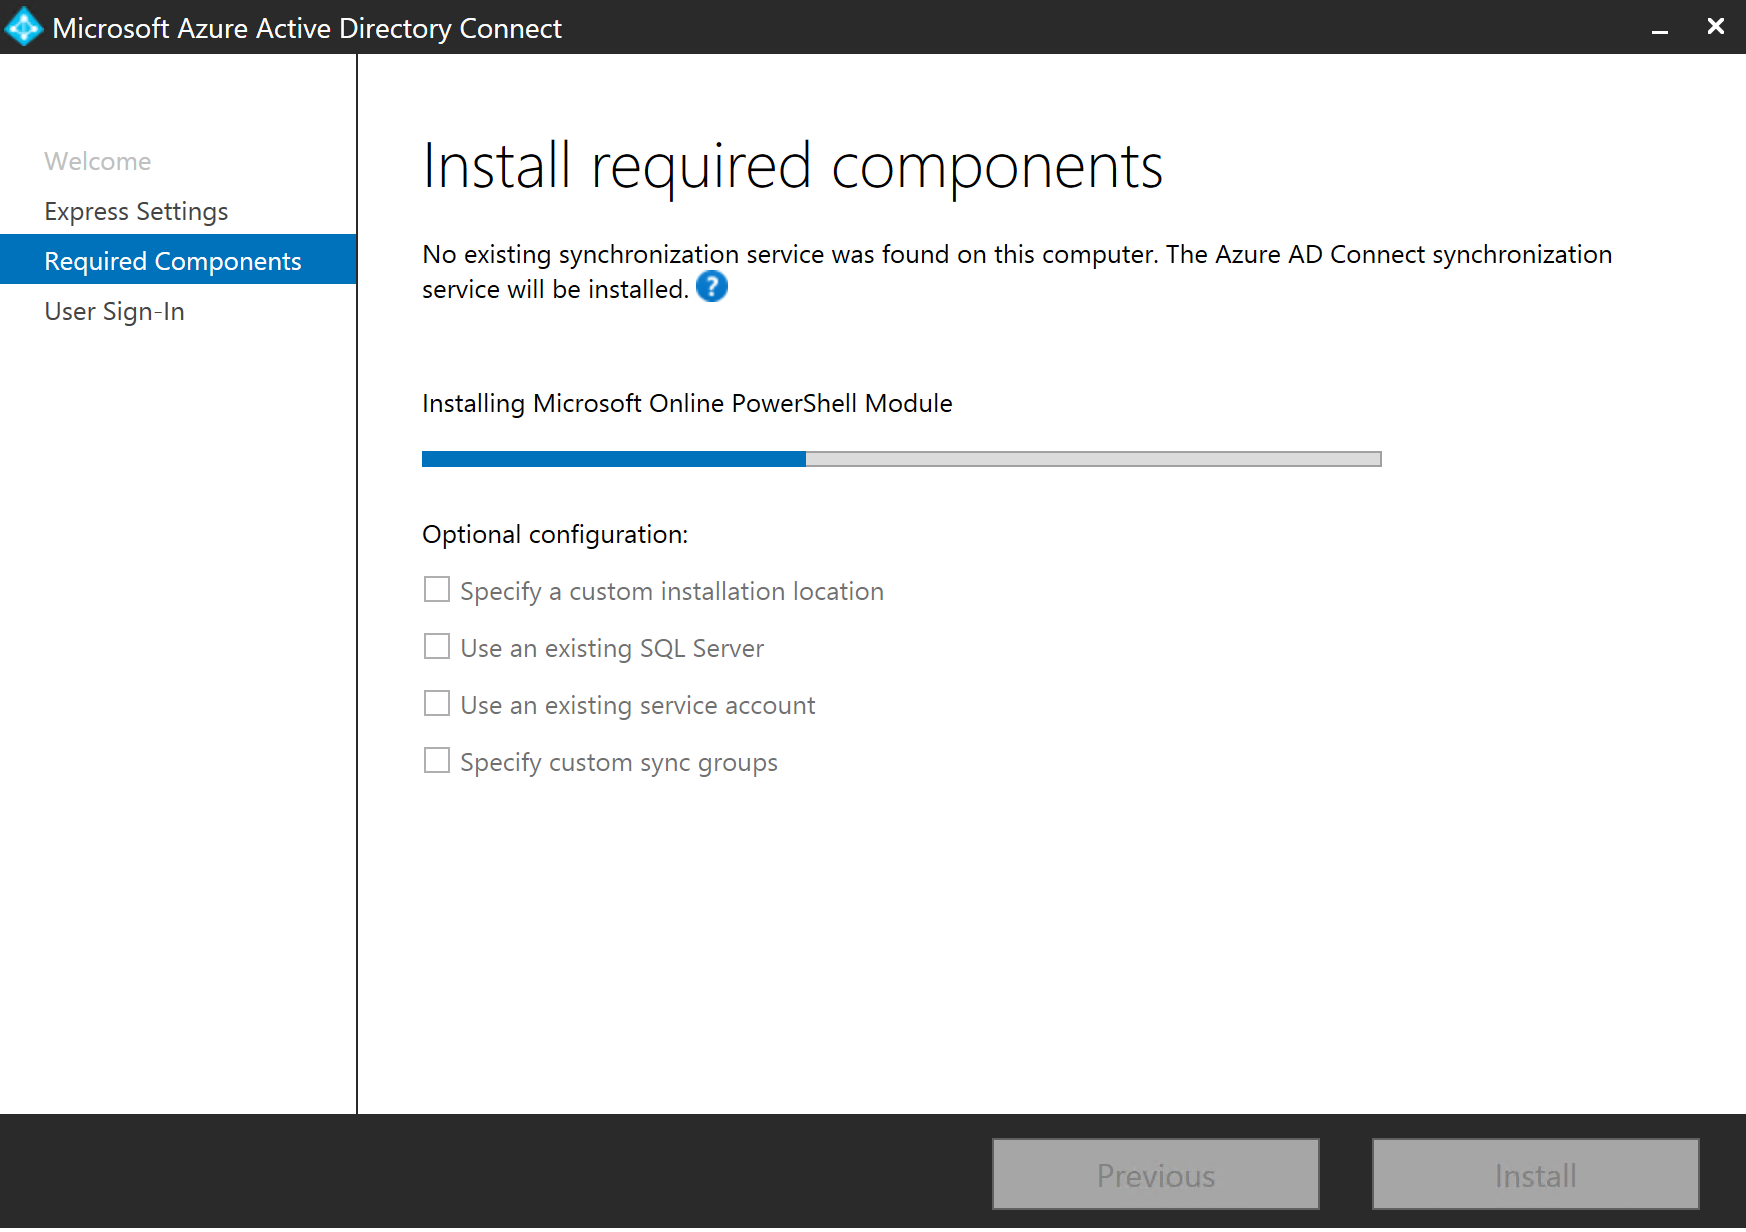
....and we're off...
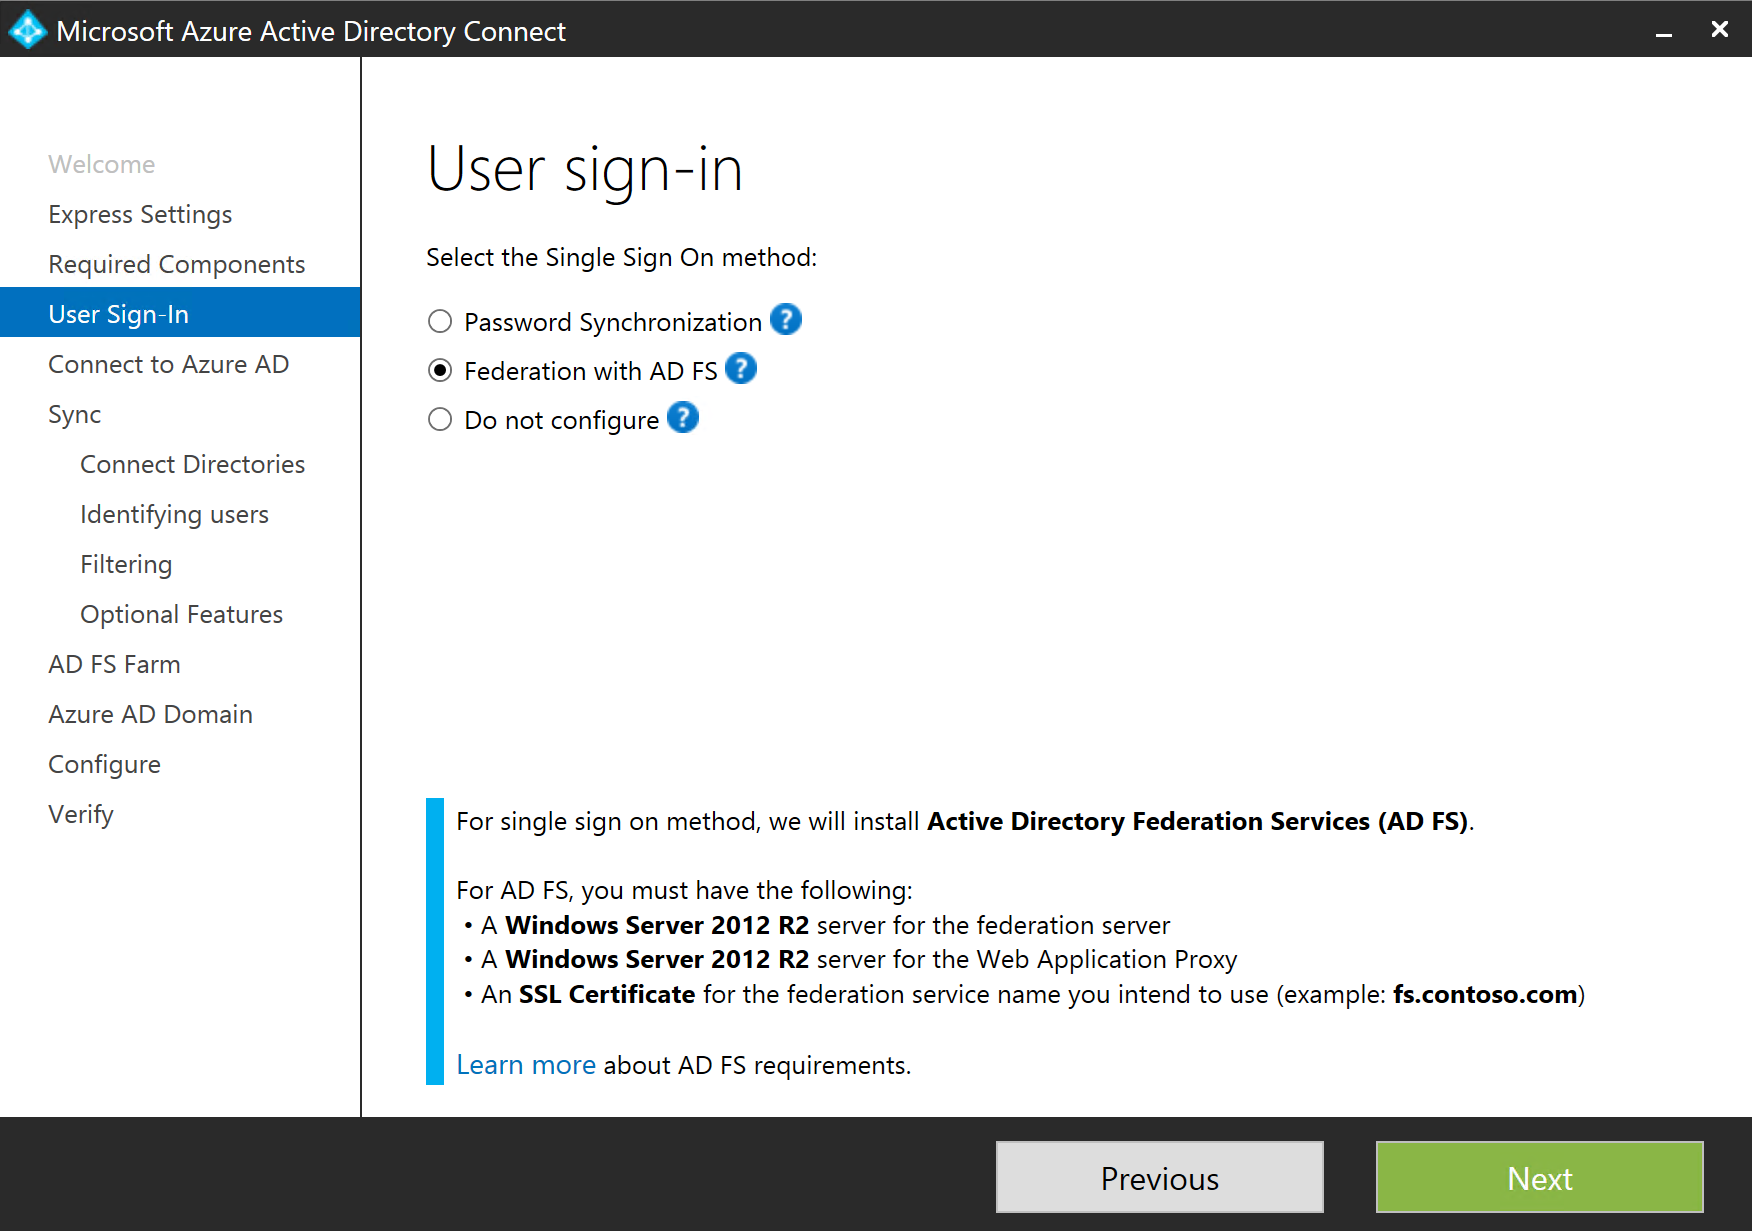
You should see some icons pop up on your desktop. Sit tight until it runs through. Once done, you will get the below screen. Select ADFS and click Next...
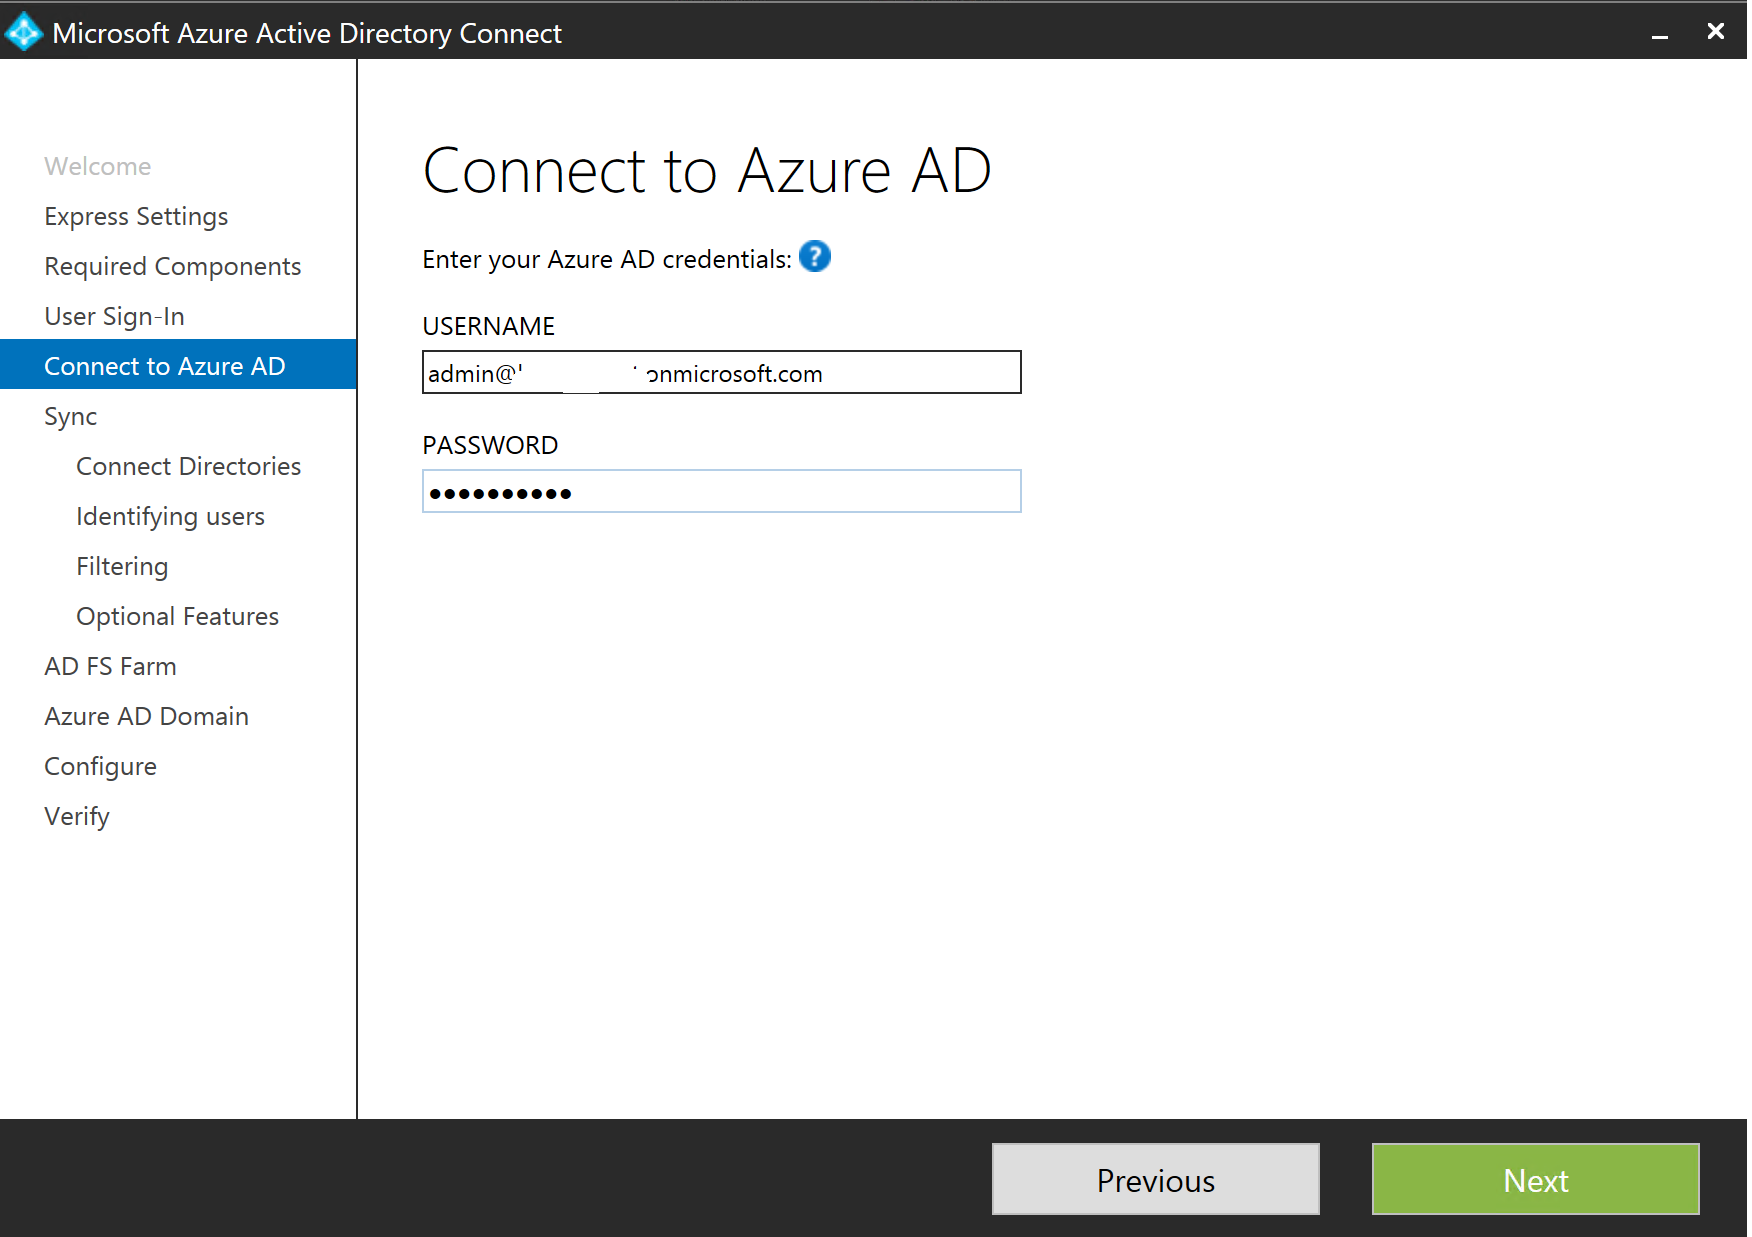
Next up, we connect to Azure AD, so add those credentials and click Next...
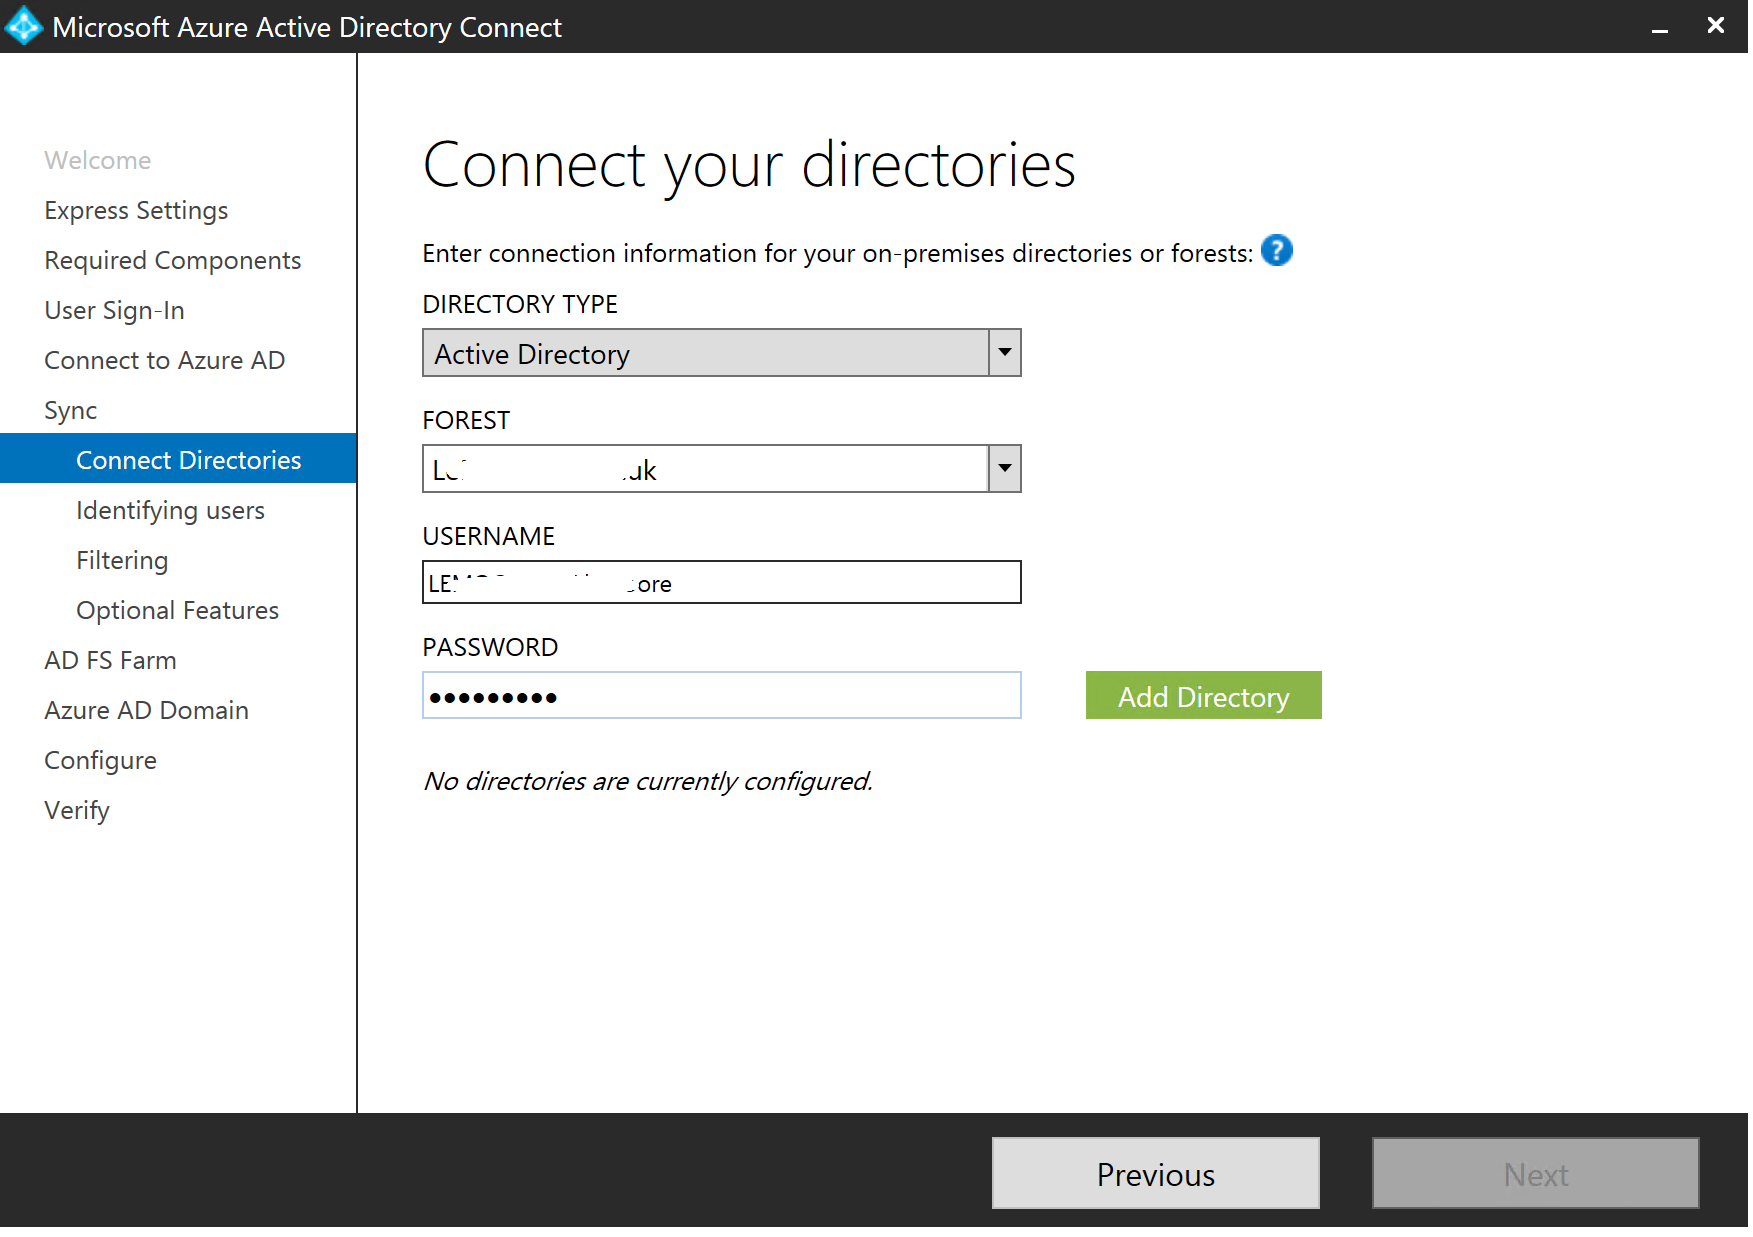
Once that goes through, we need to add some directories. As we are in a resource forest topology, we need to add both forests. We add the local "accounts" forest first. The order does make a difference.
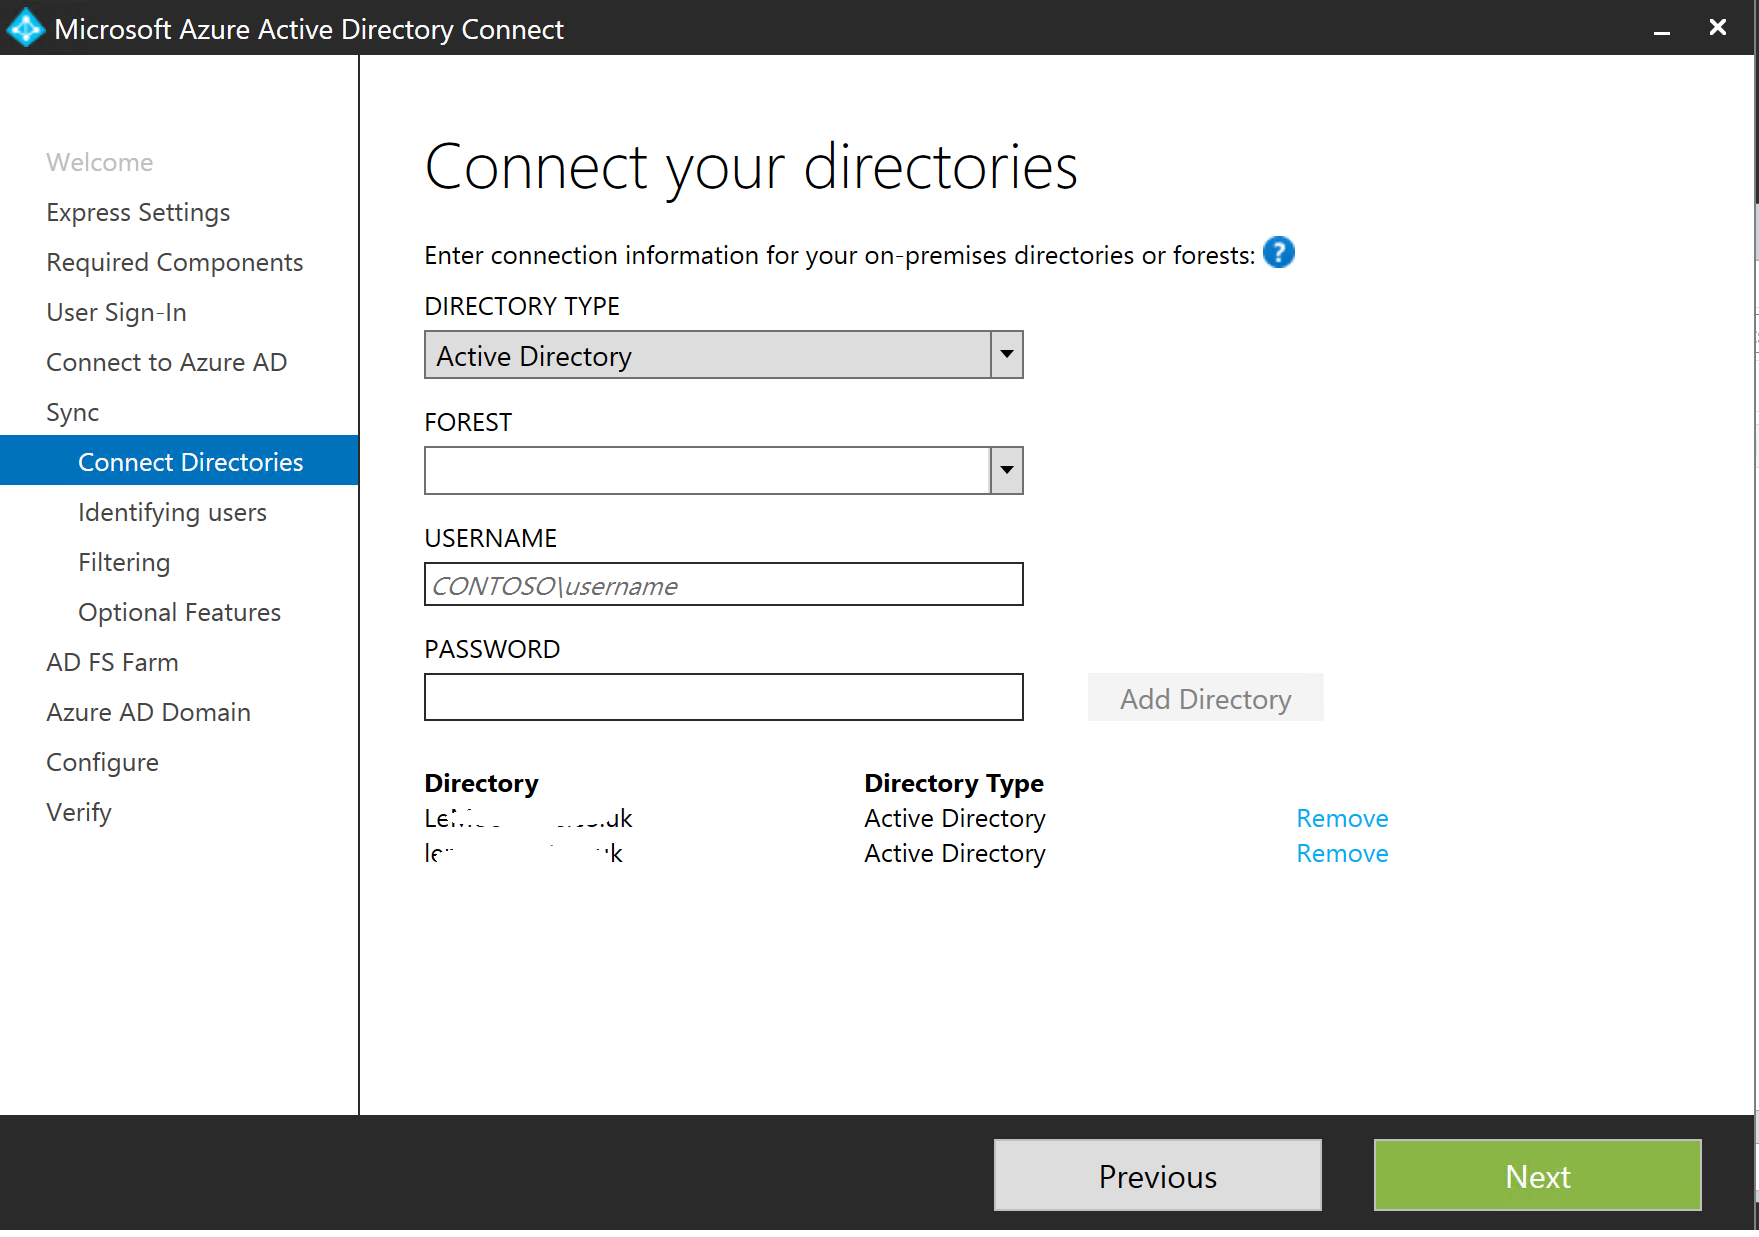
...add the second one and then click Next...
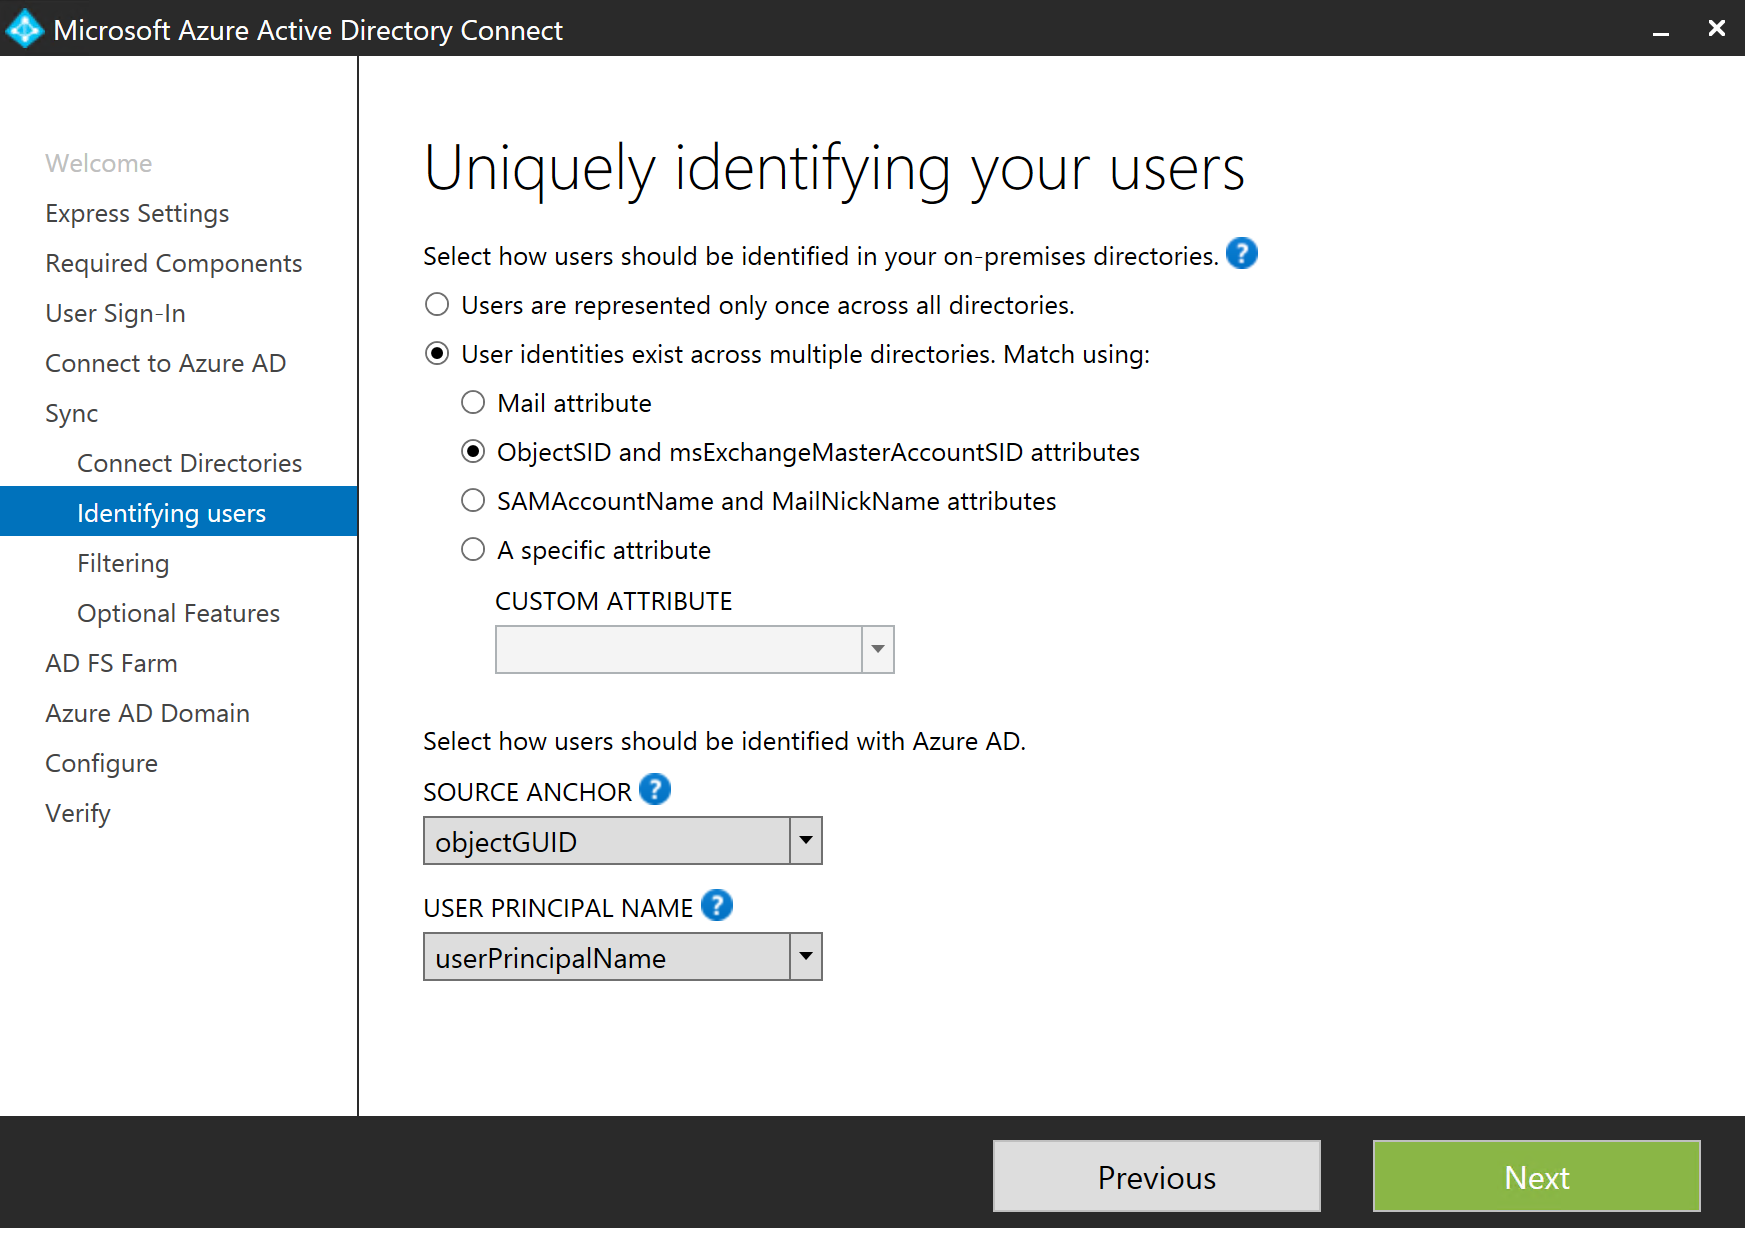
Next up we need to decide how we are going to identify our users. We are in a resource forest, so for our identity and the disabled user account in the resource forest to be "merged" together in the metaverse, we need to match them up. For this we use the ObjectSID and msExchangeMasterAccountSID attributes. I am using ObjectGUID as my Source Anchor. In certain environments you may choose to use something else. One common one is an EmployeeID, or staff number. We want something that will never, ever change. So, select as desired and click Next...
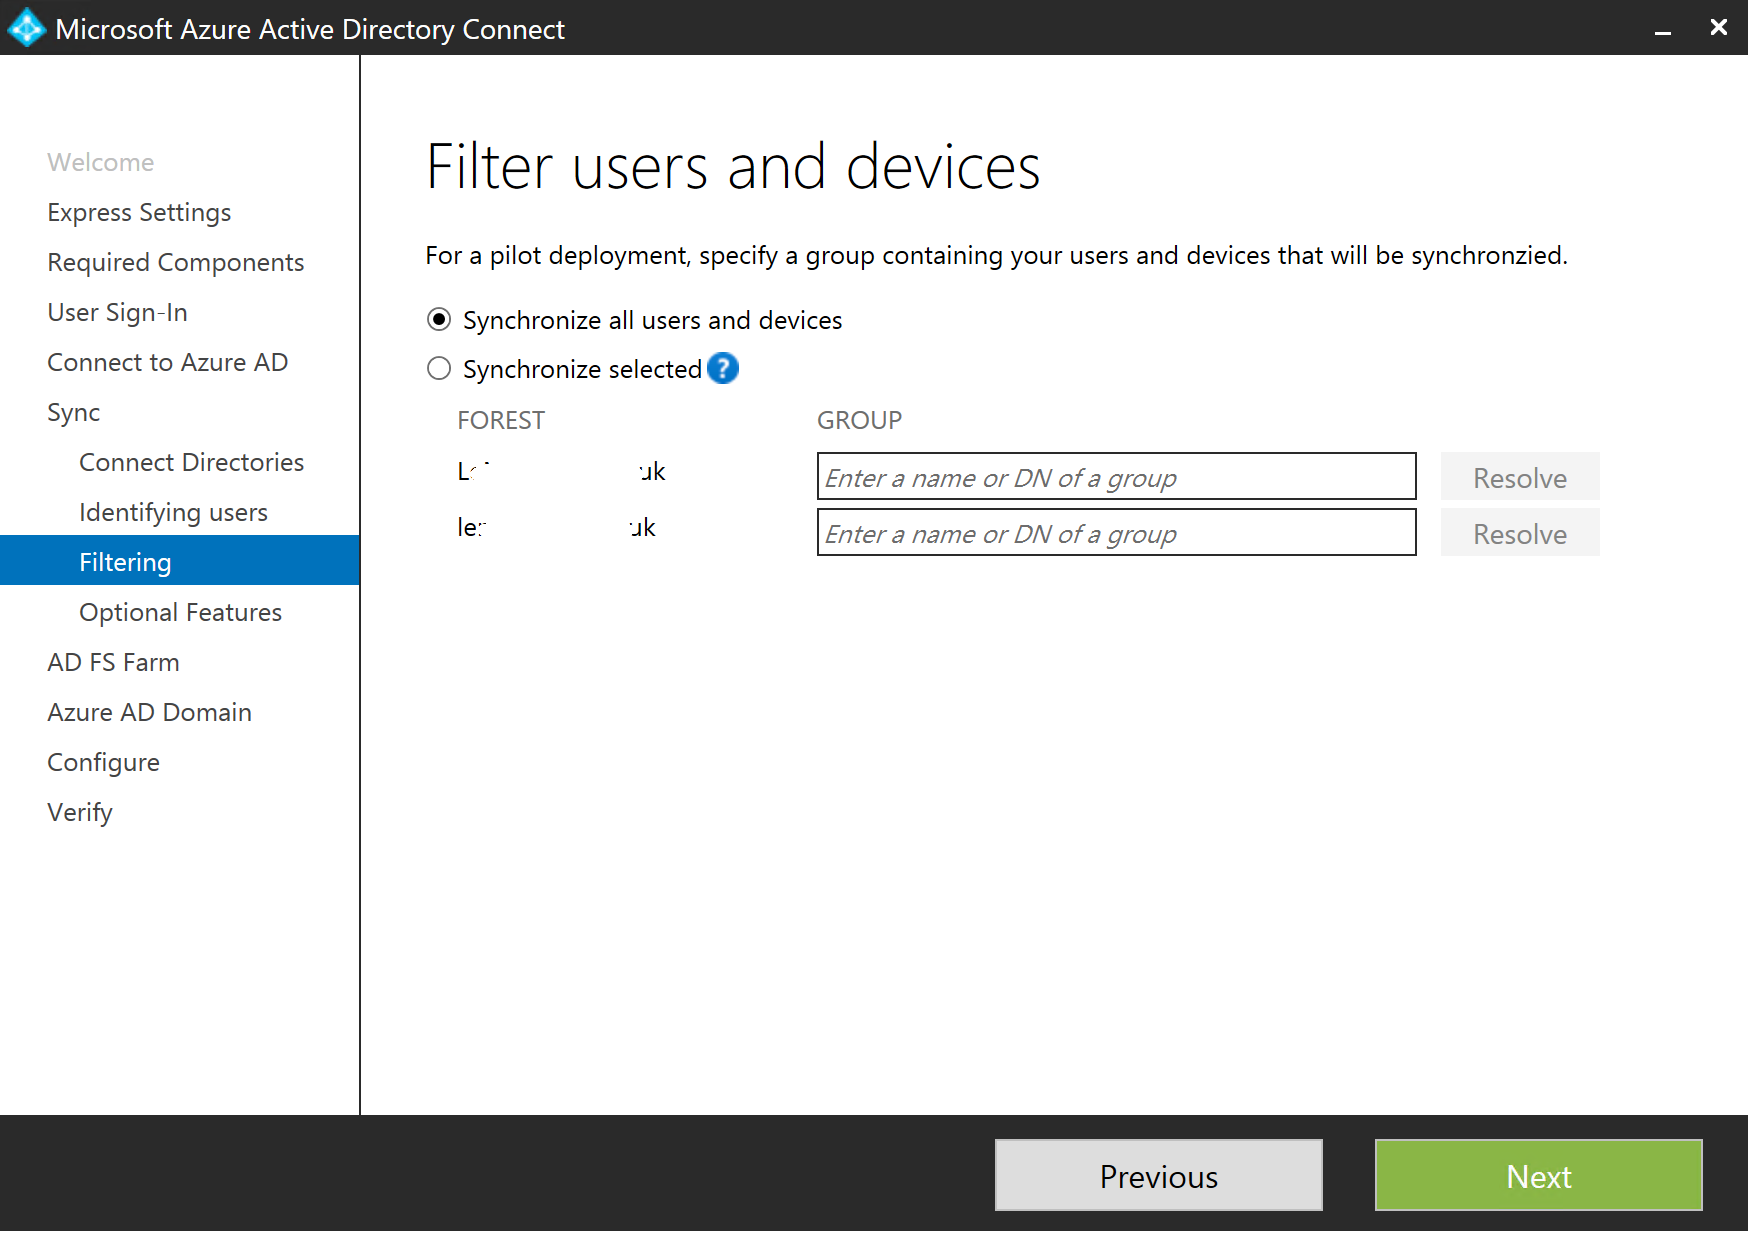
If you want, you can sync based on group membership. This is handy for a POC. Alternatively, you can edit the containers later on. Decide what you want to do and click Next...
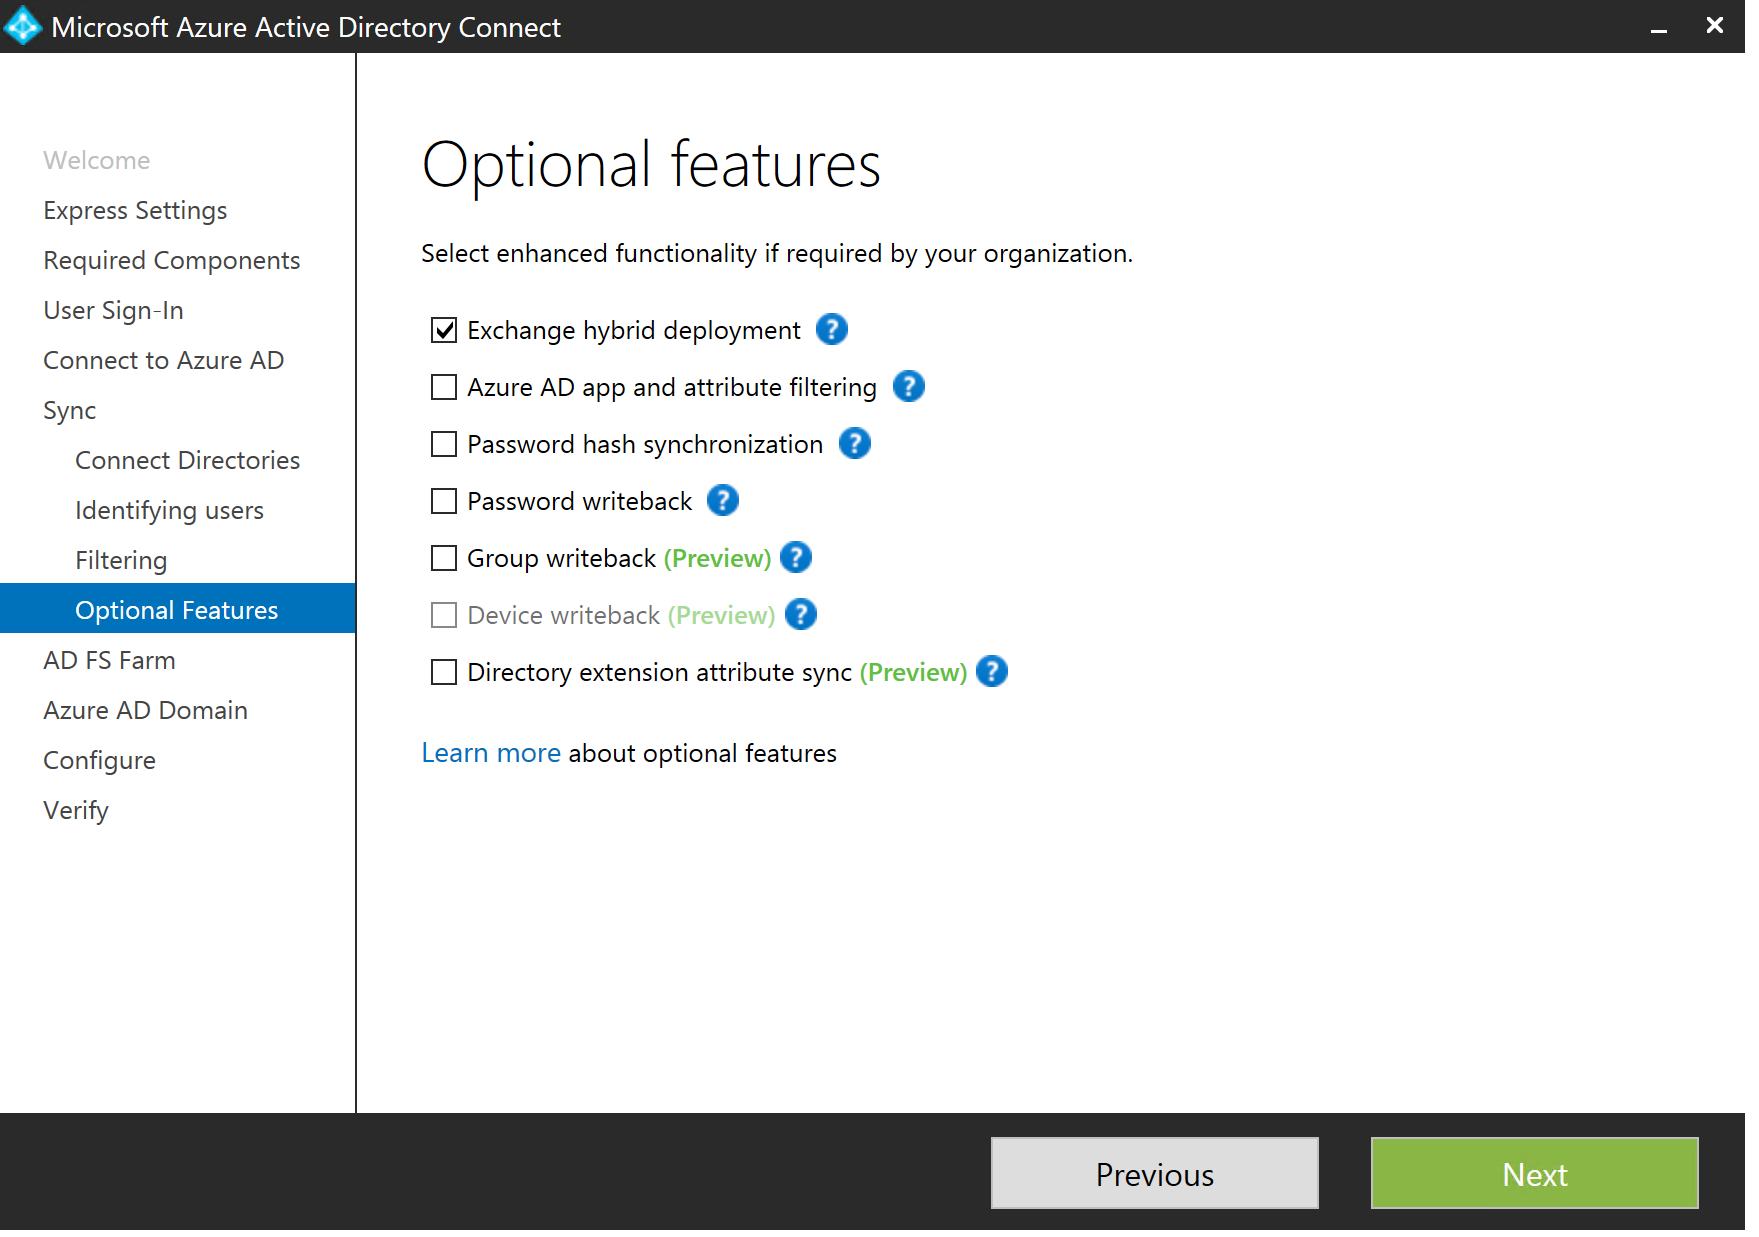
Next up, lets choose our optional features. How cool are some of these? Password Writeback! Awesome! Anyway, we want to select "Exchange hybrid deployment" because, well, that is what we are doing, right? Click Next...
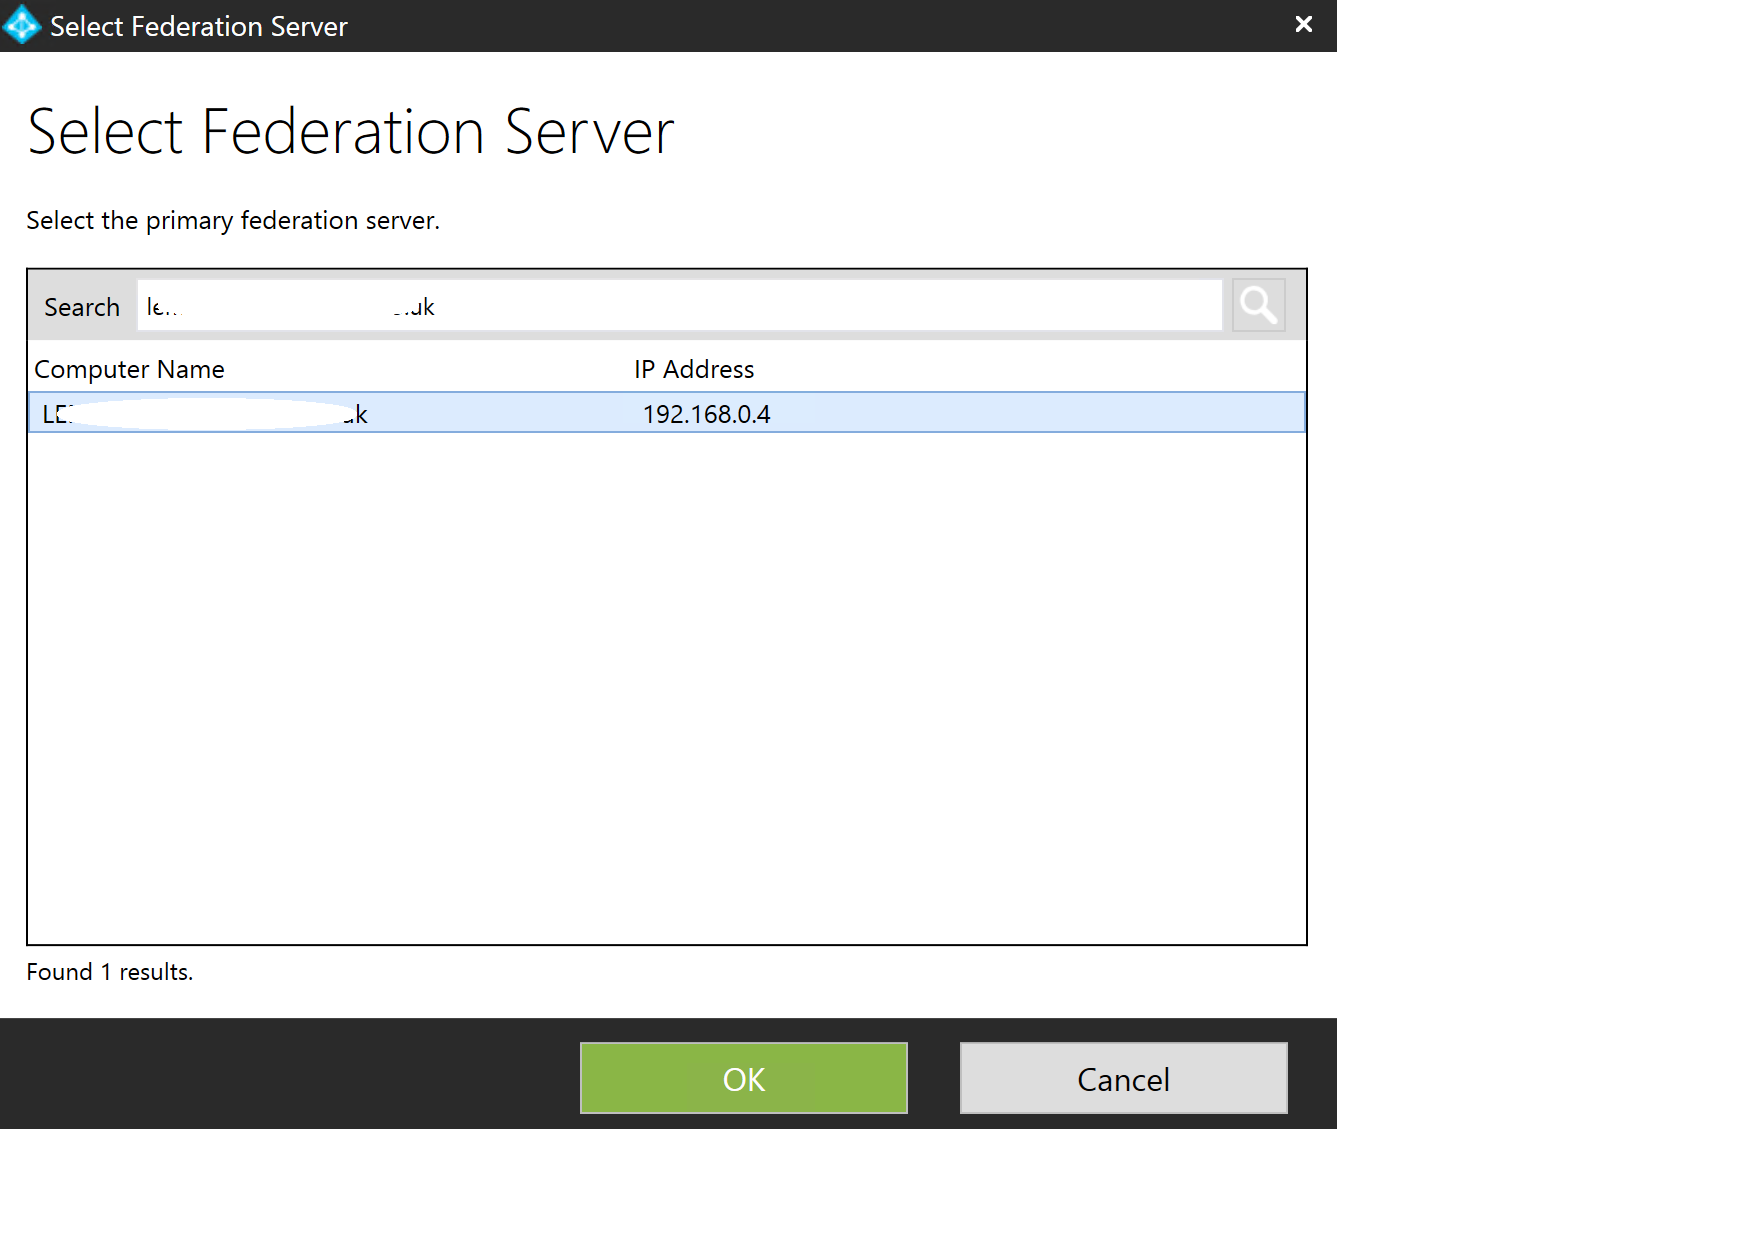
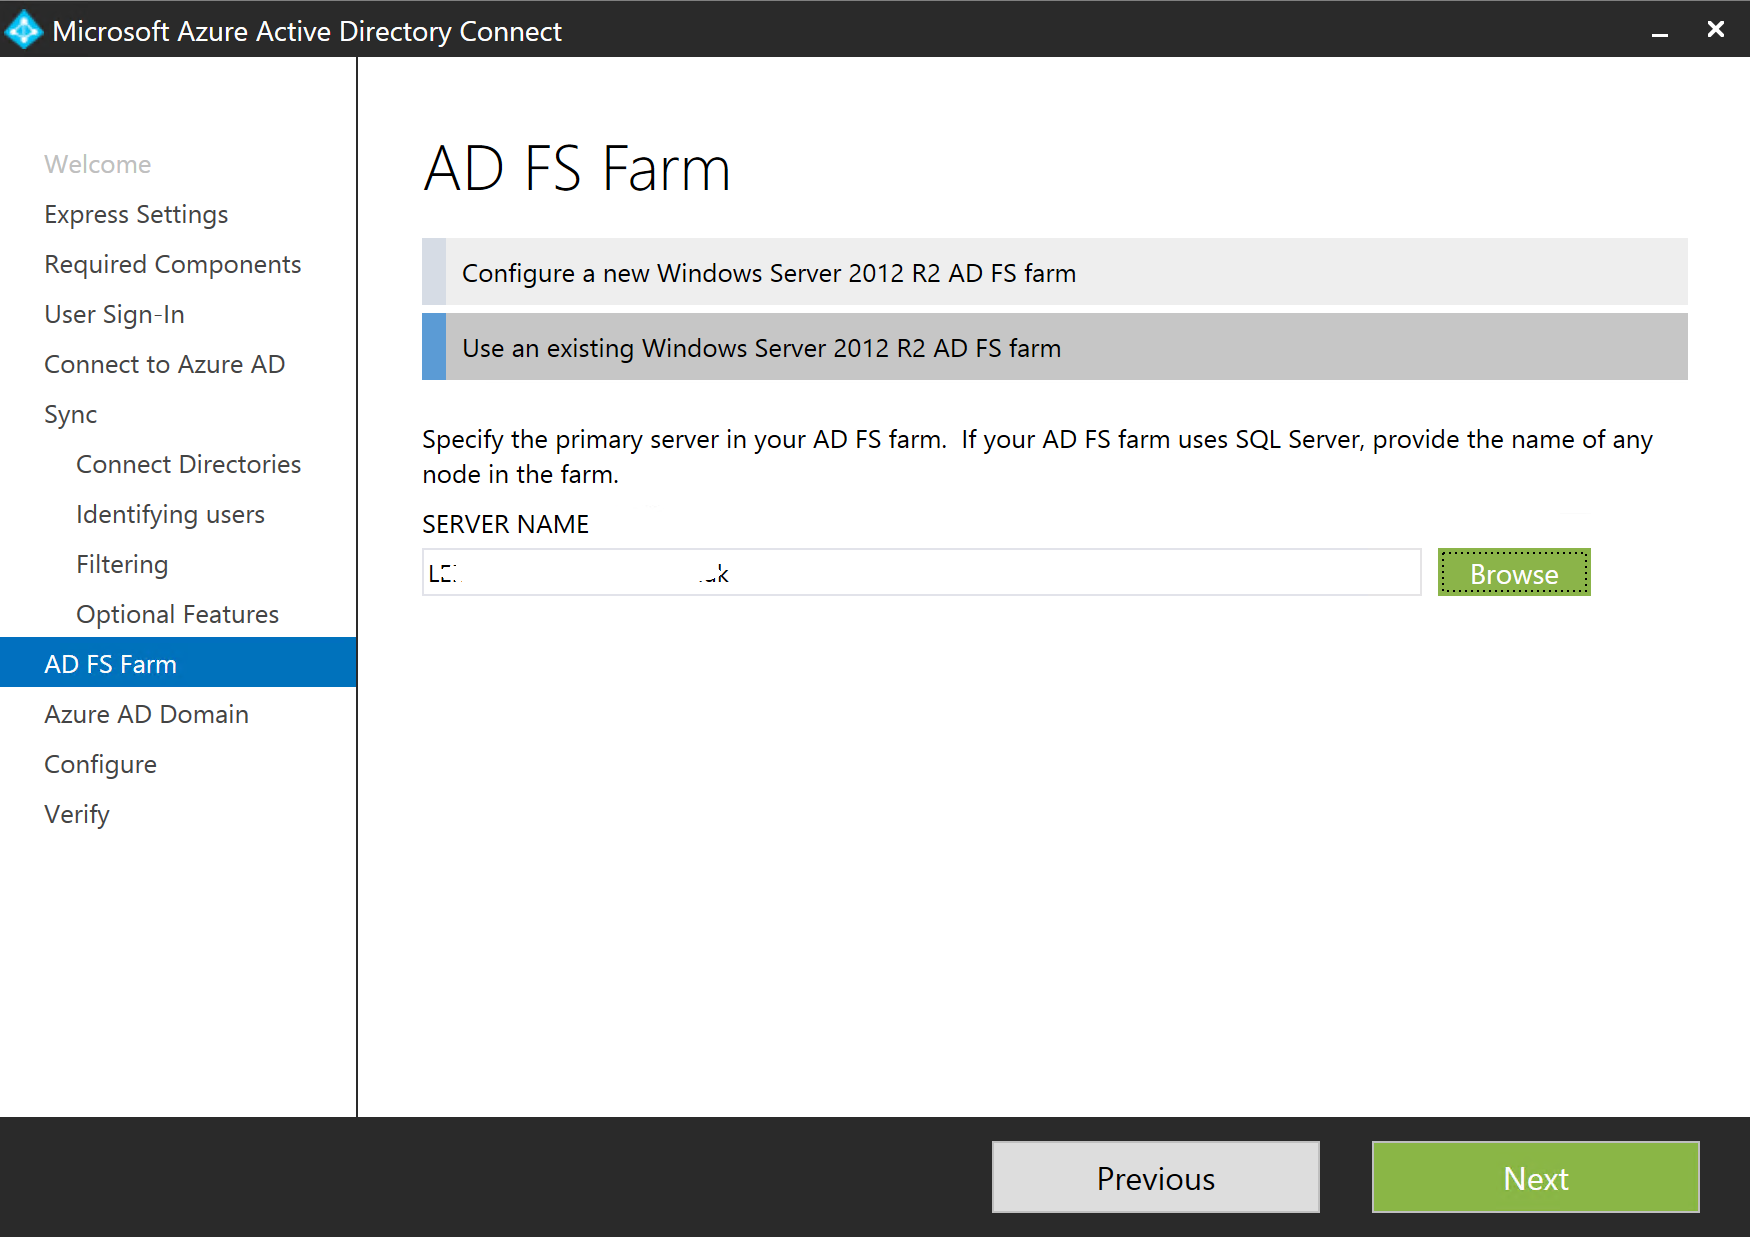
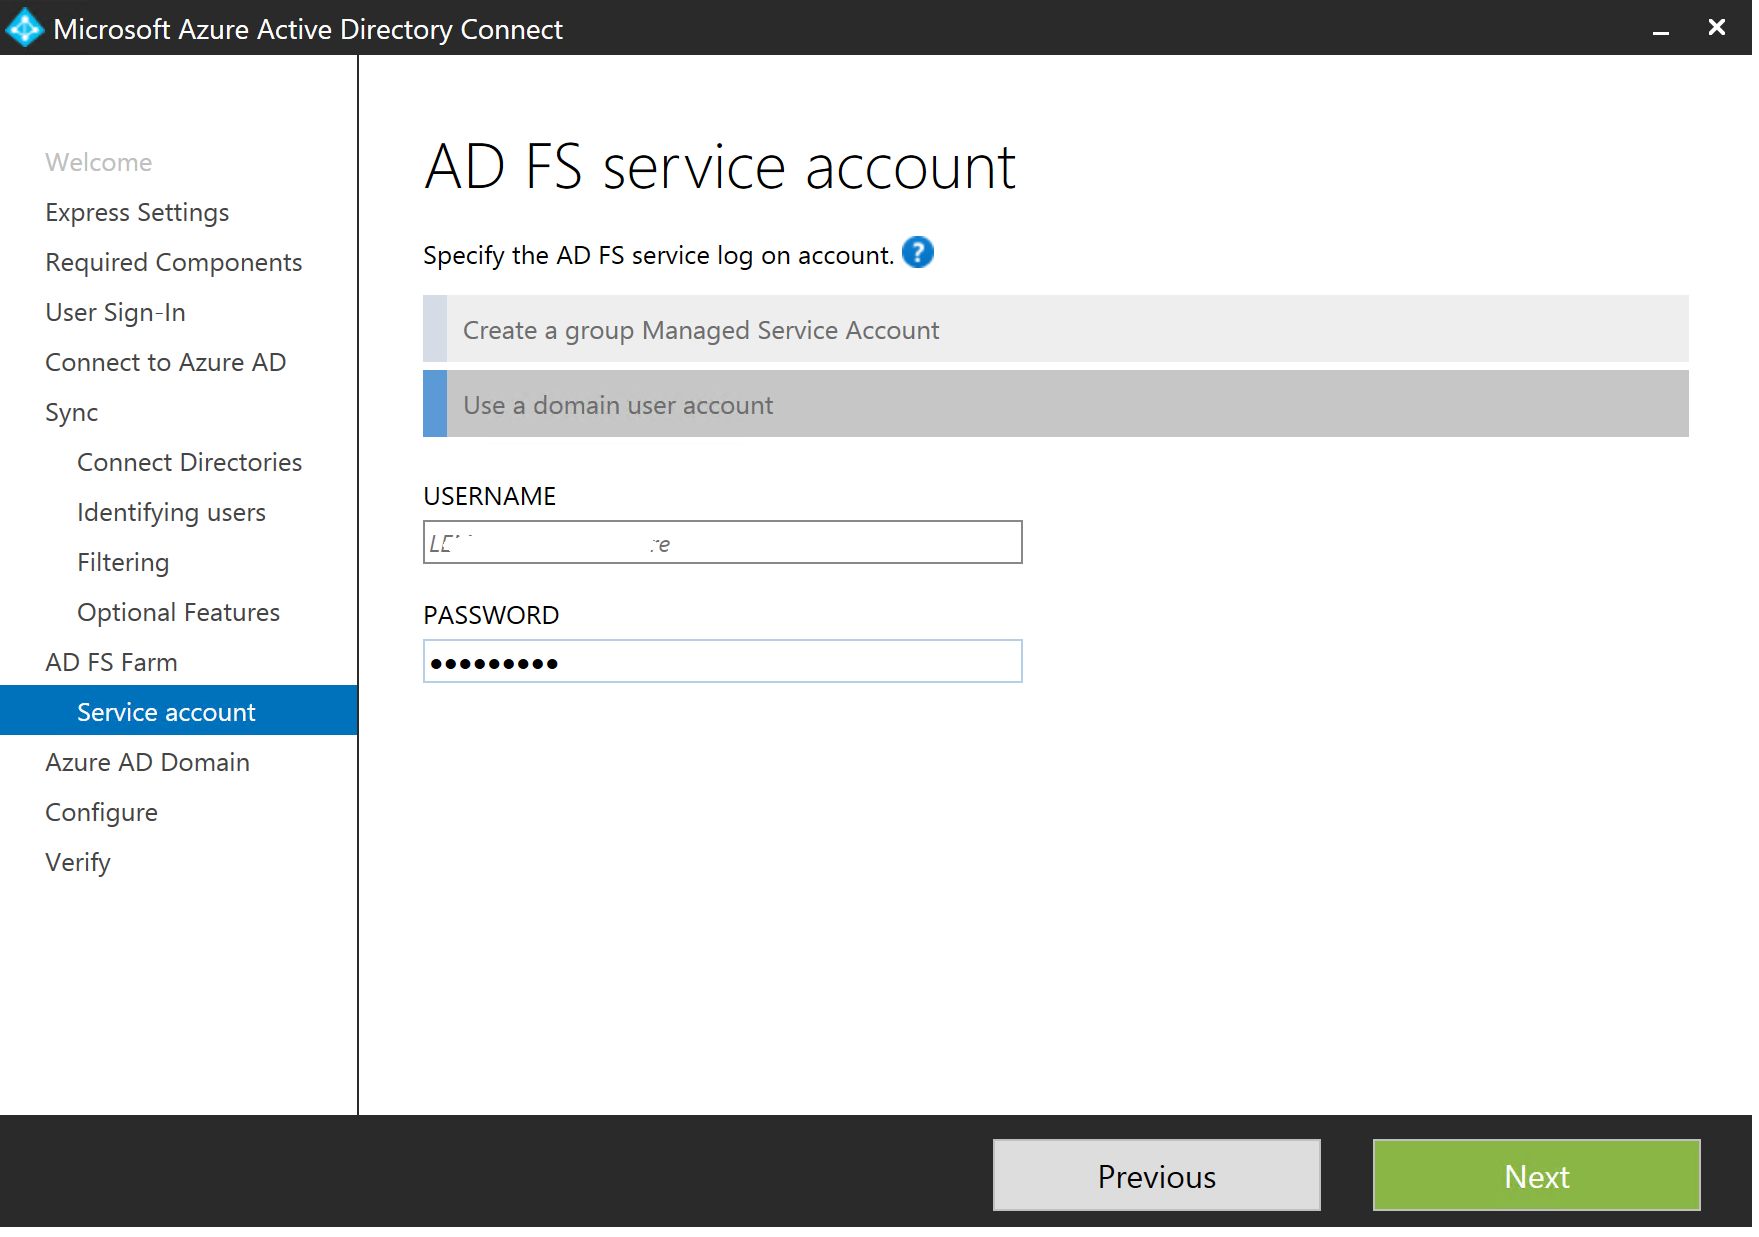
Right, now for some AD FS Configuration. Add your AD FS Server here and click OK...
You will see the below. Click Next...
Once done, you will see the below screen. Add your credentials and click Next...
Note: You will need to enable Remote Management on the AD FS server for this to go through. It should tell you! Make sure those pesky firewalls are not in your way, too!
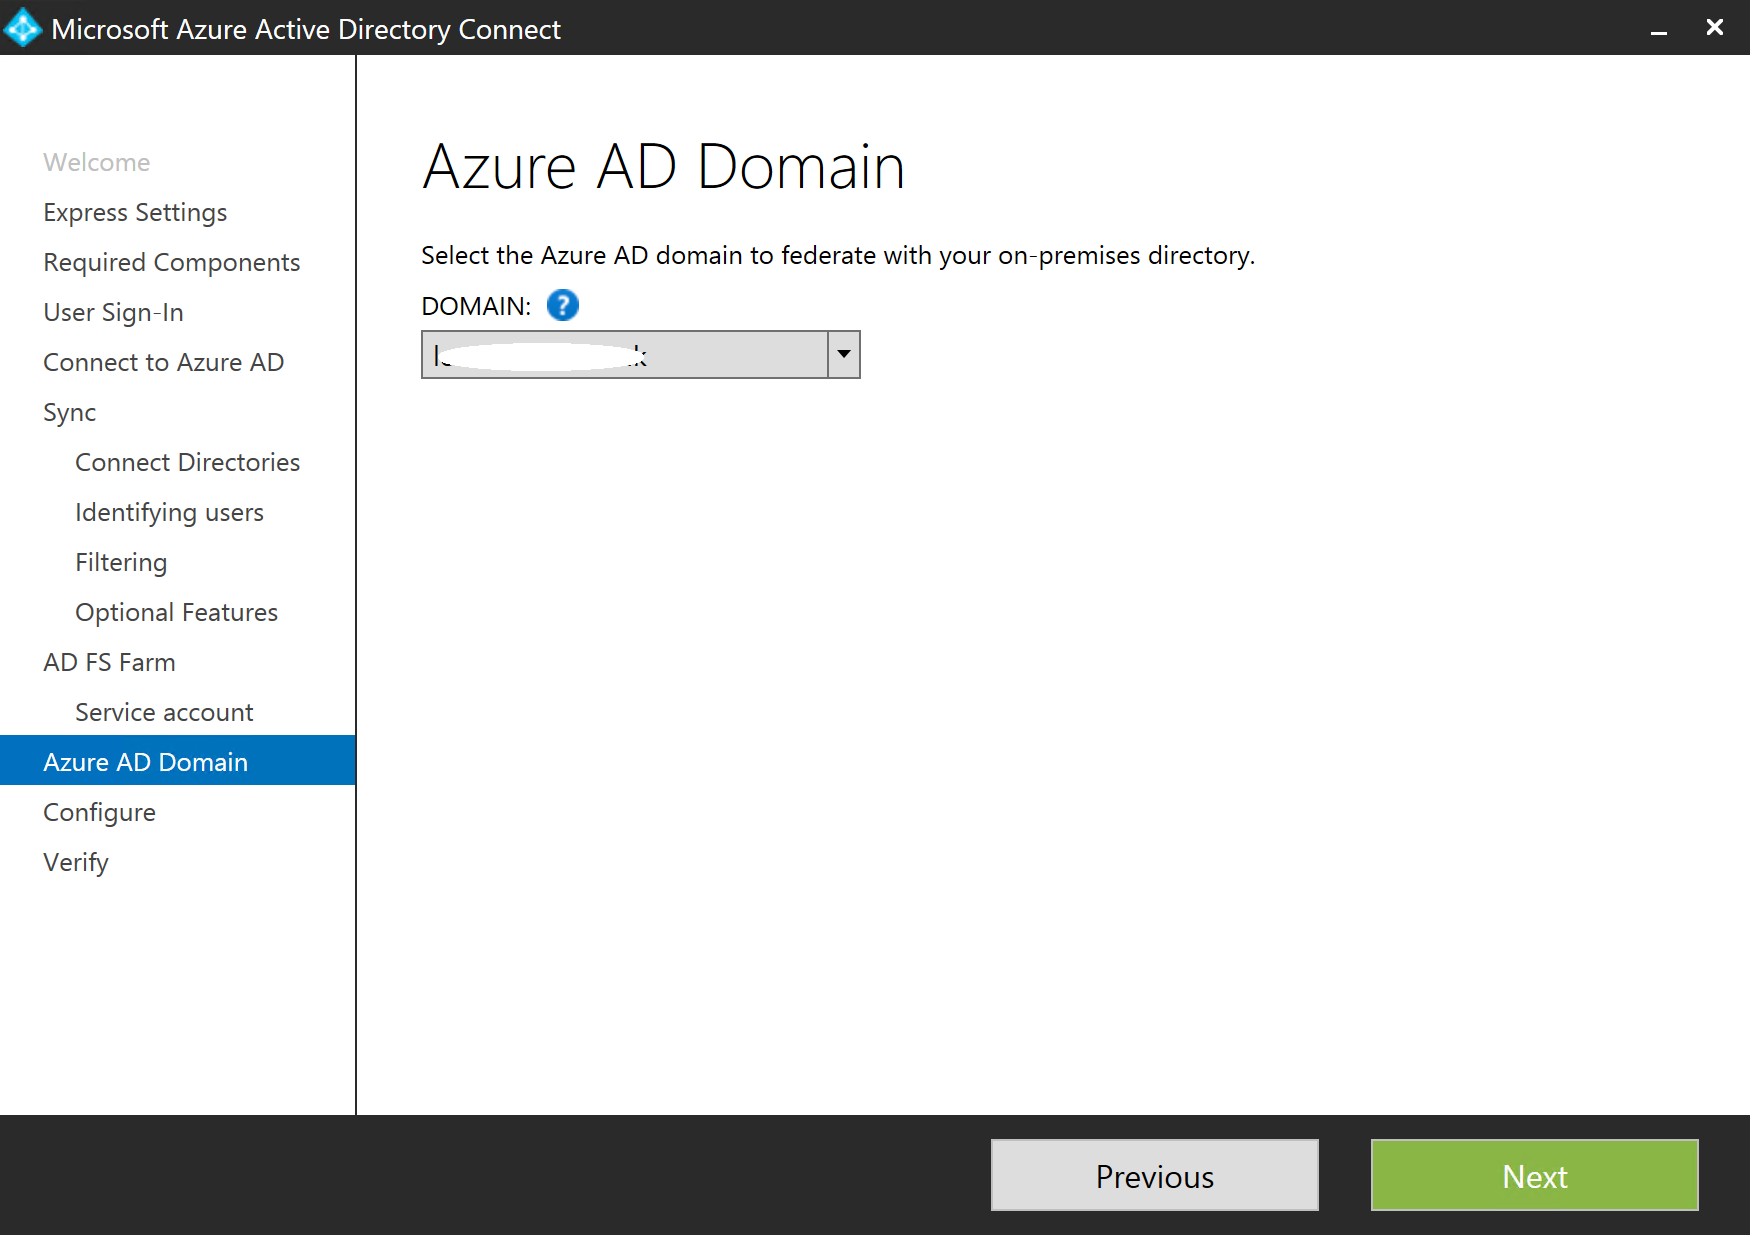
Nearly there! Are you excited?
Select your Azure AD domain and click Next...
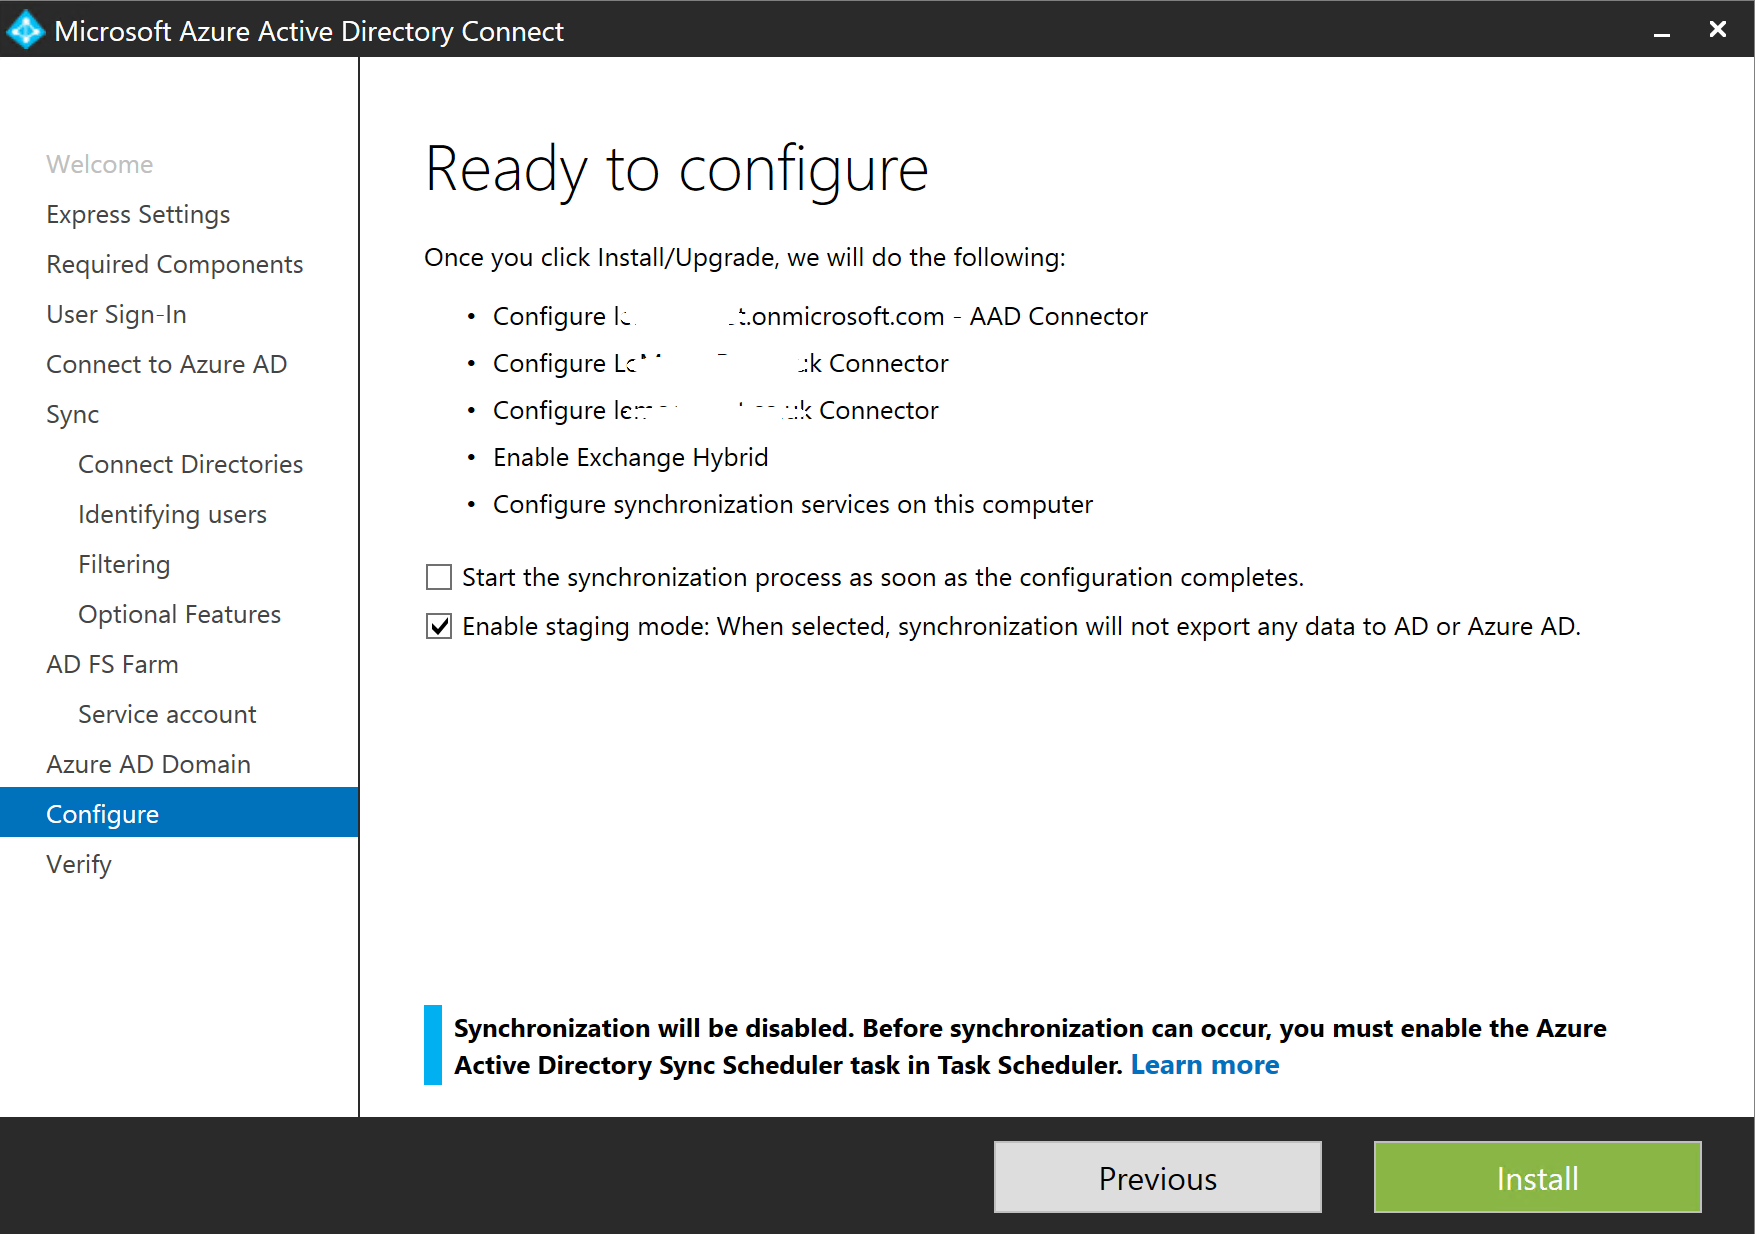
Woo hoo, we are ready to configure! I know you are excited now...
Note: Notice I have unticked "Start synchronization process as soon as the configuration completes". This disables the task in Task Scheduler. We have some more configuration to do so we don't want to sync just yet. I also enable Staging mode. This keeps us nice and safe. Safety first, remember boys and girls.
Click Install...
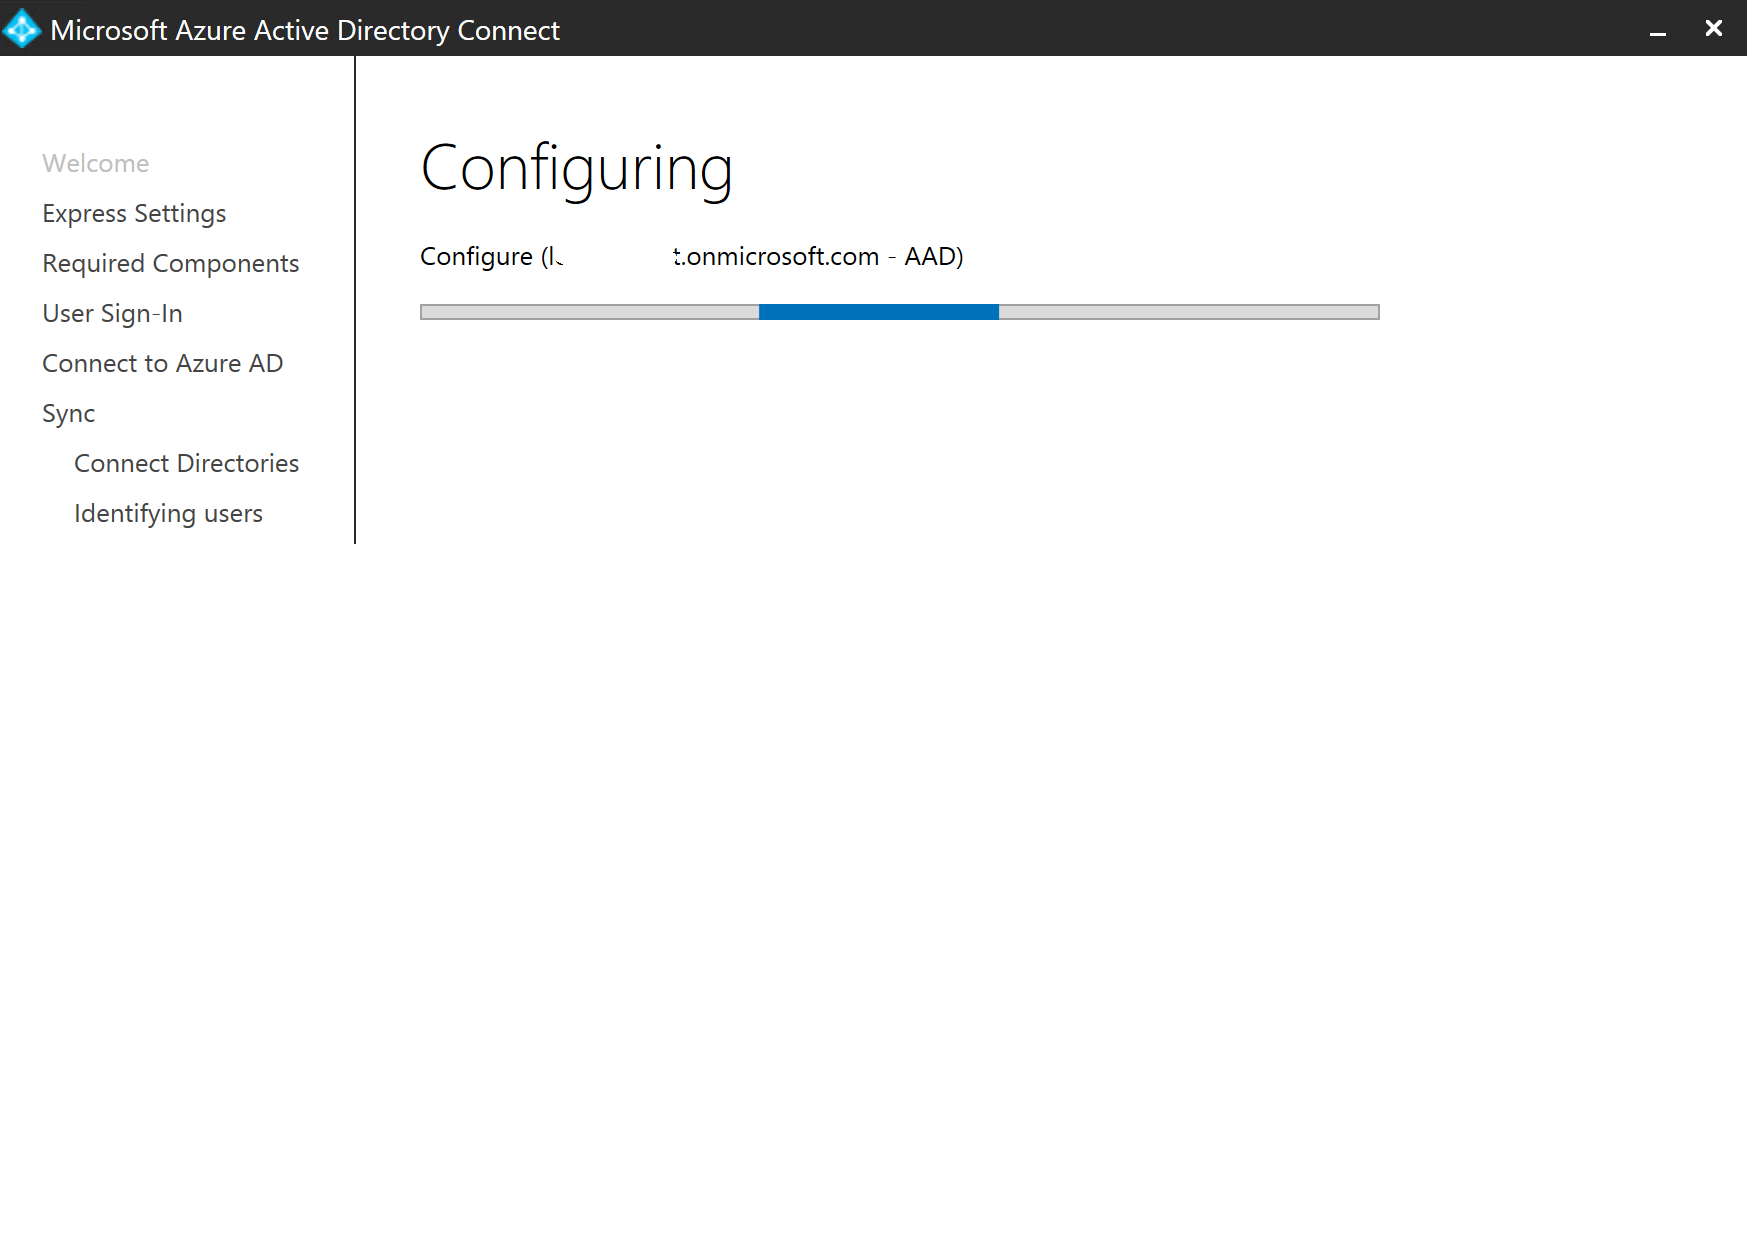
...and we're off again..
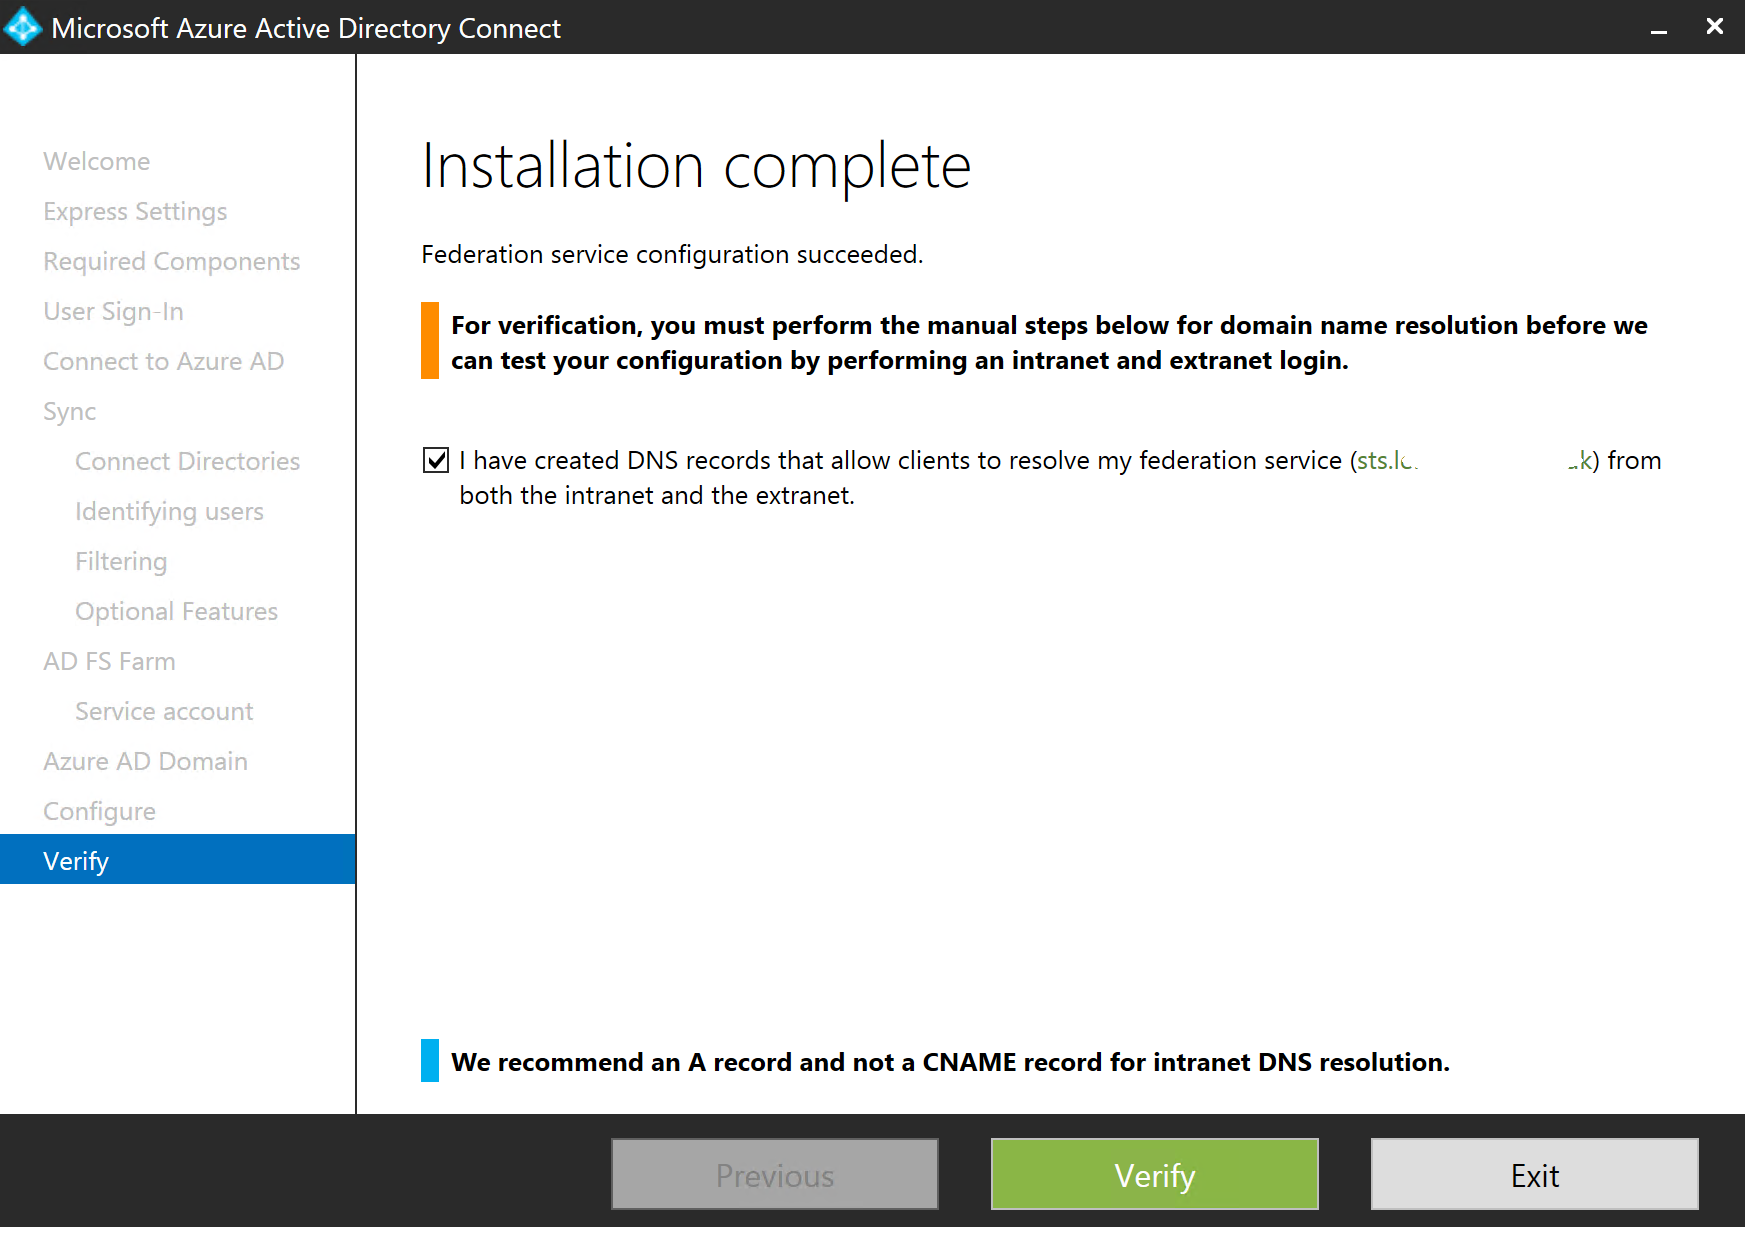
WOO HOO!! Now click Verify... A little verification never hurt anybody, did it?
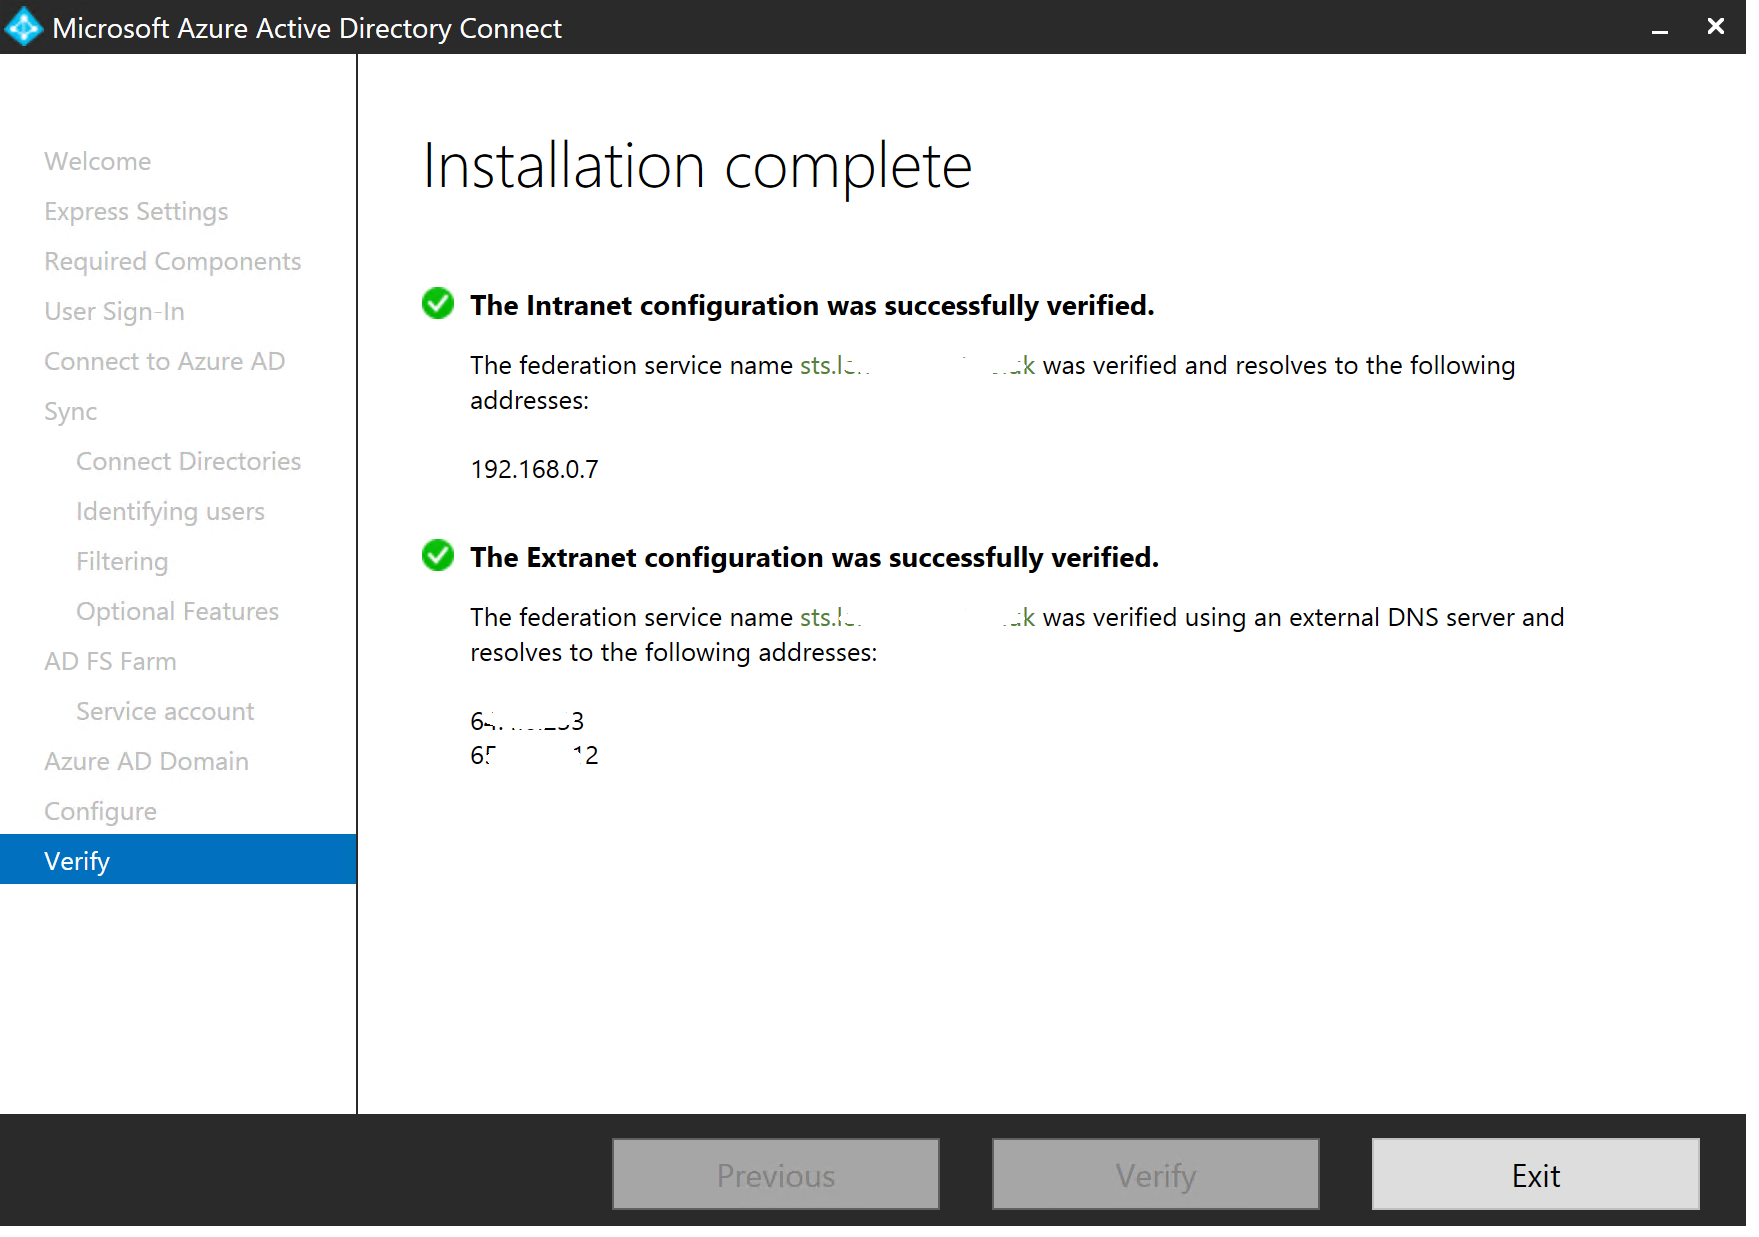
Ooooh yes, we are rolling now!
Phew, we got through it! A few more steps and you will be in cloud heaven.
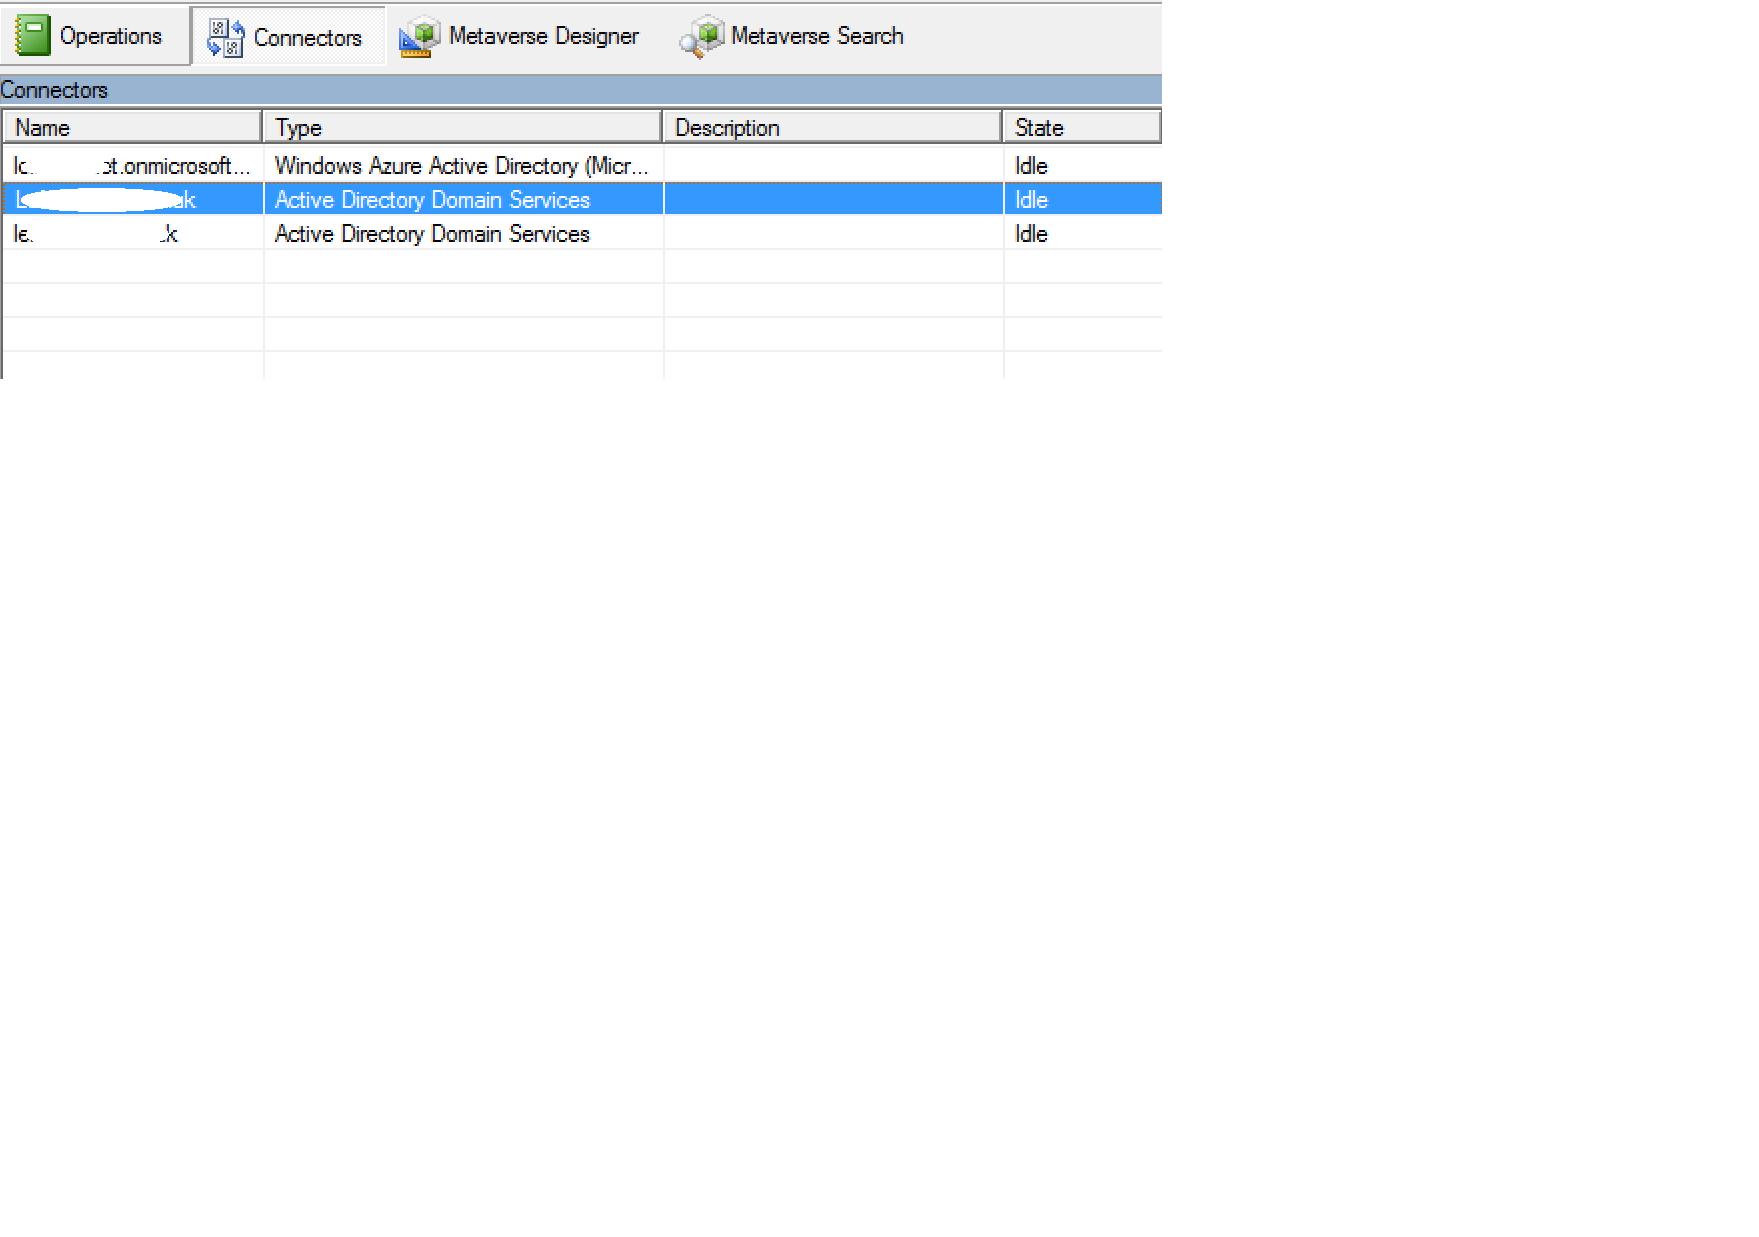
In the Start menu, you will see Synchronisation Service. Open that up. We need to edit which OU's we are going to Sync. You can add all sorts of filters here if you want to get creative. Remember, KISS
Click Connectors, and double-click one of your On-Premises directories
Then on the left, select Configure Directory Partitions, and then on the right, click Containers. You will be prompted for credentials. Use your On-Premises account here.
Next, select which OU you want to Sync and click OK>OK.
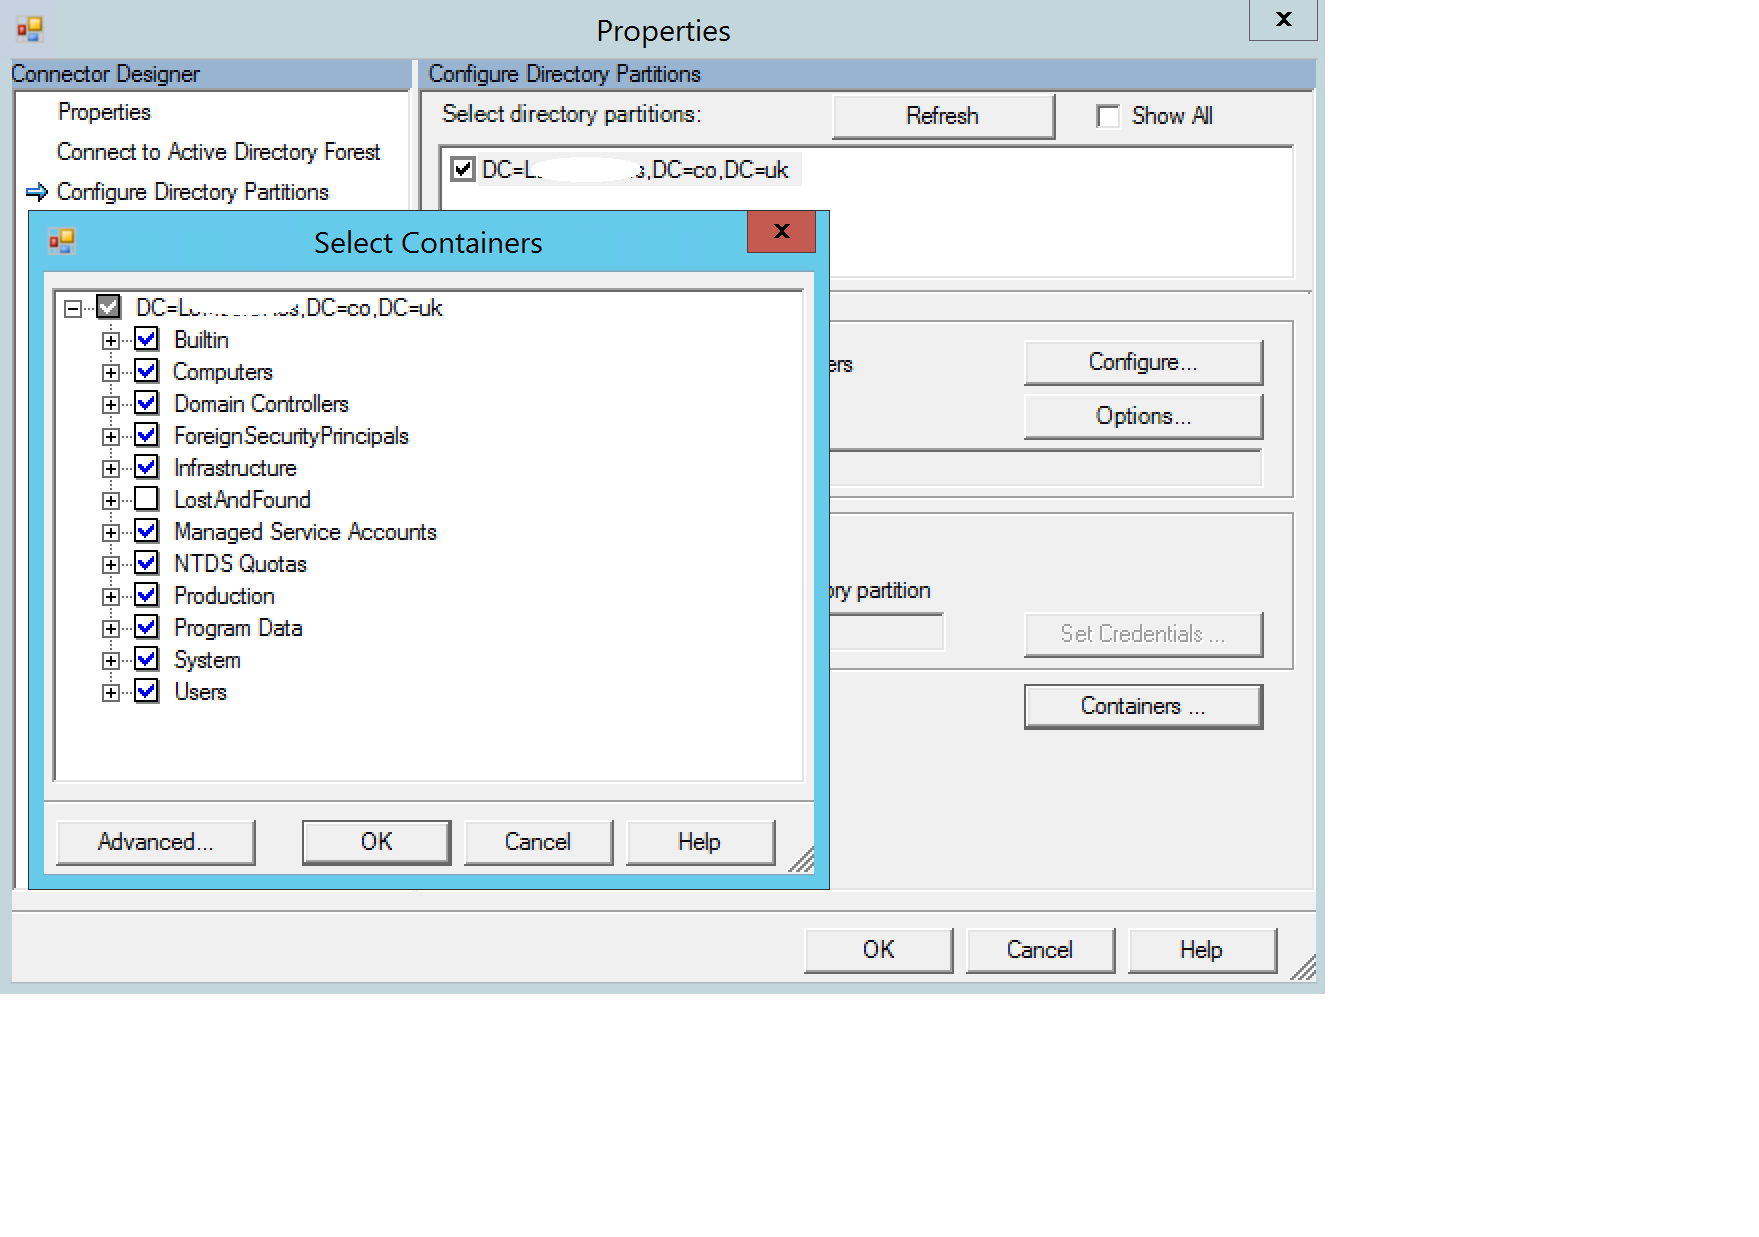
Now do the same for the other On-Premises forest!
Right we are soooooo close...
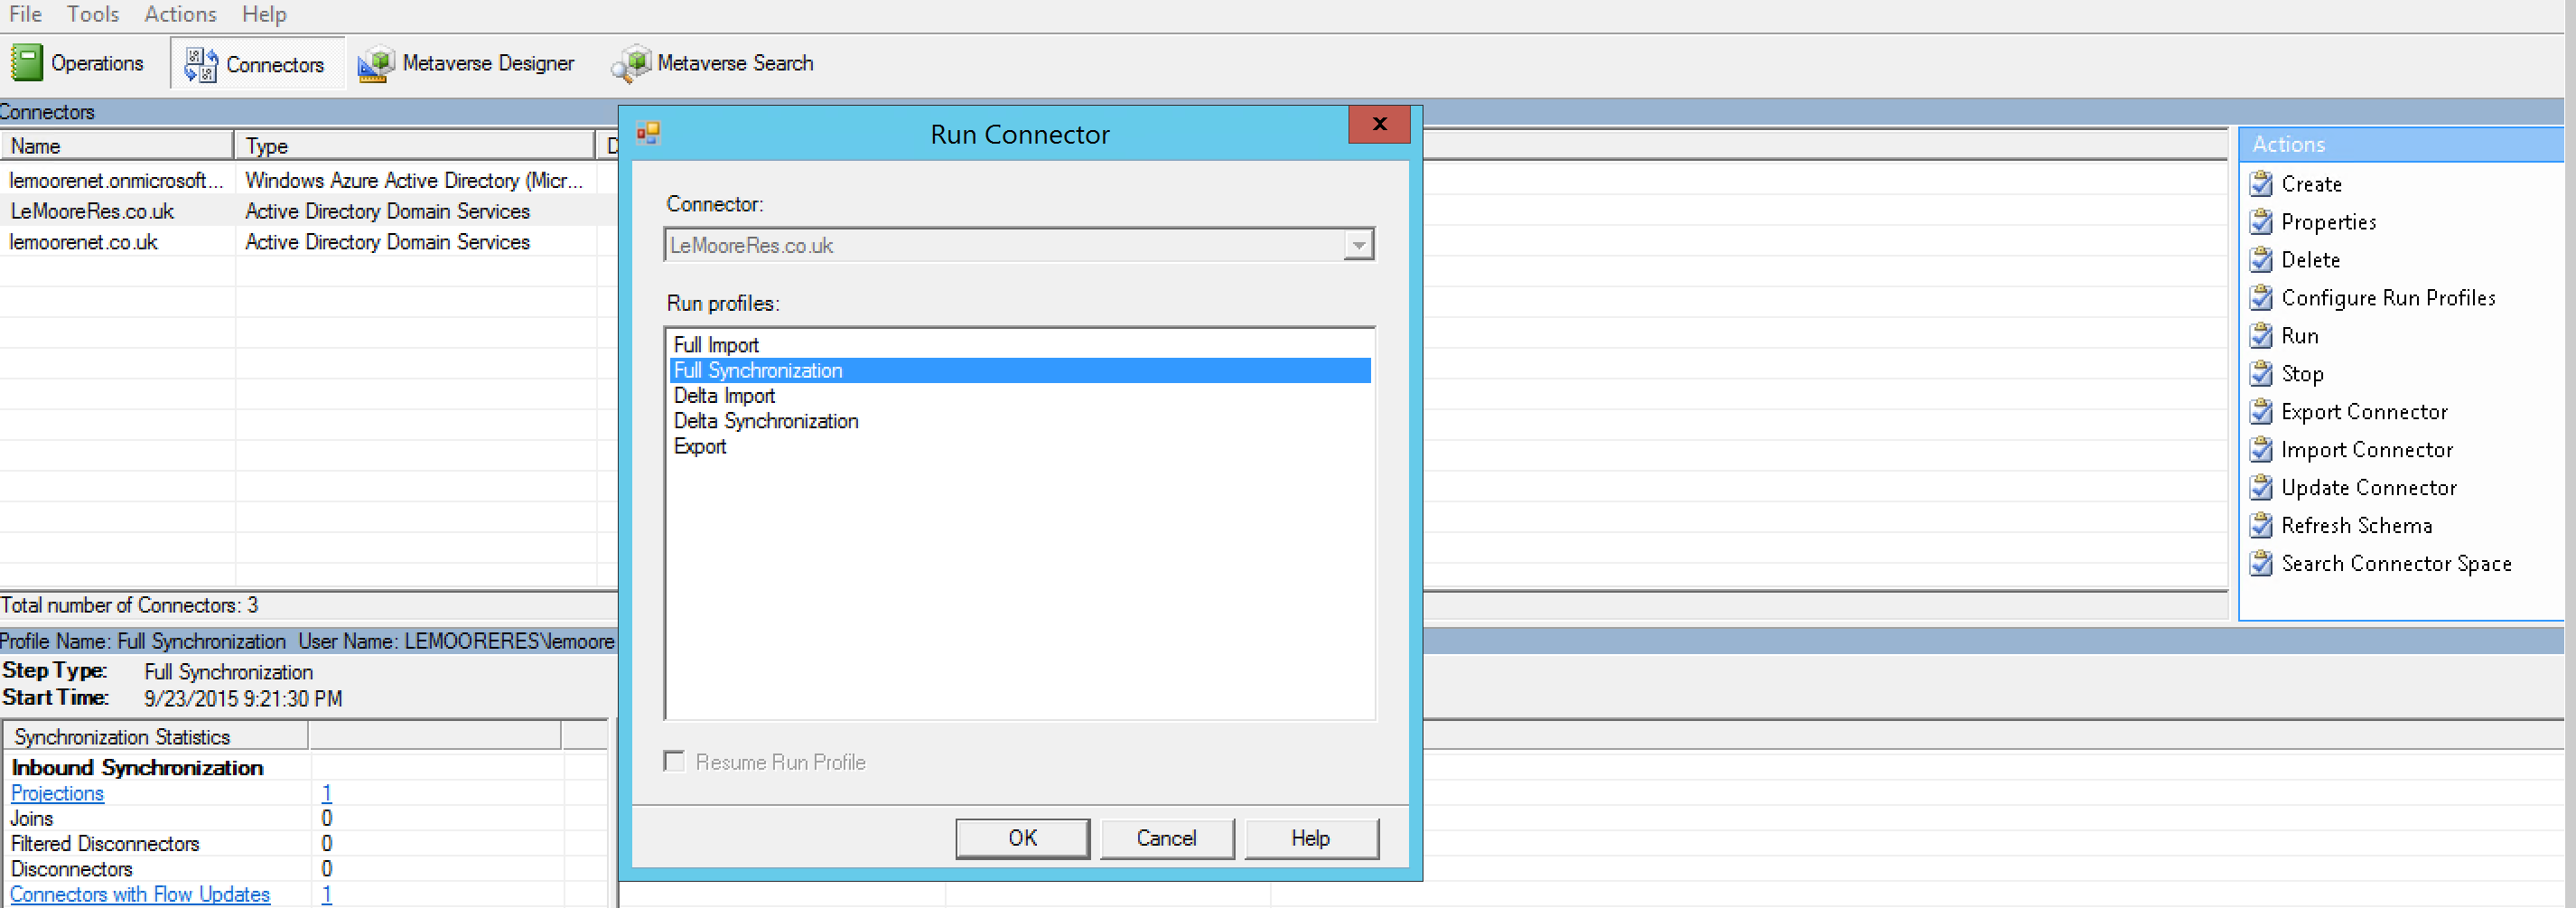
Lets run a sync and see what we get? Remember, nothing is going up to Azure AD yet.
On each of the forests, run a Full Synchronisation. Select the forest, Click Run on the right, and run a Full Synchronisation.
Now lets search the metaverse. I love saying metaverse.
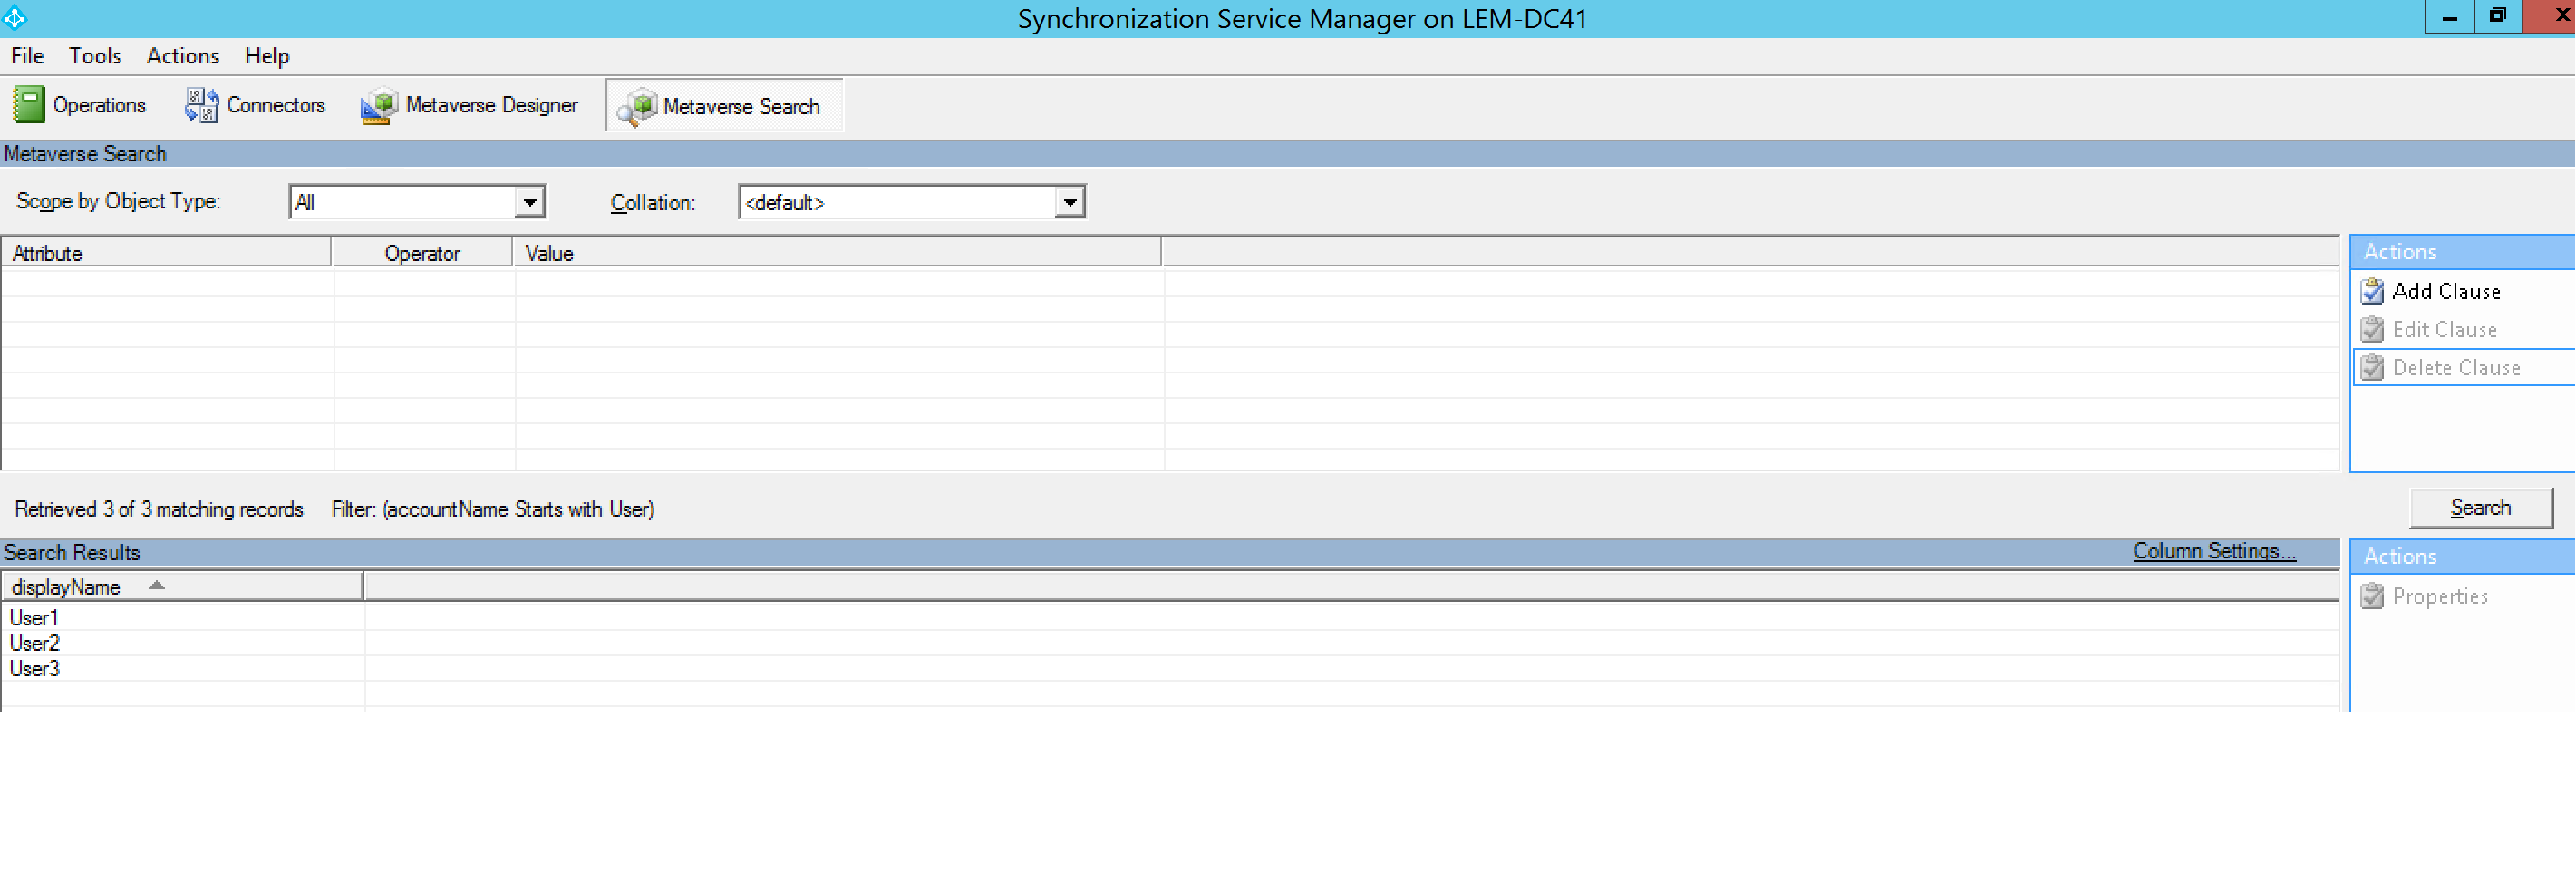
Oh yes, look at all those lovely users just waiting to be sync'd to the cloud. We know our user matching worked as we only see one account here. Remember we are syncing two forests here! As they say in Spanish... Muy Bueno!
Right, last two things... Open AAD Connect up again and get rid of the Staging Mode. I don't think this needs a picture so you are not getting one.
Next, go in to Task Scheduler and enable the task there. Then run that badboy. You don't need a pic for that either.
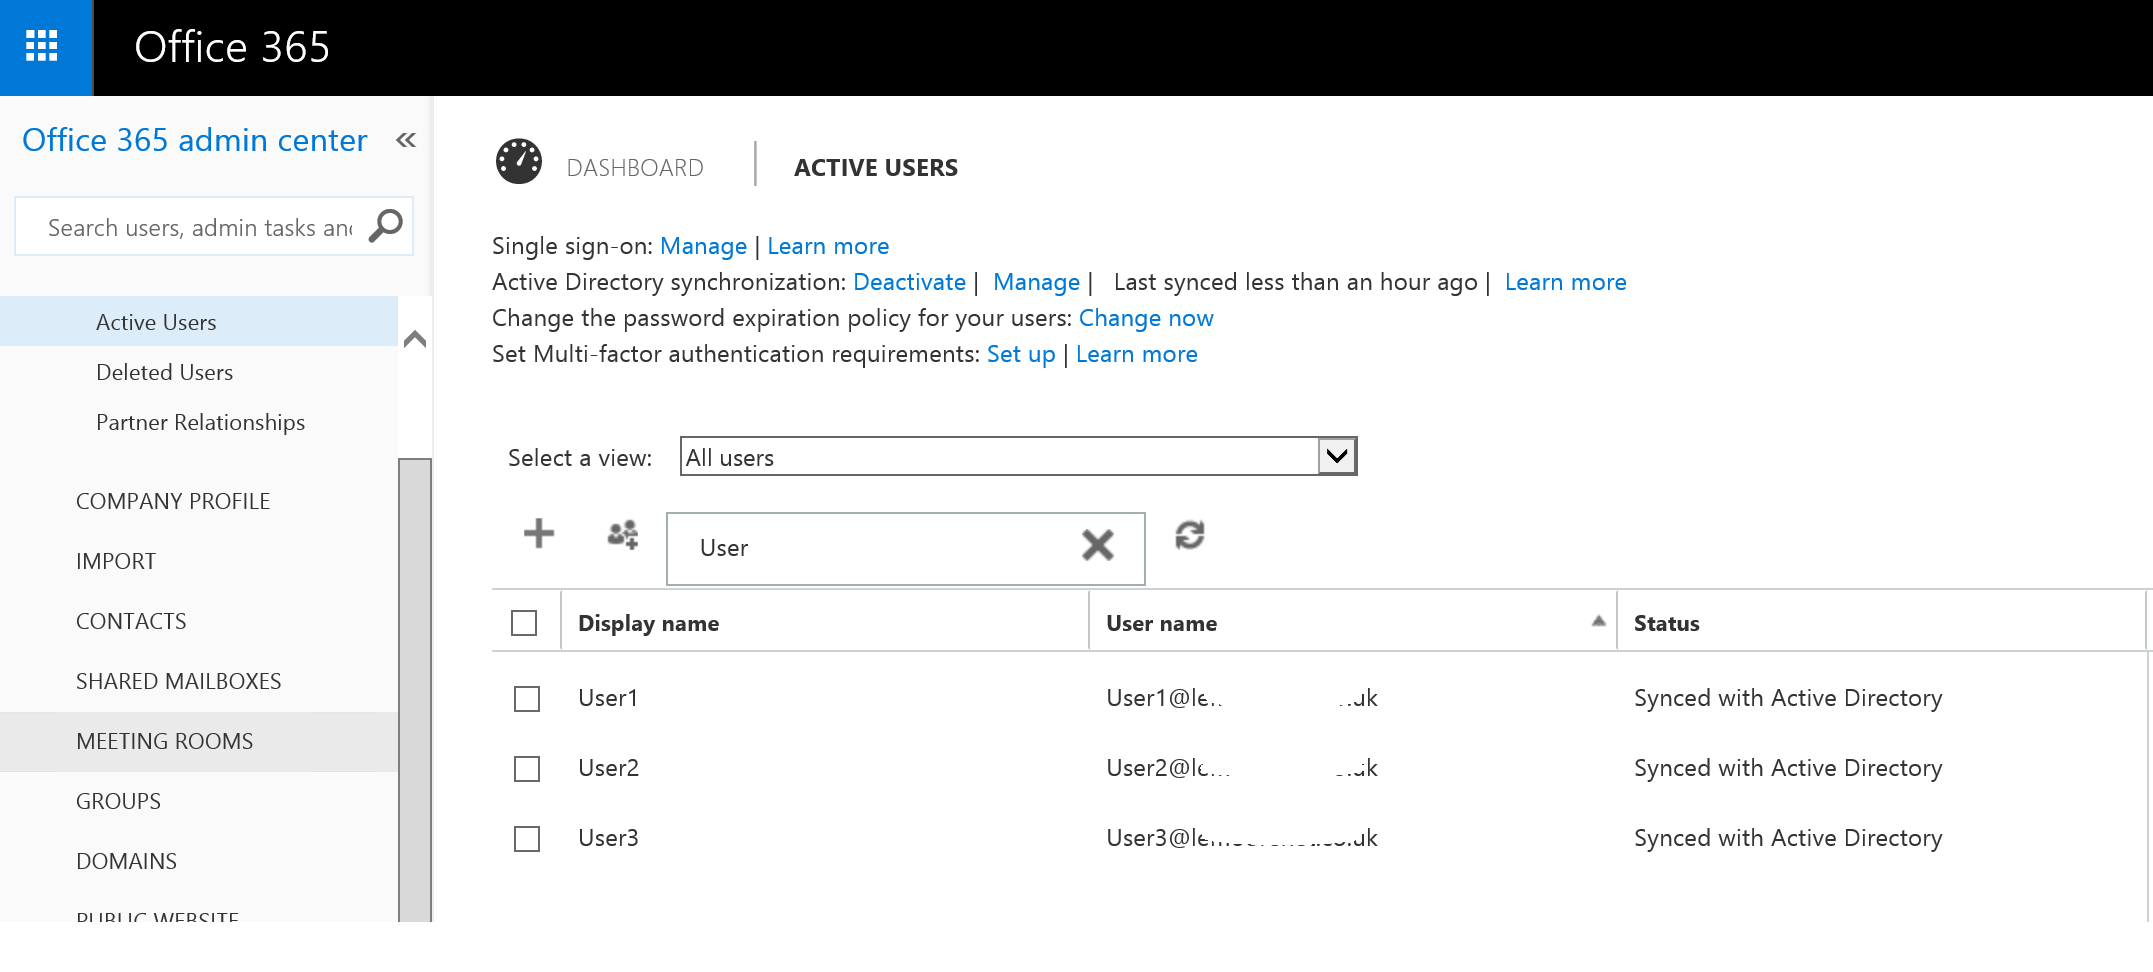
Let it do its thing, and then log into your Office 365 portal... Boom, there are your users. Can I get an Amen?
Nice! I love it when a plan comes together!
Now, go license them and move a mailbox up there (configuration of your on-premises Exchange environment is out of the scope of this article. But, in short, make sure your DNS records are right and your MRS Endpoints are enabled and your certs are all good).
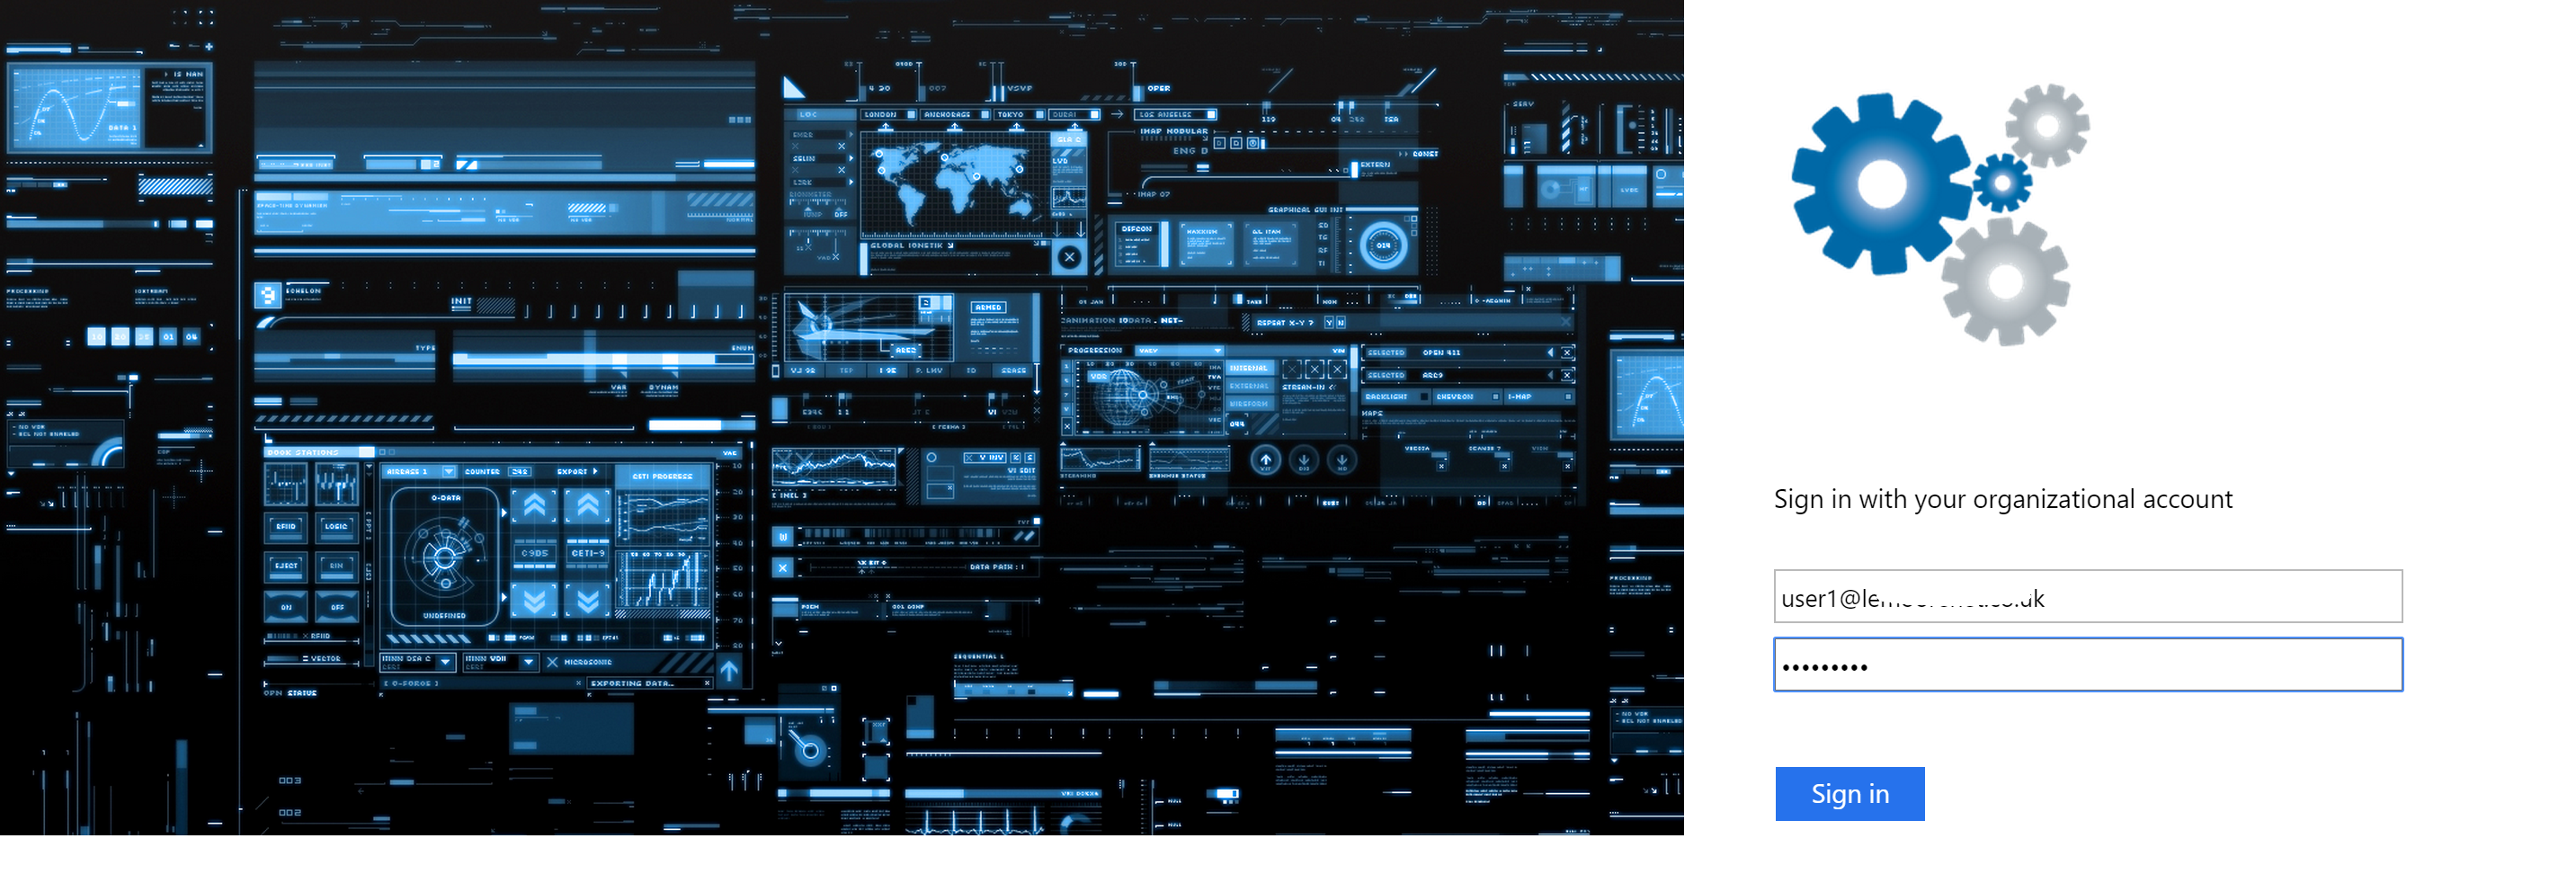
Go to your corporate OWA login page, which should redirect to your AD FS Sign-In page..
Are your fingers crossed?
Oh, where has our mailbox gone? That's right, it's in the cloud...
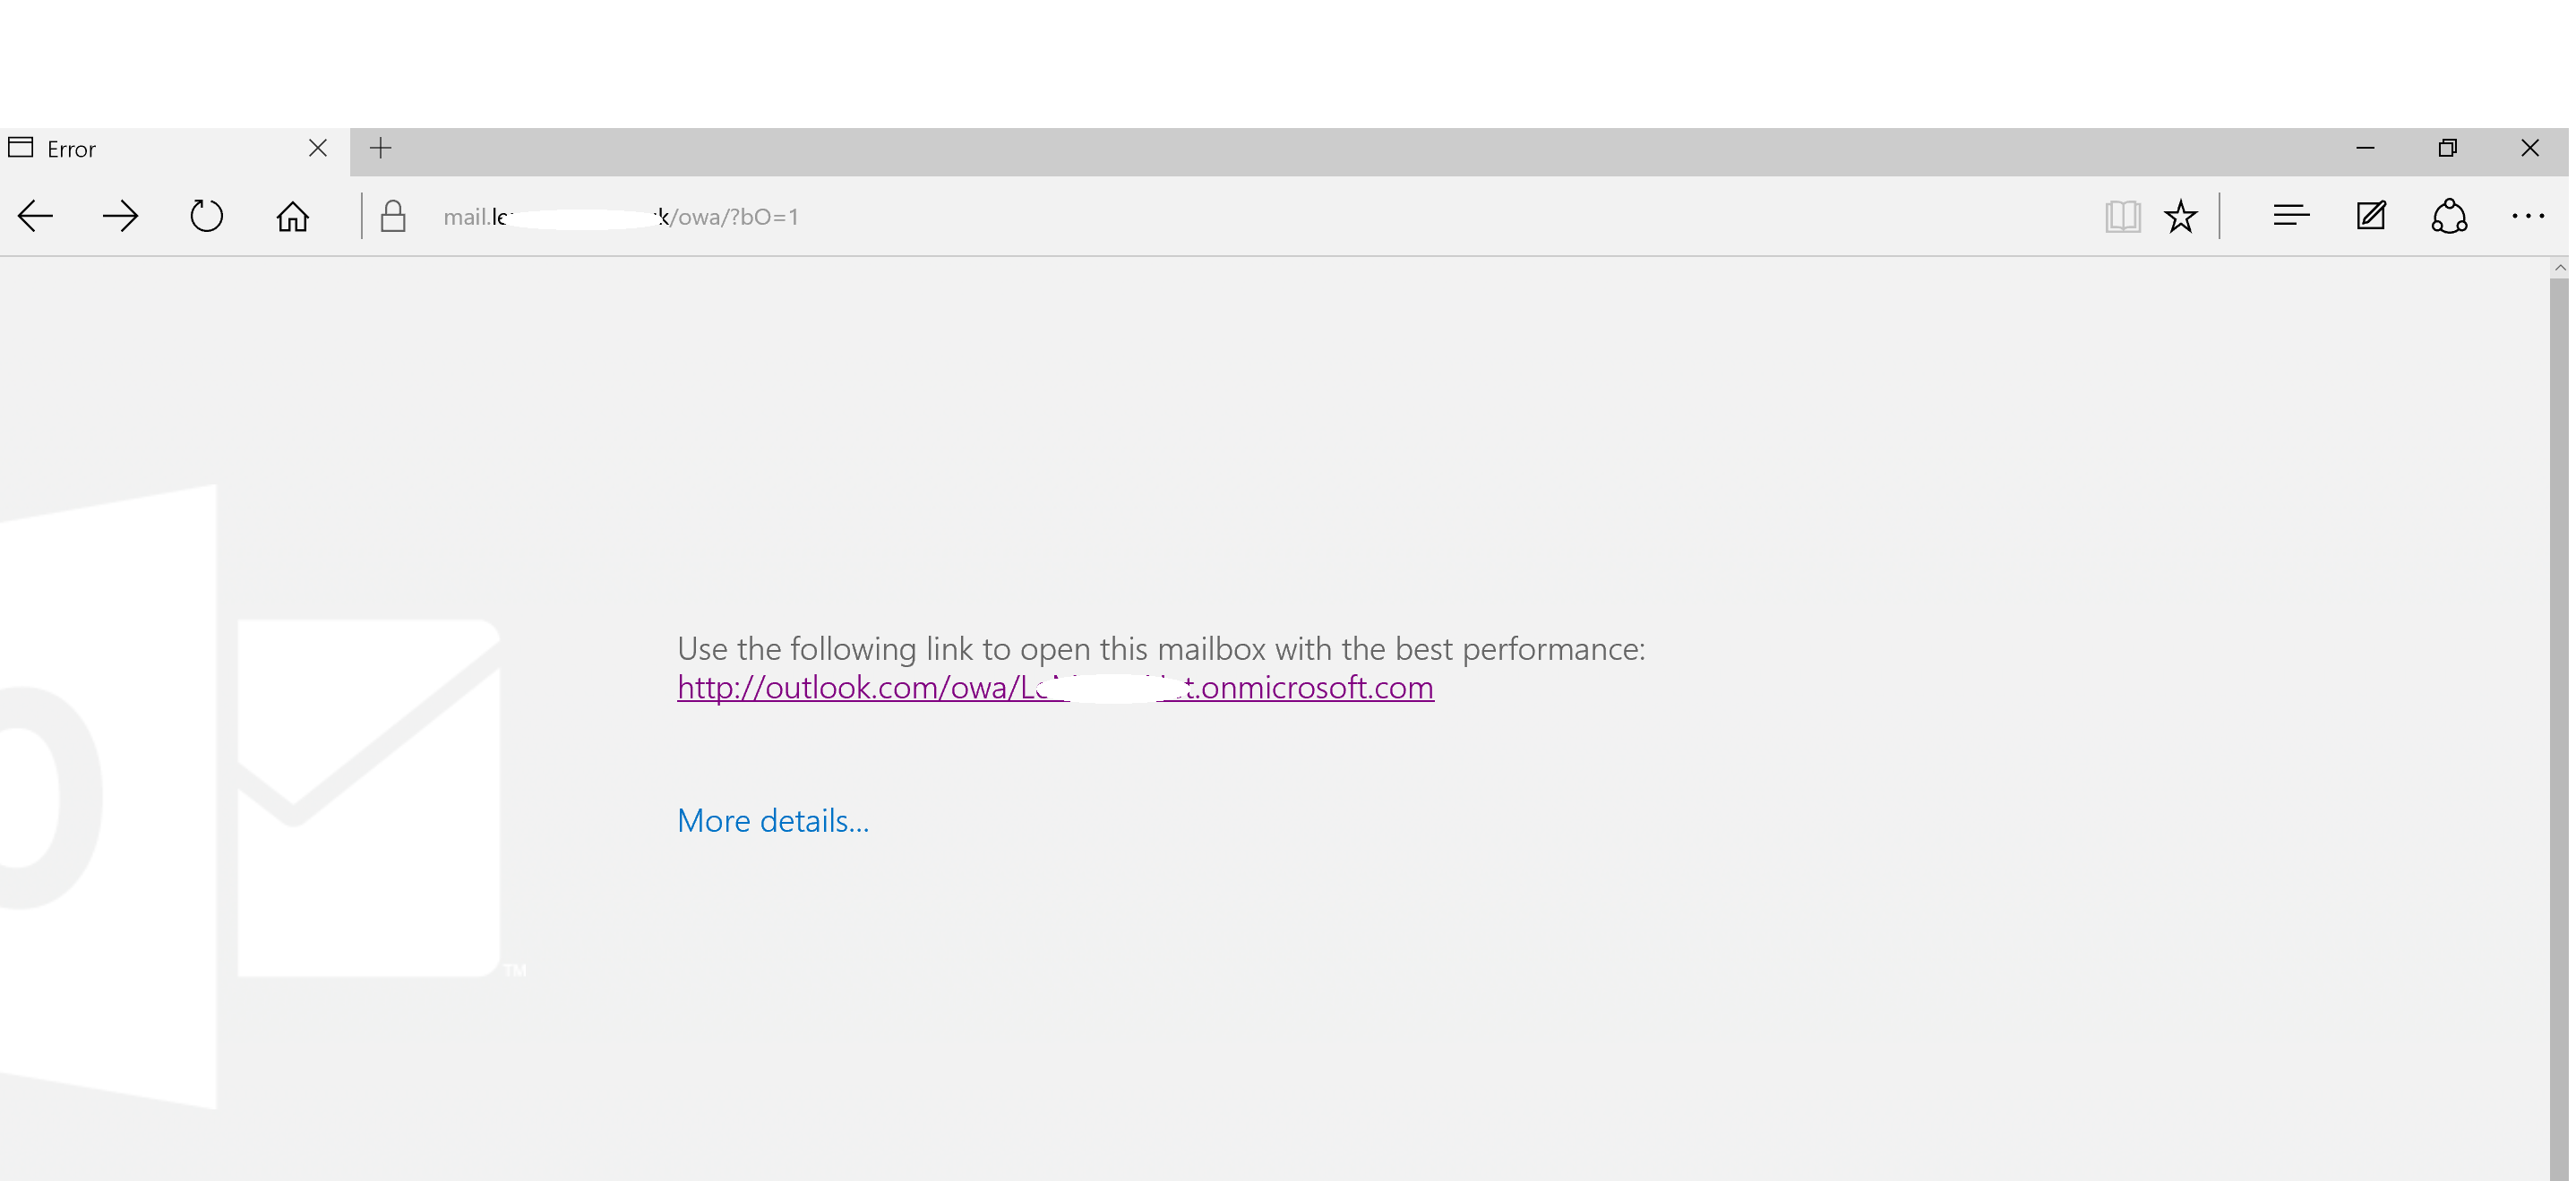
Lets hit the portal instead...
Of course it will redirect us to our AD FS Server as we have configured our domain in Office 365 as a federated domain.
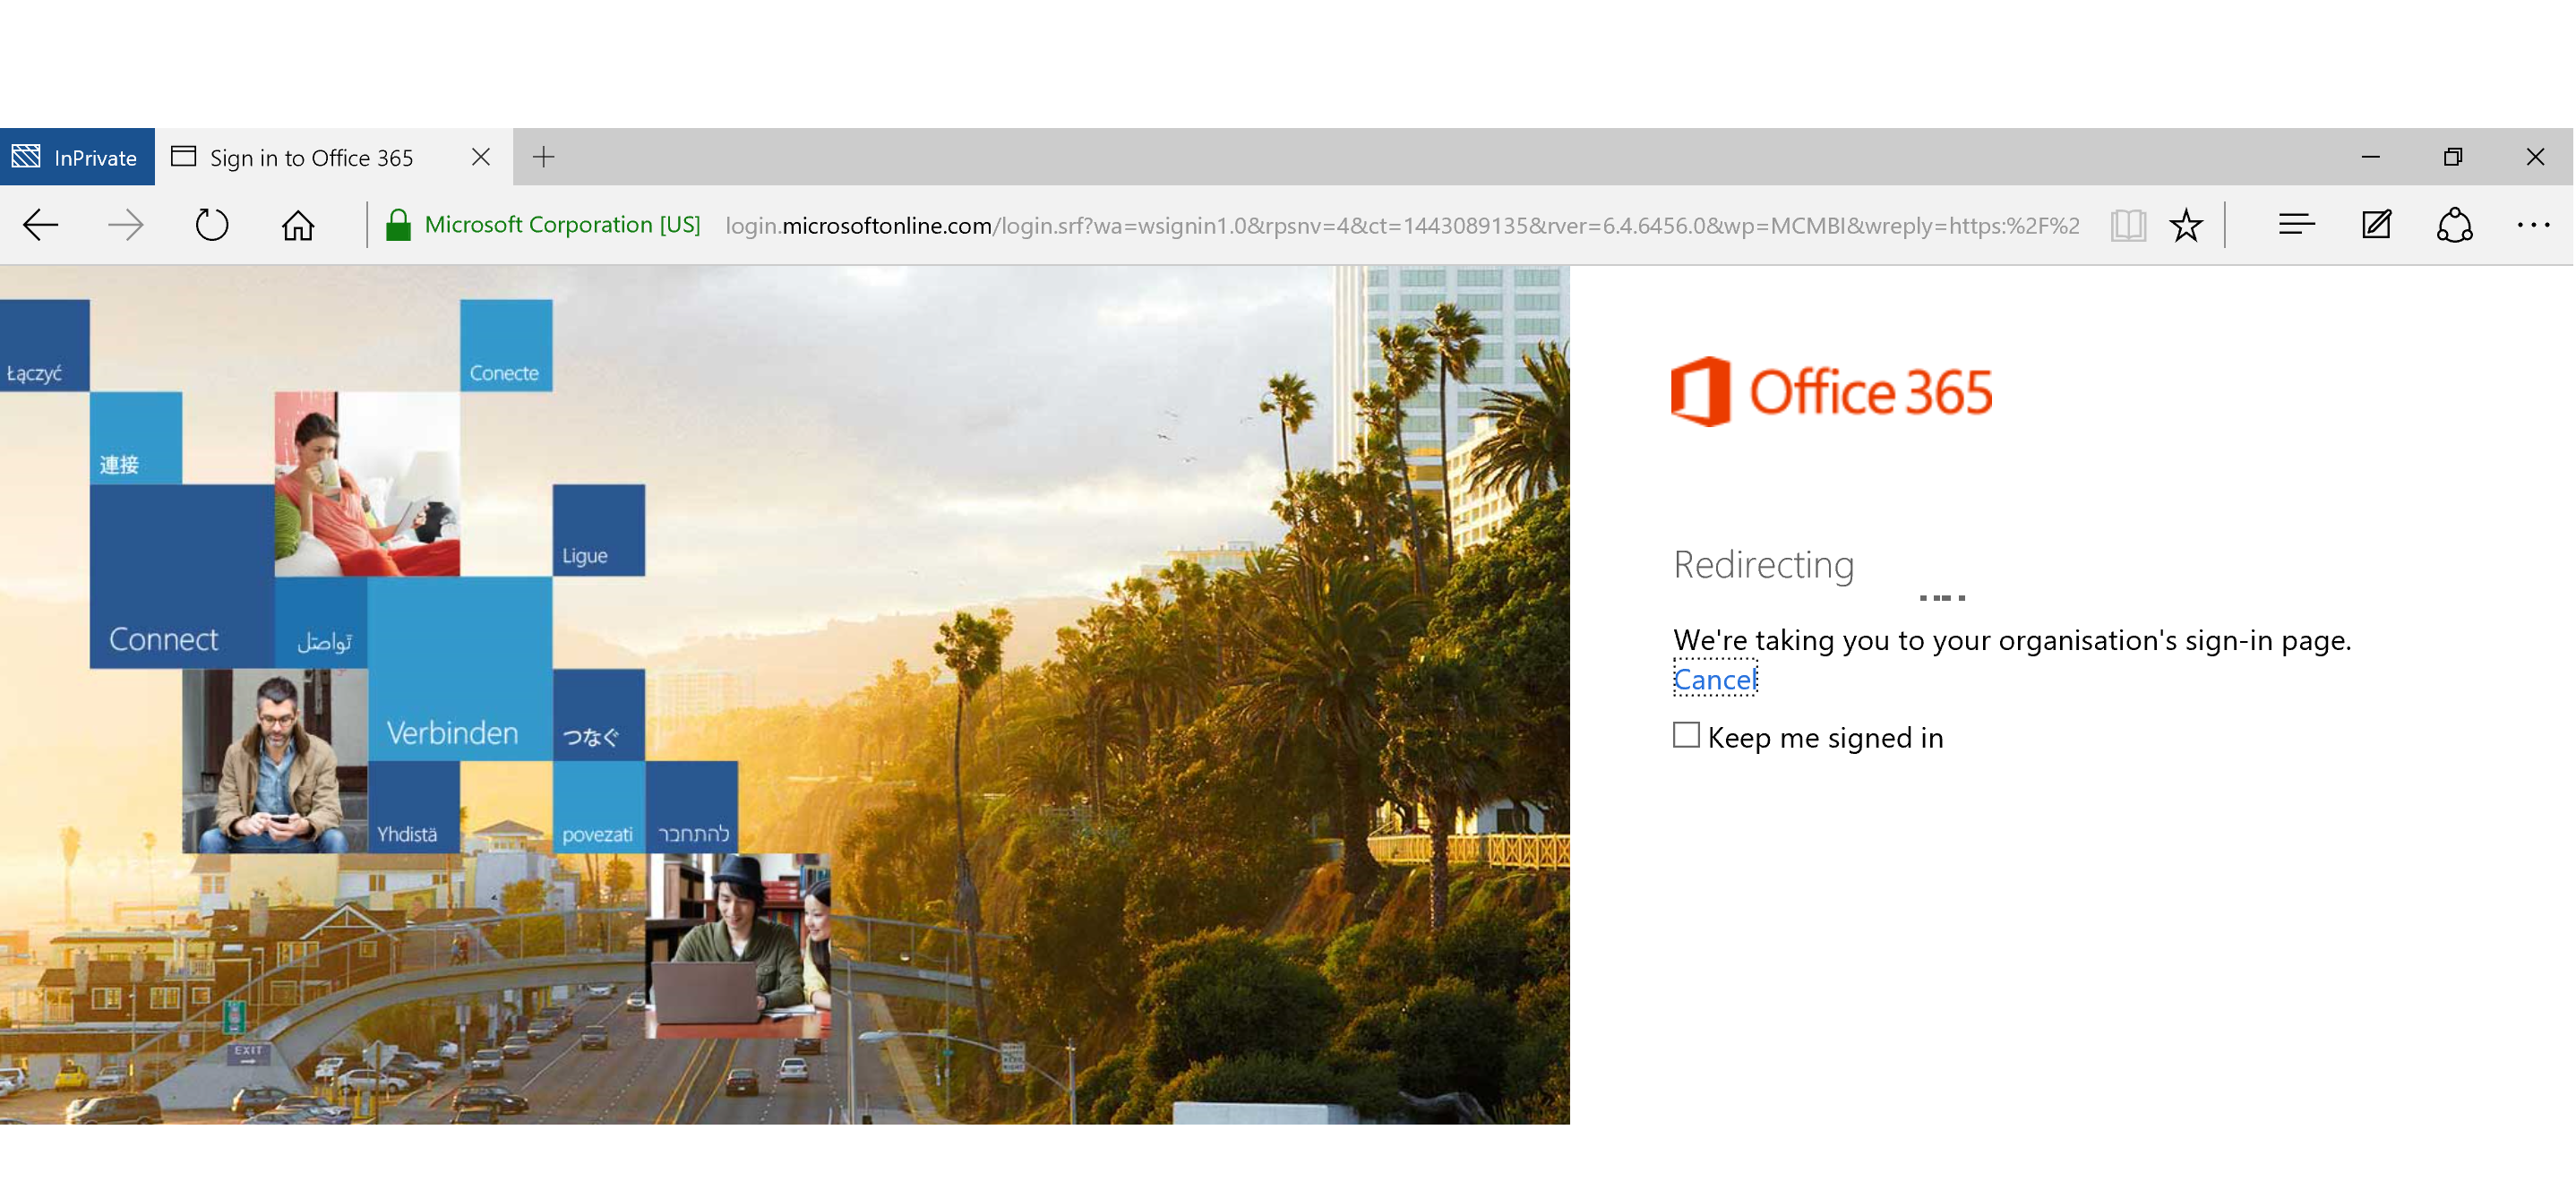
Back here again...
Fingers crossed...
.......
...................
..........................
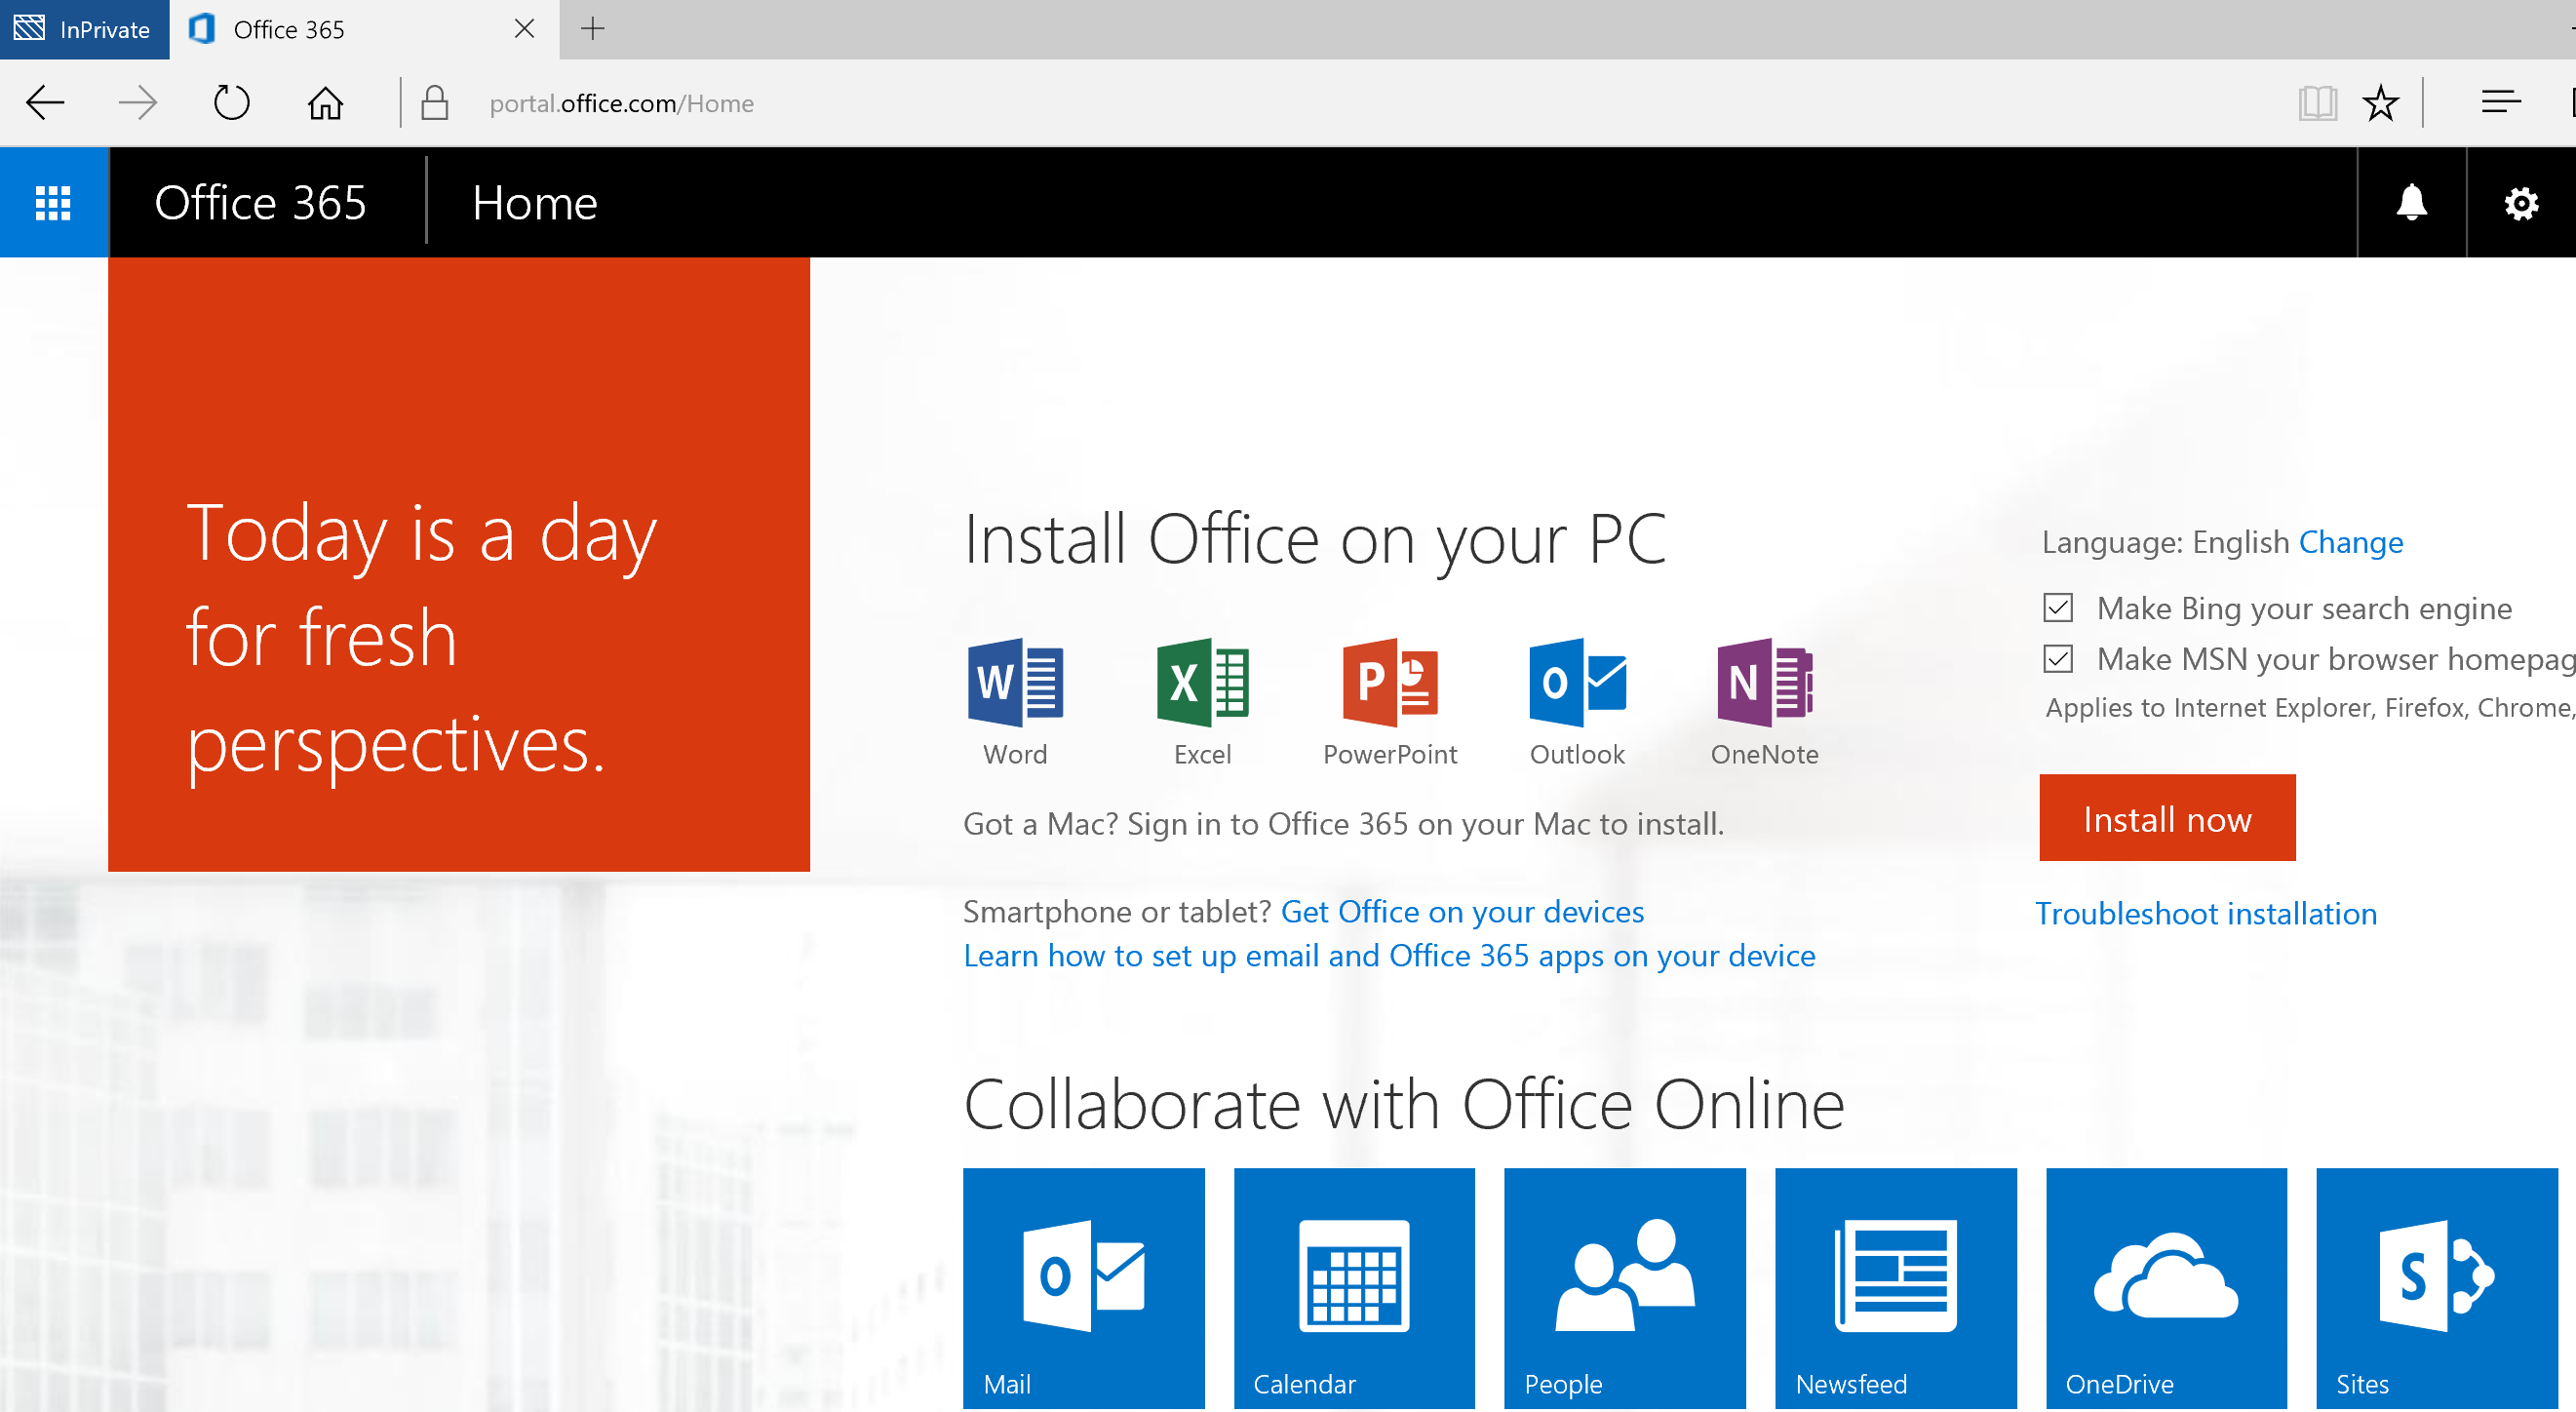
....success! We are in.
I hope this helps you get up to the cloud! Shout below if you have any questions :)
Adrian Moore
Senior Premier Field Engineer
Some bedtime reading:
Exchange Server 2013 Hybrid Deployments
Hybrid deployment best practices
Integrating your on-premises identities with Azure Active Directory
Understanding Users and Contacts in Azure Active Directory Sync
Understanding Key AD FS Concepts
Thanks to Pawel Partyka, Kris Wilson, Timothy Heeney and Andreas Kjellman for helping me out!