Deploying a Simple Cloud App: Part 2 - Provisioning a Storage Account
If you’ve started reading from this post, you’ll need to go through the previous parts of this series before starting this one:
Introduction
Part 1: Provisioning and Configuring SQL Azure
![Deploying-a-Simple-Application_thumb[2] Deploying-a-Simple-Application_thumb[2]](https://msdntnarchive.blob.core.windows.net/media/TNBlogsFS/prod.evol.blogs.technet.com/CommunityServer.Blogs.Components.WeblogFiles/00/00/00/48/12/metablogapi/1057.Deploying-a-Simple-Application_thumb2_thumb_11735B90.png) The architecture of the application also calls for Windows Azure storage to store some of the application’s configuration data, as well as data for the ASP.NET providers.
The architecture of the application also calls for Windows Azure storage to store some of the application’s configuration data, as well as data for the ASP.NET providers.
If you’d like to find out more about Windows Azure Storage, read through the Windows Azure Storage section in Introduction to Windows Azure Platform on the Microsoft Patterns and Practices site.
Let’s get started.
If you’re not already logged in to the Windows Azure Management Portal, navigate to the portal and log in.
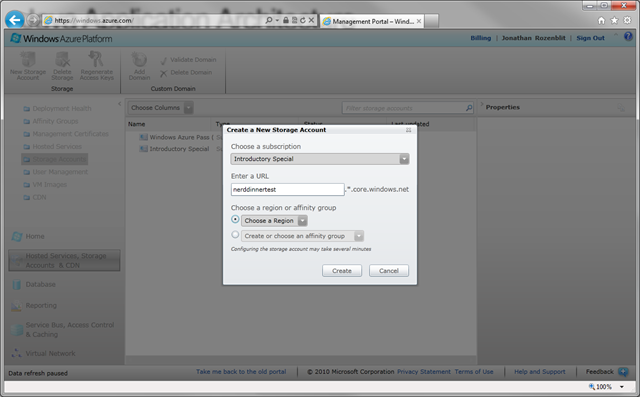
From the ribbon, click on New Storage Account.
Choose your subscription from the subscription drop down.
Choose a unique URL prefix for your storage account.
Storage accounts have unique URL prefixes under the cloudapp.net domain. You’ll need to choose a unique prefix as this is the address that allows HTTP based access to the application’s storage services and you wouldn’t want someone else accessing your storage services.
As with the SQL Azure server, we need to specify a region or affinity group for our storage account. For the purposes of this walkthrough, select North Central US.
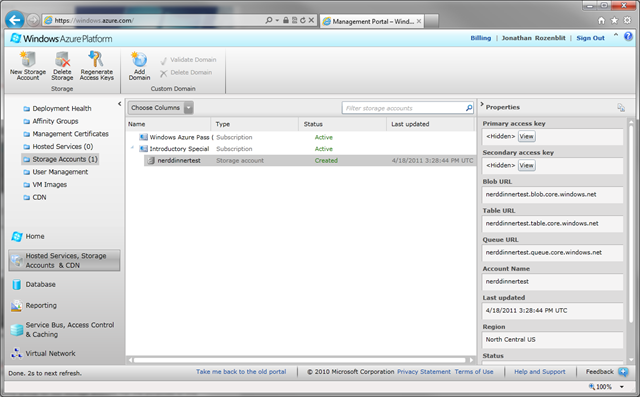
Click Create to kick off the provisioning process. Within a few moments, the view will update, displaying the created storage account.
That’s it for the storage account. We’ll come back to here later on in order to grab the configuration information the application will need in order to securely connect to the storage services.
Let’s go back to our to do list and see what we have to do next.

