So you have a datacenter, what next?
I’ve worked with a number of organizations who are apprehensive about moving workloads to cloud infrastructures. I understand this thought process because these organizations have invested significantly in expertise, equipment, software, and services. Over the last few years there’s been a strong push for private cloud in which you’re creating (or leveraging hosted resources) a cohesive pooled infrastructure (e.g. your cloud) and carving off resources across the business.
Many organizations have built up, what I call compute silos, where there “cloud” is based on how localized datacenters have been built for over a decade. What I mean, is racks and equipment are purchased, virtual machines are carved up based on what’s available per host, and disaster recovery is implemented via storage and/or within the virtualization technology.
The strategy I described above provides control and I understand there are scenarios in which servers and/or data must reside within the walls of the organization.
So what’s the point of all this?
The point is with the vast amount of cloud resources available I’d like to see more businesses migrate services and data into the cloud.
Let’s read through an example:
Your datacenter is continually expanding with the amount of resources hosted for the business. This includes maintenance and growth costs to accommodate for new technologies, applications, and storage. I won’t go into what it takes to provision a new service or application however I’ll say there are multiple steps either manual or automated.
What if it were easy to log into a website and spin up servers with multiple data disks? Well there is, and it’s called Windows Azure. You may be thinking yeah, yeah, I know all about Azure and clouds, however have you seen or tested Windows Azure yet? If not let’s walk through creating a virtual machine (VM) and how to attach a data disks to VMs in Windows Azure.
CREATING A VIRTUAL MACHINE IN WINDOWS AZURE
1. Navigate to https://manage.windowsazure.com/ and either log into your account or sign up for a trial account.
2. Once you’re logged into Windows Azure you’ll see a variety of options on the left hand navigation. Go ahead and select VIRTUAL MACHINES from the list:
3. Select +NEW at the bottom left hand corner:
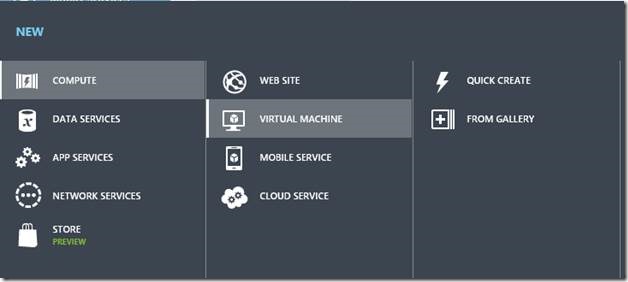
4. You’ll see a screen similar to the following:
You have two options:
1. Select QUICK CREATE and select an image from the image gallery
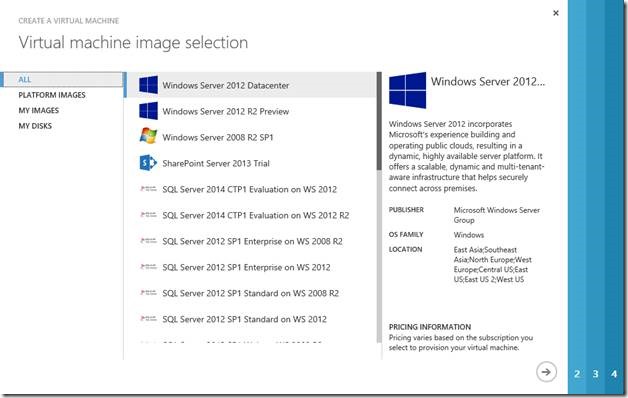
2. Select FROM GALLERY where you can select an image from a number of locations (as shown below):
a. PLATFORM IMAGES – predefined images that Azure provides
b. MY IMAGES – these are images you’ve uploaded
c. MY DISKS - .VHDs that you’ve uploaded
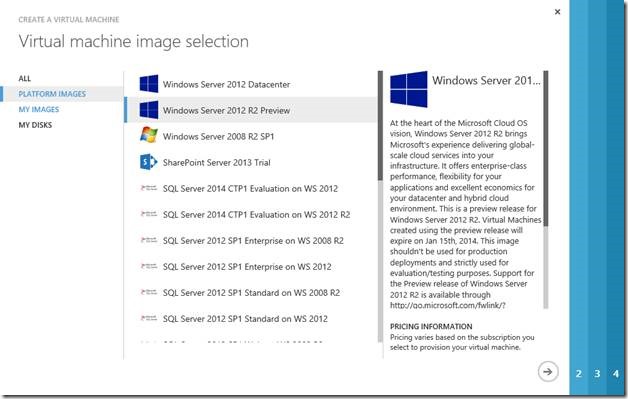
3. For this walkthrough I’m going to select from the PLATFORM IMAGES and click the arrow on the lower right corner:
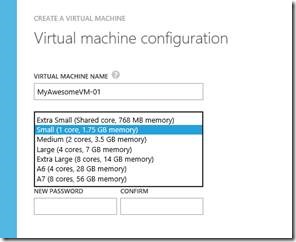
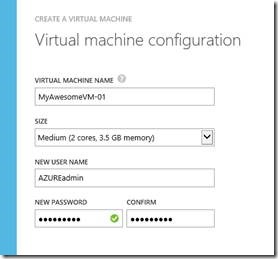
4. Now we need to type in some information. Here is where you type in a name and select from a list of virtual machine sizes.
- If you have a web server maybe you’ll want something on the small size. However if you plan to run SQL Server or an application that requires a large amount of resources, you may want to select a larger size.
- Next type in a user name and password to be used to log into the VM after it’s provisioned (take note of the credentials, you’ll need them later).
- Quick TIP: when you first log into the VM, the credentials will be as follows:
- VIRTUAL MACHINE NAME\NEW USER NAME
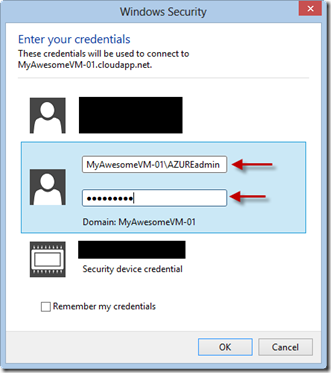
- So in my case I will log in as follows: MyAwesomeVM-01\AZUREadmin (not case sensitive)
5. Click the arrow on the lower right corner to move to the next step.
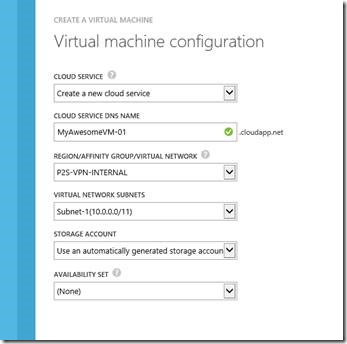
6. On this page you have a number of options as shown below:
Let’s step through each choice:
a. CLOUD SERVICE - A cloud service is a container for one or more virtual machines you create. You can create a cloud service for a single virtual machine, or you can load balance multiple virtual machines by placing them in the same cloud service.
b. CLOUD SERVICE DNS NAME – the name of your VM
c. REGION/AFFINITY GROUP/VIRTUAL NETWORK – several options here:
i. REGION – the region around the globe where you had your VM placed (e.g. US, EUROPE, and ASIA)
ii. AFFINITY GROUP - When you create an affinity group, it lets Windows Azure know to keep all of the services that belong to your affinity group running at the same data center cluster.
iii. VIRTUAL NETWORK – If you’ve created a virtual network (Site-to-Site or Point-to-Site VPN) you can attach it to it.
d. VIRTUAL NETWORK SUBNETS – attach to a subnet
e. STORAGE ACCOUNT – This is where you want your .VHD disks to live
f. AVAILABILITY SET – An availability set is a group of virtual machines that are deployed across fault domains and update domains. An availability set makes sure that your application is not affected by single points of failure, like the network switch or the power unit of a rack of servers.
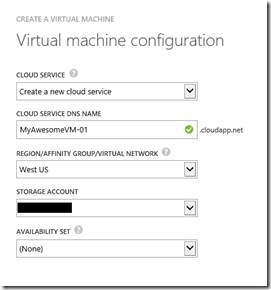
7. Here are my selections:
8. Select your choices and click the arrow on the lower right corner to move to the next step.
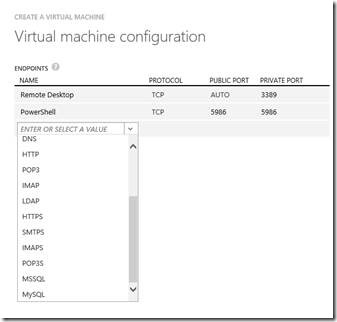
9. Last step. Here is where you’ll select what additional ports you want to open up or remove:
- Note: If you choose a Windows Server as your image the Firewall will be enabled however you will be allowed to remote in.
10. Click the check mark on the lower right corner to move to the next step:
11. Your new virtual machine will now begin provisioning. This will take a few minutes…
ACCESSING YOUR VIRTUAL MACHINE FOR THE FIRST TIME
Once your virtual machine is created you’ll want to access it.
1. Navigate to https://manage.windowsazure.com/ and either log into your account or sign up for a trial account.
2. Once you’re logged into Windows Azure you’ll see a variety of options on the left hand navigation. Go ahead and select VIRTUAL MACHINES from the list:
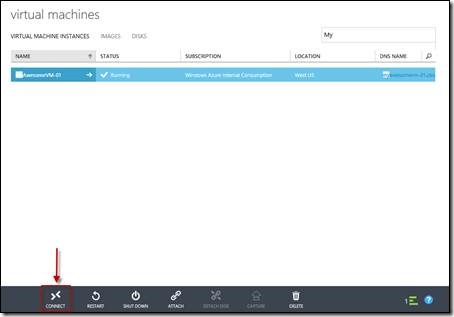
3. Find your VM either by using the search feature or select from the list and click CONNECT at the bottom of the screen:
4. You’ll see a pop-up (similar to when you download a file) at the bottom of your browser. Click Open:
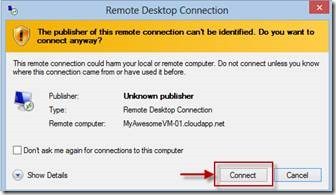
5. Now click connect when the Remote Desktop Connection dialog pops up:
6. Remember those credentials you wrote down earlier? This is where you’ll want to enter them.
- I’m using Windows 8 so I’ll walk through using the credential GUI for Windows 8:
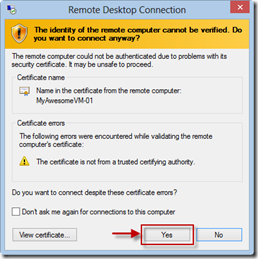
7. When the Remote Desktop Connection GUI pops up select “Yes”:
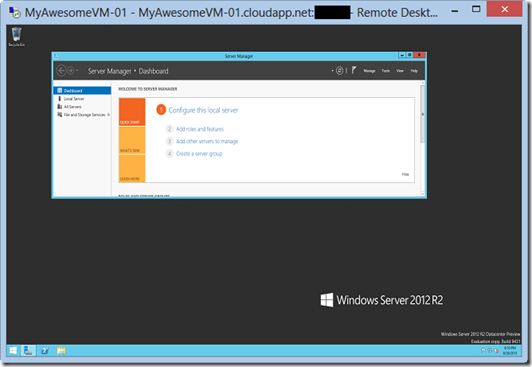
8. Congratulations! You have logged into an Azure Virtual Machine (we’ll attach a data disk next).
Quick Tip: If you want the screen to resize when you adjust it select the
from the upper left corner and click “Smart Sizing”.
ATTACHING DATA DISKS TO WINDOWS AZURE VIRTUAL MACHINES
One of the things I recommend doing after an Azure VM is created is to add data disks. Why? Because if you were to add data to the default C: (OS Drive) or D: (Temp Drive) drives and the VM was corrupted, deleted, etc. Azure will start fresh with a new VM. However data disks are preserved.
Imagine installing SQL server on the C: drive in your own datacenter and the OS was corrupted not allowing you to boot in to the OS. You’d probably lose all of your SQL data (if there were no backups). This would also occur if that happed with a VM in Azure as well. To guard against data loss you’ll want to attach new or existing disks to your Azure virtual machine and point the data resources for your applications to the data disks.
Let get started with creating a data disk on the VM previously created:
1. Navigate to https://manage.windowsazure.com/ and either log into your account or sign up for a trial account.
2. Once you’re logged into Windows Azure you’ll see a variety of options on the left hand navigation. Go ahead and select VIRTUAL MACHINES from the list:
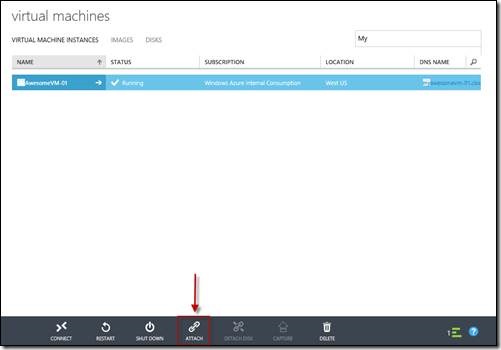
3. Find your VM either by using the search feature or select from the list and click ATTACH at the bottom of the screen:
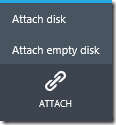
4. You’ll see two options pop up:
1. Attach disk – attach pre-existing disk (one you created before or uploaded)
2. Attach empty disk – attach a new disk
5. I’m going to select “Attach empty disk”:
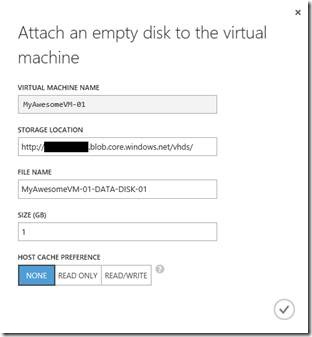
Let’s walk through the options:
- STORAGE LOCATION – By default it will use the STORAGE LOCATION you chose when you created the VM.
- FILE NAME – You can change the disk name under FILE NAME to something more intuitive.
- SIZE (GB) – For the size of the disk, you can choose up to 1 TB in size or 1023 GB :)
- HOST CACHE PREFERENCE
- The host caching settings for an operating system disk or for a data disk improves performance under some circumstances. Host caching is off by default for both read and write operations for data disks. Host-caching is on by default for both read and write operations for operating system disks.
- Configure your options and click the check mark in the lower right. Disk creation will take a few minutes to complete...
6. Once provisioning is completed, open up the Remote Desktop Connection or connect to your Azure VM again.
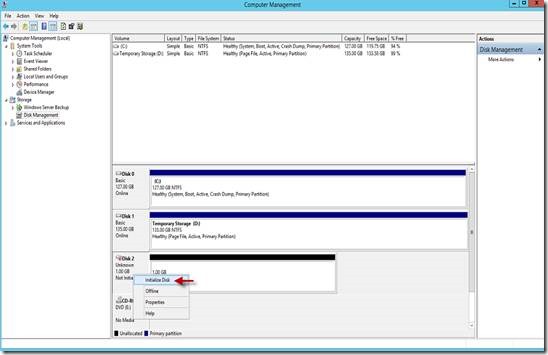
7. On your Azure VM, open up Computer Management and select “Disk Management”.
8. Find the new disk, right click on it, and select “Initialize Disk”
9. Select OK at the next dialog and you’ll have a new unallocated disk.
10. From this point, right click on the unallocated disk and create a volume as you would normally on Windows Server.
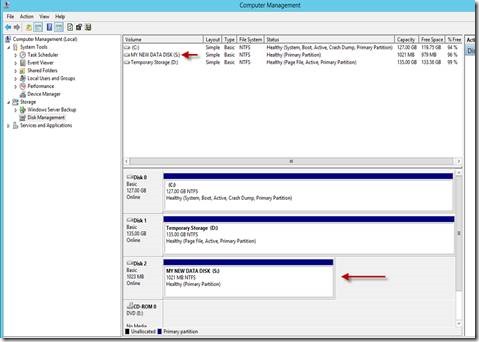
Here’s look at what my disk looks like:
Congratulations you’ve successfully created an Azure Virtual Machine and added an empty data disk to the VM.
I hope this walk-through was informative and that you’ll take the next step to dedicate a workload up in Windows Azure!




![clip_image020[1] clip_image020[1]](https://msdntnarchive.blob.core.windows.net/media/TNBlogsFS/prod.evol.blogs.technet.com/CommunityServer.Blogs.Components.WeblogFiles/00/00/01/00/04/metablogapi/2117.clip_image0201_thumb_33C70365.png)
