Email Phishing Protection Guide - Part 15: Implement the Microsoft Azure AD Password Protection Service (for On-Premises too!)
The Email Phishing Protection Guide is a multi-part blog series written to walk you through the setup of many security focused features you may already own in Microsoft Windows, Microsoft Office 365, and Microsoft Azure. By implementing some or all of these items, an organization will increase their security posture against phishing email attacks designed to steal user identities. This guide is written for system administrators with skills ranging from beginner to expert.
Introduction: Email Phishing Protection Guide - Enhancing Your Organization's Security Posture Part 1: Customize the Office 365 Logon Portal Part 2: Training Users with the Office 365 Attack Simulator Part 3: Deploy Multi Factor Authentication (MFA) Part 4: Deploy Windows Hello Part 5: Define Country and Region Logon Restrictions for Office 365 and Azure Services Part 6: Deploy Outlook Plug-in to Report Suspicious Emails Part 7: Deploy ATP Anti-Phishing Policies Part 8: Deploy ATP Safe Link Policies Part 9: Deploy ATP Safe Attachment Policies Part 10: Deploy and Enforce Smart Screen for Microsoft Edge, Microsoft Internet Explorer and Google Chrome Part 11: Monitor Phishing and SPAM Attacks in Office 365 Part 12: Discover Who is Attacking Your Office 365 User Identities Part 13: Update Your User Identity Password Strategy Part 14: Prevent Brute Force and Spray Attacks in Office 365 Part 15: Implement the Microsoft Azure AD Password Protection Service (for On-Premises too!) Part 16: Disable Office 365 Legacy Email Authentication Protocols Part 17: Control Application Consent Registrations in Microsoft Office 365 and Microsoft Azure Part 18: Increase Security with Microsoft Secure Score Part 19: Email Phishing Protection Security Checklist Part 20: Recommended Security and Anti-Phishing Training from Microsoft Ignite 2018
Part 15: Implement the Microsoft Azure AD Password Protection Service (for On-Premises too!)
Microsoft has a very large user base across 200+ products such as Office 365, Outlook.com, Hotmail.com, Xbox Live, etc. and with that, receives billions of authentication requests - many legitimate from real users, while many were from attackers.
In August 2018, Microsoft blocked over 1.29 billion (yes, billion) authentication requests from malicious attempts to obtain a username and password. Many of these come from password spray attacks which is when an attacker has a set of commonly used passwords that are then used in an attempt to guess the password of a defined set of user accounts. The thinking is that one of these passwords will be common enough to match what a user has chosen for their password. Remember, attackers are smart and know the typical passwords people use such as incrementing a common password by a number each time they are required to change it, use an exclamation point or some other character at the end, etc. They have advanced algorithms to help work through these password combinations as well as password dictionaries available from the Internet that contains millions of passwords. While commonly targeted accounts are often from those in leadership positions at an organization, other user accounts are valuable as well. If an attacker can get access a sales person's account, a logistical planning person, a user who stocks shelves at a store, etc. he or she can then begin to look around the rest of the organization for valuable data, harvest the email directory to perform additional targeted attacks, and more. The attacker has all the time in the world to look around once they are in and start to work their way through the organization.
To increase an organization's security posture, there are many locks and adjustments that should be made as described in this blog series. When it comes to passwords, adopting a password-less strategy using Windows Hello, the Microsoft Authenticator app, and/or FIDO2 security keys is highly recommended. If you are unable to start the password-less journey in your organization and need to fortify your user accounts quickly, the modernization of password policies is needed as described in the previous blog. In addition to these strategies, consider using the features Microsoft now has in place both in the cloud and on-premises to prevent the use of these easy to guess passwords.
With the recently launched (June 2018) Azure Active Directory Password Protection service you can prevent cloud and on-premises Active Directory users from using commonly used passwords. This is a great way to defend against the commonly used password spray attacks. By using this service, some organizations were able to determine that up to 52% of the passwords used in their organization were weak and easily guessed by attackers, and then able to significantly reducing the attack surface. The list of these commonly used passwords is determined by analyzing the attack patterns from across the Microsoft cloud and developing a list of the weak strings being used to attack with. This list is a dynamic global list that is constantly updated based on new attacks and is one of the items used by the Azure Active Directory Password Protection service.
While this works well for Azure Active Directory cloud users, there is also a way to extend this same service to on-premises Active Directory Domain Controllers. This is done by installing a small agent either directly on the domain controllers or, if you block direct Internet access to domain controllers you can instead install a proxy agent on another server for them to use. If using the proxy agent setup or direct domain controller communication, password changes will use end-to-end encryption between the domain controller and Azure.
The agents are lightweight, quick to setup and highly recommended to take advantage of Azure Active Directory Password Protection. Once setup, you will want to first use only the Audit mode to see how many users are using weak passwords. After additional planning, the Audit mode can be switched to Enforced. The service supports multi-forest environments as well as a high availability architecture. As off September 2018, this service remains in a public preview.
Below are instructions about how to view current settings in Azure Active Directory Information Protection and how to set this up on-premises. For additional information, diagrams, agent downloads, and answers to common questions about this service, see the reference documentation.
Microsoft Azure Active Directory:
- Logon to https://portal.azure.com as a global administrator.
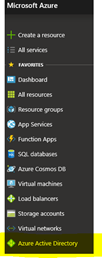
- Click on Azure Active Directory
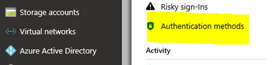
- Click on Authentication Methods
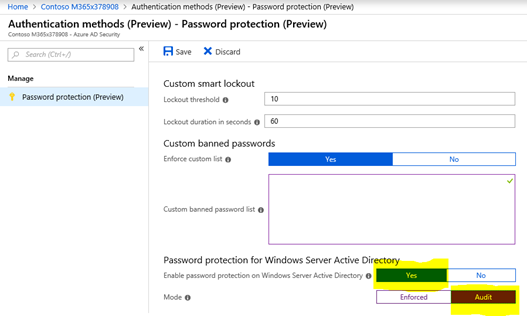
- In this screen, you can configure the custom smart lockout functions for Azure AD users. Keep in mind that these lockout threshold and durations are only for Azure AD users. Active Directory still has its own lockout and password protection policies that is in place for on-premises based users. Azure Active Directory Password Protection is in addition to this.
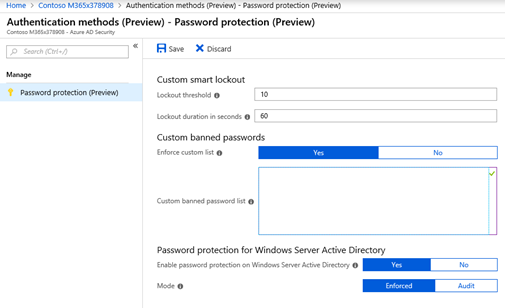
- In the screen above, in addition to the list of passwords Microsoft is preventing by default (this default list is never exposed as to not give attackers any insight), you may enter custom passwords to block from being used. In this custom list, you may want to enter terms such as the sports teams local to your office locations, your organization's name, key project names, key products a company produces, and anything else that users in your organization may typically use. You can then test this policy by using a test user account in Azure AD.
- Also in the screen above, notice the two settings for Windows Server Active Directory. These are for your on-premises Active Directory Domain Controllers (covered in next section). When ready, set the first option to enable password protection to Yes and then set the Mode to Audit.
Microsoft Active Directory (On-Premises) Password Protection Agent Installation
Before you get started to implement the on-premises portion of this setup, be sure to read the requirements section of the service documentation. It is important to note that each domain controller must have an agent installed to participate in this protection service.
Below are instructions for how to install the Active Directory Password Protection Proxy agent as well as the Domain Controller agent. I recommend installing this agent FIRST in a testing, non-production environment. For additional information on this process, see the installation guide here.
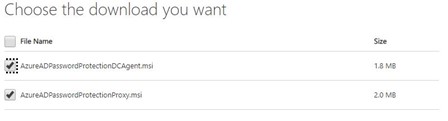
Go do the download site to access the Domain Controller agent as well as the Protection Proxy agent. Select both for download.
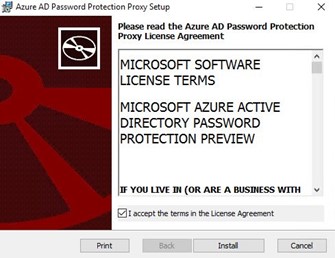
On your first domain controller, open the AzureADPasswordProtectionProxy.msi file to start the installation. Click Install to initiate the installation. This will take under 30 seconds to complete.
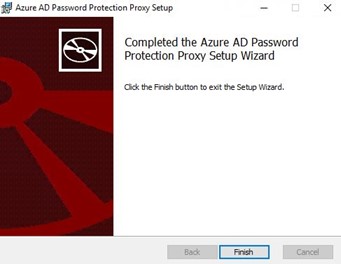
The Installation completes within about ten seconds. Click Finish to end the installer and proceed to the next step. There is no reboot required for the proxy agent installation.
You must now register the proxy and the Active Directory Forest to communicate with Azure. These steps are done in PowerShell.
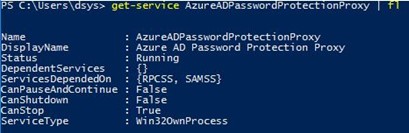
- Open PowerShell in Administrator mode
- Make sure the Azure AD password Protection Proxy agent is running by typing: get-service AzureADPasswordProtectionProxy.
- Register the proxy agent with Azure Active Directory by typing: Register-AzureADPasswordProtectionProxy. You will be prompted for credentials.

- Register the on-premesis Active Directory Forest with Azure Active Directory by entering: Register-AzureADPasswordProtectionForest. You will again be prompted for credentials.

- If needed, you may change the port the Azure AD Password Protection Proxy Service is listening on. Use instructions here if needed.
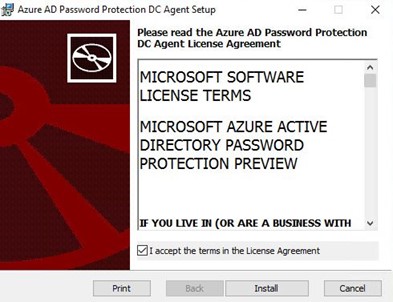
On the first domain controller, open the downloaded Domain Controller agent and select Install to start the installation.
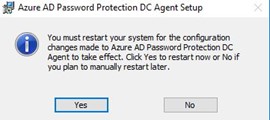
Note: A reboot will be required to complete the installation of the domain controller agent.
Within a few seconds, the installation is complete.
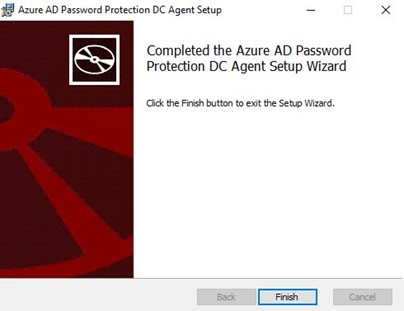
The agent installer will prompt for a reboot of the domain controller.
After the domain controller agent is installed and the domain controller has rebooted, there is no other configuration required on the servers.
At this point, make sure to follow the options in the Password Protection for Windows Server Active Directory below are set correctly. Select Yes to enable the Windows Server Active Directory protection and set the Mode to Audit.
Information about monitoring the domain controller agent and proxy agent is located here. Once ready, go back to the configuration in the previous step and change the Mode to Enforced.
Summary:
By eliminating the use of easy to guess and commonly used weak passwords in your environment, you are further shrinking the attack landscape. To provide even more secure logon capabilities, it is recommended that you update aging password policies, use Windows Hello, FIDO2 keys and the Microsoft Authenticator app.