Email Phishing Protection Guide - Part 9: Deploy ATP Safe Attachment Policies
The Email Phishing Protection Guide is a multi-part blog series written to walk you through the setup of many security focused features you may already own in Microsoft Windows, Microsoft Office 365, and Microsoft Azure. By implementing some or all of these items, an organization will increase their security posture against phishing email attacks designed to steal user identities. This guide is written for system administrators with skills ranging from beginner to expert.
Email Phishing Protection Guide Index: Introduction: Email Phishing Protection Guide - Enhancing Your Organization's Security Posture Part 1: Customize the Office 365 Logon Portal Part 2: Training Users with the Office 365 Attack Simulator Part 3: Deploy Multi Factor Authentication (MFA) Part 4: Deploy Windows Hello Part 5: Define Country and Region Logon Restrictions for Office 365 and Azure Services Part 6: Deploy Outlook Plug-in to Report Suspicious Emails Part 7: Deploy ATP Anti-Phishing Policies Part 8: Deploy ATP Safe Link Policies Part 9: Deploy ATP Safe Attachment Policies Part 10: Deploy and Enforce Smart Screen for Microsoft Edge, Microsoft Internet Explorer and Google Chrome Part 11: Monitor Phishing and SPAM Attacks in Office 365 Part 12: Discover Who is Attacking Your Office 365 User Identities Part 13: Update Your User Identity Password Strategy Part 14: Prevent Brute Force and Spray Attacks in Office 365 Part 15: Implement the Microsoft Azure AD Password Protection Service (for On-Premises too!) Part 16: Disable Office 365 Legacy Email Authentication Protocols Part 17: Control Application Consent Registrations in Microsoft Office 365 and Microsoft Azure Part 18: Increase Security with Microsoft Secure Score Part 19: Email Phishing Protection Security Checklist Part 20: Recommended Security and Anti-Phishing Training from Microsoft Ignite 2018
Part 9: Deploy ATP Safe Attachment Policies
We are on a journey in this series of blogs to increase the security posture of your organization against phishing emails. We are setting up a variety of locks that an attacker will need to pick for a successful email phishing attack. An organization needs to make it as difficult as possible for an attacker to be successful. So let's consider that a well-crafted email with an attachment has managed to pick through a few locks and made it to a user's email Inbox. Given the potential that the user may now open the attachment, we want to setup another lock to intercept and scan the document for any malicious payloads. ATP Safe Attachment Policies (one of several security features within Office 365 ATP) will help protect organizations from users who unknowingly open an attachment with a malicious payload.
With Office 365 ATP Safe Attachments, when a user receives an email with a file attached and clicks on it to open, the attachment is first opened and tested for malicious payloads in a virtual environment before being released to the user. If the attachment is safe, it will then open for the user. However, if it was found to contain malicious content the attachment is removed from the email and a warning message is displayed. This same type of protection is now available in documents that may be stored in SharePoint or OneDrive in the formats for Word Online, Excel Online, PowerPoint Online, and OneNote Online (as well as Office 365 ProPlus on Mac) - providing a much greater grid of protection in your organization. Office 365 ATP Safe Attachments provides another layer of formidable locks in the email and Office Online environment that every organization should consider implementing. See the section in this link called How to get ATP Safe Attachments if not already included in your Office 365 subscription.
Office 365 ATP Safe Attachment Policies
Organizations that have ATP capabilities in their Office 365 subscriptions must define policies for ATP Safe Attachments. Also explained in earlier links(see the table on example scenarios), the ATP Safe Attachment policy is not defined or active by default - even with the licensing assigned to users. It is up to the organization to define policies based on their internal design.
Instructions to Setup Office 365 ATP Safe Attachment Policies
Note: Only user accounts in your organization assigned with the ATP license will be protected by this policy.
Logon to https://protection.office.com as a global administrator in your Office 365 tenant. This opens the Security & Compliance area of the tenant.
Within the Security & Compliance area, expand Threat Management and then click on Policy.
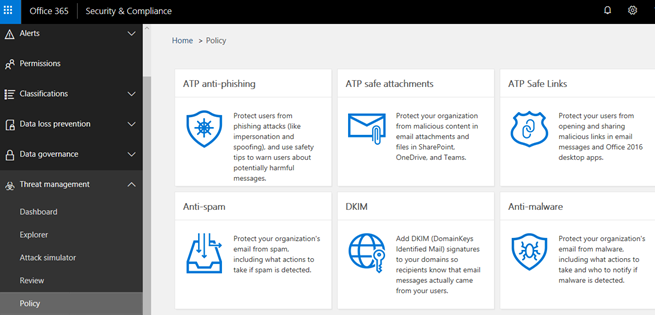
Click the ATP Safe Attachments tile. Notice in this area that the option to enable the feature is not enabled by default.
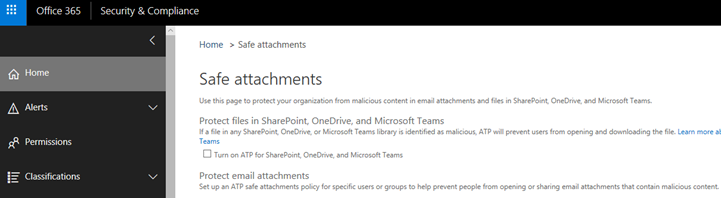
Click on the option to Turn on ATP for SharePoint, OneDrive, and Microsoft Teams.

Click on the option to create a new policy for email protection. Click on the addition symbol.

In the configuration window that appears, I recommend the following settings.
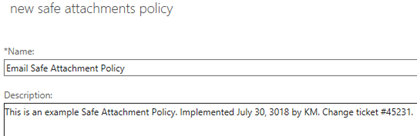
a. Start by giving your policy a new name. I called mine Email Safe Attachment Policy for this example.
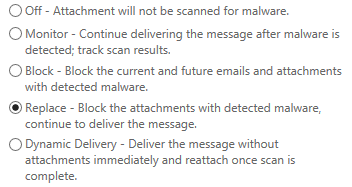
b. In the bottom option of this screen, notice the default action of Off. If it was my organization, I would choose the Replace option. This option makes sure there is no chance the user will receive the attachment and launches it before being scanned for malicious content. As always, be sure to evaluate all options for the one that fits best in your organization.
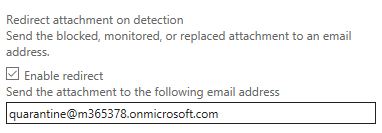
c. In the Redirect Attachment on Detection area, define an email address to redirect any of the attachments found to be malicious. This email address must first be created in the admin console. You may want to look into a Microsoft Flow or some other notification rule that is sent to a monitored Inbox (your account or a support team) indicating that malicious content has been detected, blocked, and forwarded to the email account specified that may be unmonitored. If you do not choose this option, you will receive several warnings indicating email could be lost.
d. In the Applied To section, in the drop down area I recommend choosing The Recipient Domain Is option so the policy is applied to all users in your organization. In the example below, I have defined my demo domain.

e. Click OK when done and then Save to complete the configuration. Be sure to click Save at the bottom of the configuration changes to activate this policy.
Back in the Security & Compliance area, expand Threat Management. Then, click Threat Tracker to view items in quarantine. In addition to this blog about configuring ATP Safe Attachments, be sure to review the other options to further secure your environment.
Conclusion: In this blog on ATP Safe Attachments we reviewed how this feature helps to further secure an organization and how to define a protection policy. We also reviewed how to monitor the quarantine area in Threat Tracker.