Publish the Entity Store database on Azure SQL Server
This step involves deploying an Entity Store database onto your Azure SQL Server created in the previous step.
Before you proceed, be sure to process the Aggregate Measurements using the Dynamics 365 Administrative Tools to populate the database. Use the following steps to seed the Entity Store database with sample data for the Application Suite's Analytical Workspaces & Reports.
Processing Aggregate Measurements in Dynamics 365 for Operations (15 mins)
1. Log into the Dynamics 365 instance running locally: https://usnconeboxax1aos.cloud.onebox.dynamics.com
Note: Ensure that you are using an account with Admin privileges
2. Navigate to the Aggregate measurements admin form [System administration > Setup > Entity Store]
3. Click on the check box next to Name to select all items in the list
4. Once you've selected the models you need, click on the Refresh button in the ribbon
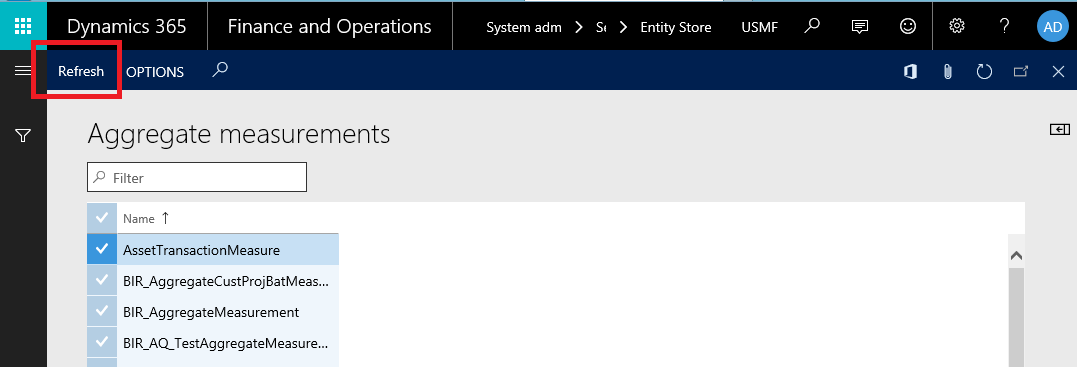
5. Click on the OK button in the fly-out to trigger a refresh
Allow this process to complete in the background (~5 - 10mins). You can monitor the status of the background process using the Batch jobs form [System administration > Inquiries > Batch jobs] . Search the list for the Deploy measurement jobs in the list to track progress.
Once the Progress of the Batch job reaches 100.00 you are ready to publish the local Entity Store database onto your Azure SQL Server. Use local tools on your 1Box machine to export the local Entity Store database as a BAK file
Export Entity Store database hosted on the 1Box (20 mins)
1. Open Microsoft SQL Server Management Studio (SSMS) on the local 1Box environment
Note: Ensure that you are using an account with Admin privileges
2. Connect to the local Database Engine - you'll notice a collection of databases present in the local instance.
3. Select the database named AxDW, this is the local Entity Store database
4. Right + click on the AxDW, select Tasks, and then select Export Data-tier Application
5. Click on the Next button in the wizard
6. Supply a file path and a file name for the exported database (*.BACPAC file)
7. Click Finish to initiate the process
Publish Entity Store database BAK file to Azure SQL Database (70 mins)
1. Open Microsoft SQL Server Management Studio (SSMS) on the local 1Box environment
Note: Ensure that you are using an account with Admin privileges
2. Connect to the Azure SQL Database Server created in the previous step using the database connection string: *.database.windows.net
3. Update the Authentication: method to SQL Server Authentication
4. Provide the Login and Password credentials used when creating the Azure SQL Server
5. Click the Connect button to access the Azure SQL Server
Note: You'll be prompted to log into your Azure subscription to connect to the Azure SQL Server
6. Once connected, expand the root node and selecte Database
7. Right + click the folder and select Import Data-tier Application
8. Click on the Next button in the wizard
9. Locate the Entity Store database back-up file (*.BACPAC file)
10. Click on the Next button in the wizard
11. Provide a New database name like AxDW
Important: Take note of the Database Name provided here
12. Update the Edition of Windows Azure SQL Database value to Premium
Note: Entity Store Database utilizes Non-clustered column indexes (NCCI) which is only supported in Premium edition
13. Click on the Next button to begin importing Entity Store Database
As a final step, you'll need to modify the web configuration settings on the 1Box development environment to utilize the new Azure resources.