Diagnosing IBW Installation Problems - Part 2 of 3
*Updated with link to Part 3- 4/13/10*
In Part 1 of this series we figured out where the logs are located. In this section, we’ll go over how IBW works and what messages get written to which log files.
How IBW works
Before getting into each of the logs and what they describe, it will be helpful to explain the phases of IBW and the different components that log things in unique ways:

Note: The phases described here are not directly equivalent to the Configuration Passes (1-7) which you see when setting settings in ICE.
- Phase A
- In this sub-phase, you plug the IBW media into your device and boot into IBW. IBW runs on top of the Windows PE operating system. So, in phase A, your computer boots up into WinPE and the “Autorun” program launches.
- Autorun
- Autorun is the initial screen you see in IBW that has 2 main options: “Build an Image” or “Deploy an Answer File or WIM”. From the time WinPE starts through when you see the text “Setup is starting”, no IBW logs are created, as IBW has not actually started yet.
- Phase B
- When you click “Build an image”, this essentially just calls the actual IBW program, which is setup.exe in the \sources\ folder of your IBW media. If you use the “Deploy an Answer file or WIM” option, this just calls setup.exe /unattend:MyAnswerFile.xml or setup.exe /installfrom:MyWim.wim.
- IBW Engine
- Here, if you choose to not use an answer file or if your answer file was incomplete, you’ll see the IBW user interface where you can pick and choose packages, drivers, languages, configure your installation disks, etc. If you are using an answer file, the Image Based Setup Engine processes your answer file in the background and configures the installation appropriately.
- Phase C
- After the installation is ready to start, the IBS engine will expand the Embedded Core to your installation disk, and then pass off the installation of packages to a servicing tool called DISM.
- DISM / CBS
- DISM processes your answer file and calls into the operating system’s CBS stack to actually install the packages and apply settings.
- Phase D
- After most of the installation is finished, IBW will reboot your computer to finish the installation.
- Online Setup
- After your computer has rebooted, it will actually boot up into the Standard 7 operating system instead of into IBW. In other words, at this point setup is not being run from the DVD or USB disk that you originally booted off of, but from the hard disk you installed to. In this phase of setup, installation finishes up with any last minute things that need to be done before your device is ready to use.
- Phase E
- The OOBE (Out of Box Experience) UI is shown (or hidden, if you specified that in your answer file) and setup is complete!
Viewing the logs
Now that we understand basically how the setup process works, understanding the logs is a bit easier. There are 3 main log files in the Panther directory that you’ll want to look at:
1. setupact.log
- Setupact.log lists every single operation that IBW performs between “IBW Engine” and “Online Setup.” Because the log lists everything, it can be quite large and difficult to read through. To help diagnose errors, we also have setuperr.log.
2. setuperr.log
- Setuperr.log is a subset of setupact.log. IBW essentially just copies all messages of type “Error” to setuperr.log. When I encounter an error in IBW, the first thing I do is look at setuperr.log to quickly see where the general problem is.
3. cbs_unattend.log
- When IBW passes your answer file off to DISM to actually install the packages, the control is entirely handled by DISM. IBW essentially says, “Hey DISM, can you process this answer file for me? Let me know when you’re done. Thanks!” Because of how this handoff works, the logging also transfers from IBW to DISM. Instead of recording the package installation messages to setupact.log, they’re put in cbs_unattend.log. If you look at setuperr.log and see something mentioning DISM or CBS, then cbs_unattend.log is where you can find the problem. If setuperr.log doesn’t mention DISM or CBS, then you should look in setupact.log for more detail.
To actually look at the contents of the logs, you have 2 main options:
1. Use Notepad.exe to look at the logs when you’re still on the device. Notepad is a great way to quickly look at the logs immediately after the failure occurs.
- From the command prompt, you can simply type notepad logname.log to open up the log file. For this to work, you’ll need to have already navigated to the Panther directory.
- Alternatively, you could type something like notepad c:\$WINDOWS.~BT\Sources\Panther\setupact.log without having to use the cd command to go to the Panther directory first. Example shown below:
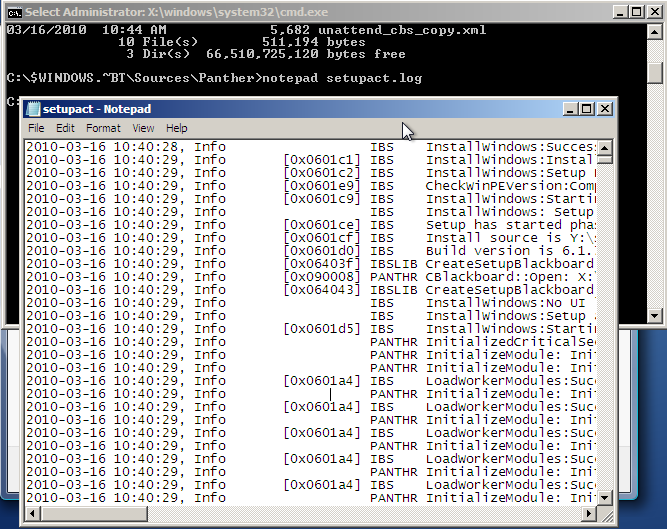
2. As you can see from the screenshot above, Notepad on WinPE doesn’t provide the best viewing experience. While it’s quick to get at the logs, your screen resolution is typically pretty low, giving you a small window to work with. Option 2 is copying the files to external media so that they can be read on a normal Windows computer.
- The xcopy command is a quick and easy way to copy an entire folder from one location to another.
- In the example below I’ve navigated to the Panther directory using cd, checked to make sure the files are in the right location using dir, moved up a directory again using cd then used xcopy to copy the logs to a network share, Y:\MyLogsFromFailedInstall.

Now that we have access to the log files, we can start to examine them to determine what the problem is and how to solve it.
Stay tuned for Part 3, where we’ll examine the logs in detail and go over some common errors you may run across.
- Robert
Technorati Tags: Embedded Standard