Configuring SQL Server alias with SharePoint Server 2013
This post will show how to configure SQL Server alias in a SharePoint Server 2013 environment and the benefits of this configuration.
SQL Server alias is very usefull in the following scenarios:
- Upgrading your SQL Server from a older version
- Migrating your Databases from a instance to other
- Aplying a database switch on a Disaster Recovery
This setting is a best practice when you are creating a new Farm, because it is possible to easily switch your database instance without major changes. This happens because SharePoint will connect to the alias that will be configured and not to a specific SQl Server instance. If a SQL Server instance goes down, SharePoint can be pointed to another instance, just changing the alias’ information.
IMPORTANT: This configuration must be done on all server where SharePoint Server is installed (aka Application servers and Web Front-End servers). Don’t do this on the SQL Server.
The following steps show how to create a SQL Server alias on SharePoint 2013 Servers using the SQL Server Client Network Utility:
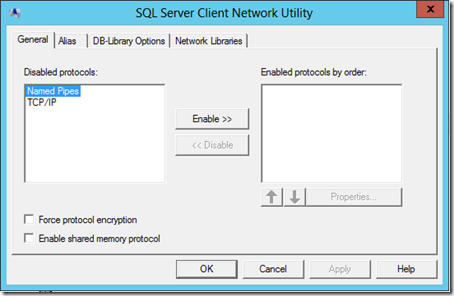
1 - Run SQL Server Client Network Utility at:
C:\windows\system32\cliconfg.exe
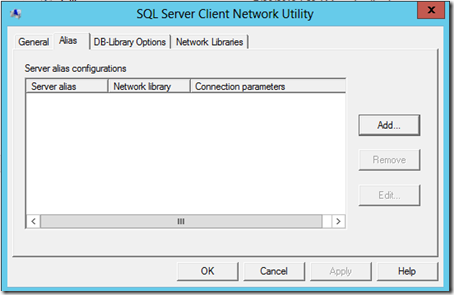
2 - Select the Alias tab, and click Add.
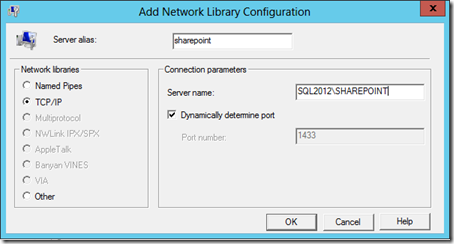
3 - From the Network Libraries section, select TCP/IP.
4 - Type an alias in the Server Alias text box and the SQL Server instance in the Server Name text box.
5 - Check Dynamically Determine Port and click OK.
NOTE: If you use another port to connect on SQL Server, uncheck this option and set the correct port manually.
6 - Run the 32-bit version at:
C:\windows\syswow64\cliconfg.exe
7 - Repeat all these steps in 32-bit version of SQL Server Client Network Utility.
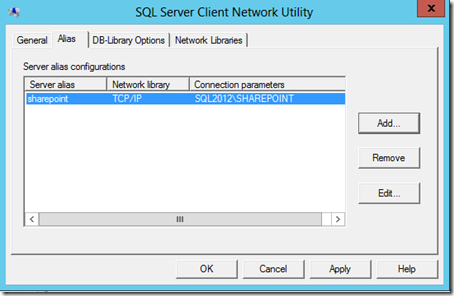
Now you can create your Farm, setting, on the Database Server field in Configuration Wizard, the name of the alias that you have created. If you need to change the SQL Server Instance for you SharePoint databases, you just need running the SQL Server Client Network Utility again and change the Server Name text box.
Remember to do this configuration in all SharePoint Servers that you have in your Farm.
[UPDATE 04/16/14]
Considering a large SharePoint environment, following the steps above is a very arduous task. To automate this configuration and easily deploy on multiple servers, you can use the following PowerShell commands:
For 64-bit version:
New-ItemProperty HKLM:SOFTWARE\Microsoft\MSSQLServer\Client\ConnectTo –name <your_alias> -propertytype String -value "DBMSSOCN,<your_sql_instance>,1433"
For 32-bit version:
New-ItemProperty HKLM:SOFTWARE\Wow6432Node\Microsoft\MSSQLServer\Client\ConnectTo –name <your_alias> -propertytype String -value "DBMSSOCN,<your_sql_instance>,1433"
Where:
<your_alias> = The name of your alias (In my case “sharepoint”)
<your_sql_instance> = The name of your SQL Server Instance (In my case “SQL2012\SHAREPOINT”)
NOTE: Thanks for my friend Christian Keller (SharePoint Premier Field Engineer from Microsoft Germany) who suggested me to update my post including large environments.


