Manage Engineering Change with 'Cases' for Dynamics AX 2012 R3
Engineering Change Management controls the design changes released by the engineering department to modify or correct, maybe a bill of material. Usually, an engineering change review committee is assembled by the management which determines the effective date and disposition of existing material.
- Engineering Change Management is a logistics function that can be used to change redundant master data and document the changes.
- By making the changes become valid on a predefined date, aids the planning process.
- The changes take effect at the predefined date in all areas of the logistics process chain.
Why do we usually use Engineering Change Management?
- To monitor and document the changes
- To be able to execute the change at a specified date
How the process helps in controlling losses:
The below examples explain how a loss can be raised:
- An unwanted change in the product master for a Item Group can lead to configuration issue for a GL account.
- An unwanted or an authorized change in the Cost Group can cause a Costing and Profitability issue.
- An unwanted change in the unit of measure can cause an issue everywhere in any transaction of the application.
To name these, are only a few of the losses created by an unwanted change for the master data like product master or Bill of Material. Through controlled changes of the master using the ECM, can improve the margins in a phased manner.
Though Engineering Change Management applies to many areas, Bill of Material is one such, which needs to get controlled for the changes as the change applies to many areas of application .The Controlled change through ECM leads to proper documentation of the changes and provides a controlled environment for the changes.
With Dynamics AX 2012 CU7 release, a new Case Category type was added, called Product Change.
Let us see with steps and easy to follow screenshots, in a scenario where -
Scenario: The Engineering Change Review Committee recommends change in a particular Bill of Material for a finished good. Dynamics AX user needs to initiate, document, approve and release changes to the product for the planning and production cycles.
In this example, we replace the Bill of Material component Sedan Wiring Harness (Item Number M0016) with component Coupe Wiring Harness (Item Number M0015), in Bill of Material for Car Audio System (Item Number D0005). The environment used in this example is Dynamics AX 2012 R3 with demo database.
Step 1: Create a new Case Category -
Step 1.1: Go to Organizational administration > Setup > Cases > Case categories.
Step 1.2: On the Case categories form, on the Action Pane, click New > Case category.
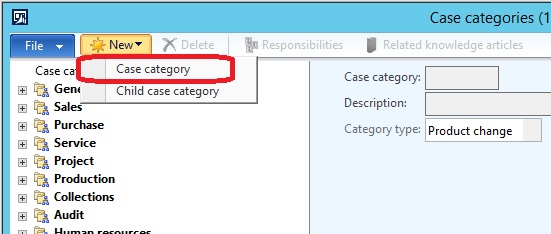
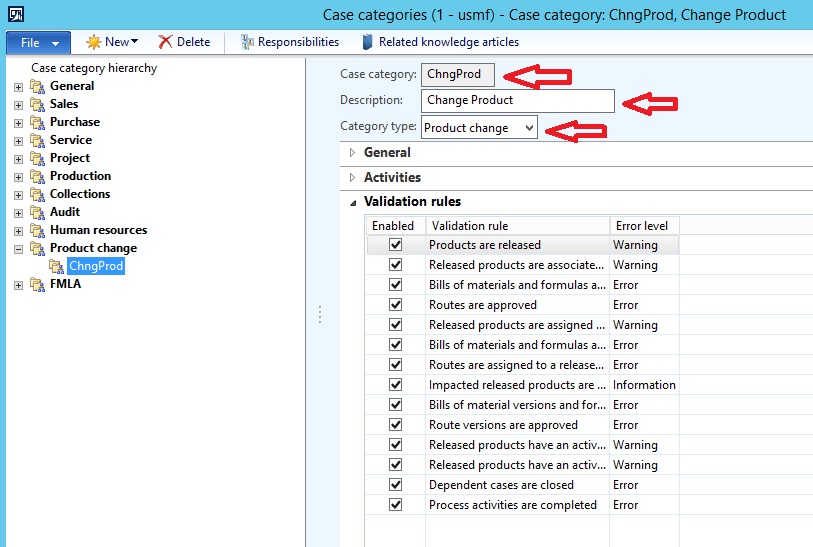
Step 1.3: Enter in the Case category field. Enter description of the new case category in Description field. In the Category type field, select Product change.
Step 2: Document Product Change -
When we create the product change case, we associate the artifact to the case, identify all those products, bills of materials and routes that may be impacted and associate them with the product change case.
Step 2.1: Go to Released products.
Step 2.2: Select the D0005 product.
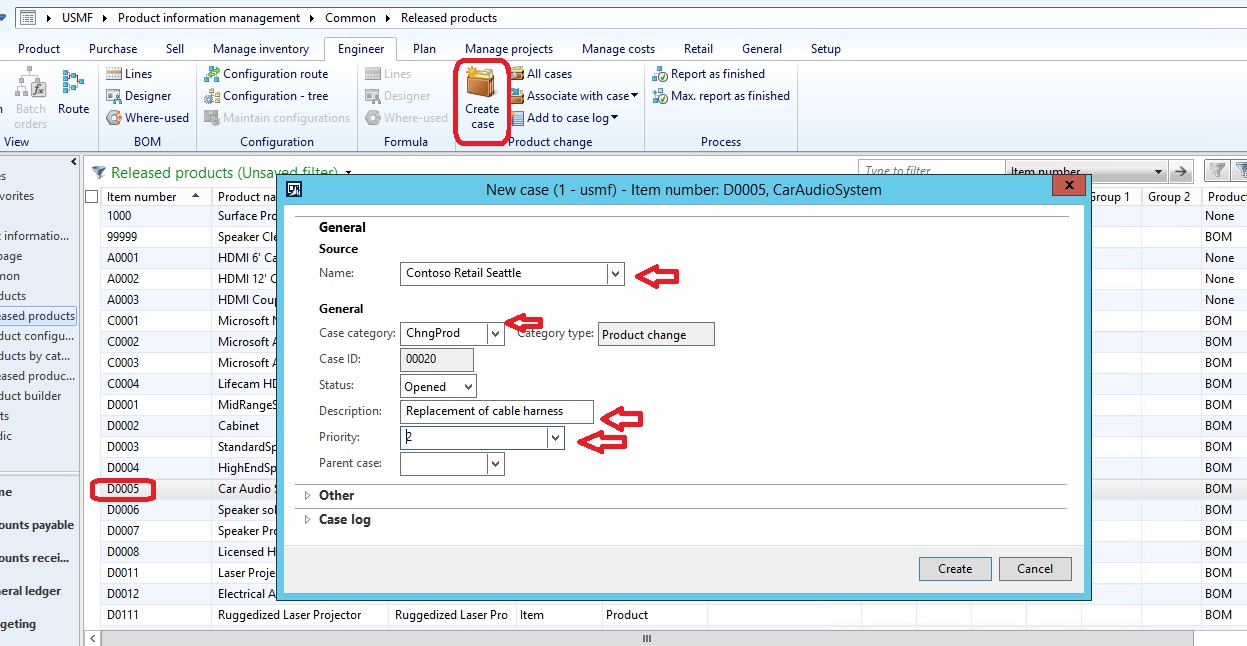
Step 2.3: Click the Engineer tab, and then click Create case.
Step 2.4: In the Name field, select Contoso Retail Seattle, the organization that is causing the change.
Step 2.5: In the Case category field, select the case category created in step 1.3.
Step 2.6: In the Description field, enter a short description of the product change case.
Step 2.7: Click Create to create the product change case.
Step 3: Add the dependent products, Bill of Material and Routes, to the Case -
Step 3.1: From the Released Products list, Select the Item D0005, Go to the Engineer tab and Click on All Cases.
Step 3.2: Open the case created in step 2.7
Step 3.3: On the Case details page, expand the Associations FastTab.
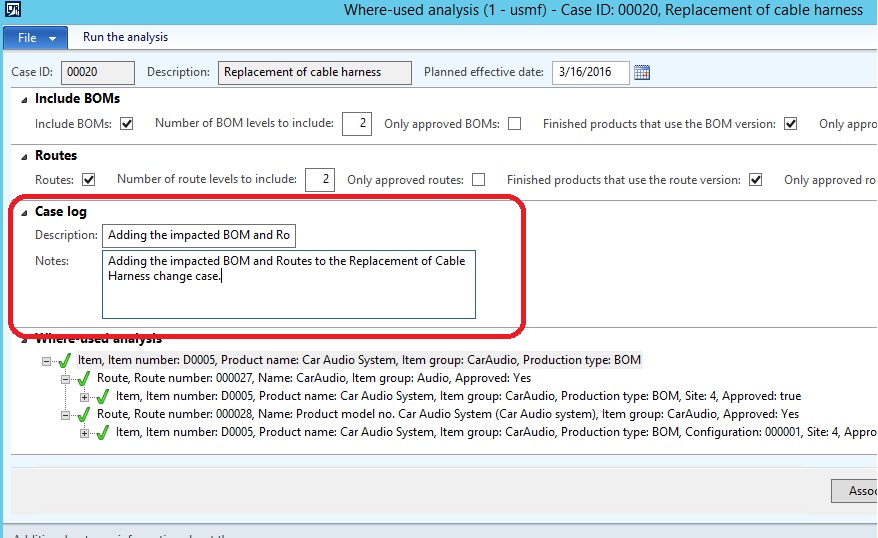
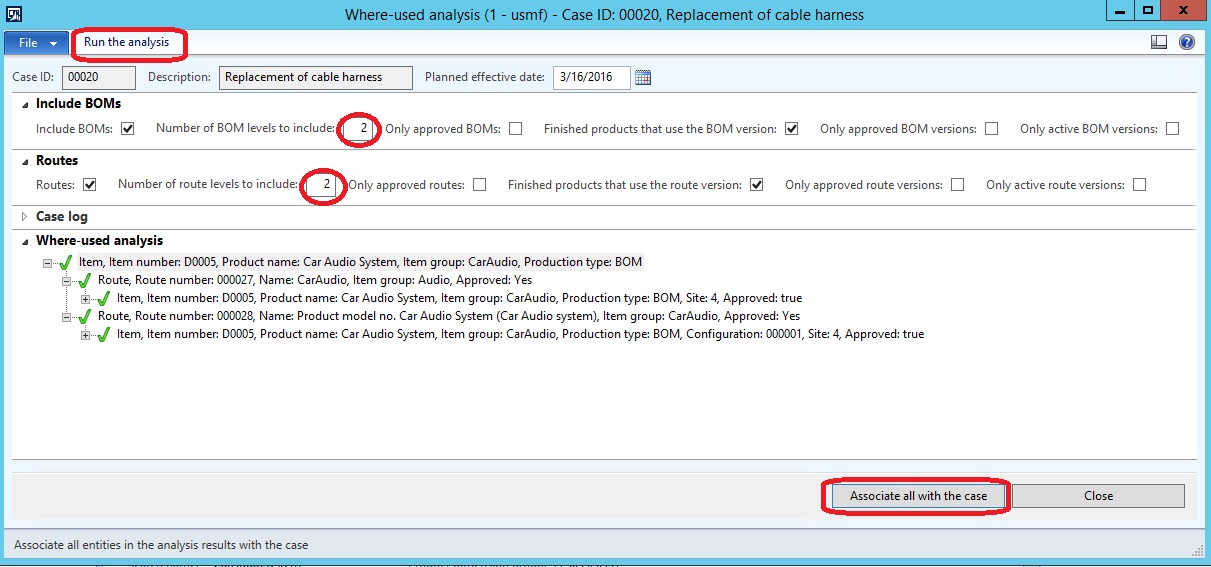
Step 3.4: Select the D0005 item association, and then click Where-used analysis.

Step 3.5: On the Where-used analysis form, set the Number of route levels to include field to 2 and set the Number of BOM levels to include field to 2.
Step 3.6: Click Run the analysis.
Step 3.7: Add a note in the case Log.
Step 3.8: Click the Associate all with the case button.
Step 4: Associate Bills of Materials with the Product Change Case -
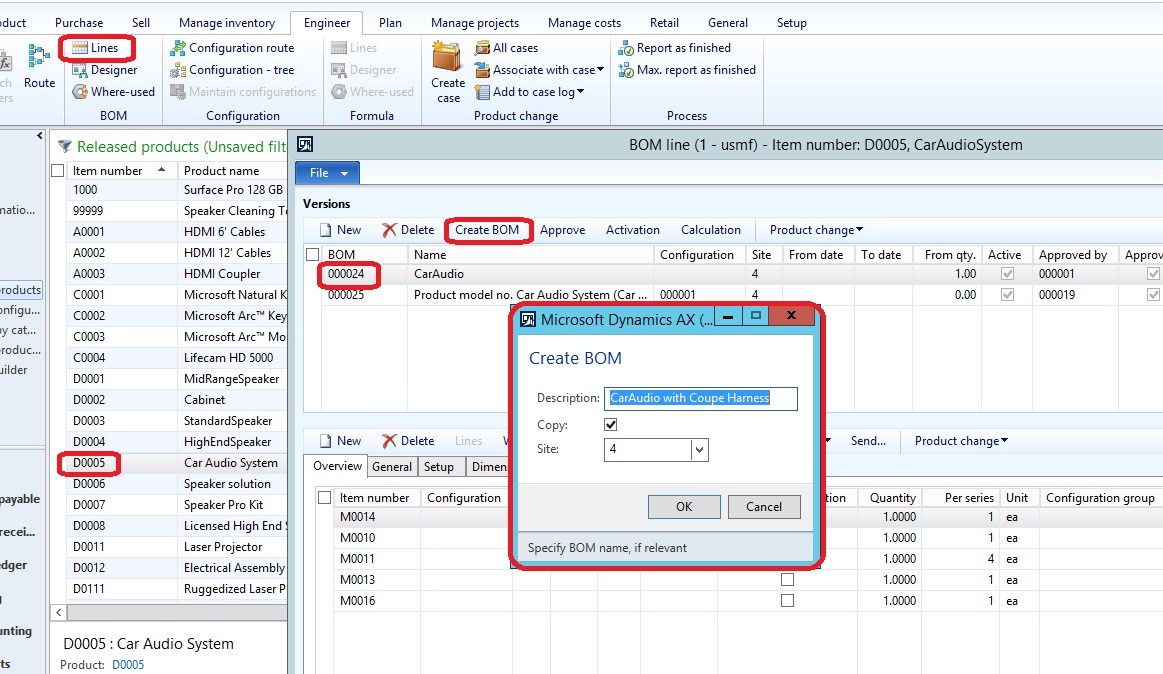
Step 4.1: From the Released product details form, click the Engineer tab and click Lines.
Step 4.2: Then click Create BOM.
Step 4.3: Enter description to name the new BOM.
Step 4.4: Select the Copy check box, and select the Site.
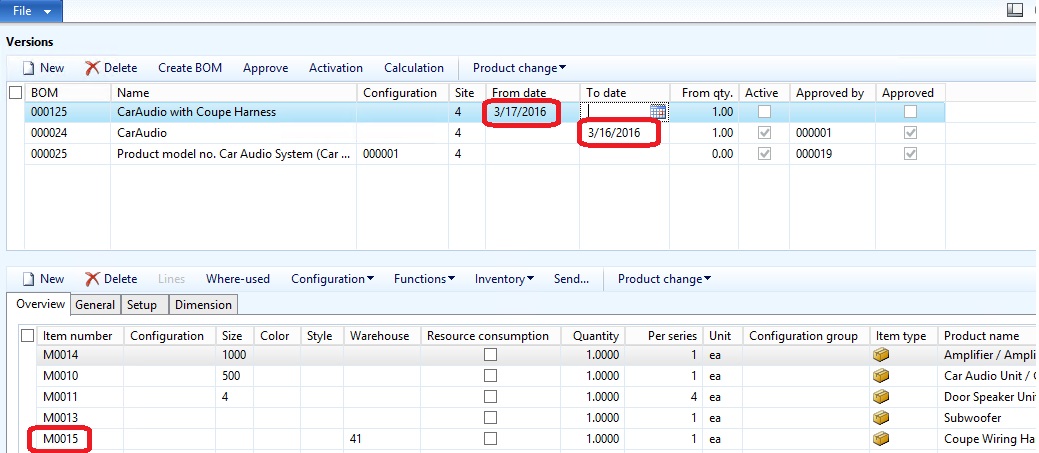
Step 4.5: In the new BOM, replace component Sedan Wiring Harness (Item M0016) with component Coupe Wiring Harness (Item M0015)
Step 4.6: Update the To and From dates to Approve and Activate the BOM. The other option is to Approve and Activate the BOM as explained in step 7 below. However, in this example, I have activated the BOM here to show that we have the flexibility to Approve and Activate the BOM with both these options and to document the changes.
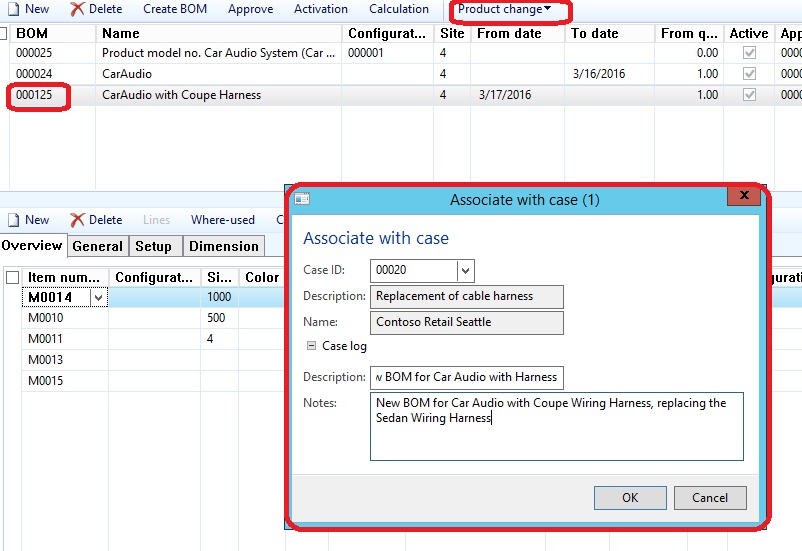
Step 4.7: On the Action Pane above the Versions grid, click Product change, and then click Associate with case.
Step 4.8: Associate the BOM with the product case created in Step 2.7
Step 4.9: You may also add a note in the case log.
Step 5: Associate Routes with the Product Change Case -
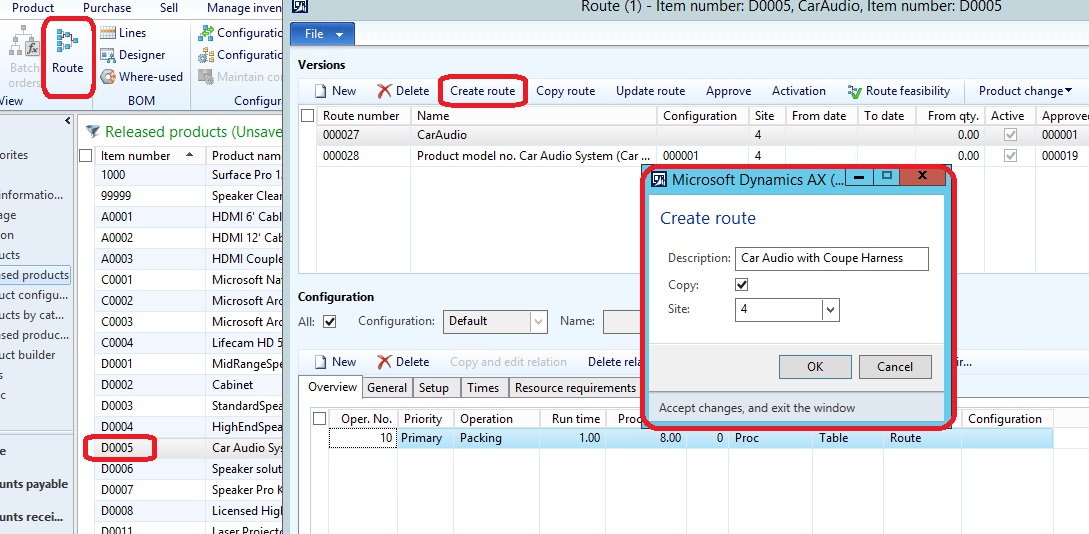
Step 5.1: From the Released product details form, click the Engineer tab and click Routes.
Step 5.2: Then click Create route.
Step 5.3: Enter description to name the new Route.
Step 5.4: Select the Copy check box, and select the Site.
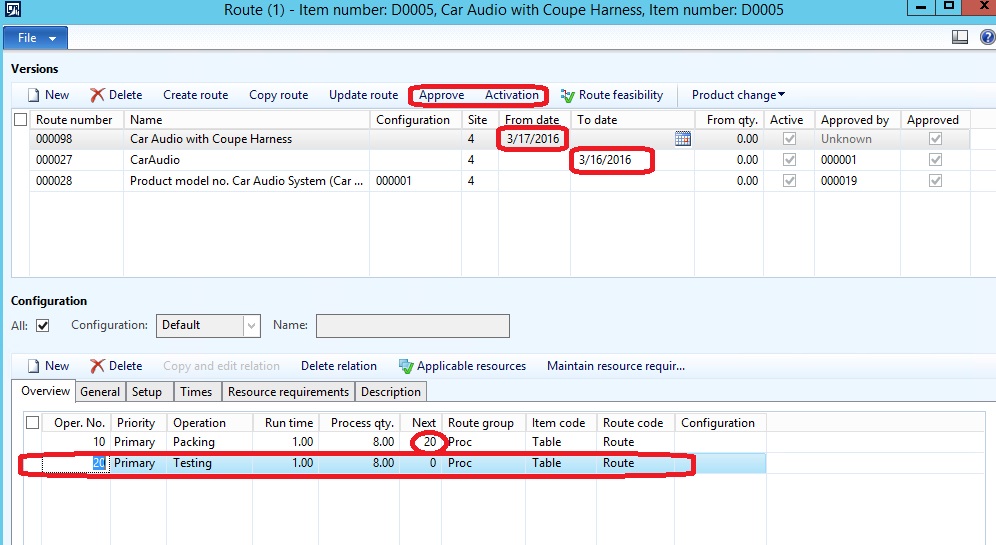
Step 5.5: Add another operation in the new Route.
Step 5.6: Approve and Activate the new Route. The other option is to Approve and Activate the Route as explained in step 7 below. However, in this example, I have activated the Route here to show that we have the flexibility to Approve and Activate the Route with both these options and to document the changes.
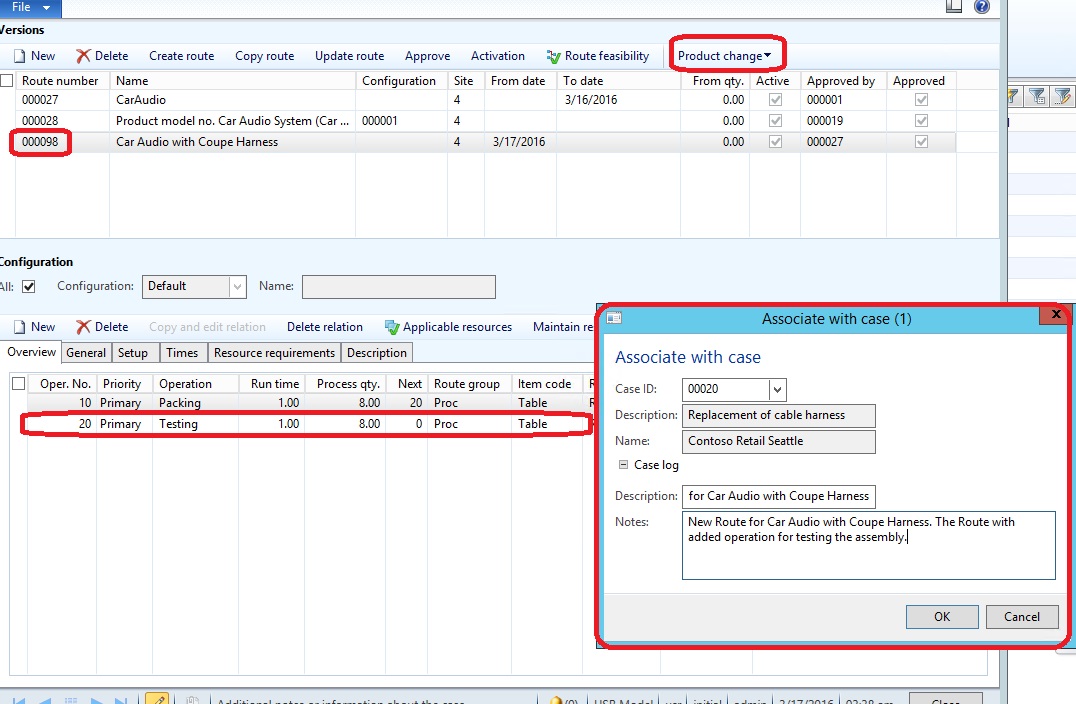
Step 5.7: On the Action Pane above the Versions grid, click Product change, and then click Associate with case.
Step 5.8: Associate the Route with the product case created in Step 2.7
Step 5.9: You may also add a note in the case log.
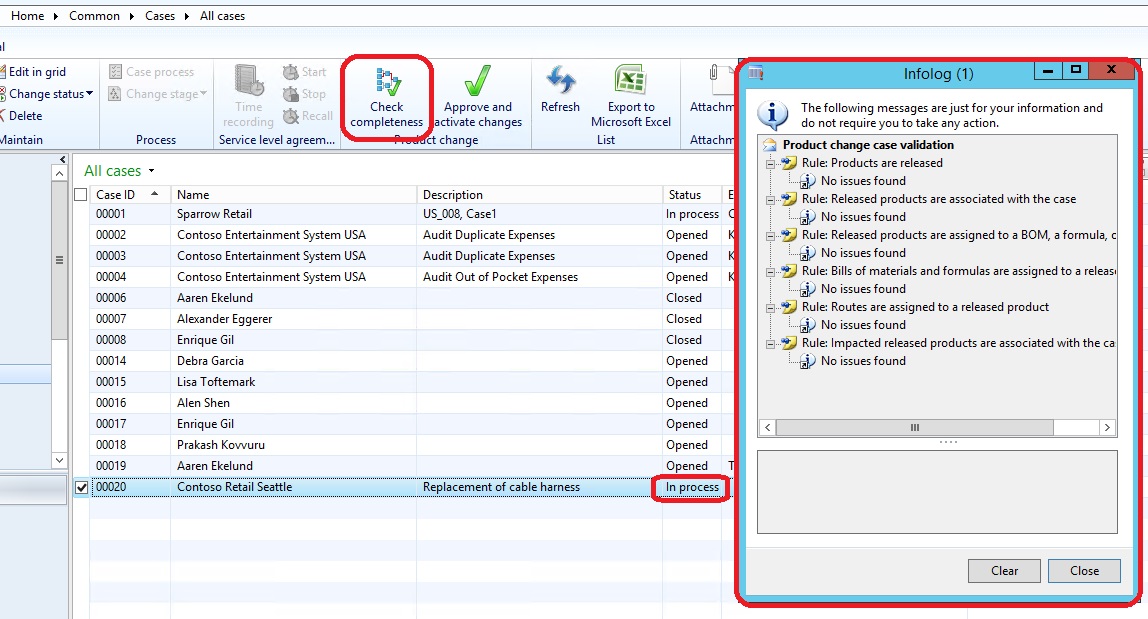
Step 6: Verify the Product Changes -
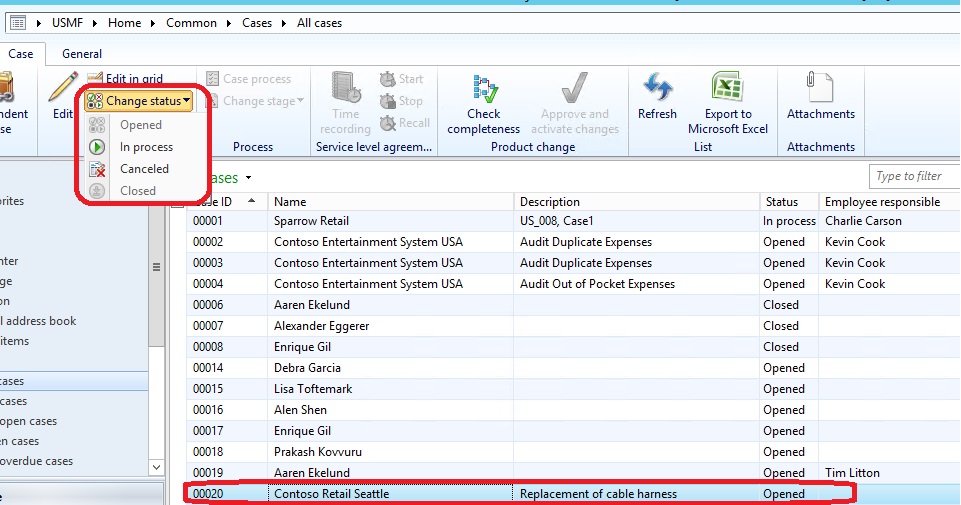
Step 6.1: Go to Home > Cases > All cases.
Step 6.2: Select the product case created in step 2.7.
Step 6.3: On the Action Pane, click Change status and select In process.
Step 6.4: On the Action Pane, click Verify completeness.
Step 7: Approve and Activate Product Changes -
Step 7.1: On the Action Pane, click Approve and activate changes.

Step 7.2: On the Action Pane, click Approve and activate changes.
Step 7.3: In the upper part of the Approve and activate changes form, select all.
Step 7.4: In the Action field, select Expire for the old BOM and Route, you want to expire.
Step 7.5: In the Action field, select Approve and activate for the new BOM and Route, you want to use.
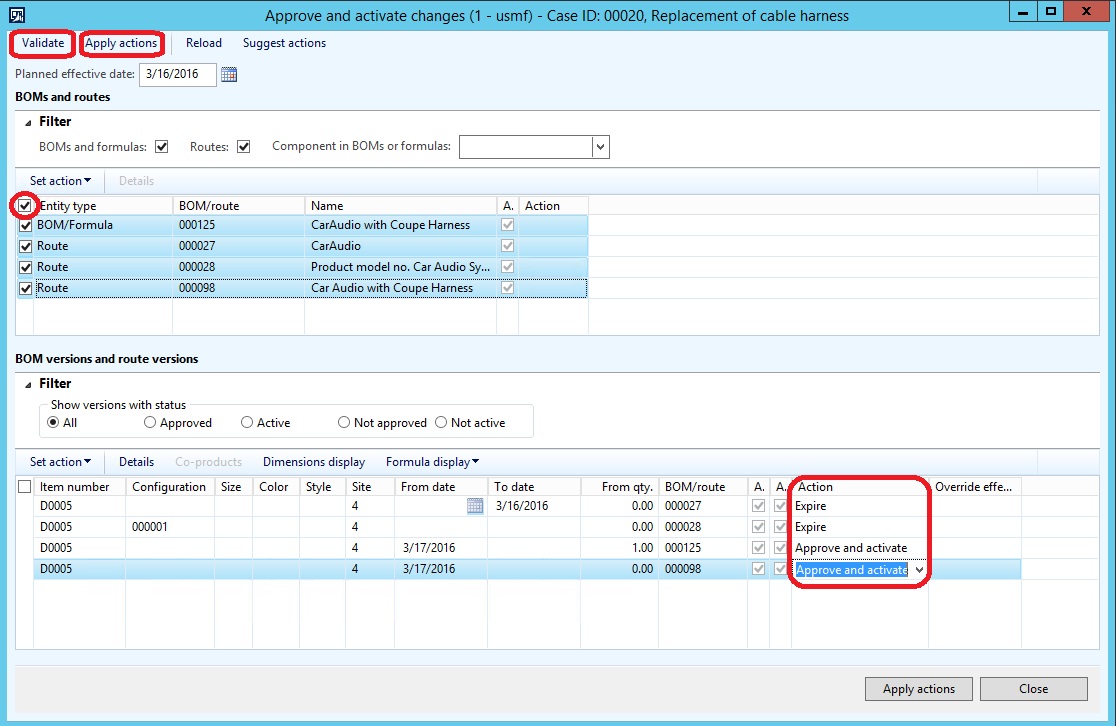
Step 7.6: Click Validate.
Step 7.7: Click Apply actions and select an Approver to release the product changes to production.
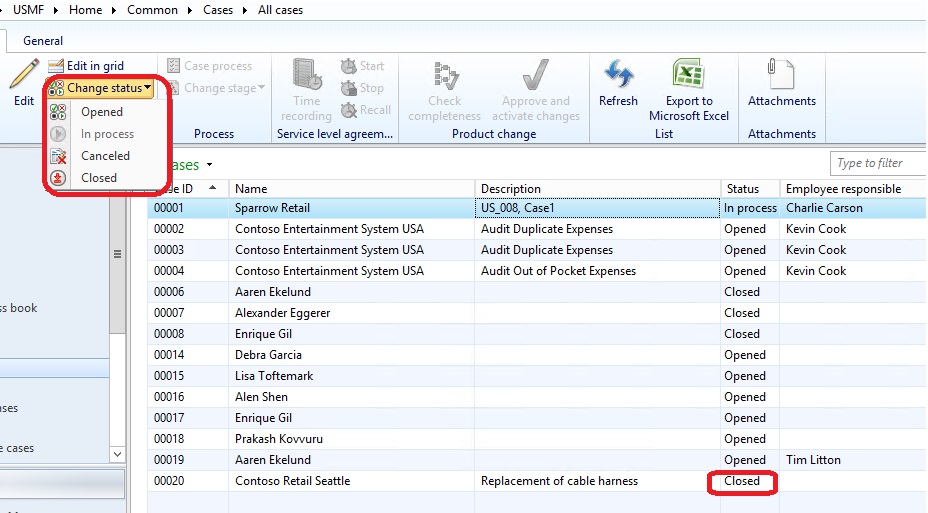
Step 8: Close the Product Change Case -
Step 8.1: On the All cases list page, select the product case created in step 2.7
Step 8.2: Click Change status and select Closed to complete the case.
With this example, we can conclude that the Engineering Change managed by 'Cases' with Dynamics AX 2012 R3, the controlled change lead to proper documentation of the changes and provides a controlled environment for the changes.
Hope this blog post was of use for you