To The Cloud! Migrate VMware VMs to Windows Azure [ 20 Key Scenarios with Windows Azure Infrastructure Services ]
This month, my fellow IT Pro Technical Evangelists and I are authoring a new articles series on 20 Key Scenarios with Windows Azure Infrastructure Services. You can catch the full series at https://aka.ms/CloudTop20. In today's article in this series, we’ll discuss migrating virtual machines from an on-premises VMware environment to the cloud as a more cost-effective alternative for many scenarios, including disaster recovery, dev/test/staging, as well as production web application servers.
Windows Azure Infrastructure Services supports VMs in the cloud using the open, industry-standard VHD ( virtual hard disk ) format used by a number of on-premises virtualization hypervisors, including our own Windows Server 2012 Hyper-V and our FREE Hyper-V Server 2012 bare-metal enterprise-grade hypervisor.
But … Can we easily migrate VMs to the Windows Azure cloud platform if using a different virtual hard disk format, such as VMware VMDKs, with an on-premises hypervisor? Yes, you can!
In this article, we’ll step through a Guided Hands-on Lab to demonstrate the process of migrating VMs from VMware ESX, ESXi or vCenter servers to our Windows Azure Infrastructure Services cloud platform. Along the way, we’ll explore a couple very useful FREE tools: the Microsoft Virtual Machine Converter tool and the Windows Azure PowerShell Module.
Why Migrate from VMware to Windows Azure Infrastructure Services?
Lots of IT Pros are exploring the Windows Azure Infrastructure Services cloud platform as a cost-effective Pay-As-You-Go solution for hosting VMs for disaster recovery, development, test, staging, demos and production web application workloads where access to cloud-scale Internet datacenters is important.
Can I connect these Migrated Cloud VM’s to my On-Premises Network?
Absolutely! Check out our Guided Lab on Extending Your Network with Windows Azure Virtual Networking for a step-by-step walkthrough of how to implement a secure Site-to-Site VPN from an isolated Windows Azure virtual network to your on-premises datacenter network.
Guided Lab Exercises
In this Guided Lab, you’ll complete the following tasks to migrate a VMware VM to the Windows Azure Infrastructure Services cloud platform:
- Convert VMware VMDKs to VHD format using Microsoft Virtual Machine Converter tool.
- Install Hyper-V Integration Services in converted VM using Hyper-V Manager tool.
- Upload and Provision as a VM on Windows Azure Infrastructure Services cloud platform using Windows Azure PowerShell Module.
VM requirements:This Guided Lab provides the steps for migrating a Windows virtual machine that was previously provisioned in an on-premises VMware environment. To run the migrated VM in Windows Azure, this lab makes the following assumptions on the configuration of the pre-existing VM:
- Remote Desktop Enabled: The pre-existing VM has Remote Desktop Services enabled for remote admin console access.
- DHCP Client Enabled: The pre-existing VM has the DHCP Client service enabled and is configured to receive IP settings via DHCP
Estimated Time to Complete: 20 minutes
Let’s Get Started!
To launch this Guided Lab Scenario, click the Play button in the window below.
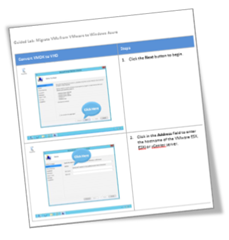
Guided Lab Scenario: Migrate VMs from VMware to Windows Azure
Guided Lab Tips:
- After launching the lab in the window above, you may wish to also click the Show Full Screen button in the lower right portion of the window for best viewing.
- The lab captions can be moved by clicking/dragging if they obscure a portion of your Guided Lab window, particularly when using lower screen resolutions.
Get the associated 38-Page Step-by-Step Lab Guide for FREE ...
If you'd like a copy of the 38-Page Step-by-Step Lab Guide and the accompanying PowerShell snippets that are associated with this article for reference when migrating your own VMs to the Cloud ... just follow the easy steps below to get it sent to you!
 |
|
You'll receive an email in response with your 38-Page Lab Guide Attached and additional FREE resources for other scenarios with Windows Azure Infrastructure Services, such as building a FREE SharePoint 2013 Lab in the Cloud and Extending Your Network with Windows Azure Virtual Networks!
What other tools will I need to begin migrating my own VMs?
To prepare for migrating your own VMs from VMware to Windows Azure Infrastructure Services, you’ll also need to download these FREE tools:
- DOWNLOAD: Microsoft Virtual Machine Converter
- DOWNLOAD: Windows Server 2012 Evaluation Kit
- DOWNLOAD: Windows Azure PowerShell Module
And … you’ll need to configure your new Windows Azure Subscription with a few basic steps:
After you’ve performed this basic setup, you’ll be ready to follow along with the steps demonstrated in the Guided Lab above within your own environment!
Want to Learn More About Windows Azure?
Check out these FREE resources below to learn more about Windows Azure Infrastructure Services:
- "Early Experts" Cloud Quest - Build a Virtual Network and VMs in the Cloud
- Cloud Labs - Over 20+ Additional Step-by-Step Scenarios with Windows Azure Infrastructure Services
Hope to see you in the Clouds!
- Keith
