Certificate based authentication - O365
This blog provides step by step process to implement Certificate base authentication on Azure AD for iOS and android devices. Certificate base authentication enables iOS and android devices to use user certificate when connecting to Exchange online resources. Supported scenarios are:
- Office mobile applications on mobile devices
- Exchange ActiveSync clients
Certificate base authentication eliminates the need of entering username and password instead require user certificate to access O365 workloads using Microsoft Office applications on mobile devices.
Requirement to enable Certificate based authentication for your O365 Tanent
- Access to certificate authority which generate client certificates in your environment
- Certificate authority should have CRL (certificate revocation list) which is published on internet
- Root and intermediate CA certificates
- User certificate must be issued for client authentication purpose
- The client certificate must have primary email address in principle name or RFC822 name value of the SAN (Subject Alternate Name)
- Federation server to be configured with additional claim rules to pass on certificate serial number and issuer
Installing Azure AD module
- Start Windows PowerShell with administrator privilege
- Install Azure AD module version 2.0.0.33 or higher (if not already installed) using below cmdlets
Install-Module -Name AzureAD –RequiredVersion 2.0.0.33
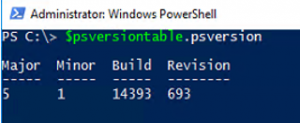
Note: - make sure you have PowerShell version 5.0 , verify that by using $psversiontable.psversion cmdlets
- Connect to your Azure AD tenant:
Connect-AzureAD
Configuring your Azure AD tenant for certificate based authentication
- Export Root CA certificate in .cer format
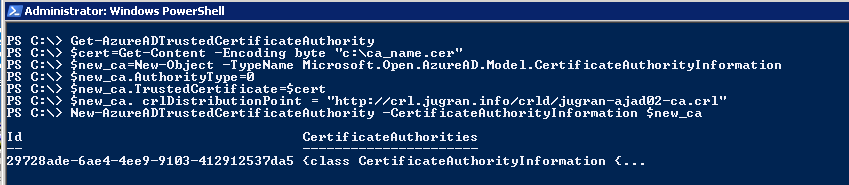
- Configure your CA details in Azure AD so that Azure AD can validate user certificates and perform revocation check
Note: - Verify any existing Trusted CA settings in Azure AD using below cmdlets
Get-AzureADTrustedCertificateAuthority
$Cert=Get-Content -Encoding byte "Location of Root CA CER file"
$New_CA=New-Object -TypeName Microsoft.Open.AzureAD.Model.CertificateAuthorityInformation
$New_CA.AuthorityType=0
$New_CA.TrustedCertificate=$Cert
$New_CA.crlDistributionPoint="CRL Distribution URL"
New-AzureADTrustedCertificateAuthority -CertificateAuthorityInformation $New_CA
- Verify the Azure AD trust configuration:
Get-AzureADTrustedCertificateAuthority

Adding new claims rule for Claims Provider Trust and Relying Party Trusts in ADFS server
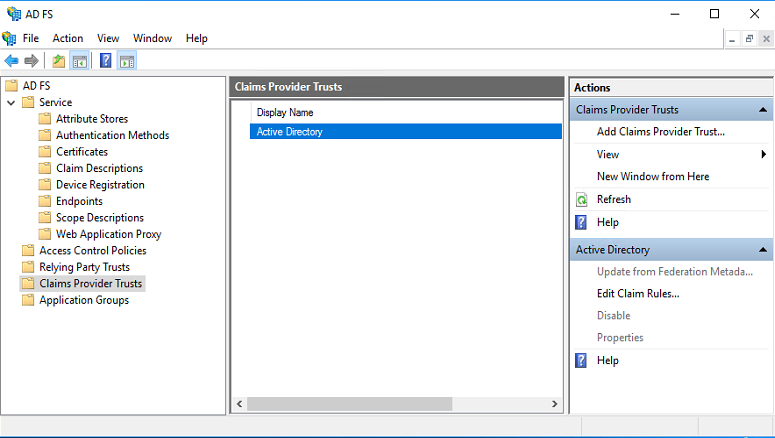
- Login to ADFS server and open ADFS management console
- Clink on Claims Providers Trusts and select Active Directory from middle pane
- Choose Edit Claims Rules from Right click Manu or from Actions menu
Click on Add Rule
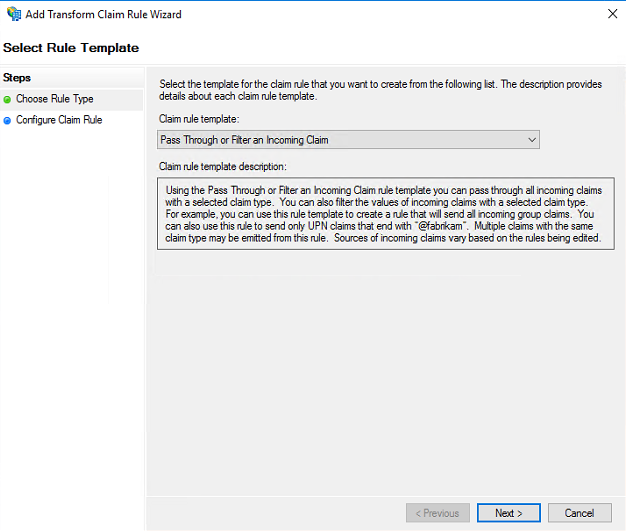
Select Claim rule template “Pass Through or Filter an Incoming Claim” and hit Next
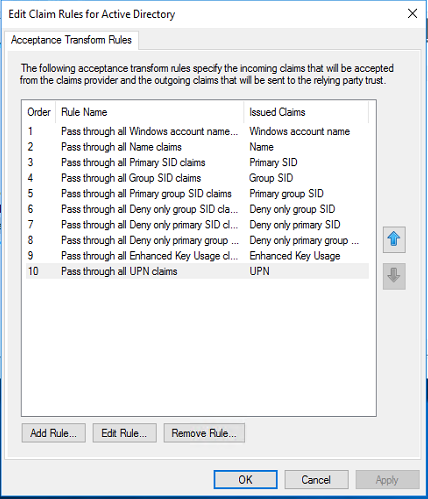
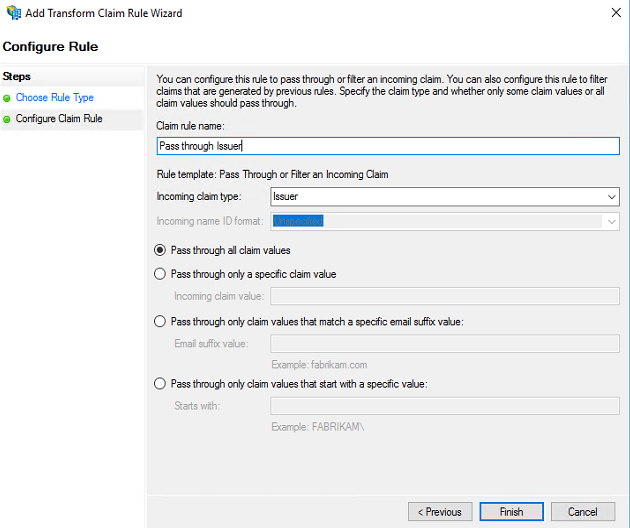
Define the claim rule name and select Incoming rule type as “Serial Number” from drop down list. Also select Pass through all claim radio button and click Finish to create the new rule.

In the same way add new claim rule for “Issuer” as well. The steps are same except you must choose Incoming claim type as Issuer.
Now we must add these two claims rule for Relying Party Trust i.e. Microsoft Office 365 Identity Platform as well.
- On ADFS management console, click Relying Party Trust and select Microsoft Office 365 Identity Platform from middle pane
- Choose Edit Claims Rules from Right click Manu or from Actions menu
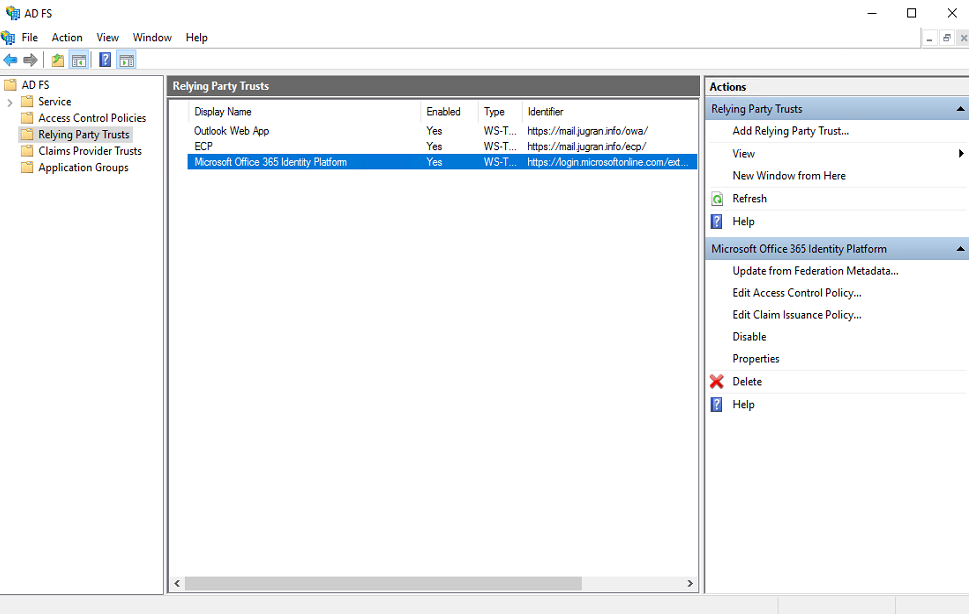
Clink on Add Rule
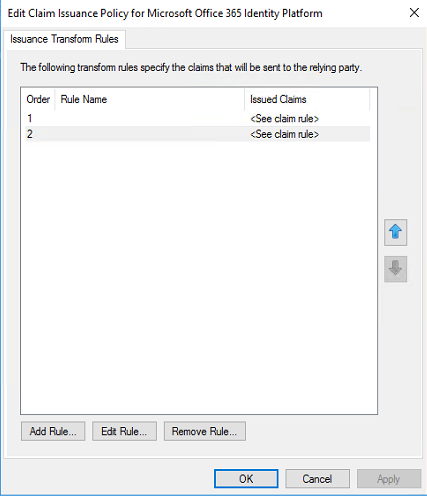
Select Claim rule template “Pass Through or Filter an Incoming Claim” and hit Next

Define the claim rule name and select Incoming rule type as “Serial Number” from drop down list. Also select Pass through all claim value radio button and click Finish to create the rule.

In the same way add new claim rule for “Issuer” as well. The steps are same except you must choose Incoming claim type as Issuer

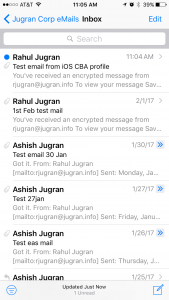
Testing Certificate based authentication to access active sync email profile on iOS Device
Now to test the CBA on iOS device we have to push certificate and email profile to iOS device from any MDM solution. In my testing, I have used O365 Intune to push certificate profile as well as email profile to my test iOS device.
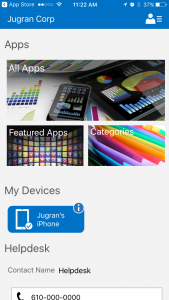
Once MDM solution (in my case it is Intune) is ready to manage iOS devices you must enroll iOS device using Microsoft Intune Company Portal app on iOS device. Once the app is installed login to the Company Portal app using your domain credentials and once your are logged in, it should look like this
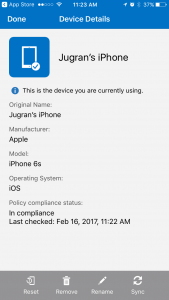
Once device is enrolled into Intune successfully, you can manage the device from Intune and push Certificate profile, i.e. pushing Root CA certificate as well as client certificate on iOS device. You may verify that on iOS device by going to settings -> General -> Device Management.
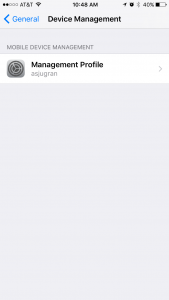
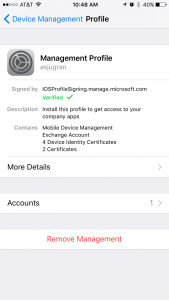
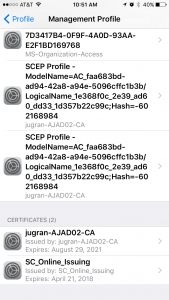
To verify device has got the correct certificates for authentication go to more details in Management Profile on iOS device. You may see couple of certificates. One should be your Root CA certificate and another user certificate for authentication.
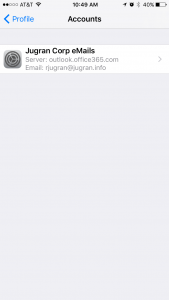
To verify email profile, go to accounts under Device Management Profile and you should see email profile like this.
Once you verify the Certificate profile and email profile on iOS device you should be ready to access your emails using certificate authentication without entering your username and password. You may also use CBA for all Office mobile applications on iOS device.