Integrating an MVC application with Azure Active Directory (Visual Studio 2013)… and being able to deploy it
Things have changed a little between Visual Studio 2012 and Visual Studio 2013. I had not used this capability in 2012 and when I started trying to do this, I found out that there was little to no documentation on how to do it or that it was all out of date. Hence this post. Hopefully you will find it useful and I’ll follow up with another post on how to convert an existing MVC application from forms authentication into being able to use AAD.
Creating the basic MVC application
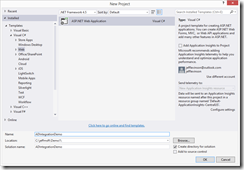
- Open Visual Studio and select File > New Project
- Select Web > ASP.NET Web Application
- Rename it something unique and click OK
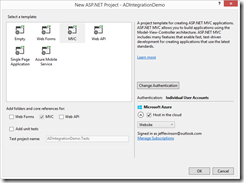
- Click Change Authentication
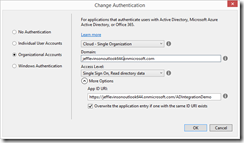
- Select Organizational Accounts
- Enter your Azure domain name
- You can either leave the Access level at Single Sign On or change it as desired – in this case I changed it to Single Sign On, Read directory data
- Expand the More Options and make sure the App ID URI is filled in appropriately – if it is, don’t make any changes to it
- If it is not filled in, enter “https://[domain as listed in the domain field]/[application name]
- Click OK
- Make sure Host in the cloud is checked and Website is selected in the drop-down
- Click OK
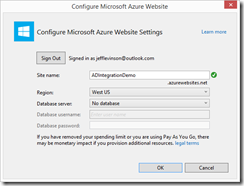
- On the Configure Azure Website dialog, leave the defaults as is (or change the server location if necessary) and click OK
- Note that I’m walking through the default settings – this isn’t sufficient as you’ll see later on
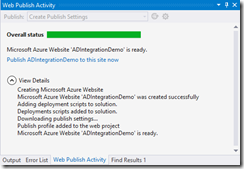
Very shortly the website will be provisioned (but not published).
Everything’s done – like every good developer we want to run what we just created to get that sense of satisfaction so let’s do that.
Running the default web application
Let’s see how well this works:
- Press F5
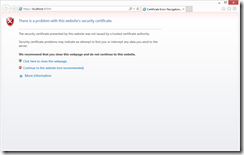
- A certificate warning page is displayed because by default it puts SSL in place and it uses a self-signed certificate. No problem here, click Continue to this website (not recommended).
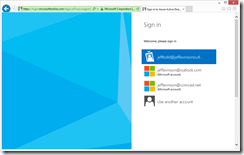
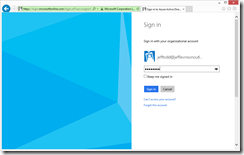
- Next the Sign in to Azure Active Directory page is displayed – so far so good!
- Click the user to sign in as (if you don’t have an AD user (versus your Microsoft credentials) skip this part – we’ll add some credentials in a little bit).
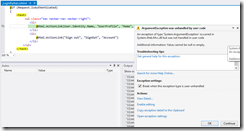
- As a side note, if you do enter your Microsoft credentials you’ll get this little gem (we’ll come back and address this in a bit):
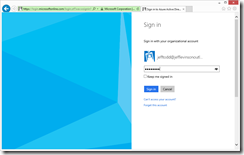
- Enter your username and password and click Sign in
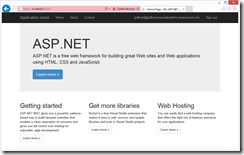
- Lo and behold we have access to our application
Sweet! Now let’s publish it…
- Right-click the project name in Solution Explorer and select Publish
- Without making any changes (nothing you can do can change the outcome at this point) click Publish
- After the application publishes it will automatically launch. Crossing our fingers at this point, closing our eyes and praying a little bit we open them up and…
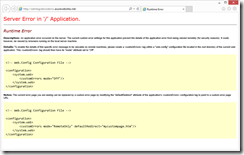
DOH!
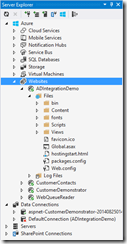
This isn’t particularly helpful so let’s modify the web.config to get some additional information. Adding the section indicated and re-running it (which by the way you don’t have to republish to do this – you can simply edit the web.config on the server by looking in Server Explorer as shown here:
Double-click the web.config file to open it and you’ll note that it says [Remote] in the document tab. After adding the following code:
<customErrors Mode="Off" />
Save the web.config, right-click on the website in Solution Explorer and click Browse. Now we get the following back (instead of a screenshot of an entire stack trace, I’m just going to show the first line which is the only important line here):
[SqlException (0x80131904): A network-related or instance-specific error occurred while establishing a connection to SQL Server. The server was not found or was not accessible. Verify that the instance name is correct and that SQL Server is configured to allow remote connections. (provider: SQL Network Interfaces, error: 52 - Unable to locate a Local Database Runtime installation. Verify that SQL Server Express is properly installed and that the Local Database Runtime feature is enabled.)]
Um, huh? What database? We didn’t add a database and the default MVC application doesn’t have anything that uses a database. Let’s check out the web.config and see what’s accessing a database.
Looking at the web.config we see the following entry:
<connectionStrings>
<add name="DefaultConnection" connectionString="Data Source=(LocalDb)\v11.0;AttachDbFilename=|DataDirectory|\aspnet-ADIntegrationDemo-20140909062518.mdf;Initial Catalog=aspnet-ADIntegrationDemo-20140909062518;Integrated Security=True" providerName="System.Data.SqlClient" />
</connectionStrings>
What’s this about? Well, if you’ve written MVC applications you’ll know this is where VS stores data related to ASP.Net related authentication. Well, this is the same type of situation but different.
What the application is trying to do is to grab two specific pieces of information so it can authenticate the client using SAML assertions against Azure AD. The problem is that once you deploy it to the web, this database is not accessible anymore. So how do you fix it and what goes in the database.
Fixing the problem
In order to fix the problem we have to look at the local database. To do that, do the following:
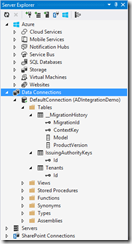
- In Server Explorer, expand the Data Connections node and you should already see a connection to the application’s database as shown here:
If it doesn’t exist, add it as follows:
- Right-click Data Connections and select Add Connection
- Change the data source to Microsoft SQL Server Database File
- Browse to the App_Data folder and select the mdf file there
- Click OK
Expanding the table nodes we find a very simple schema
The important tables are the IssuingAuthorityKeys and the Tenants table. Right-click each table and select Show Data
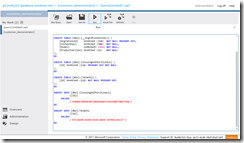
Each table has a single column and a single row. These tables need to be moved to a database accessible to the ASP.Net MVC application running in Azure. For our purposes we’ll use a SQL Database. For simplicities sake I’ve created the SQL statements needed to be executed against a SQL database. Replace the two insert statements with the values found in each of the respective tables as shown (for example):
SET ANSI_NULLS ON
GO
SET QUOTED_IDENTIFIER ON
GO
CREATE TABLE [dbo].[__MigrationHistory] (
[MigrationId] NVARCHAR (150) NOT NULL PRIMARY KEY,
[ContextKey] NVARCHAR (300) NOT NULL,
[Model] VARBINARY (MAX) NOT NULL,
[ProductVersion] NVARCHAR (32) NOT NULL
);
GO
CREATE TABLE [dbo].[IssuingAuthorityKeys] (
[Id] NVARCHAR (128) PRIMARY KEY NOT NULL
);
GO
CREATE TABLE [dbo].[Tenants] (
[Id] NVARCHAR (128) NOT NULL PRIMARY KEY
);
GO
INSERT INTO [dbo].[IssuingAuthorityKeys]
([Id])
VALUES
('92B88C3DD981BF1EBCB244FCFA63C007706C79E0')
GO
INSERT INTO [dbo].Tenants
([Id])
VALUES
('67c3a3d5-b264-4328-ade6-7a7b81136117')
GO
- If you don’t have an existing SQL database, create one in the Azure Management Portal or Server Explorer
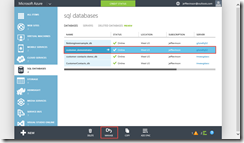
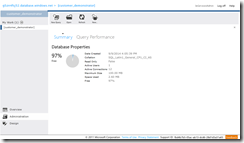
- Select the SQL Databases node and highlight the appropriate database (in my example I’m using a customer_demonstrator database) and click Manage at the bottom of the page
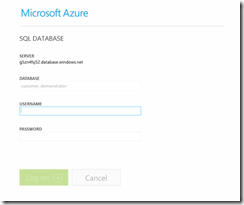
- Provide the login credentials for the database and click Log On
- Click New Query in the resulting window
- Paste the script in the sql window and click run (after replacing the issuing authority key and tenants key)
Now we have a table that holds the appropriate data needed by the application. Let’s try publishing the application once again. This time however we’re going to make a change to the connection string (make sure to grab the connection string for the database while you’re in the Azure portal).
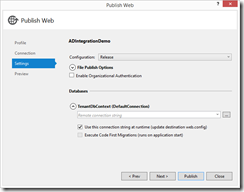
- On the Publish Web page, select the Settings tab:
- Change the connection string using the connection string copied from the server (remember to put your password in)
Now, I’ll save you the suspense – in our default configuration if we publish right now it will fail – there’s one last problem. By default SSL is not set up yet the configuration by default requires SSL (you’ll get the following error message: ID1059: Cannot authenticate the user because the URL scheme is not https and requireSsl is set to true in the configuration, therefore the authentication cookie will not be sent. Change the URL scheme to https or set requireSsl to false on the cookieHandler element in configuration. )
- Click Close on the Publish Web dialog
- Open the web.config file and edit the following like:
<cookieHandler requireSsl="true" />
- Change “true” to “false” – now publish the application
Doh!!! We are just not having a lot of luck with this. What’s the problem now? Looking at the URL we can see that the callback for the logon takes us back to https://localhost:4430 only we aren’t running on our local machine anymore – we want to go to https://adintegrationdemo.azurewebsites.com. Let’s take a look at what was done in Azure under the covers. The fix is simple but it’s important to understand the end-to-end flow.
Azure Active Directory
Bet you thought we weren’t going to make it here…
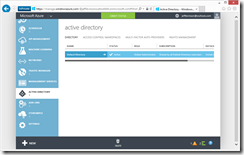
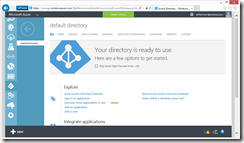
When you first sign up for Azure, a default active directory instance is created for you. Navigating to the Azure Management Portal it looks like this:
Clicking the Default Directory takes you to this page:
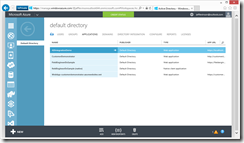
Users can be added on the Users page (and obviously Groups on the groups page) but we’re going to focus on the Applications page. Clicking that we see the following (you’ll have only one application in there – the demo that we just put together most likely):
Drill into the appropriate application and click Configure. Update the Sign In URL and the Reply URL to the correct URL on Azure (like https://ADIntegrationDemo.azurewebsites.net. Click Save.
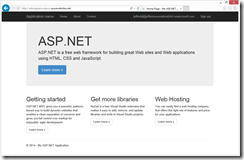
In a new browser window, enter the URL. And lo and behold we have a working application!
Now, back to the problem we ran into very early on. For some reason (no, I don’t know why) when you try to log on with a Microsoft account the first time it returns null. If you try logging on a second time it works fine. I haven’t been able to puzzle through this but a simple change to the _LoginPartial.cshtml page – it doesn’t handle nulls at all. At the following to the top of the _LoginPartial page:
@{
var user = "Null User";
if (!String.IsNullOrEmpty(User.Identity.Name))
{
user = User.Identity.Name;
}
}
And update the user action link to the following:
@Html.ActionLink(user, "UserProfile", "Home", routeValues: null, htmlAttributes: null)
Republish the application and now it will handle any situation.
Enjoy!
