Embedding Power BI Reports using REST APIs and Silent authentication via Azure Active Directory
Summary: Learn how to integrate Power BI reports right into your web or mobile application using REST API but without taking user to sign-in page of AAD.
Power BI displays reports that are interactive, and can be created and updated from many different data sources in real time. Such reports can also be integrated with web or mobile application and can have real time update. There are various factors that are looked while integrating the Power BI report like authentication for the data exposed on to web applications, refresh cycle of the data, time taken to refresh the report within the web page etc. There are various methods to integrate Power BI report into the web or mobile application like :-
- Publish to Web - This method uses an embedded code that can be generated from the power BI report. This embedded code can be used within an Iframe which can be plugged into any application. This method will provide the real time data in the web/mobile application as seen in the Power BI report. But the limitation of this method is that it has no authentication. That is once it is exposed on internet, then any one can use the embedded code and can view the data. Other limitation are that the row level security and direct query are not supported by this method.
- Using Power BI Embedded - This method uses Azure service i.e Power BI embedded via which one can create workspace collection and then multiple workspace within that collection. The Power BI desktop file (.pbix) file can be imported to the workspace and the report then can be securely embedded to the web/mobile application. With this method one doesn't need the Power BI account as the Power BI desktop file (.pbix) file can be exported to the Power BI embedded collection. This method provides authentication using the App tokens. The limitation with this method is that it does not support automatic data refresh unless one is using the direct query method with Azure SQL Database or Azure SQL Data Warehouse to generate the Power BI report. Using the direct query method may result in low performance in some case. All direct query requests are sent to the source database, so the time required to refresh a visual is dependent on how long that back-end source takes to respond with the results from the query (or queries). This will significantly increasing load on the source database and potentially impacting performance. On the other hand if "Data import" mode is used rather that direct query then one needs to refresh the PBIX file manually and re-import that in Power BI embedded each time updated data is required on the web/mobile application. More information about this method can be found at /en-us/azure/power-bi-embedded/power-bi-embedded-what-is-power-bi-embedded
- Using Rest API - Using any programming language that supports REST calls, one can integrate Power BI reports with web or mobile application in real-time. This method provides authentication , where the users have to login using their organization account. The application also needs to be registered with Azure AD tenant. The Azure AD authenticates the user and returns the authentication token. This token can be used to call any Power BI operation, including embedding Power BI report into an app. More information about this method can be found at https://powerbi.microsoft.com/en-us/documentation/powerbi-developer-overview-of-power-bi-rest-api/
The benefit of using the REST API based method is that it provides authentication and automatically renders refreshed report onto the web/mobile application as per refresh cycle of the published Power BI report. This method has no limitation with respect to using specific mode for data source like direct query, data import, blank query etc. As it will automatically refresh the data as per the refresh cycle of the Power BI report.
A challenge with using this method is that the user who is authenticated against Azure active directory must also have permissions on the Power BI report which is published on Power BI service or Power BI online. Therefore, every user who is visiting the web application where the Power BI report is embedded must also have permission on the Power BI service where the report is published. If the web application where the Power BI report is embedded already has the authentication and authorization for the user, then this may add another layer of authentication which may be overhead for the application. This can be avoided if we can impersonate the user on behalf of another user or a service account. This would also remove the dependency of providing the access of Power BI report to each user of the web or mobile application. In order to impersonate the user and use a service account that has access to the Power BI report, we can use the Silent authentication approach by registering the web application as a Native apps in Azure Active Directory.
Silent authentication by using Native Apps in AAD
First you need to register your application to AAD as a native app. Below are steps for the same :-
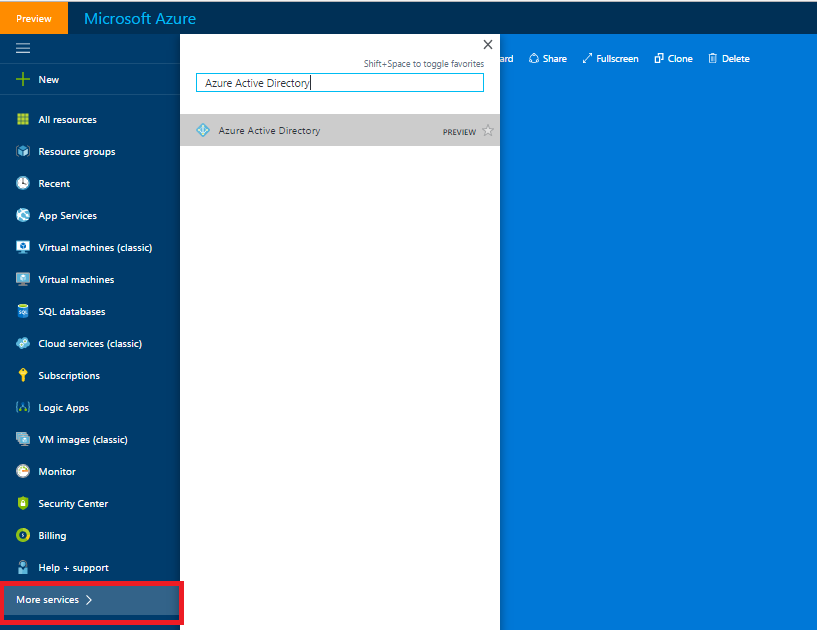
- Sign in to the Azure portal and choose your Azure AD tenant by clicking on your account in the top right corner of the page.
- Select More services, enter Azure Active Directory in the text box, and then click Enter .
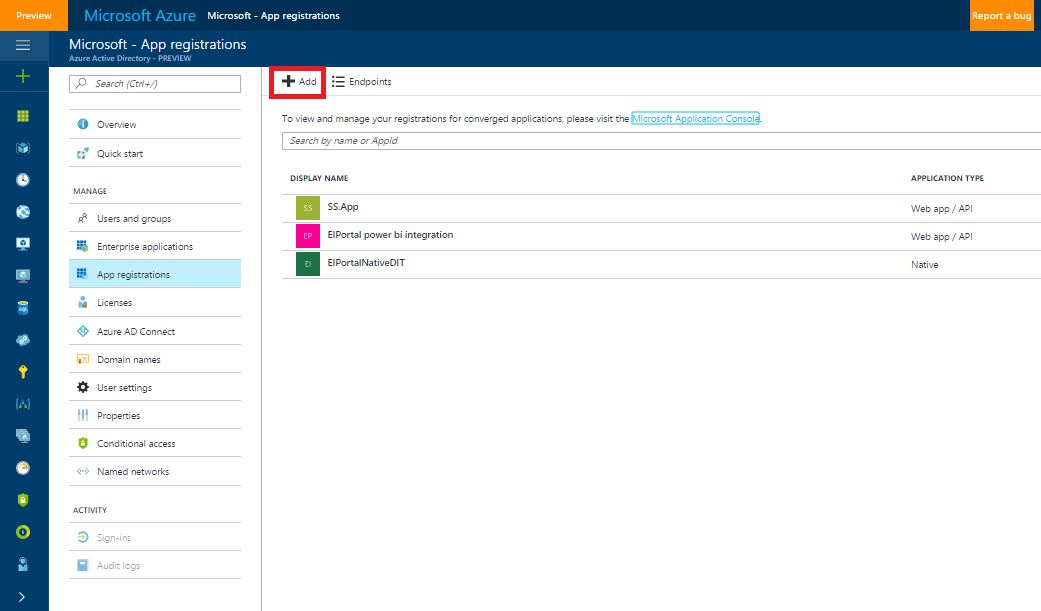
- On the Azure Active Directory blade, select App registrations, and then select Add.
- Enter name of the app and in the Application Type select Native.
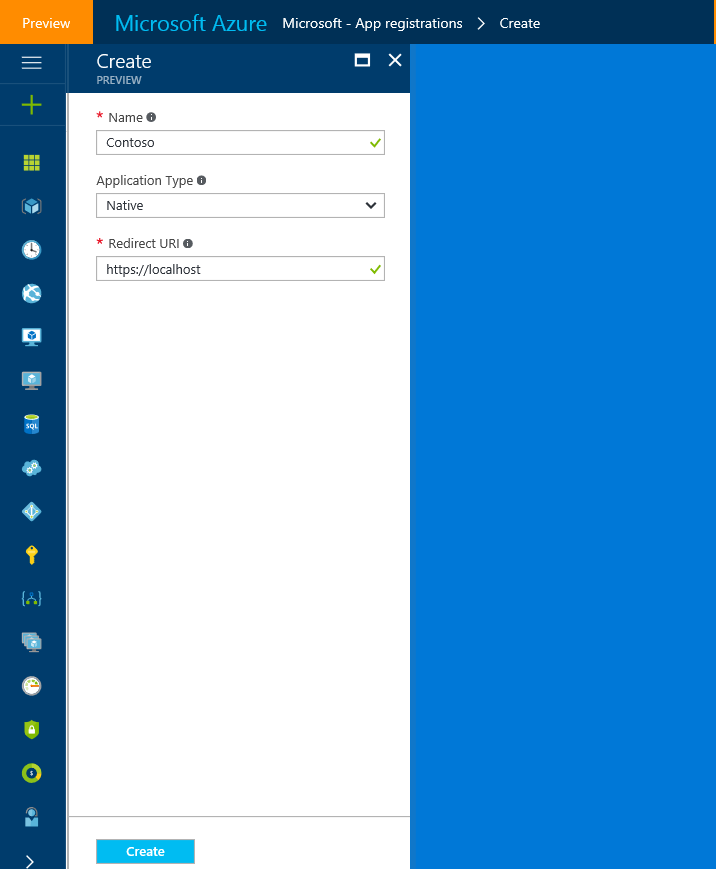
- The Redirect URI is the place in the app that you will be redirected to after authenticating. You can leave it to a fictitious value for now like https://localhost
- Once the details are filled, click on Create.
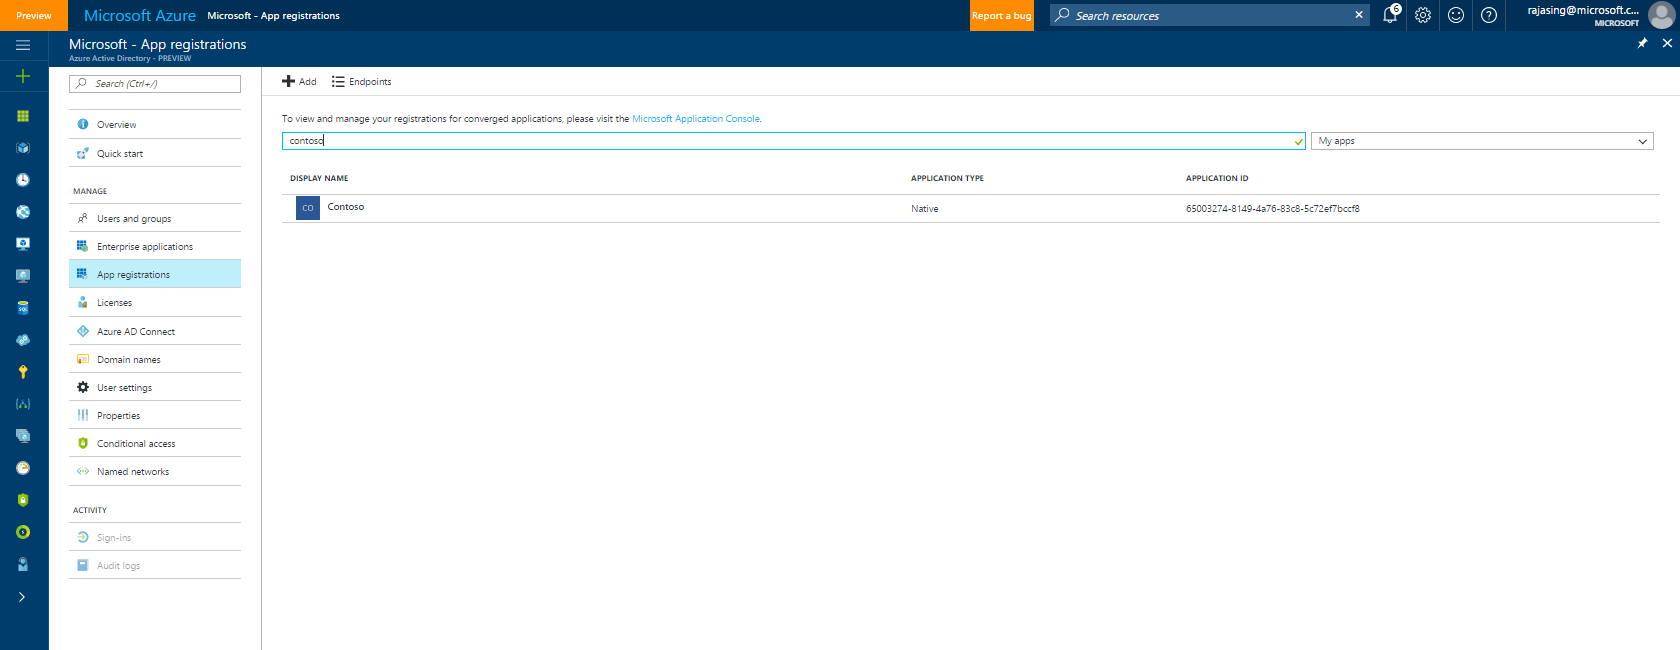
- This will create the app and you can search it by typing the name of the app in the text box.
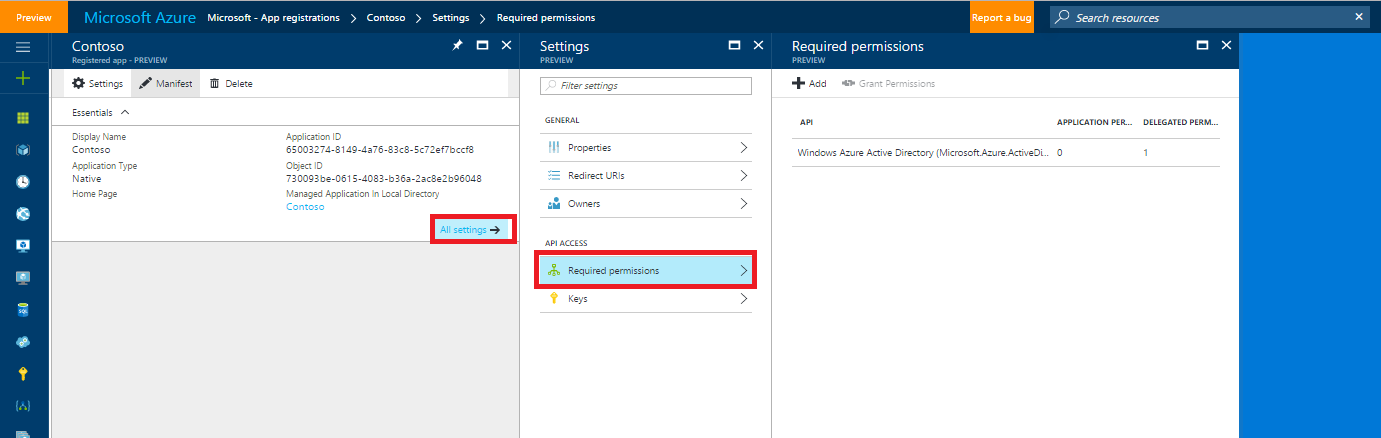
- After this, navigate to the app, that you have just created and in the Settings blade, click on Required permissions, to delegate the permission to Power BI service.
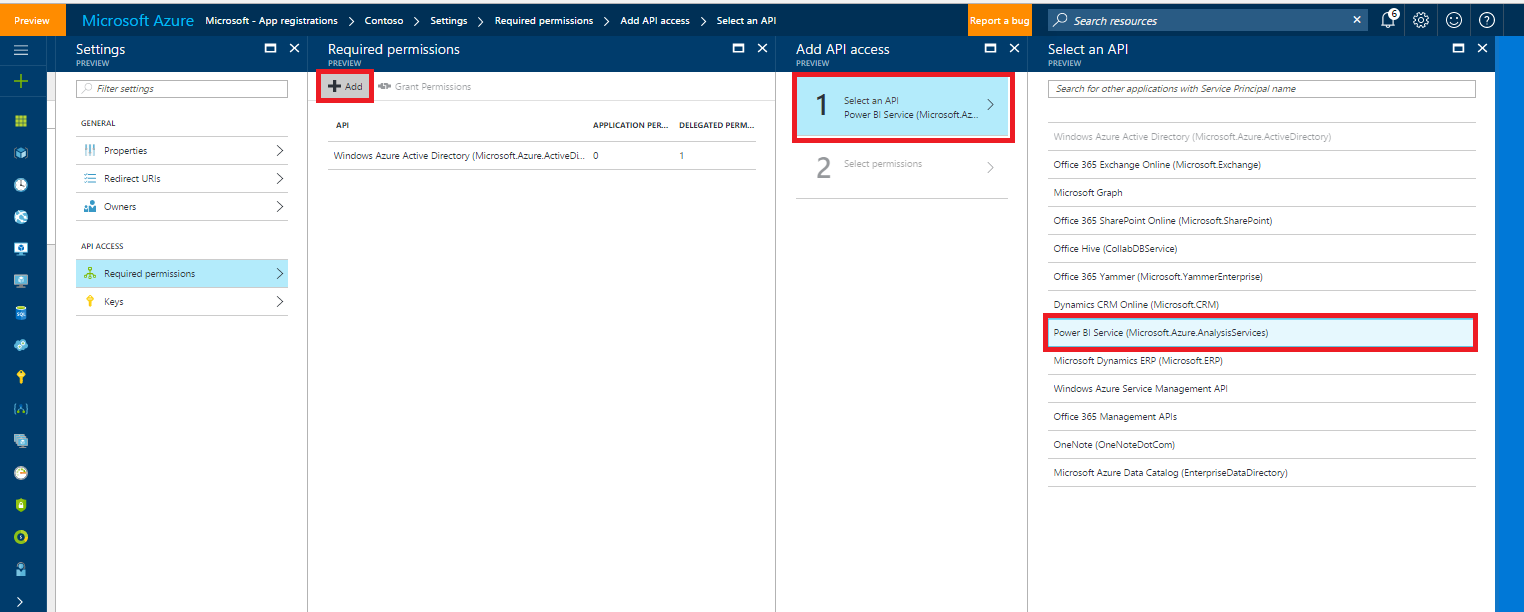
- Click on Add and then click on Select an API from the Add API access blade. Select Power BI Service in the Select an API blade and click on Select button.
- In the Enable Access blade select the permission you want to delegate and click on Select button on this blade.
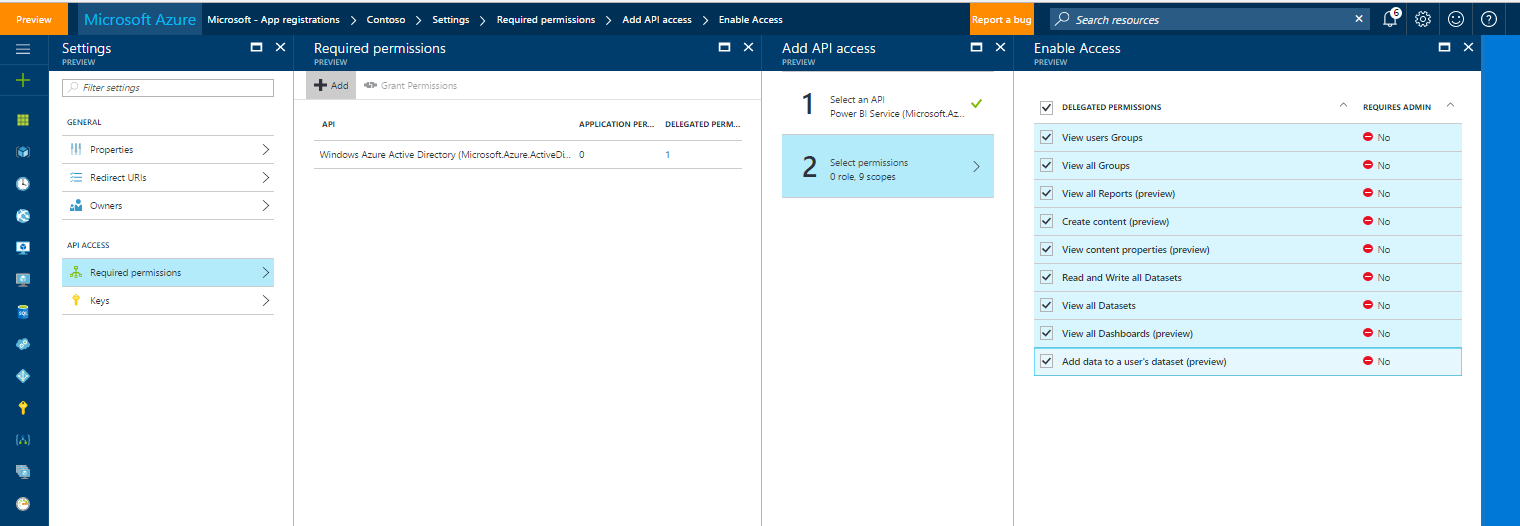
- Click on Done in the Add API access blade. With this the native app will get created in AAD, with the required permissions being delegated to the Power BI service
- Navigate to the native app that is created above and note down the Application ID of the app. This Application ID is the client id of this app and will be used in the next sections.
User consent for the permissions
Once the app is registered in AAD tenant, next step is to get user consent for the permissions which are delegated to the application. This is one time activity for a particular service account and the consent can be granted by using the below code which should be executed with the credentials of the service account, on behalf of whom the token would be requested and Power BI reports will be displayed in web or mobile application.
- In Visual Studio 2015, create a Console Application project.
- Install the Azure AD Authentication Library for .NET NuGet package. To get an authentication security token in a .NET app, you use this package. Here's how to install the package: a. In Visual Studio 2015, choose Tools > NuGet Package Manager > Package Manager Console. b. In Package Manager Console, enter Install-Package Microsoft.IdentityModel.Clients.ActiveDirectory -Version 2.21.301221612.
- Add the code below into class Program {...}.
- Here the Resource Id should be same as specified in the code snippet, this is resource id for the Power BI service. Client Id is the application id that was noted in the above section. Redirect Url is the one which was specified while creating the native app. In Authority you can specify your tenant or use "common" as the {tenant} in https://login.microsoftonline.com/{tenant}.
- After installing the Microsoft.IdentityModel.Clients.ActiveDirectory package, add using Microsoft.IdentityModel.Clients.ActiveDirectory; to Program.cs.
- Run the Console App,
Sample code to get user consent
Add this code to Program {...}.
static void Main(string[] args)
{
string resourceId = "https://analysis.windows.net/powerbi/api";
string clientId = "{client_id}";
string redirectUrl = "https://localhost";
string authority = "https://login.windows.net/microsoft.onmicrosoft.com";
AuthenticationContext authContext = new AuthenticationContext(authority);
AuthenticationResult result = authContext.AcquireTokenAsync(resourceId, clientId, new Uri(redirectUrl), new PlatformParameters(PromptBehavior.Auto)).Result;
string token = result.AccessToken;
}
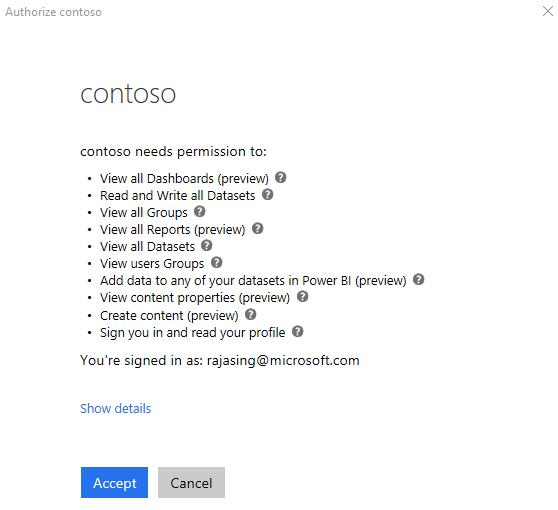
When you run this code snippet, you get the screen as below. Make sure the user who is granting the consent is the same on behalf of which the reports would be displayed in web or mobile applications. Click on Accept button.
The next step is to get the authentication token on behalf of a service account or user. Running the below code sample will generate the token, on behalf of the user, whose credentials are provided as parameter while creating the instance of userCredential object. The {client_Id} is the application id for the native app, which was created above. Running this code would also require to install Microsoft.IdentityModel.Clients.ActiveDirectory NuGet package, similar to the one used in the above section.
static void Main(string[] args)
{
AuthenticationContext authenticationContext = new AuthenticationContext("https://login.microsoftonline.com/common");
UserCredential userCredentials = new UserCredential("{user_id}", "{password}");
AuthenticationResult result = authenticationContext.AcquireTokenAsync("https://analysis.windows.net/powerbi/api", "{client_Id}", userCredentials).Result;
string token = result.AccessToken;
}
Using the authentication token you can call any Power BI operation, for which the service account has permission on the Power BI portal where the report is published. This also includes the operation to get the power BI report and embed in the web or mobile app. More info about integration of the reports once the token is fetched can be found at https://powerbi.microsoft.com/en-us/documentation/powerbi-developer-overview-of-power-bi-rest-api.
Summary
What I´ve shown here in this blog post is how you, in a very fast (and easy) way, can integrate Power BI reports in a web or mobile application which are secured with proper authentication and also have automatic refresh of the Power BI reports. So if you have been waiting for a great way to integrate Power BI report in web or mobile application, this is your answer.
That´s all for now, folks. I hope you´ve liked what you´ve read and that you will find this blog post useful to get started with the Power BI integration. Leave a comment below if there are questions.