How to manipulate the Task Form with SharePoint Designer for new task actions?
Hello SharePoint Designer users,
I’m Chong Youn (John) Choe, a PM in the SharePoint Designer team. It makes me very happy to post an article on a new issue.
Background
Approval is one of the key applications of workflow. A couple of actions are provided in SharePoint Designer 2013 to receive participant’s response. In SharePoint Designer 2013, task forms are auto-generated based upon a certain Content Type, so it is worthwhile to learn how to customize the content type for those who are interested in customizing the task form in your workflows.
Example Scenario
Chris Bryant, a designer of Contoso, wants to have feedback on the new product model design he presented last night. Default Start a Task Process action is only suitable for getting an approval or a rejection response from the participants he selects, as such, he decides to modify the task form to better fit into the need of collecting feedback.
Custom Content Type Creation
First, a custom content type needs to be created in the site. It can be done either the SharePoint server side or SharePoint Designer client side.
For the Server side do the following:
1. Go to Site Content Type page
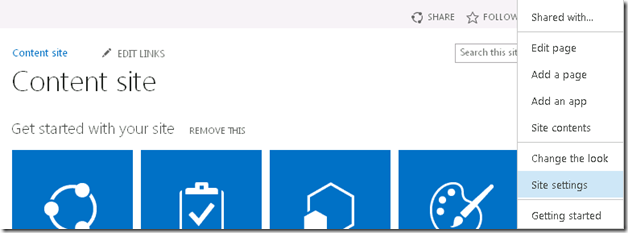
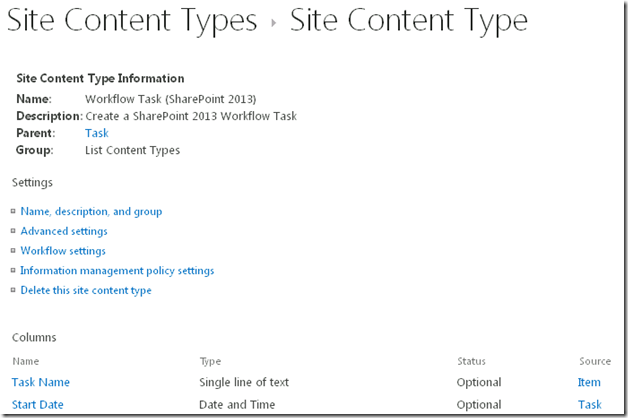
Go to Site Settings, and select Site Content Types in the Web Designer Galleries section. On the Site Content Types page, choose Workflow Task (SharePoint 2013) in List Content Types.
Figure 1 Site settings menu
Figure 2 Workflow Task (SharePoint 2013)
2. Create a site content type which inherits the Workflow Task (SharePoint 2013) content type.
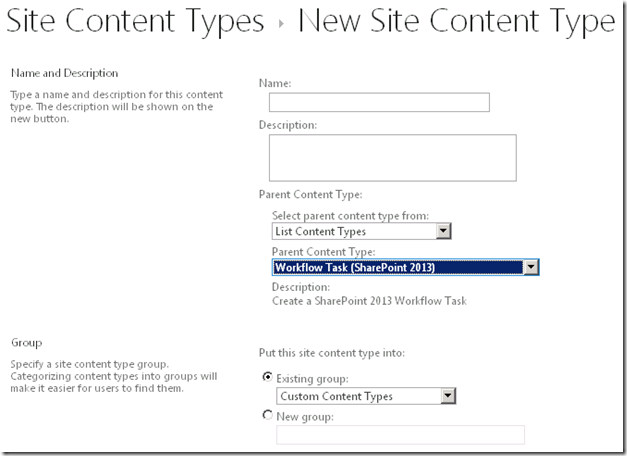
Go back to the Site Content Types page and press the Create link. Set its name, description, and then set its Parent Content Type as the Workflow Task (SharePoint 2013) content type. Setting the parent content type to the Workflow Task (SharePoint 2013) content type is a required step in order to use your new custom content type. Choose or introduce a Content Type Group and press OK.
Figure 3 Set Parent Content Type
3. Add the new Content Type to your Tasks list.
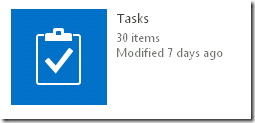
Click on Settings, and then click on the back to site home and go to Site Contents option and then click on your Tasks list.
Figure 4 Tasks button
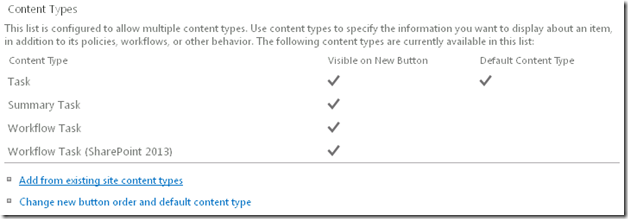
Choose the List tab in the ribbon, and click List Settings. Scroll down to locate the Content Types section, and press the Add from existing site content types option to add the newly created content type.
Figure 5 Content Types session in List Settings
 |
|
The same work can be done even easier on SharePoint Designer,
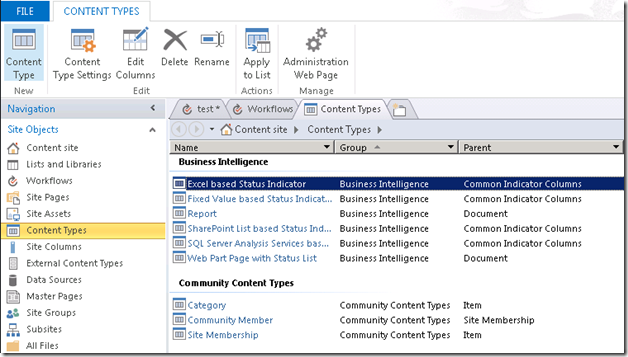
1. Go to the Content Types menu under the Site Objects tab in the Navigation pane. All the Content Types in the site will be displayed. Create a site content type by pressing the Content Type button
Figure 6 Content Types menu in SharePoint Designer |
|
 |
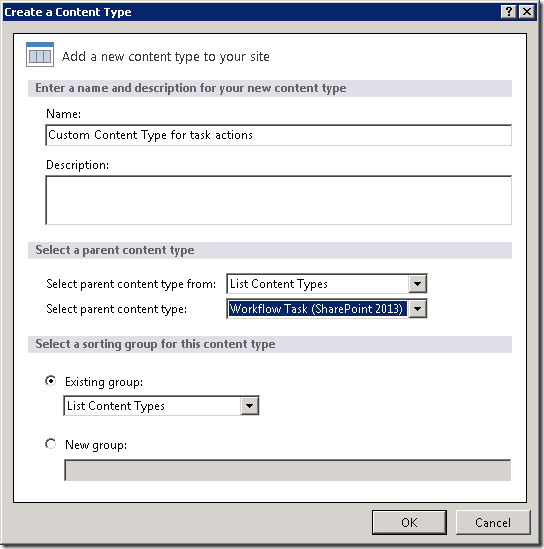
2. Choose the name for your new content type and select a sorting group for it. Make sure that the parent content type is the Workflow Task (SharePoint 2013) content type as depicted in figure 7.
Figure 7 Create a Content Type dialog
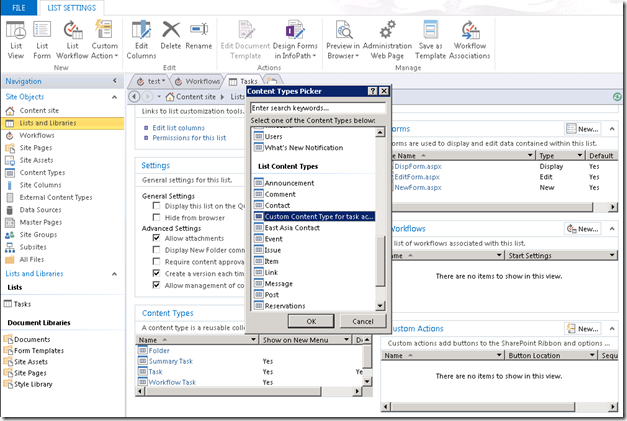
3. Next, add the content type into your Tasks list, this is required in order to use it in the Task Actions. Go to your Tasks list under List and Libraries under Site Objects in the Navigation tab again. Afterwards, add the newly created content type into the Tasks list.
Figure 8 Content Types Picker on SharePoint Designer |
|
 |
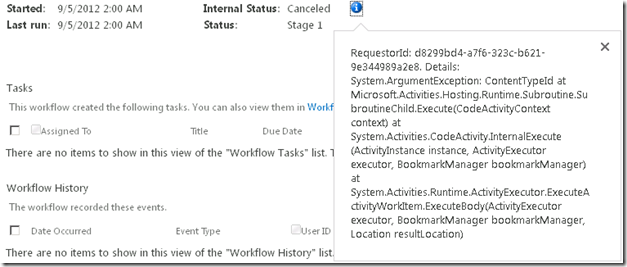
Without adding the content type in the Tasks list, the following run time error will occur.
Figure 9 Run time error
Using either method to creating your Custom Content Type will make it available in the workflow.
The Outcome option column is the column that will hold all of the possible responses each participant can select. Any custom content type created by the above steps will be shown in the Start a Task Process and Assign a Task actions.
Custom Content Type Modification
When adding a Start a Task Process or Assign a Task action, the new Content Type will be displayed in the Task action’s designer type.
Once it’s confirmed that the Custom Content Type has been created and is usable by the workflow, let’s start working on how to customize the form.
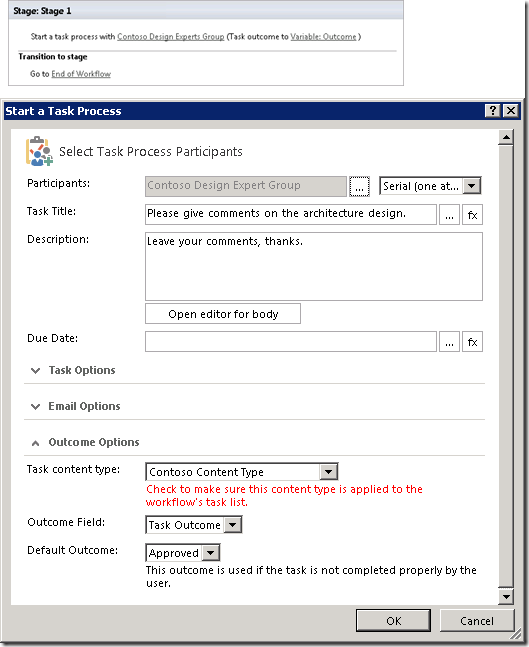
A very simple workflow to collect feedback is depicted in figure 10.
Figure 10 Collect Feedback Workflow
Chris, Contoso’s designer, wants to receive feedback from an internal expert group hence the form should be modified to store comments from each participant.
1) Go to the Site Settings page, and open Site content types in Web Designer Galleries
2) Click on the Custom Content Type under List Content Types
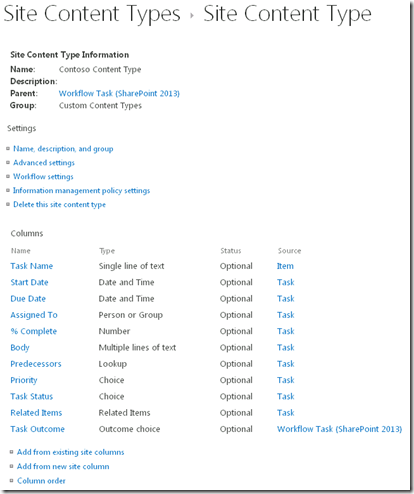
Figure 11 Contoso Content Type
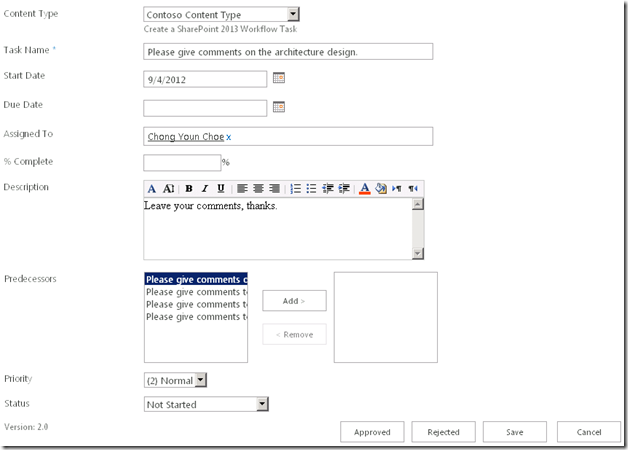
At this point, the task form’s look will be the same as the default task form. Which looks like figure 11.
Many fields in the default form are useless in this scenario. For Chris, the following fields may be modified in the Content type.
| Figure 12 Task Form Contoso Content Type |
Let’s examine all the fields one by one in figure 11, Contoso Content Type, to decide if they are needed in our task form.
1) Task Name is a Required field
2) Start Date/Due Date may be meaningful but is not something we have to have in our form
3) Assigned To field is not required in the form since the participants will be editing the form assigned to them already
4) % Complete is pointless since the feedback is normally given all at once
5) The Body field will be used to gather the feedback
6) Predecessors is not needed here
7) Priority has nothing to do with feedback
8) Task Status is a basic field that tracks the status
9) Related Items are not needed in this form
10) Task Outcome is a choice of outcomes, in this case a simple “Submit” option is all that’s needed to finish the feedback process.
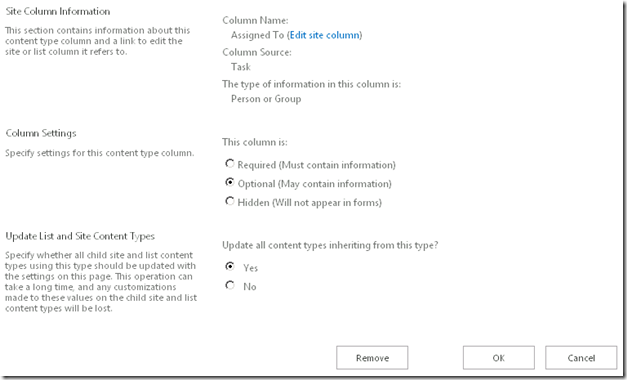
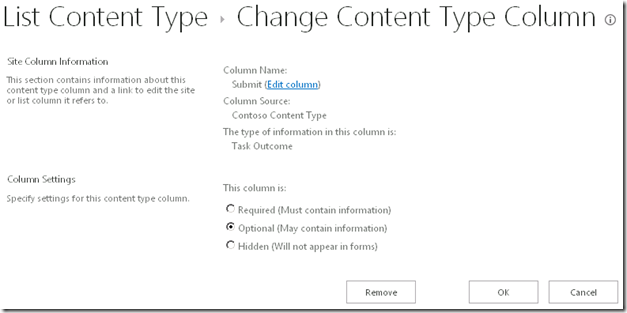
The column manipulation pages look all alike, an example screenshot is below.
When a field is set to Required, the column needs to be filled in order to close the task form, while Optional columns are displayed but can be left blank. Either taking the Hidden setting or removing the column by the Remove button will hide the column from the task form. For example, in the below screenshot, pressing the Remove button will erase the Assigned To field from the Contoso Content Type.
Figure 13 Change Content Type Column
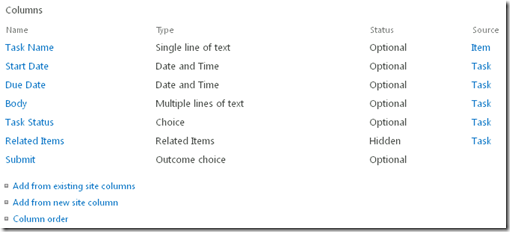
Chris has gone ahead and modified the Contoso Content Type so that it will be used purely for feedback.
The results are displayed in figure 14. The Related items column is hidden since it cannot be removed.
Figure 14 Contoso Content Type modified
In addition, the Task Outcome site colun is used in the Workflow Task (SharePoint 2013) Content Type. It is best to remove the Task Outcome column and create a new site column of Outcome choice type by clicking on Add from a new site column.
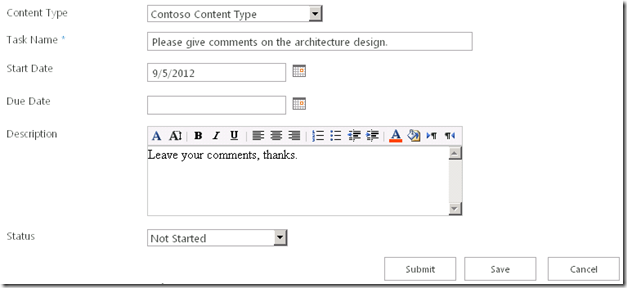
Figure 15 Task Form Contoso Content Type modified
When each participant receives a task based on the form above, the review can be written in the description field and the task can be completed by pressing the Submit button. Remaining columns such as Start Date could be hidden, too.
After this, it is also okay to rename the fields as Chris wishes. For instance, in order to change the name of the outcome field Submit, choose the Submit column and press Edit column link in the Site Column information. The column name can be renewed there, as depicted in figure 17. Note that the new name for the column can be non-ascii character based such as “テスト”.
Figure 16 Edit Column
Figure 17 Site Column Information
Limitations
SharePoint 2013 workflows with SharePoint Designer 2013 will generate task forms by analyzing the associated Content Type. Please note that InfoPath is not supported for SharePoint 2013 workflows. Which means that in order to modify the layout users need to directly manipulate the .aspx format.
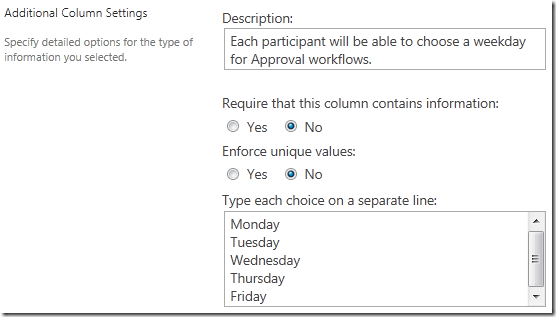
Despite the modifications explained already, the Save and Cancel buttons cannot be manipulated from SharePoint or SharePoint Designer. What’s more, the Task Status and Task Outcome type columns need to exist in a content type in order for the custom outcome buttons to appear. The order of the buttons follow the order of the choice values in the Task Outcome type columns included in the content type. The Task Outcome type columns are defined as Site Columns under Site Settings.
Figure 18 Additional Column Settings example for a Task Outcome type column
Summary
Two new actions are introduced in SharePoint 2013 workflows. The task form for the actions are modifiable from SharePoint sites and from the SharePoint Designer client without any developer level knowledge. Create a new Custom Content type that inherits the Workflow Task (SharePoint 2013) Content type, add it to your Tasks list, use the new content type in your workflow, and modify the Custom Content type as needed.
Additional customizations of the form are possible by modifying the .aspx format, but that is out of scope for this blog.
I hope with this simple technic presented here to you can enable the workflow scenarios you have.
See you again in the next posting!
Chong Youn (John) Choe
