First Silverlight for Windows Embedded Application
Hello, my name is Paul Monson and I am one of developers of the Windows Embedded Silverlight Tools (WEST).
This post will give you a brief introduction to the following features:
- The Blend 3 template for Silverlight for Windows Embedded (SWE) Applications.
- The wizard for creating a Platform Builder subproject that uses SWE.
- The event tool.
- The project update wizard.
The Blend template provides a Blend project that restricts the features available in Blend to match the features available in Silverlight for Windows Embedded as closely as possible. Using this template will enable designers and developers to create projects more quickly since the features available in Blend when using this template should just work in SWE.
Once you have designed the UI in a Blend project you can quickly create a SWE Application using the wizards and tools in Visual Studio 2008. The wizard creates a Platform Builder subproject that provides a minimalist C++ application. The wizard also generates wrapper controls for each of the UserControls that are designed in Blend.
The event tool assists in connecting event handlers to Silverlight controls.
The update wizard updates the subproject with new UserControls, named objects, and event handlers that are added to the original Blend project.
David Shoemaker explained how to install the tools you will need. After build and test your First Image you are ready to create a Platform Builder subproject application using Blend and WEST.
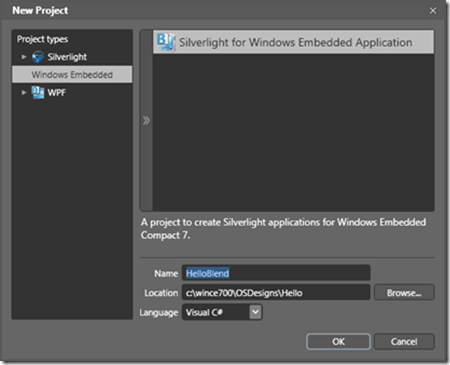
1. Begin by opening Blend 3, creating a new “Silverlight for Windows Embedded Application” project. We will be creating a Platform Builder subproject later, so make sure the location doesn’t have any spaces in it (this means that you can’t create the project in the default project location in the documents folder.)
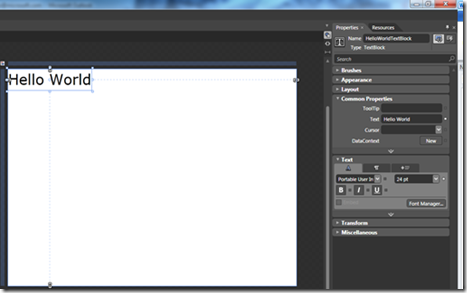
Once the project is created you should see an empty design surface in Blend. Let’s add the text “Hello World” to the design surface by adding a TextBlock and setting the following properties.
2. Set Name to “HelloWorldTextBlock”, Text to “Hello World” and the font size to 24pt.
3. Hit F5 and verify that you see the words “Hello World when you run the Silverlight App. Launch VS 2008.
Now that you’ve created a “Hello World” Blend application you are ready to use the WEST subproject wizard to create a Silverlight for Windows Embedded Application. This wizard takes the Blend project you just created as input and creates Platform Builder subproject.
4. Open your OS Design in VS 2008.
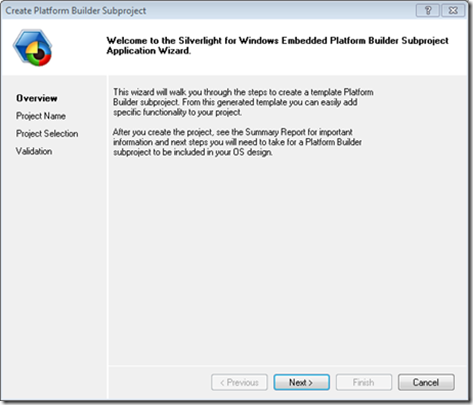
5. On the Tools menu find “Windows Embedded Silverlight Tools” and click “Create Platform Builder Subproject…” and click “Next”
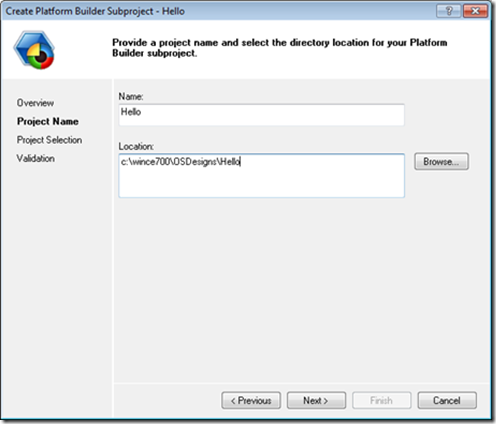
6. Project Name
a. Name=Hello
b. Choose a location for your subproject.
c. Click “Next”
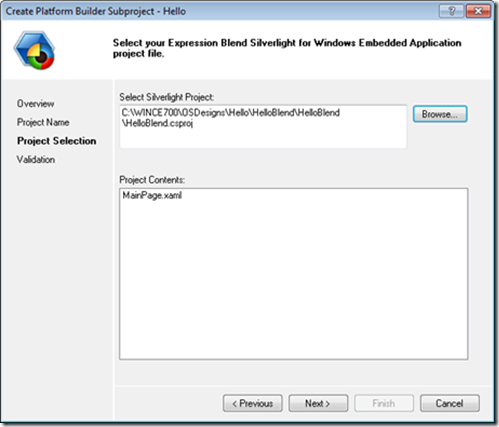
7. Project Selection
a. Browse to and select the Blend project you just created.
b. Click “Next”
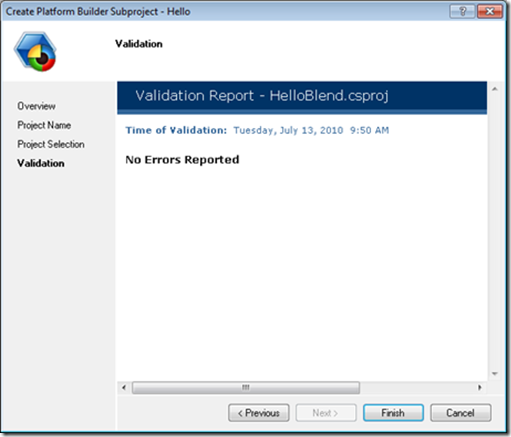
8. Check the validation report for errors. If you are following along there shouldn’t be any, but if the Silverlight project you selected uses features that are not supported by Silverlight for Windows Embedded you will see warnings or errors here. When you’re done with the report click Finish.
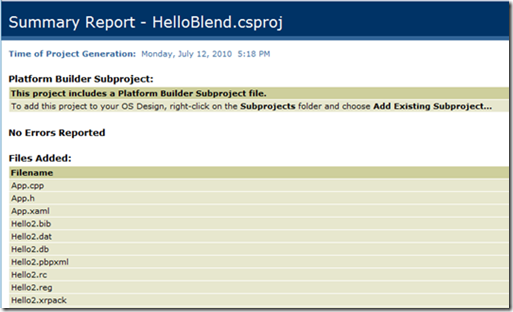
9. Now you should see a Summary Report in Visual Studio that includes a list of the files added and the information from the validation report.
10. The subproject was created but it isn’t added to your OS Design yet. To add the new subproject to your OS Design, right-click “Subprojects” in the solution explorer, and choose “Add Existing Subproject…” from the context menu.
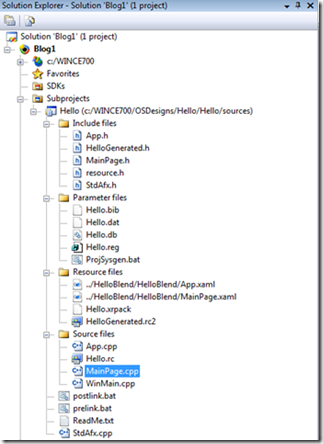
11. Select the subproject you just created and click OK. The new subproject should now appear as a node in your OS Design.
12. Open MainPage.xaml
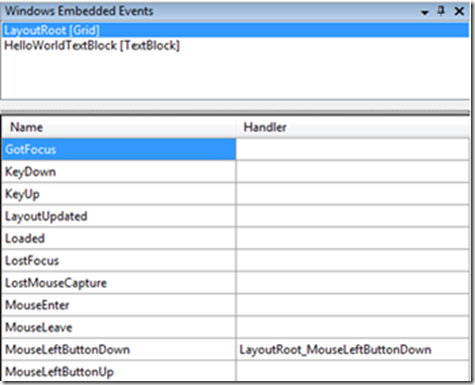
13. Click View -> Other Windows -> Windows Embedded Events to show the event tool.
14. Select “LayoutRoot” in the upper treeview.
15. Double-click the empty text box next to MouseLeftButtonDown in the lower half of the event tool.
16. Copy the following implementation into the stub. This code will exit the application when you click anywhere in the root Grid that isn’t covered by another control.
    1: HRESULT MainPage::LayoutRoot_MouseLeftButtonDown (IXRDependencyObject* pSender, XRMouseButtonEventArgs* pArgs)
    2: {
    3:     IXRVisualHostPtr pHost;
    4:     App::GetVisualHost(&pHost);
    5:     if(pHost)
    6:     {
    7:         pHost->EndDialog(0);
    8:     }
    9:     return S_OK;
   10: }
17. Right-click the subproject node and choose Build.
18. Download your OS image to your device or vCEPC.
19. On the menu choose Platform>Run and select Hello.exe
At this point you should see your “Hello World” screen appear on the device. You have just created a Silverlight for Windows Embedded application. Now let’s add a button and make it do something when you click on it.
20. In Blend 3 add a Button to MainPage.xaml. Set the Name to “Button1” and the Content of the button to “Click Me” and then run the Blend project to verify that it is valid.
21. In VS 2008 open MainPage.cpp and make it the active editor. Any file from the project should work, but in order for the update menu item to work correctly you must have a project file from the project you want to update open in the active editor.
22. On the Tools menu find Windows Embedded Silverlight Tools and click Update Silverlight for Windows Embedded Project…
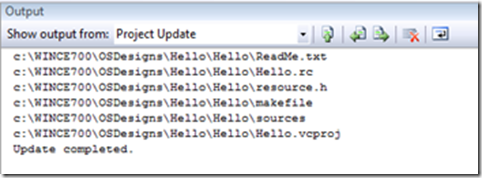
23. You should see a progress bar briefly, and when it finishes the message “Update Completed” should be displayed in the Output pane.
24. Open the MainPage.xaml from the subproject resources node.
25. Click View -> Other Windows -> Windows Embedded Events to show the event tool.
26. Select “Button1” in the upper treeview.
27. Double-click in the right-hand side of the Click event row in the lower grid.
28. A Button1_Click event handler stub is inserted and the cursor is positioned in MainPage.cpp at the insertion point.
29. Change the implementation of the stub to:
    1: HRESULT MainPage::Button1_Click (IXRDependencyObject* pSender, XRMouseButtonEventArgs* pArgs)
    2: {
    3:     m_pHelloWorldTextBlock->SetText(L"Click");
    4:     return S_OK;
    5: }
30. Right-click the subproject and choose Build.
31. If you disconnected from the test device or emulator you will need to reconnect now, and then select Target -> Run -> Hello.exe again.
32. Click the button, you should see the text block change to “Click”
If the new subproject is checked into source control, both the Blend project and the Platform Builder subproject need to be checked in with the same relative path between the projects that they had at the time the new subproject was created.
