Deploy Custom GPO via Microsoft Intune
Hello! My name is Anil Abraham, and I am a Senior PFE with the Windows and Devices team, in the UK.
Modern management for Windows 10 is a hot topic and with Autopilot, Azure AD Join and management using Intune, a question that customers keep asking me is, "Would MDM ever replace Group Policy?" With a smile, I say, "I don't know." The next question is, "what if I have custom ADMX files, like those for Google Chrome!". The answer is, you should be using Microsoft Edge :)
But hey, you know we are Microsoft, we have great products and our engineers provide great solutions to help you. So, today, I want to illustrate how you can manage settings for third party applications with custom ADMX templates using Microsoft Intune. The application in focus for this post is Google Chrome.
Group policy templates for Google Chrome can be downloaded from here.
Note: This is an external link and is subject to change.
The procedure below will use the concepts of ADMX backed MDM policies, the details of which are available here.
I understand how the ADMX policies are interpreted, especially the ones shipped with Windows. But what was of interest to me was the following statement:
“An ADMX file can either be shipped with Windows (located at %SystemRoot%\policydefinitions) or it can be ingested to a device through the Policy CSP URI (./Vendor/MSFT/Policy/ConfigOperations/ADMXInstall).”
Ingesting an ADMX
So essentially, our first step is to ingest the custom ADMX for Google Chrome through the Policy CSP.
This link further explains how to ingest the ADMX template into the policy CSP and then subsequently apply the settings we want – in this example, the "Show Home Button" setting.
With all that knowledge let’s look at how this translates to an MDM policy in Intune.
The first step is to create Custom Windows 10 policy to ingest the ADMX as shown below. I am assuming you know how to do this. If you are new to this, refer to the link .
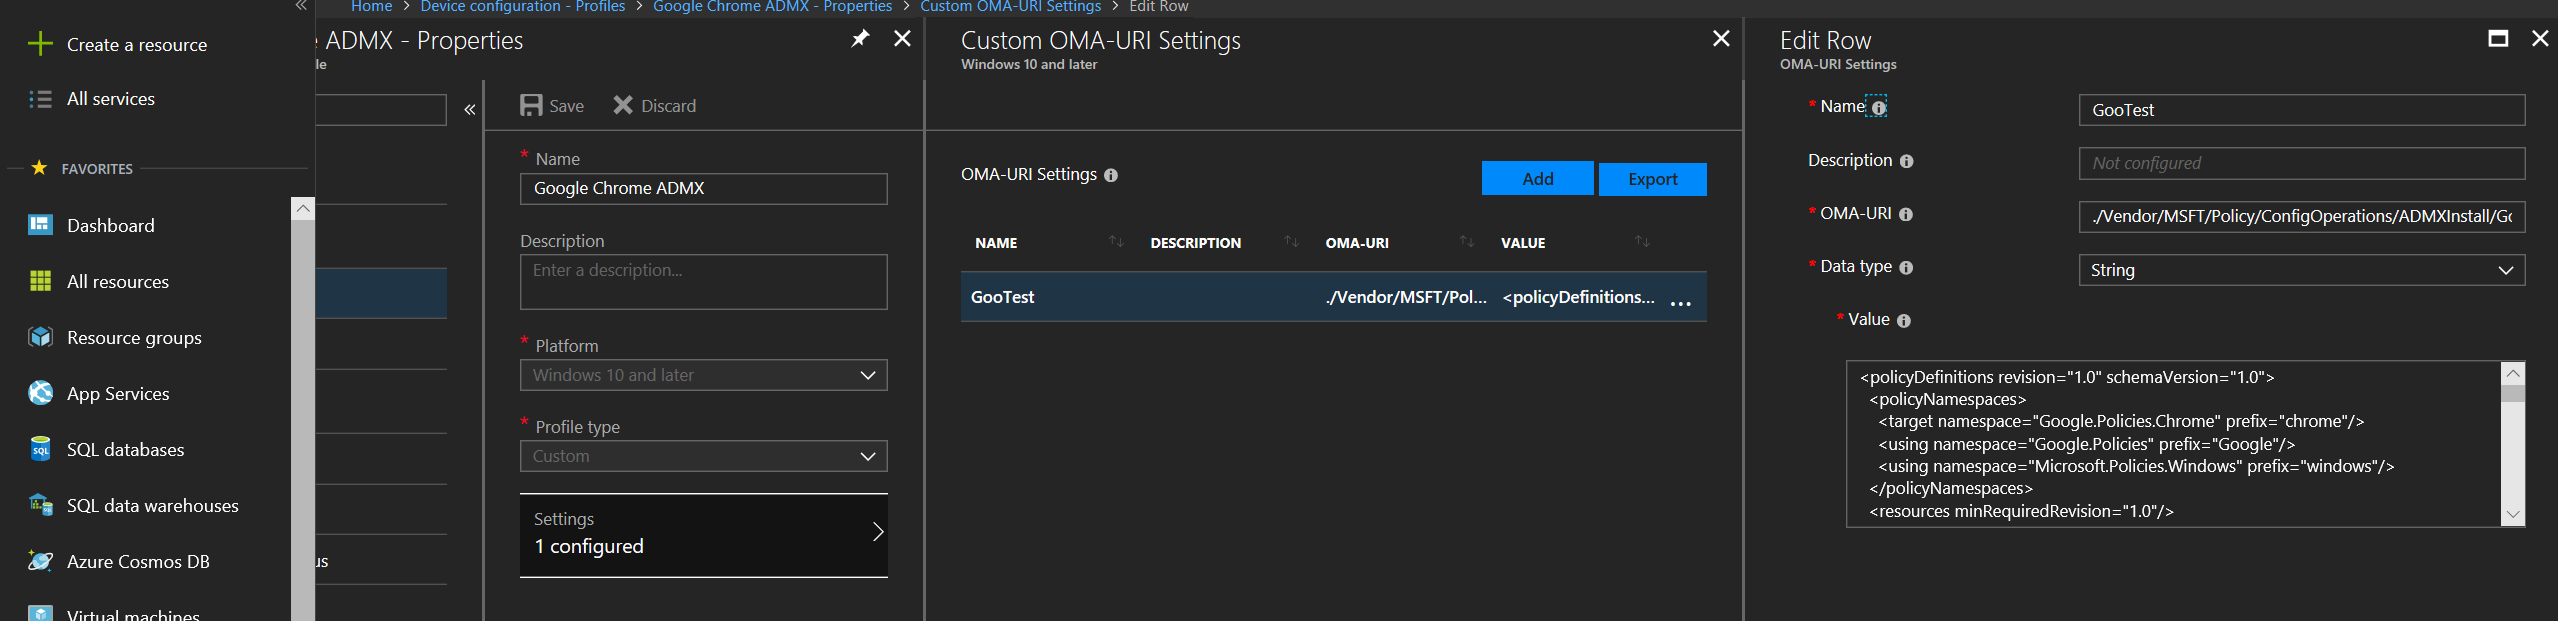
Key points to note are as below:
 OMA-URI :
 ./Vendor/MSFT/Policy/ConfigOperations/ADMXInstall/GoogleChrome/Policy/AppAdmxFile01

Data Type:
 String

Value:
 The value for the string will be the contents of the policy set available in the Chrome ADMX template. Download the txt file from here and copy the contents to the String Value field.
Note: The OMA-URI has two attributes that are user defined. They are the application name (GoogleChrome in this case) and the ADMX file name (AppAdmxFile01 in this case). The ADMX file name will change based on the file you are using. As long as it is unique on the device, it does not matter what you have called the last part.
The URI determines whether the policy is a user or a device policy. This link explains how you construct them for device or user. Once you have saved the policy assign it to group of your choice.
In my case I am assigning a machine level policy and on the machine where the policy is applied, you should see the registry keys added as below:
HKLM\SOFTWARE\MICROSOFT\PolicyManager\AdmxInstalled 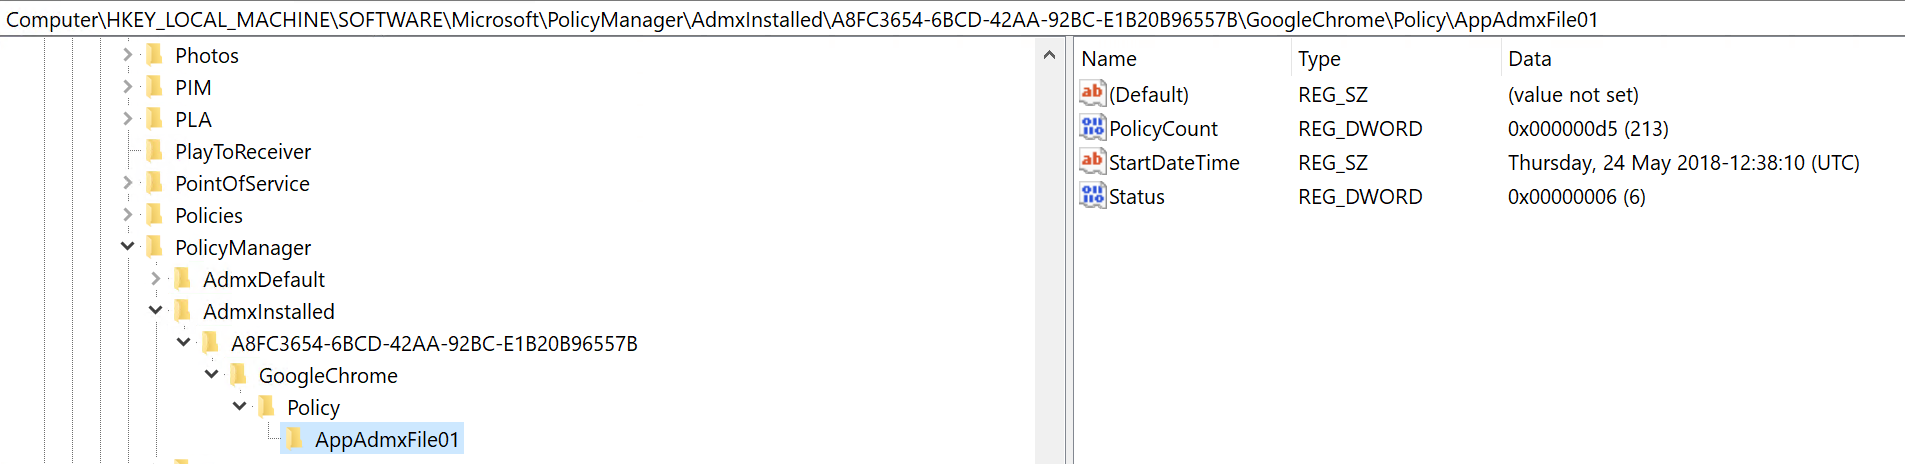
HKLM\Software\Microsoft\PolicyManager\AdmxDefault 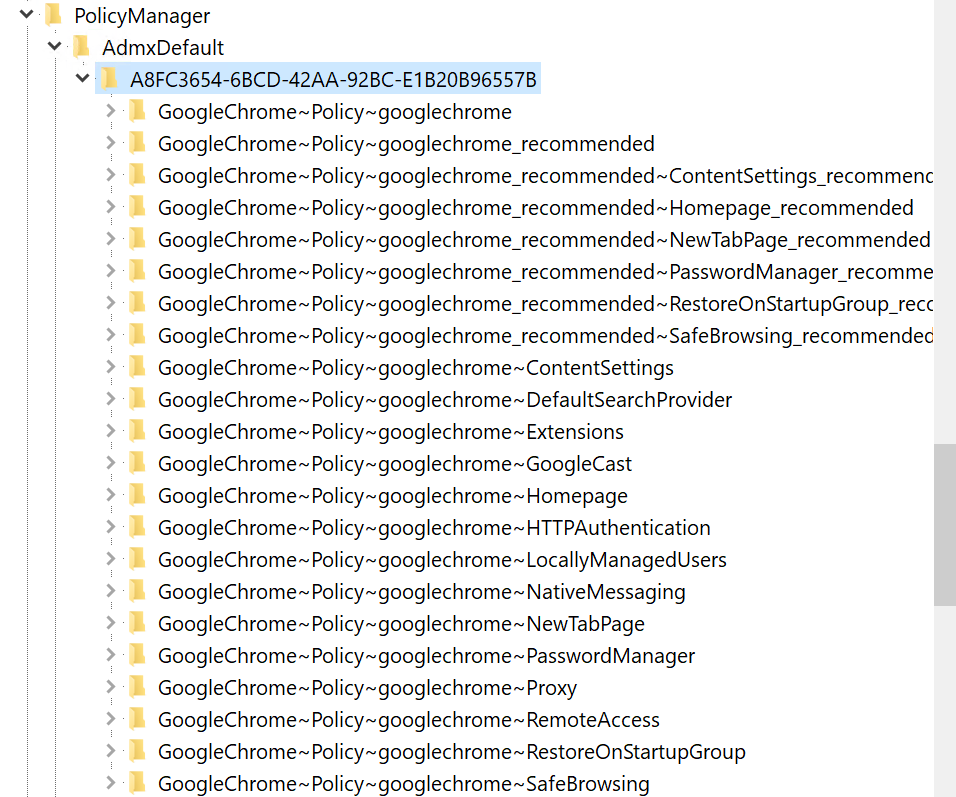
Set the ShowHomeButton
Now that we know the ADMX for Google Chrome has successfully been ingested on to the local machine, let’s look at how we can set the homepage URL.
In the ADMX, the section for the homepage is as below:
<policy class="Both" displayName="$(string.ShowHomeButton)" explainText="$(string.ShowHomeButton_Explain)" key="Software\Policies\Google\Chrome" name="ShowHomeButton" presentation="$(presentation.ShowHomeButton)" valueName="ShowHomeButton">
<parentCategory ref="googlechrome"/>
<supportedOn ref="SUPPORTED_WINXPSP2"/>
<enabledValue>
<decimal value="1"/>
</enabledValue>
<disabledValue>
<decimal value="0"/>
</disabledValue>
</policy>
To apply this policy via the OMA-URI we first need to build it. The link gives you an idea of how the policy can be built. Things to note from the ADMX snippet above are the registry key that would be set once the policy applies, the parent category and the value.
Within the ADMX, the parent category for ShowHomeButton is googlechrome and is as below:
<category displayName="$(string.googlechrome)" name="googlechrome">
<parentCategory ref="Google:Cat_Google"/>
</category>
Using the guidelines in the articles above, I constructed the OMA-URI for the setting with the details below:
./Device/Vendor/MSFT/Policy/Config/GoogleChrome~Policy~googlechrome/ShowHomeButton
To explain that in parts
- ./Vendor/MSFT/Policy/Config/ remains same for all machine polices
- GoogleChrome is your application name you chose on the ADMX ingestion URI.
- ShowHomeButton is the actual category that we are setting in our example which translates to the reg key Software\Policies\Google\Chrome\ShowHomeButton.
There is an easier way to double check this if you have successfully ingested the ADMX to a machine. The below registry key would give you an idea of what it should look like.
HKEY_LOCAL_MACHINE\SOFTWARE\Microsoft\PolicyManager\AdmxDefault\A8FC3654-6BCD-42AA-92BC-E1B20B96557B\GoogleChrome~Policy~googlechrome\ShowHomeButton
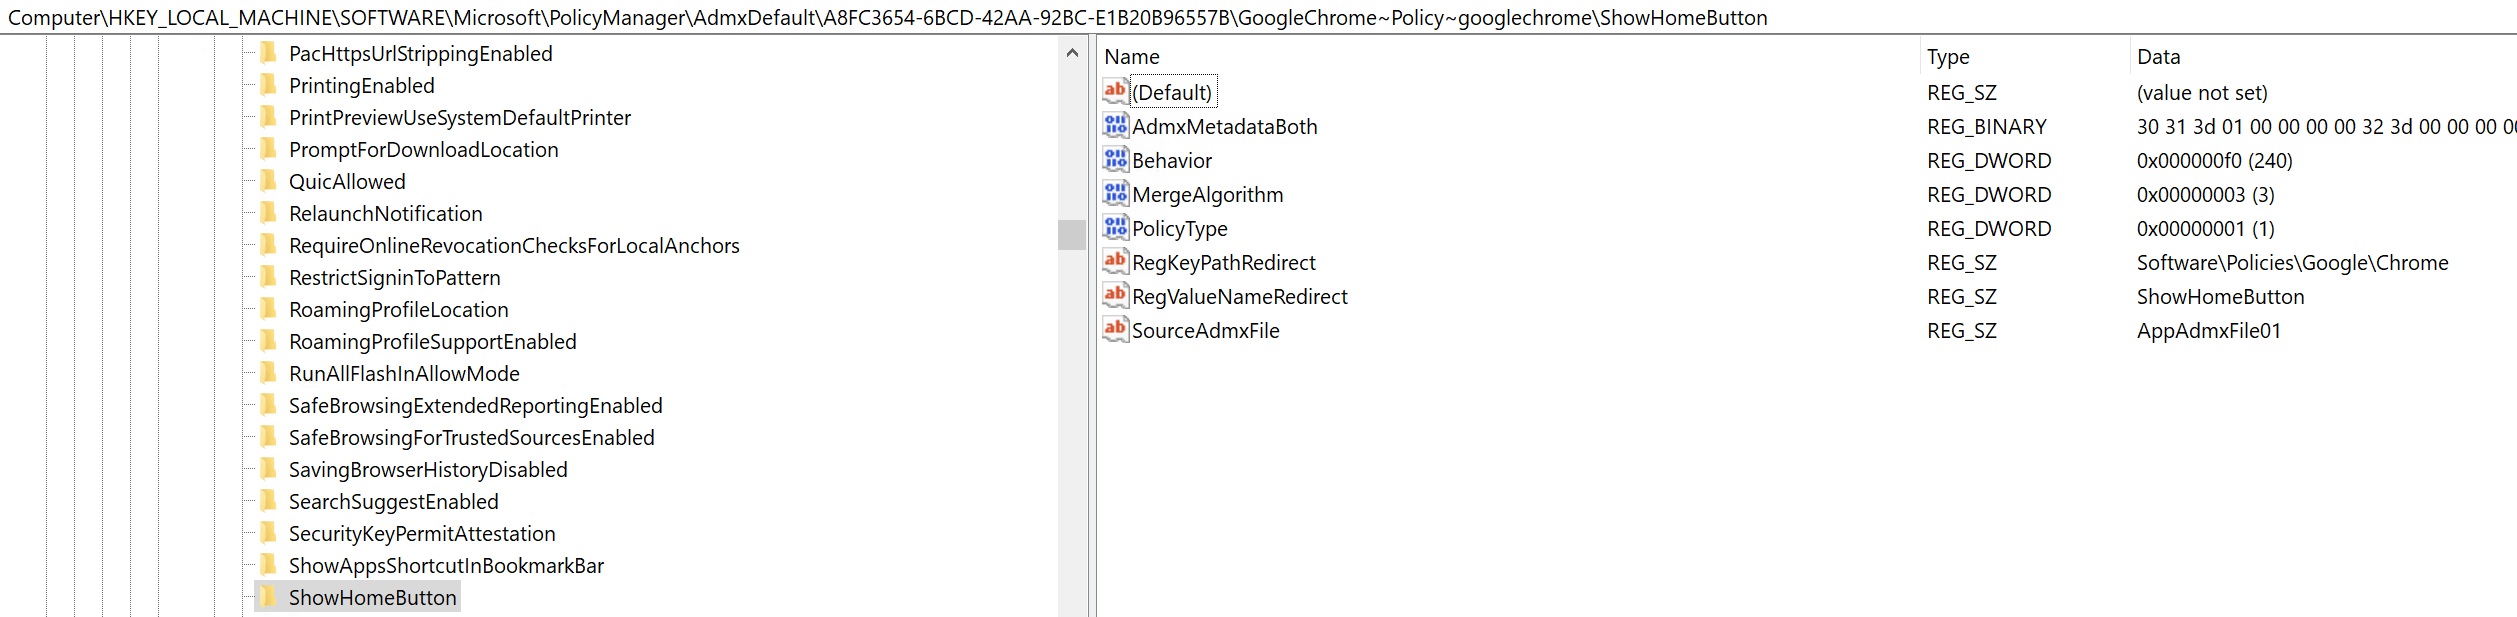
The last part of the key is the OMA-URI that we are after. Note the ‘\’ need to replace with ‘/’ in the OMA-URI.The GUID A8FC3654-6BCD-42AA-92BC-E1B20B96557B will be specific to your machine.
Now that we have constructed the OMA URI we need to create the Windows 10 custom policy as shown below in Intune.
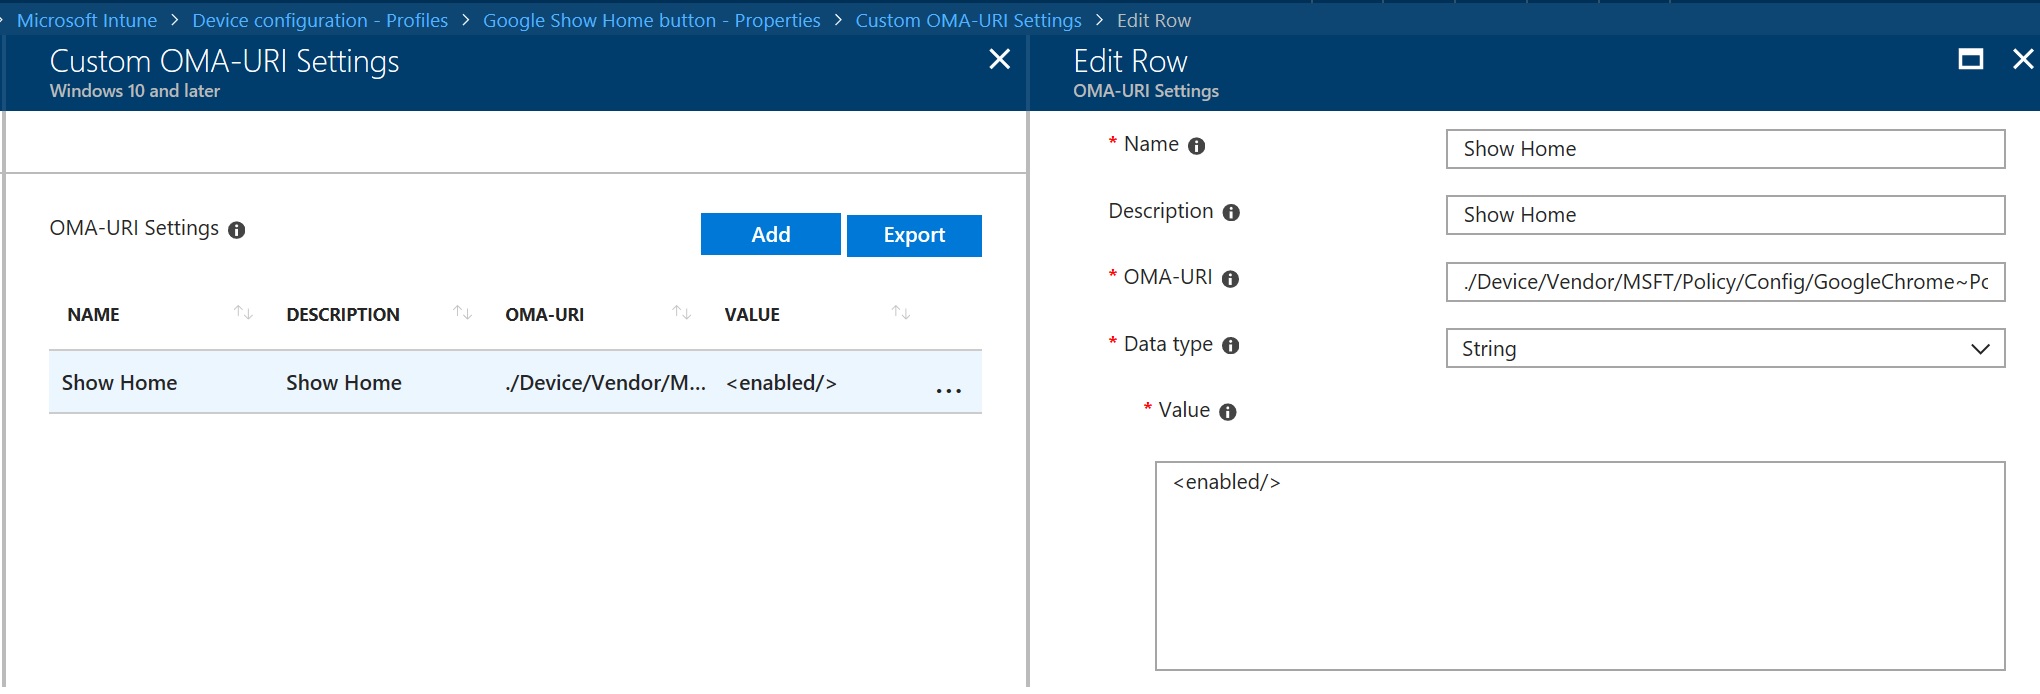
The key values are:
 OMA-URI:
./Device/Vendor/MSFT/Policy/Config/GoogleChrome~Policy~googlechrome/ShowHomeButton

Data Type:
 String

Value:
 <enabled/>
Save the policy and assign it to the same group that you assigned the admx policy to. The data id is the text id of the category that you are setting from the ADMX which in our case is the HomepageLocation_Recommended.
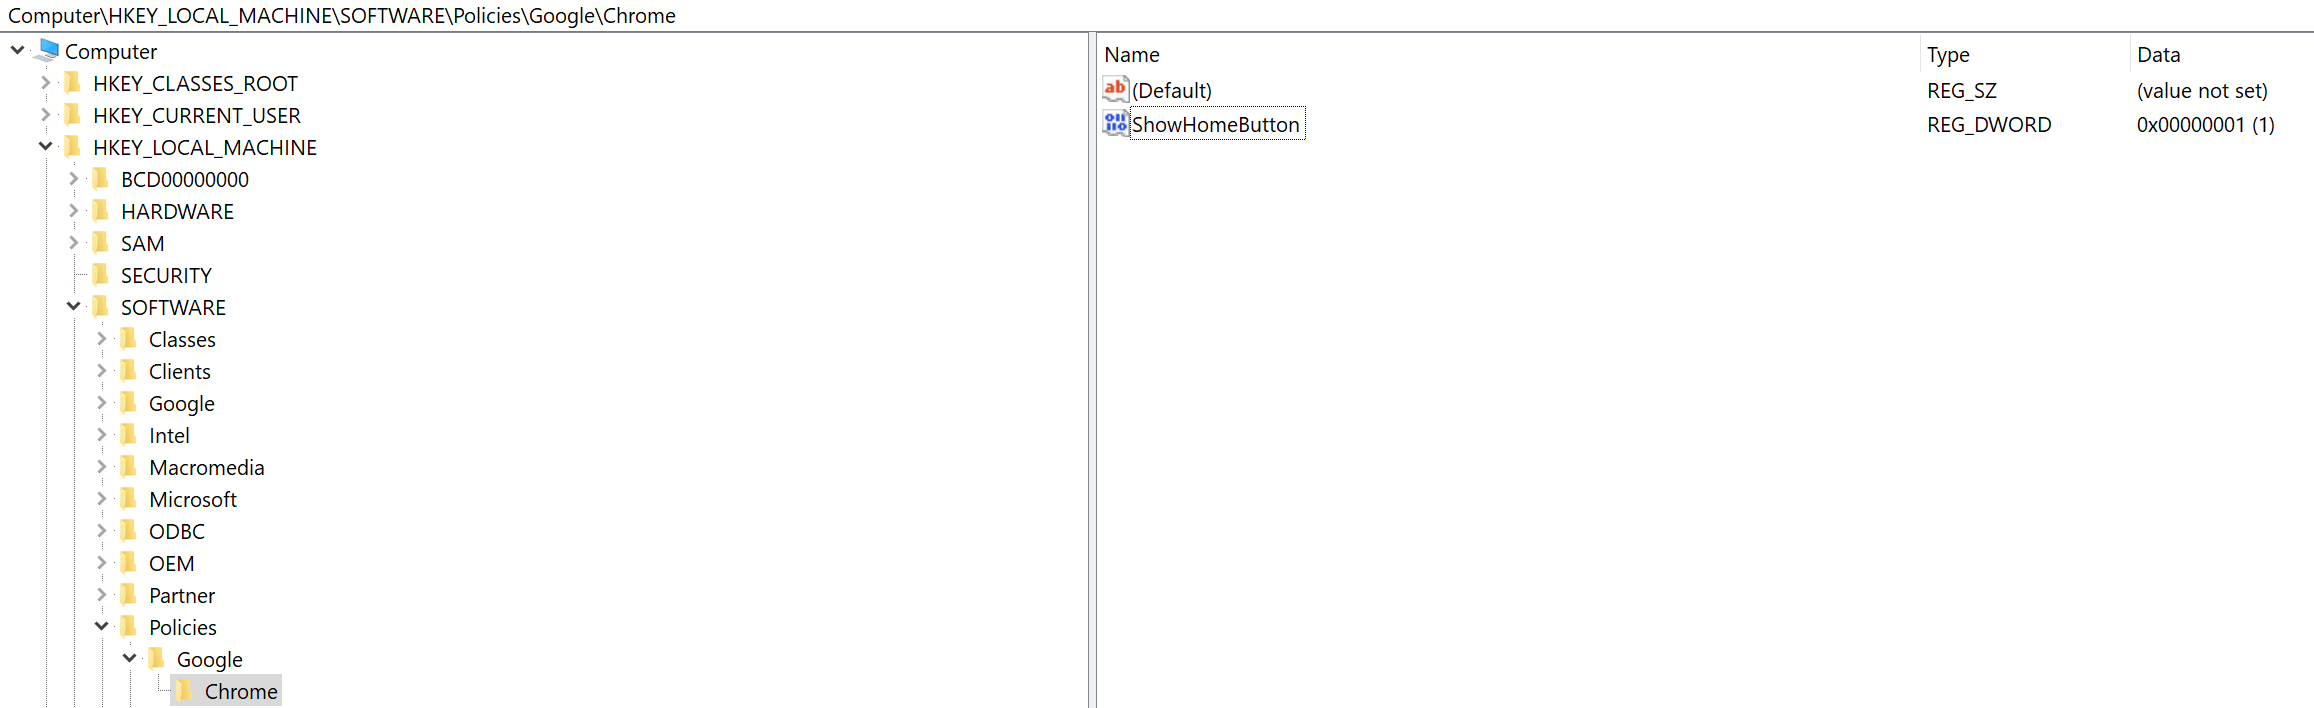
After the machine has downloaded the policy, you should see the registry key as in the screenshot below:
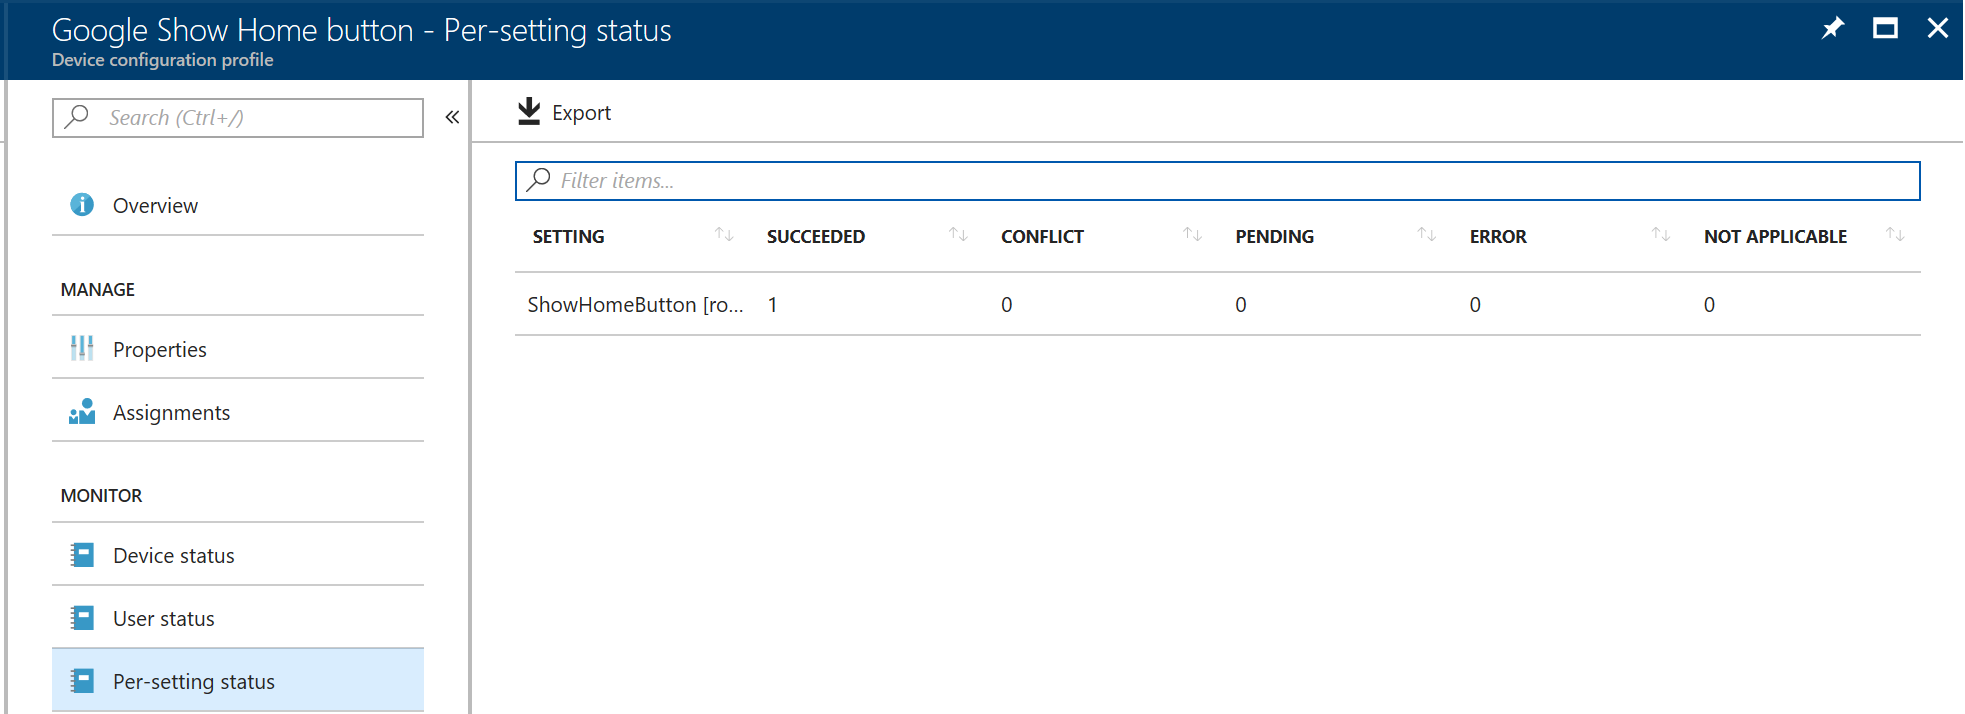
From a monitoring perspective, you should see the per-setting status to be a success as below:
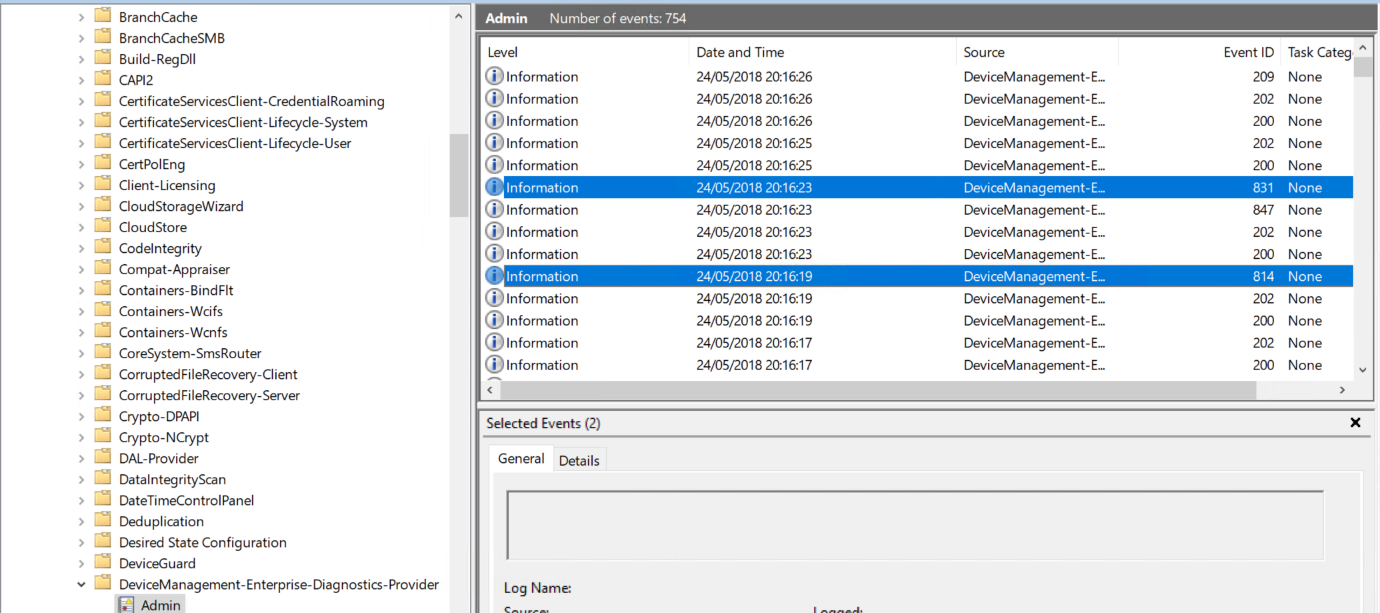
On the client, event ID 814 and 831 will be recorded for successful application of the policy as below:
From a Chrome perspective, you should see the option enabled but the button is disabled and the setting is managed.

Please note that if you are creating both the ADMX and the setting policy together it might take a couple of policy downloads before the policy applies to the device. The ADMX has to exist on the device before the policy setting can apply.
I hope this provides a good starting point to help you get started with managing policies for custom ADMX templates through Intune and better understanding of how to use Policy CSP on Window 10 latest versions for this purpose.