Tutorial: A Simple Managed Project System
Here's a preview of the new managed project system tutorial. It's written for Visual Studio 2008, Visual Studio SDK 1.0, and Windows Vista.
Submitted by Martin Tracy. This posting is provided "AS IS" with no warranties, and confers no rights.
------------------------
Tutorial: A Simple Managed Project System
In Visual Studio, projects are the containers that developers use to organize source-code files and other assets that appear in Solution Explorer. Projects let you organize, build, debug, and deploy your code, and create references to Web services, databases, and other resources.
Typically, projects are specified by the contents of a project file, for example, a .csproj file for a Visual C# project. You can create your own project type that has your own project file name extension. For more information about project types, see Project Types.
This walkthrough shows how to create a project type that has the project file name extension .myproj. You do not have to create a language to complete this walkthrough; instead, the walkthrough borrows from the existing Visual C# project system.
In particular, this walkthrough shows how to do these tasks:
· Create a simple project type.
· Create a simple project prototype template.
· Register the project template in Visual Studio.
· Create a new project instance by using the template together with the New Project wizard.
· Create a project factory for the project system.
· Create a project node for the project system.
· Add custom icons for the project system.
· Implement basic template parameter substitution.
Note: For an end-to-end sample of a complete language project system, see the IronPython sample.
Creating a Simple project Type
Project types, like most Visual Studio extensions, are implemented by VSPackages. For more information about VSPackages, see Tutorial 1: Creating a VSPackage. To create a project type, you must first create a VSPackage.
1. In Visual Studio, on the File menu, point to New and then click Project.
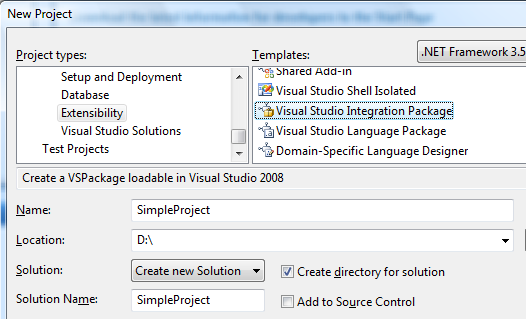
2. In the New Project dialog box, expand Other Project Types and then click Extensibility.
Under Visual Studio installed templates, click Visual Studio Integration Package.
Select Create Directory for Solution, and then type SimpleProject [MO2] in the Name box.
Type a Location for the solution, for example, D:\ .
Click OK.
3. On the wizard welcome page, click Next.
4. On the Select a Programming Language page, select Visual C# and Generate a new key file to sign the assembly, and then click Next.
5. On the Basic VSPackage Information page, click Next.
6. On the Select VSPackage Options page, click Next.
7. On the Command Options page, click Next.
8. On the Select Test Options page, clear both options and then click Finish.
The wizard creates a VSPackage project that has the settings that you specified.
Creating a Simple project Template
You will modify this basic VSPackage to implement the new .myproj project type. To create a project that is based on the .myproj project type, the Visual Studio New Project wizard has to know which files, resources, and references to add to the new project. You provide this information by putting project files in a project template folder. When a project is created by using the .myproj project type in the New Project wizard, the project files are copied to the new project. Some of these project files may contain template parameters that can be updated when the file is copied to a new project.
1. In Solution Explorer, right-click the SimpleProject project node, point to Add, and then click New Folder. Name the folder Templates.
2. In the Templates folder, add a folder named Projects.
3. In the Projects folder, add a folder named SimpleProject.
4. Right-click the SimpleProject folder, point to Add, and then click New Item. Add an Icon File named SimpleProject.ico. Click Add to open the icon editor.
5. Make the icon distinctive. This icon will appear in the New Project wizard later in the walkthrough.
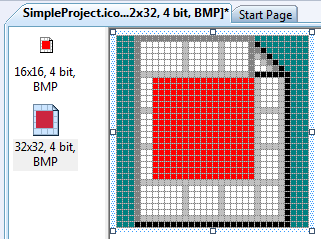
6. Save the icon and close the icon editor.
7. In the SimpleProject folder, add a Class item named Program.cs. Click Add to open the code editor.
8. Replace the existing code by using the following lines.
using System;
using System.Collections.Generic;
using System.Text;
namespace $nameSpace$
{
public class $className$
{
static void Main(string[] args)
{
Console.WriteLine("Hello VSX!!!");
Console.ReadKey();
}
}
}
Note: Later in the walkthrough, you can learn how to programmatically change the template parameters $nameSpace$ and $className$ during new project generation.
9. Save the file and close the code editor.
10. In the Properties folder, copy AssemblyInfo.cs and then paste it in the Projects\SimpleProject folder.
11. Open the Projects\SimpleProject folder. In the Properties window, set the Build Action of both AssemblyInfo.cs and Program.cs to None.
12. In Solution Explorer, right-click the SimpleProject folder, point to Add, and then click New Item. Add a XML File item named SimpleProject.myproj. Click Add to open the XML editor.
Note: myproj is the file name extension for all projects of this type. If you want to change it, you must change it everywhere it is mentioned in the walkthrough.
13. Replace the existing content by using the following lines.
<Project DefaultTargets="Build" xmlns="https://schemas.microsoft.com/developer/msbuild/2003">
<PropertyGroup>
<Configuration Condition=" '$(Configuration)' == '' ">Debug</Configuration>
<SchemaVersion>2.0</SchemaVersion>
<ProjectGuid>{99999999-9999-9999-9999-999999999999}</ProjectGuid>
<OutputType>Exe</OutputType>
<RootNamespace>MyRootNamespace</RootNamespace>
<AssemblyName>MyAssemblyName</AssemblyName>
<EnableUnmanagedDebugging>false</EnableUnmanagedDebugging>
</PropertyGroup>
<PropertyGroup Condition=" '$(Configuration)' == 'Debug' ">
<DebugSymbols>true</DebugSymbols>
<OutputPath>bin\Debug\</OutputPath>
</PropertyGroup>
<PropertyGroup Condition=" '$(Configuration)' == 'Release' ">
<DebugSymbols>false</DebugSymbols>
<OutputPath>bin\Release\</OutputPath>
</PropertyGroup>
<ItemGroup>
<Reference Include="mscorlib" />
<Reference Include="System" />
<Reference Include="System.Data" />
<Reference Include="System.Xml" />
</ItemGroup>
<ItemGroup>
<Compile Include="AssemblyInfo.cs">
<SubType>Code</SubType>
</Compile>
<Compile Include="Program.cs">
<SubType>Code</SubType>
</Compile>
</ItemGroup>
<Import Project="$(MSBuildBinPath)\Microsoft.CSharp.targets" />
</Project>
This project template describes a basic Visual C# project that has both a Debug configuration and a Release configuration. The project includes two source files, AssemblyInfo.cs and Program.cs, and several assembly references. When a project is created from the template, the ProjectGuid value is automatically replaced by a new GUID.
14. Save the file and close the XML editor.
In Solution Explorer, the expanded Templates folder should appear as follows:
· Templates
o Projects
§ SimpleProject
· AssemblyInfo.cs
· Program.cs
· SimpleProject.ico
· SimpleProject.myproj
Creating a Skeletal Project Factory
You must tell Visual Studio the location of your project template folder. To do this, add an attribute to the VSPackage class that implements the project factory so that the template location is written to the system registry when the VSPackage is built. Start by creating a simple project factory that is identified by a project factory GUID. Use the ProvideProjectFactory attribute to connect the project factory to the SimpleProjectPackage class.
1. Open Guids.cs in the code editor.
2. On the Tools menu, click Create GUID.
3. Create a GUID for your project factory, or use the one in the following example. Add the GUID to the GuidList. The GUID must be in both Guid form and string form. The resulting code should resemble the following example.
static class GuidList
{
public const string guidSimpleProjectPkgString =
"96bf4c26-d94e-43bf-a56a-f8500b52bfad";
public const string guidSimpleProjectCmdSetString =
"72c23e1d-f389-410a-b5f1-c938303f1391";
public const string guidSimpleProjectFactoryString =
"471EC4BB-E47E-4229-A789-D1F5F83B52D4";
public static readonly Guid guidSimpleProjectCmdSet =
new Guid(guidSimpleProjectCmdSetString);
public static readonly Guid guidSimpleProjectFactory =
new Guid(guidSimpleProjectFactoryString);
};
4. Save the file and close the editor.
5. In Solution Explorer, right-click the SimpleProject project node, point to Add, and then click New Item. Add a Class named SimpleProjectFactory.cs. Click Add to open the code editor.
6. Add the following using statement after the other using statements.
using System.Runtime.InteropServices;
7. Add a Guid attribute to the SimpleProjectFactory class. The value of the attribute is the new project factory GUID.
[Guid(GuidList.guidSimpleProjectFactoryString)]
class SimpleProjectFactory
8. Rebuild the solution and verify that it builds without errors.
Registering the Project Template
Now you can register your project template.
1. Open SimpleProjectPackage.cs in the code editor.
2. Add a ProvideProjectFactory attribute to the SimpleProjectPackage class, as follows.
[ProvideProjectFactory(
typeof(SimpleProjectFactory),
"Simple Project",
"Simple Project Files (*.myproj);*.myproj",
"myproj", "myproj",
@"..\..\Templates\Projects\SimpleProject",
LanguageVsTemplate = "SimpleProject",
NewProjectRequireNewFolderVsTemplate = false)]
[Guid(GuidList.guidSimpleProjectPkgString)]
public sealed class SimpleProjectPackage : Package
3. Rebuild the solution and verify that it builds without errors. Rebuilding registers the project template.
The ProvideProjectFactory attribute has the following syntax.
public ProvideProjectFactoryAttribute(
Type factoryType,
string name,
string displayProjectFileExtensionsResourceID,
string defaultProjectExtension,
string possibleProjectExtensions,
string projectTemplatesDirectory
)
The parameters defaultProjectExtension and possibleProjectExtensions are set to the project file name extension (.myproj). The projectTemplatesDirectory parameter is set to the relative path of the Templates folder. RegPkg.exe converts this to a full path to register it in the system registry.
Examining the Template Registration
Run regedit.exe and examine the system registry key.
HKEY_CURRENT_USER\Software\Microsoft\VisualStudio\9.0Exp\Configuration\Projects\{471EC4BB-E47E-4229-A789-D1F5F83B52D4}
Note: The GUID in the \Projects\ key should match the value of GuidList.guidSimpleProjectFactoryString in the earlier example.
Value Name |
Type |
Value Data |
(Default) |
REG_SZ |
SimpleProjectFactory |
DefaultProjectExtension |
REG_SZ |
myproj |
DisplayName |
REG_SZ |
Simple Project |
DisplayProjectFileExtensions |
REG_SZ |
Simple Project Files (*.myproj);*.myproj |
Language(VsTemplate) |
REG_SZ |
SimpleProject |
Package |
REG_SZ |
{96bf4c26-d94e-43bf-a56a-f8500b52bfad} |
PossibleProjectExtensions |
REG_SZ |
myproj |
ProjectTemplatesDir |
REG_SZ |
D:\SimpleProject\...\Templates\Projects\SimpleProject |
The value data is obtained by reflecting over the VSPackage assembly, especially the ProvideProjectFactory attribute. The Package value data is obtained by reflecting the SimpleProjectPackage class Guid attribute, whose value is given by GuidList.guidSimpleProjectPkgString. The value of your Package may differ.
The ProjectTemplatesDir value is the full path of the \Templates\Projects\SimpleProject\ folder that you created for the project. This folder holds the project template files that are copied and expanded when a project of type .myproj is created. Visual Studio uses this path to display the new project icon and additional information in the New Project dialog box.
Testing the Template Registration
1. In Visual Studio, press F5 to start a new instance of Visual Studio in the experimental hive.
2. On the File menu, point to New, and then click Project.
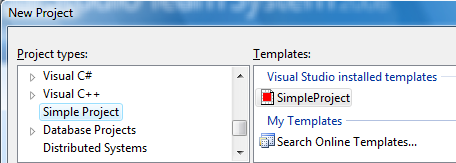
In the New Project dialog box, select the SimpleProject project type.
The SimpleProject icon appears under Visual Studio installed templates.
3. Close the instance of Visual Studio that is running in the experimental hive.
Now you have a project factory that can demonstrate registration, but it cannot yet create a project. The project package and project factory work together to create and initialize a project.
Initializing the Project Factory
To implement the connection between the project package and project factory, complete these tasks:
· To the solution, add links to the source-code files for the Microsoft.VisualStudio.Package Project framework. This framework is an extension of the Managed Package Framework (MPF). The Project framework is provided only as source code.
· Derive SimpleProjectPackage from Microsoft.VisualStudio.Package.ProjectPackage.
· Create a SimpleProjectFactory and register it with Visual Studio by using the Microsoft.VisualStudio.Package.RegisterProjectFactory method.
· Derive SimpleProjectPackage from Microsoft.VisualStudio.Package.ProjectPackage.
· Pass to the SimpleProjectFactory constructor a reference to the SimpleProjectPackage. This reference is cached for later use in setting a service provider site. For more information about services, see Services.
1. Open Visual Studio.
2. In Solution Explorer, right-click the SimpleProject node and then click Unload Project.
3. Right-click the SimpleProject node and then click Edit SimpleProject.csproj.
4. In the XML editor, add the following ProjectBasePath element after the RegisterWithCodebase element. Do not break the line that contains the ProjectBasePath element.
<RegisterWithCodebase>true</RegisterWithCodebase>
< ProjectBasePath > $(VSSDK90Install)VisualStudioIntegration\Common\Source\CSharp\Project</ProjectBasePath>
5. Add the following Import element after the existing Import elements.
<Import Project="$(MSBuildBinPath)\Microsoft.CSharp.targets" />
<Import Project="$(MSBuildExtensionsPath)\Microsoft\
VisualStudio\v9.0\VSSDK\Microsoft.VsSDK.targets" />
< ImportProject = "$(ProjectBasePath)\ProjectBase.Files" />
6. Save the project file and close the editor.
7. Right-click the SimpleProject node, and then click Reload Project.
Solution Explorer should now display a ProjectBase folder.

8. In the Solution Explorer, right-click the References node, and add the following .NET references.
· EnvDTE (<Visual Studio installation path>\Common7\IDE\PublicAssemblies\EnvDTE.dll)
· Microsoft.VisualStudio.Designer.Interfaces
9. In the SimpleProjectPackage.cs file, add the following using statement after the existing using statements.
using Microsoft.VisualStudio.Package;
10. Derive the SimpleProjectPackage class from Microsoft.VisualStudio.Package.ProjectPackage.
public sealed class SimpleProjectPackage : ProjectPackage
11. Add the following line to the SimpleProjectPackage.Initialize method, just after base.Initialize.
base.Initialize();
this.RegisterProjectFactory(new SimpleProjectFactory(this));
12. In SimpleProjectFactory.cs, add the following using statement after the existing using statements.
using Microsoft.VisualStudio.Package;
13. Derive the SimpleProjectFactory class from ProjectFactory.
class SimpleProjectFactory : ProjectFactory
14. Add the following dummy method to the SimpleProjectFactory class. You will implement this method in a later section.
protected override ProjectNode CreateProject()
{
return null;
}
15. Add the following constructor to the SimpleProjectFactory class. This SimpleProjectPackage reference is cached in a private field so that it can be used in setting a service provider site.
private SimpleProjectPackage package;
public SimpleProjectFactory(SimpleProjectPackage package)
: base(package)
{
this.package = package;
}
16. Rebuild the solution and verify that it builds without errors.
Testing the Project Factory Implementation
1. In the SimpleProjectFactory.cs file, set a breakpoint on the following line in the SimpleProjectFactory constructor.
this.package = package;
2. Press F5 to start a new instance of Visual Studio in the experimental hive.
3. On the File menu, point to New, and then click Project.
4. In the New Project dialog box, select the SimpleProject project type and then click OK.
Execution stops at the breakpoint.
5. Press SHIFT+F5 to stop debugging.
Extending the Project Node Class
Now you can implement the SimpleProjectNode class, which derives from the ProjectNode class. The ProjectNode base class handles the following tasks of project creation:
· Copies the project template file, SimpleProject.myproj, to the destination folder. The copy is renamed according to the name entered in the New Project wizard. The ProjectGuid property value is replaced with a new GUID.
· Traverses the MSBuild elements of the project template file, SimpleProject.myproj, and looks for Compile elements. For each Compile target file, copies the file to the new project destination folder.
The derived SimpleProjectNode class handles these tasks:
· Icons for project and file nodes in Solution Explorer can be created or selected.
· Additional project template parameter substitutions can be specified.
1. Right-click the SimpleProject project node, point to Add, and then click New Item. Add a Class named SimpleProjectNode.cs. Click Add to open the code editor.
2. Replace the existing code with the following code.
using System;
using System.Collections.Generic;
using Microsoft.VisualStudio.Package;
namespace Company.SimpleProject
{
public class SimpleProjectNode : ProjectNode
{
private SimpleProjectPackage package;
public SimpleProjectNode(SimpleProjectPackage package)
{
this.package = package;
}
public override Guid ProjectGuid
{
get { return GuidList.guidSimpleProjectFactory; }
}
public override string ProjectType
{
get { return "SimpleProjectType"; }
}
public override void AddFileFromTemplate(
string source, string target)
{
this.FileTemplateProcessor.UntokenFile(source, target);
this.FileTemplateProcessor.Reset();
}
}
}
This SimpleProjectNode class implementation has the following overridden methods:
● ProjectGuid, which returns the project factory GUID.
● ProjectType, which returns the localized name of the project type.
● AddFileFromTemplate, which copies selected files from the template folder to the destination project. This method is explained in a later section.
The SimpleProjectNode constructor, like the SimpleProjectFactory constructor, caches a SimpleProjectPackage reference in a private field for later use.
To connect the SimpleProjectFactory class to the SimpleProjectNode class, you must instantiate a new SimpleProjectNode in the SimpleProjectFactory.CreateProject method and cache it in a private field for later use.
3. In the SimpleProjectFactory.cs file, add the following using statement after the existing using statements.
using IOleServiceProvider =
Microsoft.VisualStudio.OLE.Interop.IServiceProvider;
4. Replace the SimpleProjectFactory.CreateProject method by using the following code.
protected override ProjectNode CreateProject()
{
SimpleProjectNode project = new SimpleProjectNode(this.package);
project.SetSite((IOleServiceProvider)
((IServiceProvider)this.package).GetService(
typeof(IOleServiceProvider)));
return project;
}
5. Rebuild the solution and verify that it builds without errors.
Testing the Project Node Class
1. Press F5 to start a new instance of Visual Studio in the experimental hive.
2. On the File menu, point to New, and then click Project.
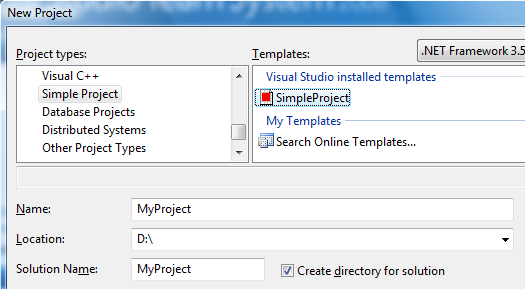
3. In the New Project dialog box, under Visual Studio installed templates, select SimpleProject.
4. Select Create Directory for Solution, and type MyProject in the Name box.
5. Type a location for the solution, for example, D:\.
6. Click OK.
Visual Studio calls your project factory to create a project.
7. Close the instance of Visual Studio that is running in the experimental hive.
Adding a Custom Project Node Icon
The project node icon in the earlier section is a default icon. You can change it to a custom icon.
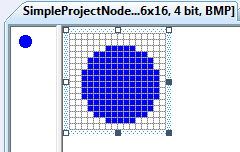
1. In the Solution Explorer, right-click the Resources folder, point to Add, and then click New Item. Add a Bitmap File named SimpleProjectNode.bmp. Click Add to open the bitmap editor.
2. Reduce the bitmap to 16 by 16 pixels. Make the bitmap distinctive.
3. In the Properties window, change the Build action of the bitmap to Embedded Resource.
4. In SimpleProjectNode.cs, add the following using statements after the existing using statements.
using System.Drawing;
using System.Windows.Forms;
5. Add the following static constructor to the SimpleProjectNode class.
private static ImageList imageList;
static SimpleProjectNode()
{
imageList =
Utilities.GetImageList(
typeof(SimpleProjectNode).Assembly.GetManifestResourceStream(
"Company.SimpleProject.Resources.SimpleProjectNode.bmp"));
}
During static construction, SimpleProjectNode retrieves the project node bitmap from the assembly manifest resources and caches it in a private field for later use. Notice the syntax of the Assembly.GetManifestResourceStream image path. To see the names of the manifest resources embedded in an assembly, use the Assembly.GetManifestResourceNames method. When this method is applied to the SimpleProject assembly, the results are as follows:
· Company.SimpleProject.Resources.resources
· Microsoft.VisualStudio.Package.Project.resources
· Company.SimpleProject.VSPackage.resources
· Resources.imagelis.bmp
· Microsoft.VisualStudio.Package.DontShowAgainDialog.resources
· Microsoft.VisualStudio.Package.SecurityWarningDialog.resources
· Company.SimpleProject.Resources.SimpleProjectNode.bmp
6. Add the following property to the beginning of the SimpleProjectNode class.
internal static int imageIndex;
public override int ImageIndex
{
get { return imageIndex + 0; }
}
7. Replace the instance constructor by using the following code.
public SimpleProjectNode(SimpleProjectPackage package)
{
this.package = package;
imageIndex = this.ImageHandler.ImageList.Images.Count;
foreach (Image img in imageList.Images)
{
this.ImageHandler.AddImage(img);
}
}
During instance construction, the ProjectNode base class loads Resources.imagelis.bmp, in which are embedded commonly used 16 x 16 bitmaps from Resources\imagelis.bmp. This bitmap list is made available to SimpleProjectNode as ImageHandler.ImageList. SimpleProjectNode appends the project node bitmap to the list. The offset of the project node bitmap in the image list is cached for later use as the value of the public ImageIndex property. Visual Studio uses this property to determine which bitmap to display as the project node icon.
Testing the Custom Project Node Icon
1. Close Visual Studio.
2. Delete the MyProject solution.
3. Open Visual Studio.
4. Press F5 to start a new instance of Visual Studio in the experimental hive.
5. On the File menu, point to New, and then click Project.
6. In the New Project dialog box, under Visual Studio installed templates, select SimpleProject.
7. Select Create Directory for Solution, and type MyProject in the Name box.
8. Type a location for the solution, for example, D:\.
9. Click OK.
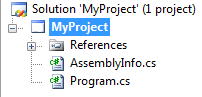
The wizard creates a Visual Studio project. Notice that SimpleProjectNode.bmp is used as the project node icon.

10. Open Program.cs in the code editor. You should see source code that resembles the following code.
using System;
using System.Collections.Generic;
using System.Text;
namespace $nameSpace$
{
public class $className$
{
static void Main(string[] args)
{
Console.WriteLine("Hello VSX!!!");
Console.ReadKey();
}
}
}
Notice that the template parameters $nameSpace$ and $className$ do not yet have new values. You can implement template parameter substitution in the next section.
11. Press SHIFT+F5 to stop debugging.
Simple Template Parameter Substitution
In an earlier procedure, you registered the project template with Visual Studio by using the ProvideProjectFactory attribute. Registering the path of a template folder in this manner lets you enable basic template parameter substitution by overriding and expanding the ProjectNode.AddFileFromTemplate class. For more information, see New Project Generation: Under the Hood, Part Two.
To replace the values of template parameters $nameSpace$ and $className$ in the Program.cs file template, you must add code to the AddFileFromTemplate class.
1. In SimpleProjectNode.cs, add this using statement to the end of the using statements:
using System.IO;
2. Replace the AddFileFromTemplate method by using the following code.
public override void AddFileFromTemplate(
string source, string target)
{
string nameSpace =
this.FileTemplateProcessor.GetFileNamespace(target, this);
string className = Path.GetFileNameWithoutExtension(target);
this.FileTemplateProcessor.AddReplace("$nameSpace$", nameSpace);
this.FileTemplateProcessor.AddReplace("$className$", className);
this.FileTemplateProcessor.UntokenFile(source, target);
this.FileTemplateProcessor.Reset();
}
2. Set a breakpoint in the method, just after the nameSpace assignment statement.
The assignment statements determine reasonable values for a namespace and a new class name. The two ProjectNode.FileTemplateProcessor.AddReplace method calls replace the corresponding template parameter values by using these new values.
Testing the Template Parameter Substitution
1. Close Visual Studio.
2. Delete the MyProject solution.
3. Open Visual Studio.
4. Press F5 to start a new instance of Visual Studio in the experimental hive.
5. On the File menu, point to New, and then click Project.
6. In the New Project dialog box, under Visual Studio installed templates, select SimpleProject.
7. Select Create Directory for Solution, and type MyProject in the Name box.
8. Type a location for the solution, for example, D:\.
9. Click OK.
Execution stops at the breakpoint in the AddFileFromTemplate method. Examine the values for the nameSpace and className.
· nameSpace is given the value of the <RootNamespace> element in the \Templates\Projects\SimpleProject\SimpleProject.myproj project template file. In this case, the value is “MyRootNamespace”.
· className is given the value of the class source file name, without the file name extension. In this case, the first file to be copied to the destination folder is AssemblyInfo.cs; therefore, className is “AssemblyInfo”.
10. Remove the breakpoint and press F5 to continue execution.
The wizard creates a Visual Studio project.
11. Open Program.cs in the code editor. You should see source code that resembles the following code.
using System;
using System.Collections.Generic;
using System.Linq;
using System.Text;
namespace MyRootNamespace
{
public class Program
{
static void Main(string[] args)
{
Console.WriteLine("Hello VSX!!!");
Console.ReadKey();
}
}
}
Notice that the namespace is “MyRootNamespace” and the class name is “Program”.
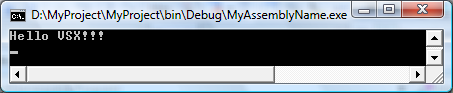
12. In the instance of Visual Studio that is running in the experimental hive, press F5. The new project should compile, run, and display “Hello VSX!!!” in the console window.