Manage Azure Stack HCI clusters using Windows Admin Center
Applies to: Azure Stack HCI, versions 22H2 and 21H2; Windows Server 2022, Windows Server 2019
This article details how Windows Admin Center can be used to manage your Azure Stack HCI clusters, specifically using the Cluster Manager feature in Windows Admin Center.
View the cluster dashboard
The Cluster Manager Dashboard or cluster dashboard displays overview information about the cluster, such as cluster health and performance.

To view your cluster dashboard:
In Windows Admin Center, under All connections select the cluster that you want to manage, then select Connect.
In the Cluster Manager view, from the Tools pane on the left, select Dashboard.
You can view the following details:
- Cluster event alerts
- List of servers joined, virtual machines running, and disk drives and volumes available on the cluster
- Total CPU, memory, and storage usage for the cluster
- Total cluster performance including input/output operations/second (IOPS) and average latency per milliseconds
- Azure Stack HCI registration and Arc enabled servers
Change storage settings
There are currently two storage settings that can be applied to your cluster. To access these components, follow the steps below:
In Windows Admin Center, under All connections select the cluster that you want to manage, then select Connect.
In the Cluster Manager view, from the Tools pane on the left, select Settings.
To change your in-memory cache, select In-memory cache and set the memory per server to cache reads. Note, writes can't be cached in memory. For more information, see Understanding the cache in Azure Stack HCI.

To change and view the properties of the Storage pool, including the friendly name that Storage Spaces Direct uses, health status, and more, select Storage Spaces and pools and locate the Storage pool section. These settings are applicable for stretched clusters also.
Status - displays the status of the storage pool cluster resource.
Health status - displays the health of the storage pool.
Storage pool friendly name - displays the friendly name that Storage Spaces Direct uses. Change the default friendly name, if desired.
Storage pool version - displays the current storage pool version. Increase the storage pool version after a successful Azure Stack HCI feature update or Windows Server upgrade. Always use the latest available storage pool version unless you plan to revert the update. Once increased, you cannot decrease the storage pool version.
Default provisioning type - displays the default provisioning type. For more information on provisioning types, see Storage thin provisioning in Azure Stack HCI.
Capacity alert threshold - specifies the level at which a capacity alert is triggered and displayed on the system's dashboard. This alert is generated when the pool reaches the specified threshold, indicating that it is nearing its capacity limit.

To change the properties of the Storage bus layer, select Storage Spaces and pools and locate the Storage bus layer section. These settings are applicable for stretched clusters also.
Cache State - enable or disable persistent cache.
Cache mode for HDD - change the cache mode for HDD drives.
Cache mode for SSD - change the cache for SSD drives.


Change cluster settings
There are several general settings that can be applied to your cluster. Here you can view properties, node shut down behavior, VM load balancing, cluster witness, and affinity rules.
In Windows Admin Center, under All connections select the cluster that you want to manage, then select Connect.
In the Cluster Manager view, from the Tools pane on the left, select Settings.
To access comprehensive cluster, operating system, and hardware related information, select Properties.

To control node shutdown behavior, select Node shutdown behavior and ensure the checkbox is enabled. This setting moves any virtual machines from the node first to allow graceful node shutdown.

To automatically load-balance virtual machines, across the cluster, select Virtual machine load balancing and do the following:
For Balance virtual machines select the appropriate action
For Aggressiveness select the appropriate behavior
For information on how load-balance virtual machines works, see Virtual Machine Load Balancing overview.

To choose a quorum witness type, select Witness. Then for Witness type choose one of the following:
Cloud witness - to use an Azure cloud resource as witness
Disk witness - to use a disk resource as witness (don't use for stretched clusters or clusters using Azure Stack HCI or Storage Spaces Direct)
File share witness - to use a file share as witness
For detailed information on how to set up a witness, see Set up a cluster witness. Also, see Understanding cluster and pool quorum on Azure Stack HCI.

To use affinity rules to control virtual machine placement, across host servers and sites, select Affinity rules. Then select Create rule. For detailed information on how set up rules, see Create server and site affinity rules for VMs.


Change Hyper-V settings
There are several Hyper-V host settings that can be applied to your cluster.
In Windows Admin Center, under All connections select the cluster that you want to manage, then select Connect.
In the Cluster Manager view, from the Tools pane on the left, select Settings.
To set virtual hard disk and virtual machine paths, select General and then use the following settings:
Virtual Hard Disks Path - specify the default folder for storing virtual hard disk files
Virtual Machines Path - specify the default folder for storing the virtual machine configuration files

To allow redirection of local devices and resources from virtual machines, select Enhanced Session Mode.

Note
Enhanced Session Mode connections require a supported guest operating system.
To allow virtual machines to span physical NUMA nodes, select NUMA Spanning. Non-uniform memory architecture (NUMA) spanning can provide a virtual machine with more memory than what is available on a single NUMA node.

To indicate the number of VMs that can be moved simultaneously, while running (live migrated), select Live Migration. Note, the default value is 1. To change the default, input a new number and specify the following details:
For Authentication Protocol select either CredSSP or Kerberos
For Performance Options select either Compression or SMB. Compressed data is sent over a TCP/IP connection
Enable the Use any network checkbox to use any available network on a node to perform the migration

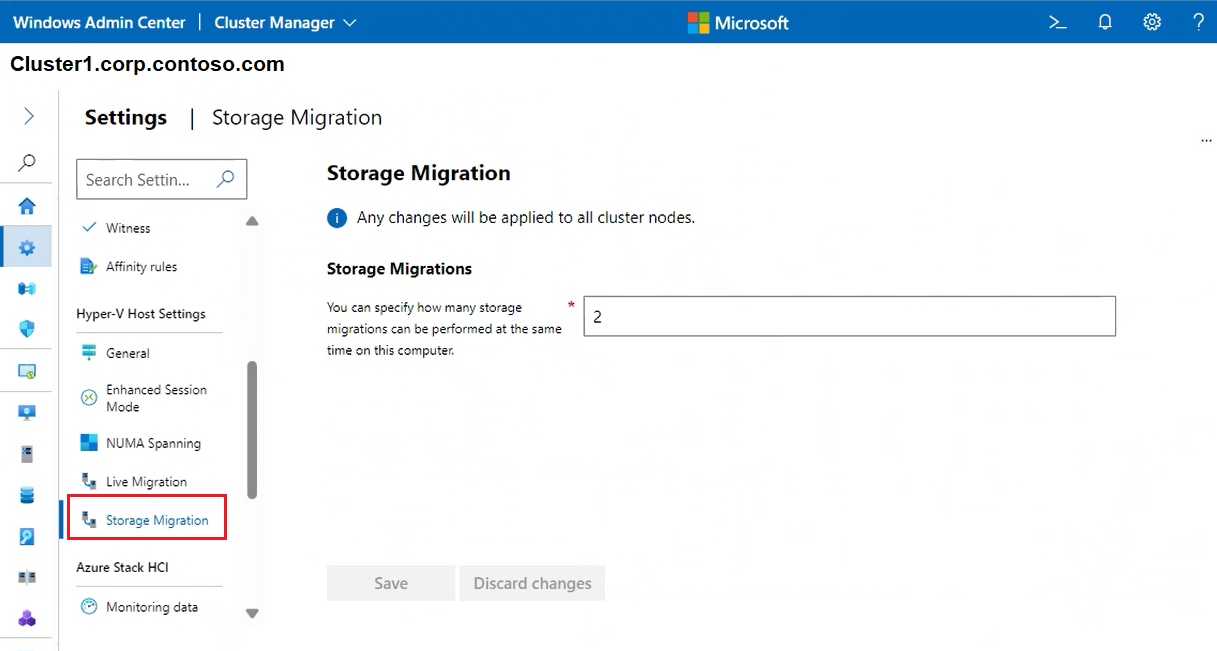
To indicate the number of storage migrations that can be performed at the same time, select Storage Migration and then input a number.


Change Azure Stack HCI settings
There are several Azure Stack HCI settings that you can apply to your cluster.
In Windows Admin Center, under All connections select the cluster that you want to manage, then select Connect.
In the Cluster Manager view, from the Tools pane on the left, select Settings.
To change how often log data is collected from your cluster, if monitoring capabilities are enabled, select Monitoring data. For information on how to enable log collection, see How do I enable log collection in Azure.

To change the Service Health data level, navigate to the Azure Stack HCI cluster in Azure Portal. Select Settings, then Configuration, and Service Health data.

Note
This change can only be performed from Azure Portal. By default, Azure Stack HCI collects basic system metadata necessary to keep its service current, secure, and properly operating. For most systems, this data level doesn't need to be changed.
To enable VM provisioning through the Azure portal on HCI, a Resource Bridge is required. The resource bridge creates Azure Resource Manager entities for VMs including disks, images, interfaces, networks, custom locations, and cluster extensions. For more information, see VM provisioning through Azure portal on Azure Stack HCI (preview).

To provision VMs on your Azure Stack HCI cluster from the Azure portal, select Azure Arc VM setup for Azure Stack HCI. For more information, see VM provisioning through Azure portal on Azure Stack HCI (preview)

To automatically activate all Windows Server VMs running on your cluster, utilize Activate Windows Server VMs. For more detail, see Activate Windows Server VMs using Automatic Virtual Machine Activation

To utilize Azure-exclusive workloads, on Azure Stack HCI that can work outside of the cloud, select Azure benefits. For more detail, see Azure Benefits on Azure Stack HCI.

To opt in as a customer to install the next version of the Azure Stack HCI OS, before it's officially released, select Join the preview channel. For more information on this program, see Join the Azure Stack HCI preview channel.


Next steps
For more detailed information, see also:
Feedback
Coming soon: Throughout 2024 we will be phasing out GitHub Issues as the feedback mechanism for content and replacing it with a new feedback system. For more information see: https://aka.ms/ContentUserFeedback.
Submit and view feedback for