Customize the neutral branding in your external tenant
After creating a new external tenant, you can customize the end-user experience. Create a custom look and feel for users signing in to your apps by configuring Company branding settings for your tenant. With these settings, you can add your own background images, colors, company logos, and text to customize the sign-in experiences across your apps.
You can also create user flows programmatically using the Company Branding Graph API.
Tip

To try out this feature, go to the Woodgrove Groceries demo and start the “Company branding” use case.
Prerequisites
- If you haven't already created your own Microsoft Entra external tenant, create one now.
- Register an application.
- Create a user flow
- Review the file size requirements for each image you want to add. You may need to use a photo editor to create the right-sized images. The preferred image type for all images is PNG, but JPG is accepted.
Branding elements
By default, Microsoft offers a neutral branding for your tenant that can be personalized to suit your company's specific requirements. This default branding doesn't include any pre-existing Microsoft branding. If the custom company branding fails to load, the sign-in page will automatically switch back to this neutral branding. Additionally, each custom branding property can be manually added to the custom sign-in page.
You can customize this neutral branding with a custom background image or color, favicon, layout, header, and footer. You can also customize the sign-in form and add custom text to different instances or upload custom CSS. The following image displays the neutral default branding of the tenant. You can find the numbered branding elements and their corresponding descriptions after the image.

- Neutral background.
- Favicon.
- Banner logo.
- Footer as a page layout element.
- Footer hyperlinks, such as Privacy & cookies, Terms of use.
How to customize the default sign-in experience
Before you customize any settings, the neutral default branding appears in your sign-in, sign-up and sign-out pages. You can customize this default experience with a custom background image or color, favicon, layout, header, and footer. You can also upload a custom CSS.
Sign in to the Microsoft Entra admin center as at least a Organizational Branding Administrator.
If you have access to multiple tenants, use the Settings icon
 in the top menu to switch to the external tenant you created earlier from the Directories + subscriptions menu.
Browse to Company Branding either by using the search bar or by navigating to Home > Tenant overview > Customize branding.

On the Default sign-in tab select Edit.
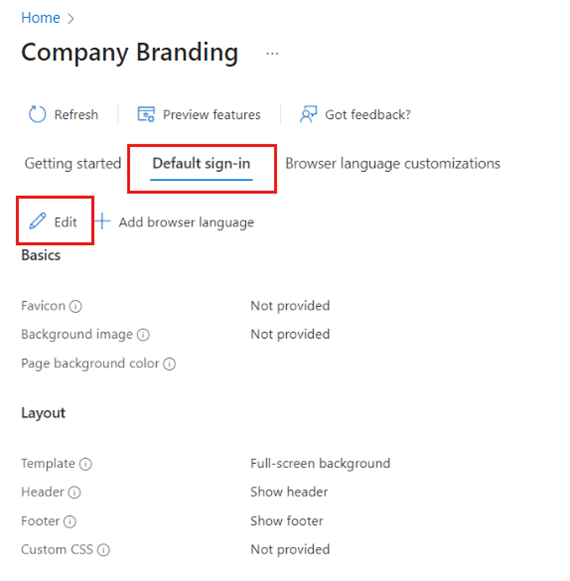
To customize the sign-in page background and layout
On the Basics tab, modify any of the background elements.
Favicon – The icon that displays in the web browser tab.
Background image – The large image that displays on the sign-in page. If you upload an image, it scales and crop to fill the browser window.
Page background color – The color that replaces the background image whenever the image can’t be loaded, for example due to connection latency.

Select Next: Layout if you would like to continue customizing or Review + save if you would like to save your changes.
On the Layout tab, select the placement of web page elements on the sign-in page.
Template – Choose whether the background displays full-screen or partial-screen.
Header – Show or hide the header.
Footer – Show or hide the footer.
Custom CSS – Upload your own CSS file to replace default Microsoft styling with your own styling for: color, font, text size, position of elements, and displays for different devices and screen sizes.

Select Next: Header if you would like to continue customizing or Review + save if you would like to save your changes.


To customize the logo, privacy link, and terms of use
On the Header tab, select the logo to display in the header of the sign-in page.
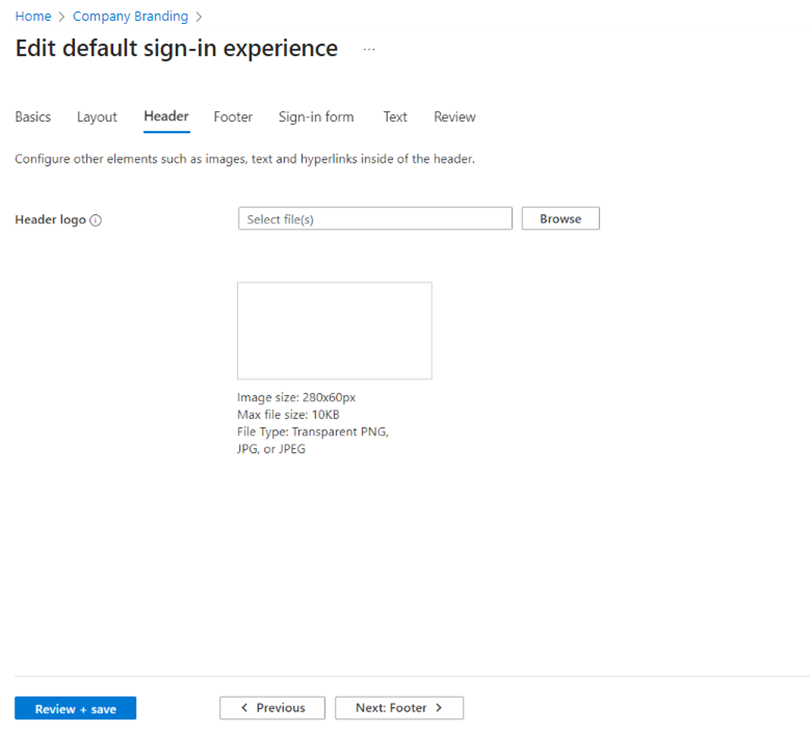
Select Next: Footer if you would like to continue customizing or Review + save if you would like to save your changes.
On the Footer tab, you can customize the URLs and link text for the privacy and terms of use hyperlinks that appear in the footer of the sign-in page.
Privacy & Cookies – Select the checkbox next to Privacy & Cookies to display this hyperlink in the footer. The Microsoft default privacy link displays unless you enter your own hyperlink Display text and URL.
Terms of Use – Select the checkbox next to Terms of Use to display this hyperlink in the footer. The Microsoft terms of use link displays unless you enter your own hyperlink Display text and URL.
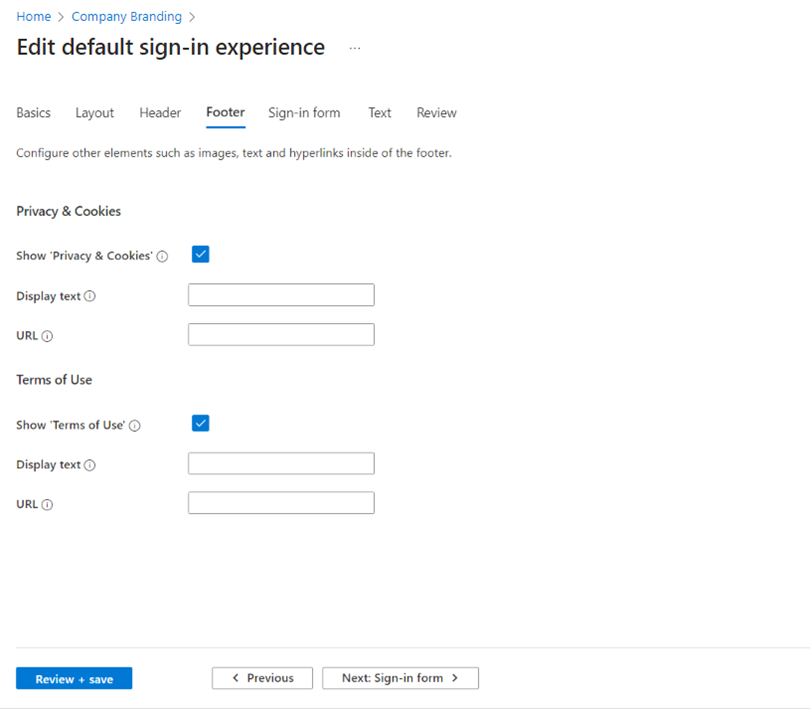
Select Next: Sign-in form if you would like to continue customizing or Review + save if you would like to save your changes.

To customize the sign-in form
On the Sign-in form tab, configure elements of the sign-in form:
Banner logo – Displays on the sign-in page and in the user’s access panel.
Square logo (light theme) – Represents user accounts in your organization.
Square logo (dark theme) – If the light theme square logo displays poorly on dark backgrounds, you can upload a logo to be used in its place when dark backgrounds are used.

Scroll to the lower half of the page and configure more elements of the sign-in form:
Username hint text – The hint text that displays in the username input field on the sign-in page (not recommended if guest users sign in to your app).
Sign-in page text – Appears at the bottom of the sign-in and sign-up pages. Guidelines:
- 1,024 characters maximum
- Don't include sensitive information
- Use this syntax to format text:
- Hyperlink:
[text](link) - Bold:
**text** or __text__ - Italics:
*text* or _text_ - Underline:
++text++
- Hyperlink:

To customize self-service password reset
Scroll to the Self-service password reset section to configure options for showing, hiding, or customizing the self-service password reset link on the sign-in page.
- Show self-service password reset – Select this checkbox to display the self-service password link.
- Common URL – Enter a password reset URL to use in place of the default Microsoft link.
- Account collection display text – Enter link text to display in place of the Microsoft default text "Can’t access your account" text.
- Password collection display text – Enter link text to display in place of the Microsoft default "Forgot password" text.
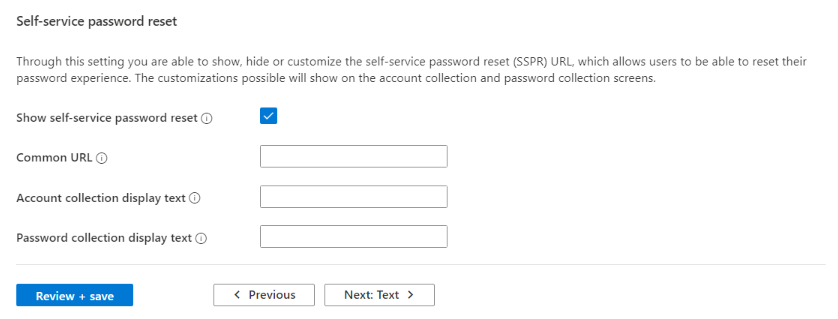
Select Next: Text if you would like to continue customizing or Review + save if you would like to save your changes.

To customize user attributes
For your tenant, you might have different requirements for the information you want to collect during sign-up and sign-in. The tenant comes with a built-in set of information stored in attributes, such as Given Name, Surname, City, and Postal Code. You can create custom attributes in your tenant using the Microsoft Graph API or in the portal under the Text tab in Company Branding.
On the Text tab select Add Custom Text.
Select any of the options:
- Select Attributes to override the default values.
- Select Attribute collection to add a new attribute option that you would like to collect during the sign-up process.
- Select Sign in to add custom text for the sign-in page.
- Select Sign up to add custom text for the sign-in page.
- Select Sign-in/up one time code (SISU OTC) to add a custom title.

Select Next: Review to review all your modifications. Then select Save if you'd like to save your changes or Previous if you want to continue customizing.

Important
In the external tenant, we have two options to add custom text to the sign-up and sign-in experience. The function is available under each user flow during language customization and also under Company branding. Although we have two ways to customize strings (via Company Branding and via User Flows), both ways modify the same JSON file. The most recent change made either via User flows or via Company branding will always override the previous one.
Customize the sign-out experience
You don’t need to customize the sign-out experience for your external tenant. If you’ve customized your branding for the sign-in experience, the sign-out experience will automatically match the sign-in experience. If you haven’t customized the sign-in experience, the sign-out experience will match the default neutral branding in your external tenant.
How to customize the tenant name
You can customize your tenant name in the Microsoft Entra admin center to replace the Microsoft banner logo in the neutral default sign-in experience. The new tenant name also appears in the verification email sent to the user.

Sign in to the Microsoft Entra admin center as at least a Organizational Branding Administrator.
If you have access to multiple tenants, use the Settings icon
in the top menu to switch to the external tenant you created earlier from the Directories + subscriptions menu.In the search bar, type and select Tenant properties.
Edit the Name field.
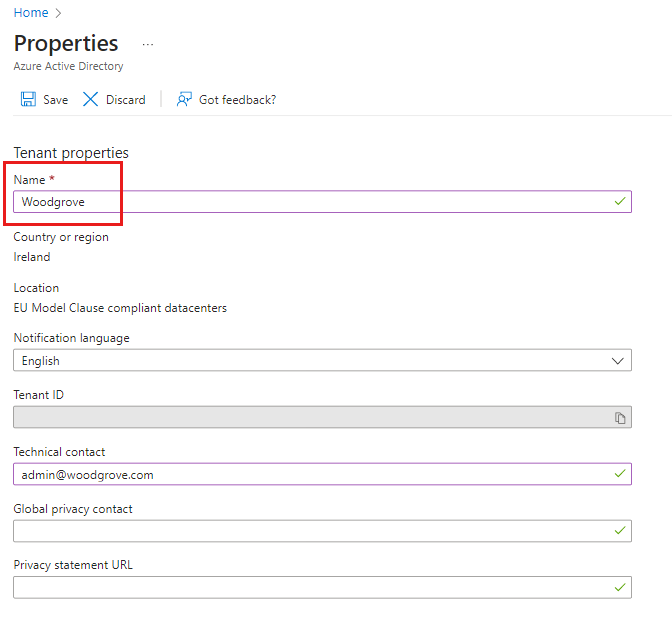
Select Save.
Customize your branding with the Microsoft Graph API
You can use the Microsoft Graph API to customize a few items programmatically. For example, you can use the API to upload a custom background image, change the color of the sign-in page, and add a custom logo. For more information, see the update default branding article.
Next steps
In this article we learned how to customize the look and feel of the customer sign-in and sign-up experience. To learn more about customizing the language of the tenant, see the Language customization article. For an understanding of the differences in workforce tenant branding, see the article How to customize branding for your workforce.
Feedback
Coming soon: Throughout 2024 we will be phasing out GitHub Issues as the feedback mechanism for content and replacing it with a new feedback system. For more information see: https://aka.ms/ContentUserFeedback.
Submit and view feedback for