Tutorial: Add sign-in and sign-out to an ASP.NET Core web application for an external tenant
This tutorial is the final part of a series that demonstrates building an ASP.NET Core web application and prepare it for authentication using the Microsoft Entra admin center. In the part 2 of this series, you created an ASP.NET Core project in Visual Studio Code and configured it for authentication. In this final step, you'll add sign-in and sign-out experiences and sign-in and sign-out of the application.
In this tutorial you'll;
- Add sign-in and sign-out experiences
- Add code to view ID token claims
- Sign-in and sign-out of the application using the user flow
Prerequisites
Add the sign-in and sign out experience
After installing the NuGet packages and adding necessary code for authentication, we need to add the sign-in and sign out experiences. The code reads the ID token claims to check that the user is authenticated and uses User.Claims to extract ID token claims.
In your IDE, navigate to Views/Shared, and create a new file called _LoginPartial.cshtml.
Open _LoginPartial.cshtml and add the following code for adding the sign in and sign out experience.
@using System.Security.Principal

<ul class="navbar-nav">
@if (User.Identity is not null && User.Identity.IsAuthenticated)
{
        <li class="nav-item">
            <span class="nav-link text-dark">Hello @User.Claims.First(c => c.Type == "preferred_username").Value!</span>
        </li>
        <li class="nav-item">
            <a class="nav-link text-dark" asp-area="MicrosoftIdentity" asp-controller="Account" asp-action="SignOut">Sign out</a>
        </li>
}
else
{
        <li class="nav-item">
            <a class="nav-link text-dark" asp-area="MicrosoftIdentity" asp-controller="Account" asp-action="SignIn">Sign in</a>
        </li>
}
</ul>
Next, add a reference to
_LoginPartialin the Layout.cshtml file, which is located in the same folder. It's recommended to place this after thenavbar-collapseclass as shown in the following snippet:<div class="navbar-collapse collapse d-sm-inline-flex flex-sm-row-reverse"> <partial name="_LoginPartial" /> </div>
View ID token claims
The web app is now configured to sign in users with the Microsoft identity platform. The next step is to add code that allows us to view the ID token claims. The app will check that the user is authenticated using User.Identity.IsAuthenticated, and lists out the ID token claims by looping through each item in User.Claims, returning their Type and Value.
Open Views/Home/Index.cshtml and replace the contents of the file with the following snippet:
@{
ViewData["Title"] = "Home Page";
}

<style>
    table {
        border-collapse: collapse;
        width: 100%;
    }
    th, td {
        text-align: justify;
        padding: 8px;
        border-bottom: 1px solid #ddd;
        border-top: 1px solid #ddd;
    }
</style>

<div class="text-center">
    <h1 class="display-4">Welcome</h1>

    @if (@User.Identity is not null && @User.Identity.IsAuthenticated)
    {
        <p>You are signed in! Below are the claims in your ID token. For more information, visit: <a href="https://learn.microsoft.com/azure/active-directory/develop/id-tokens">Microsoft identity platform ID tokens</a></p>
        <table>
            <tbody>

                @foreach (var item in @User.Claims)
                {
                    <tr>
                        <td>@item.Type</td>
                        <td>@item.Value</td>
                    </tr>
                }
            </tbody>
        </table>
    }

    <br />
    <p>Learn about <a href="https://learn.microsoft.com/azure/active-directory/develop/v2-overview">building web apps with Microsoft identity platform</a>.</p>
</div>
Sign-in to the application
Start the application by typing the following in the terminal to launch the
httpsprofile in the launchSettings.json file.dotnet run --launch-profile httpsOpen a new private browser, and enter the application URI into the browser, in this case
https://localhost:7274.To test the sign-up user flow you configured earlier, select No account? Create one.
In the Create account window, enter the email address registered to your external tenant, which will start the sign-up flow as a user for your application.
After entering a one-time passcode from the external tenant, enter a new password and more account details, this sign-up flow is completed.
- If a window appears prompting you to Stay signed in, choose either Yes or No.
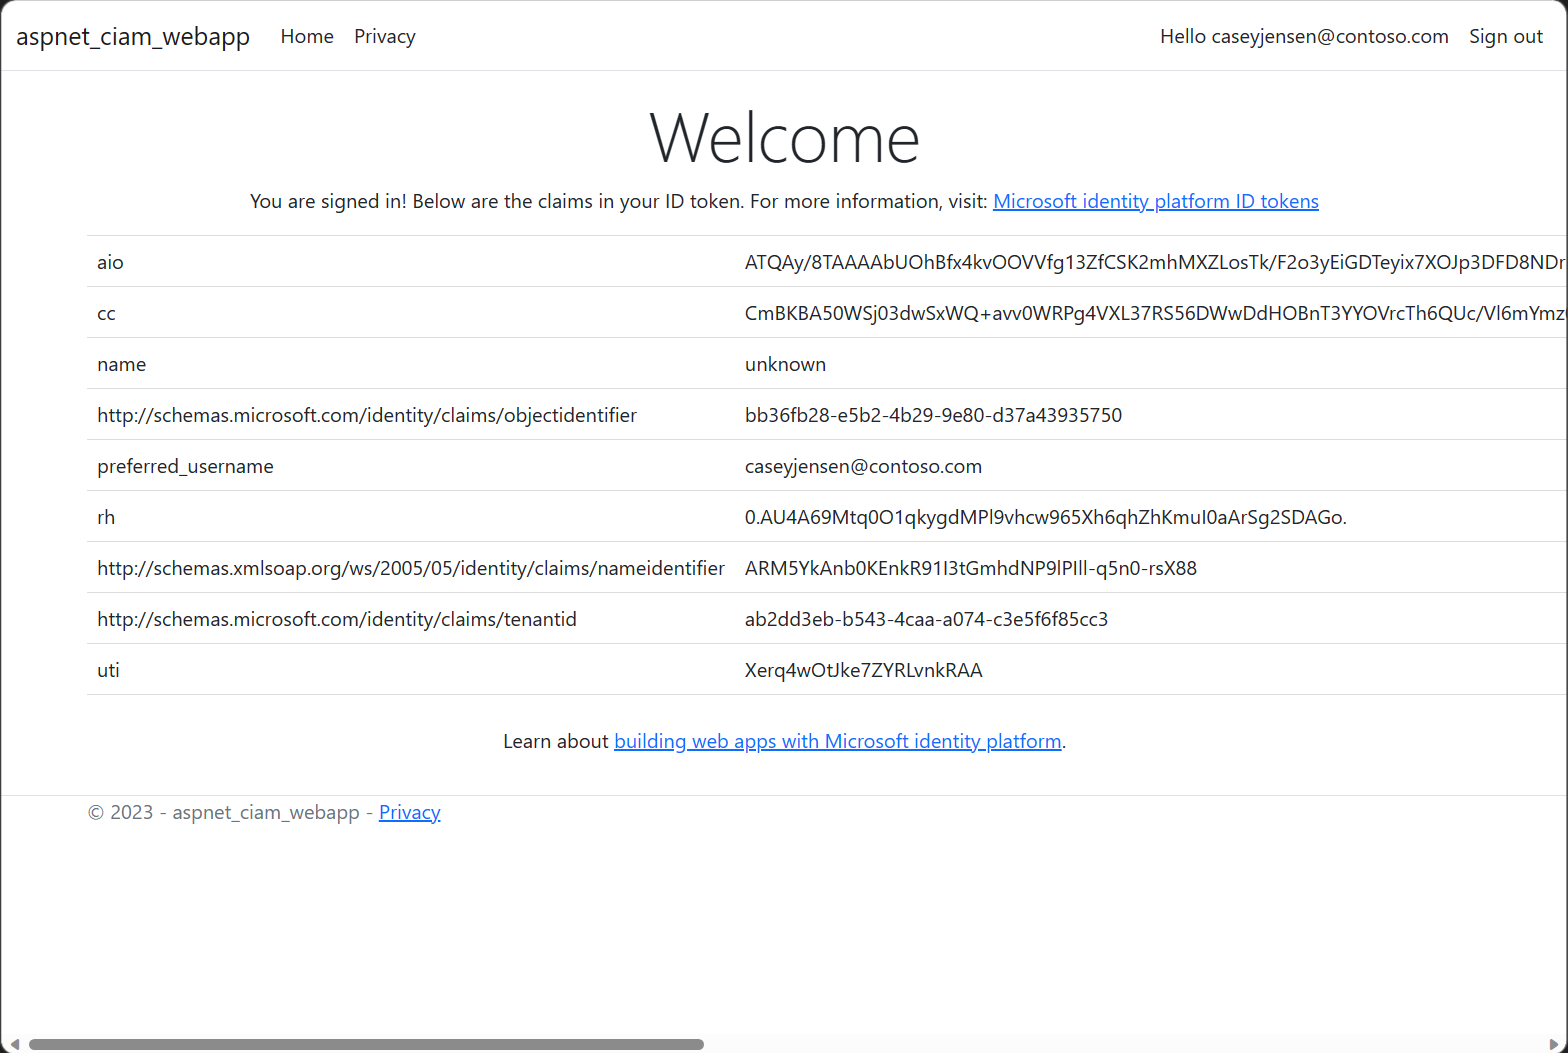
The ASP.NET Core Welcome page appears in your browser as depicted in the following screenshot:
Sign out of the application
- To sign out of the application, select Sign out in the navigation bar.
- A window appears asking which account to sign out of.
- Upon successful sign out, a final window appears advising you to close all browser windows.
See also
Feedback
Coming soon: Throughout 2024 we will be phasing out GitHub Issues as the feedback mechanism for content and replacing it with a new feedback system. For more information see: https://aka.ms/ContentUserFeedback.
Submit and view feedback for