SAML Request Signature Verification
SAML Request Signature Verification is a functionality that validates the signature of signed authentication requests. An App Admin now can enable and disable the enforcement of signed requests and upload the public keys that should be used to do the validation.
If enabled Microsoft Entra ID validates the requests against the public keys configured. There are some scenarios where the authentication requests can fail:
- Protocol not allowed for signed requests. Only SAML protocol is supported.
- Request not signed, but verification is enabled.
- No verification certificate configured for SAML request signature verification. For more information about the certificate requirements, see Certificate signing options.
- Signature verification failed.
- Key identifier in request is missing and two most recently added certificates don't match with the request signature.
- Request signed but algorithm missing.
- No certificate matching with provided key identifier.
- Signature algorithm not allowed. Only RSA-SHA256 is supported.
Note
A Signature element in AuthnRequest elements is optional. If Require Verification certificates is not checked, Microsoft Entra ID does not validate signed authentication requests if a signature is present. Requestor verification is provided for by only responding to registered Assertion Consumer Service URLs.
If
Require Verification certificatesis checked, SAML Request Signature Verification will work for SP-initiated(service provider/relying party initiated) authentication requests only. Only the application configured by the service provider will have the access to to the private and public keys for signing the incoming SAML Authentication Requests from the application. The public key should be uploaded to allow the verification of the request, in which case Microsoft Entra ID will have access to only the public key.
Enabling
Require Verification certificateswill not allow IDP-initiated authentication requests (like SSO testing feature, MyApps or M365 app launcher) to be validated as the IDP would not possess the same private keys as the registered application.
Prerequisites
To configure SAML request signature verification, you need:
- A Microsoft Entra user account. If you don't already have one, you can Create an account for free.
- One of the following roles: Global Administrator, Cloud Application Administrator, Application Administrator, or owner of the service principal.
Tip
Steps in this article might vary slightly based on the portal you start from.
Configure SAML Request Signature Verification
Sign in to the Microsoft Entra admin center as at least a Cloud Application Administrator.
Browse to Identity > Applications > Enterprise applications > All applications.
Enter the name of the existing application in the search box, and then select the application from the search results.
Navigate to Single sign-on.
In the Single sign-on screen, scroll to the subsection called Verification certificates under SAML Certificates.
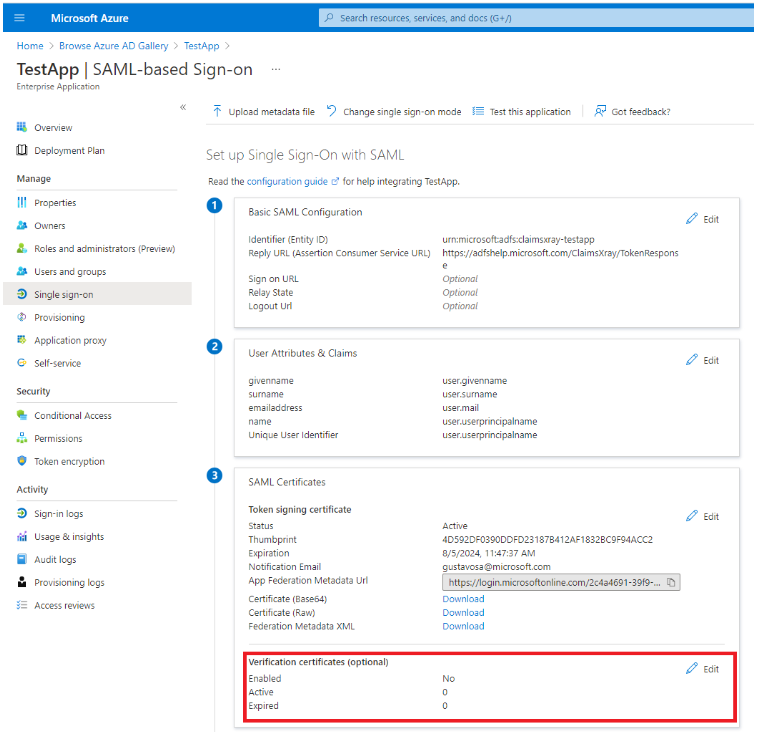
Select Edit.
In the new blade, you're able to enable the verification of signed requests and opt-in for weak algorithm verification in case your application still uses RSA-SHA1 to sign the authentication requests.
To enable the verification of signed requests, select Require verification certificates and upload a verification public key that matches with the private key used to sign the request.
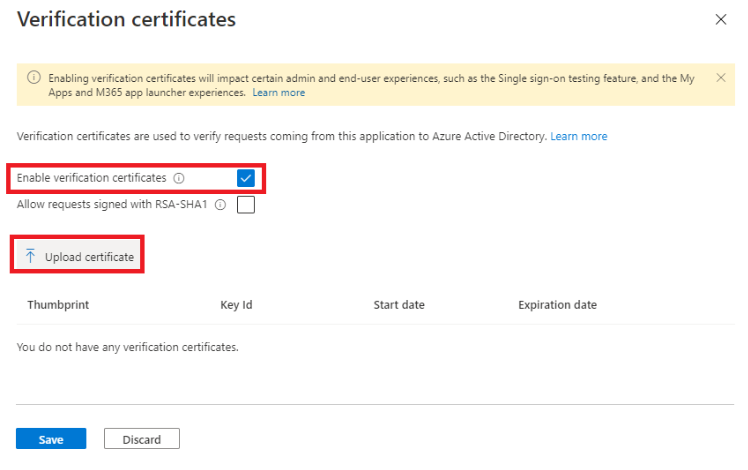
Once you have your verification certificate uploaded, select Save.
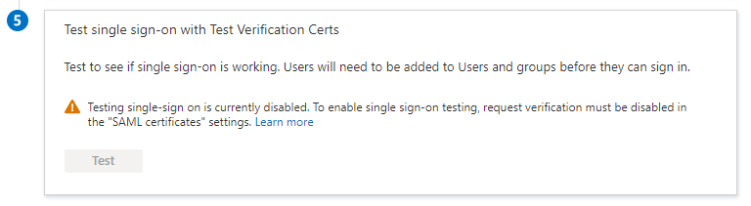
When the verification of signed requests is enabled, the test experience is disabled as the requests requires to be signed by the service provider.
If you want to see the current configuration of an enterprise application, you can navigate to the Single Sign-on screen and see the summary of your configuration under SAML Certificates. There you're able to see if the verification of signed requests is enabled and the count of Active and Expired verification certificates.

Next steps
- Find out How Microsoft Entra ID uses the SAML protocol
- Learn the format, security characteristics, and contents of SAML tokens in Microsoft Entra ID
Feedback
Coming soon: Throughout 2024 we will be phasing out GitHub Issues as the feedback mechanism for content and replacing it with a new feedback system. For more information see: https://aka.ms/ContentUserFeedback.
Submit and view feedback for