How to create and manage compute instances in Azure AI Studio
Note
Azure AI Studio is currently in public preview. This preview is provided without a service-level agreement, and we don't recommend it for production workloads. Certain features might not be supported or might have constrained capabilities. For more information, see Supplemental Terms of Use for Microsoft Azure Previews.
In this article, you learn how to create a compute instance in Azure AI Studio. You can create a compute instance in the Azure AI Studio or in the Azure portal.
You need a compute instance to:
- Use prompt flow in Azure AI Studio.
- Create an index
- Open Visual Studio Code (Web or Desktop) in Azure AI Studio.
You can use the same compute instance for multiple scenarios and workflows. Note that a compute instance can't be shared. It can only be used by a single assigned user. By default, it will be assigned to the creator and you can change this to a different user in the security step.
Compute instances can run jobs securely in a virtual network environment, without requiring enterprises to open up SSH ports. The job executes in a containerized environment and packages your model dependencies in a Docker container.
Important
Compute instances get the latest VM images at the time of provisioning. Microsoft releases new VM images on a monthly basis. Once a compute instance is deployed, it does not get actively updated. You could query an instance's operating system version. To keep current with the latest software updates and security patches, you could: Recreate a compute instance to get the latest OS image (recommended) or regularly update OS and Python packages on the compute instance to get the latest security patches.
Create a compute instance
To create a compute instance in Azure AI Studio:
Sign in to Azure AI Studio and select your project from the Build page. If you don't have a project already, first create a project.
Under Manage, select Compute instances > + New.
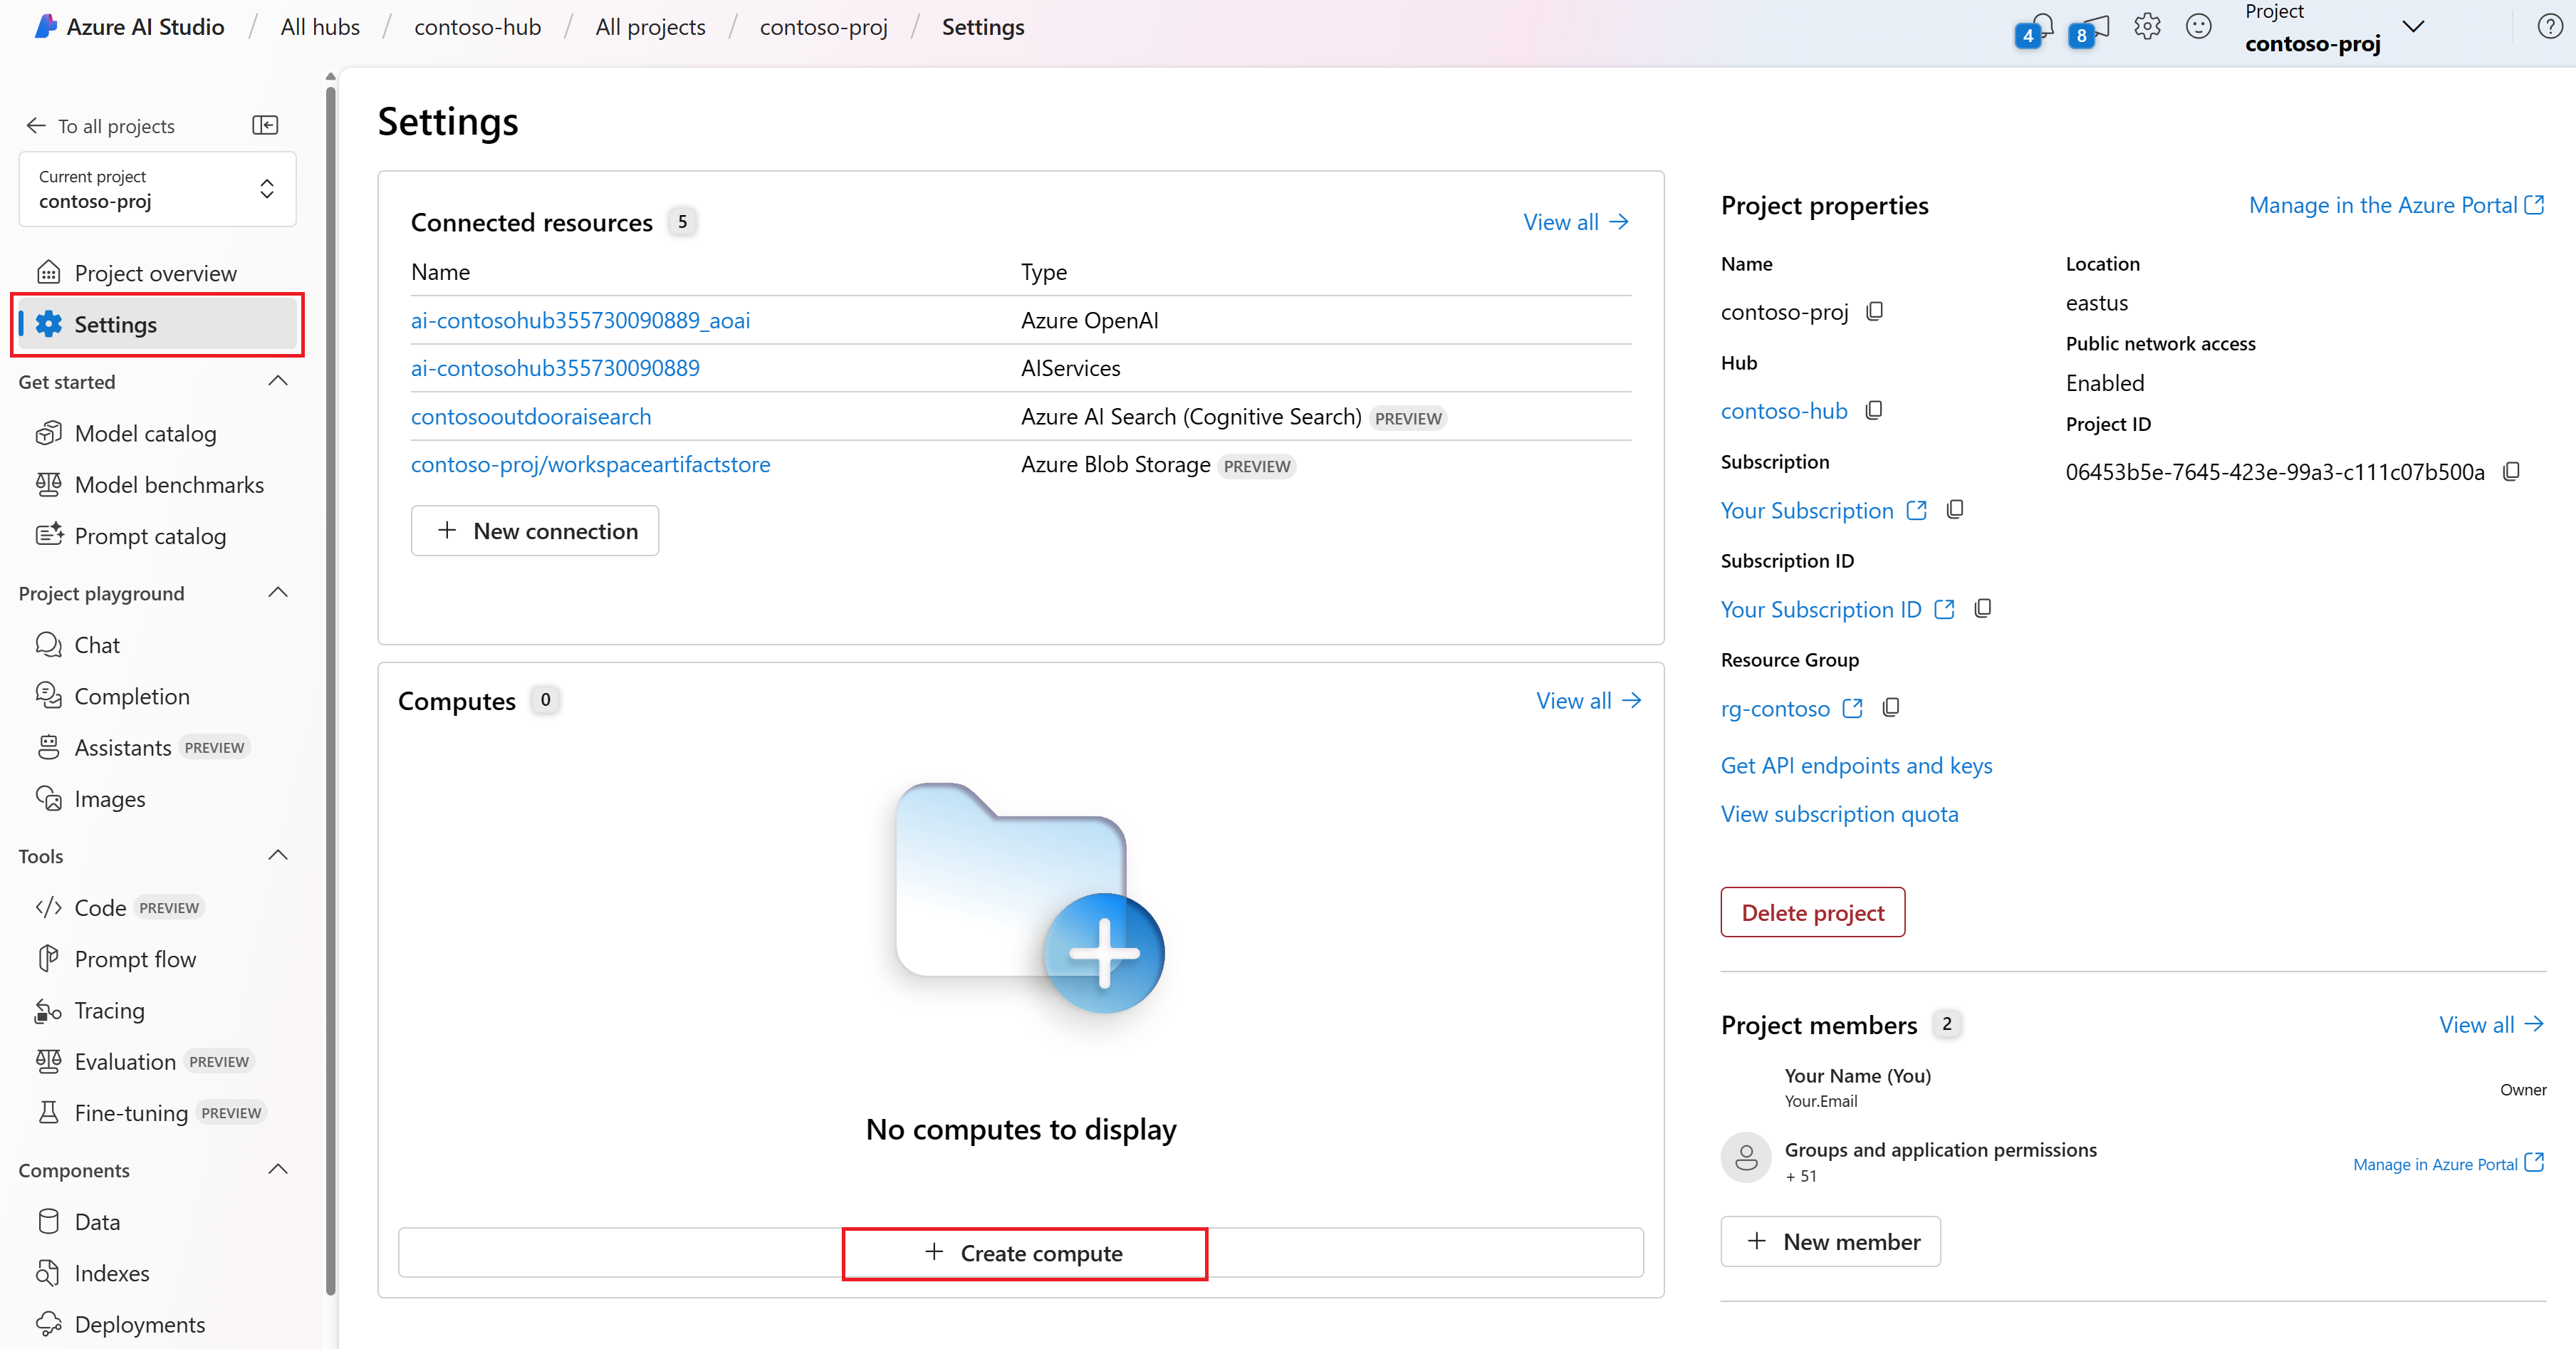
Enter a custom name for your compute.
Select your virtual machine type and size and then select Next.
- Virtual machine type: Choose CPU or GPU. The type can't be changed after creation.
- Virtual machine size: Supported virtual machine sizes might be restricted in your region. Check the availability list
For more information on configuration details such as CPU and RAM, see Azure Machine Learning pricing and virtual machine sizes.
On the Scheduling page under Auto shut down make sure idle shutdown is enabled by default. You can opt to automatically shut down compute after the instance has been idle for a set amount of time. If you disable auto shutdown costs will continue to accrue even during periods of inactivity. For more information, see Configure idle shutdown.
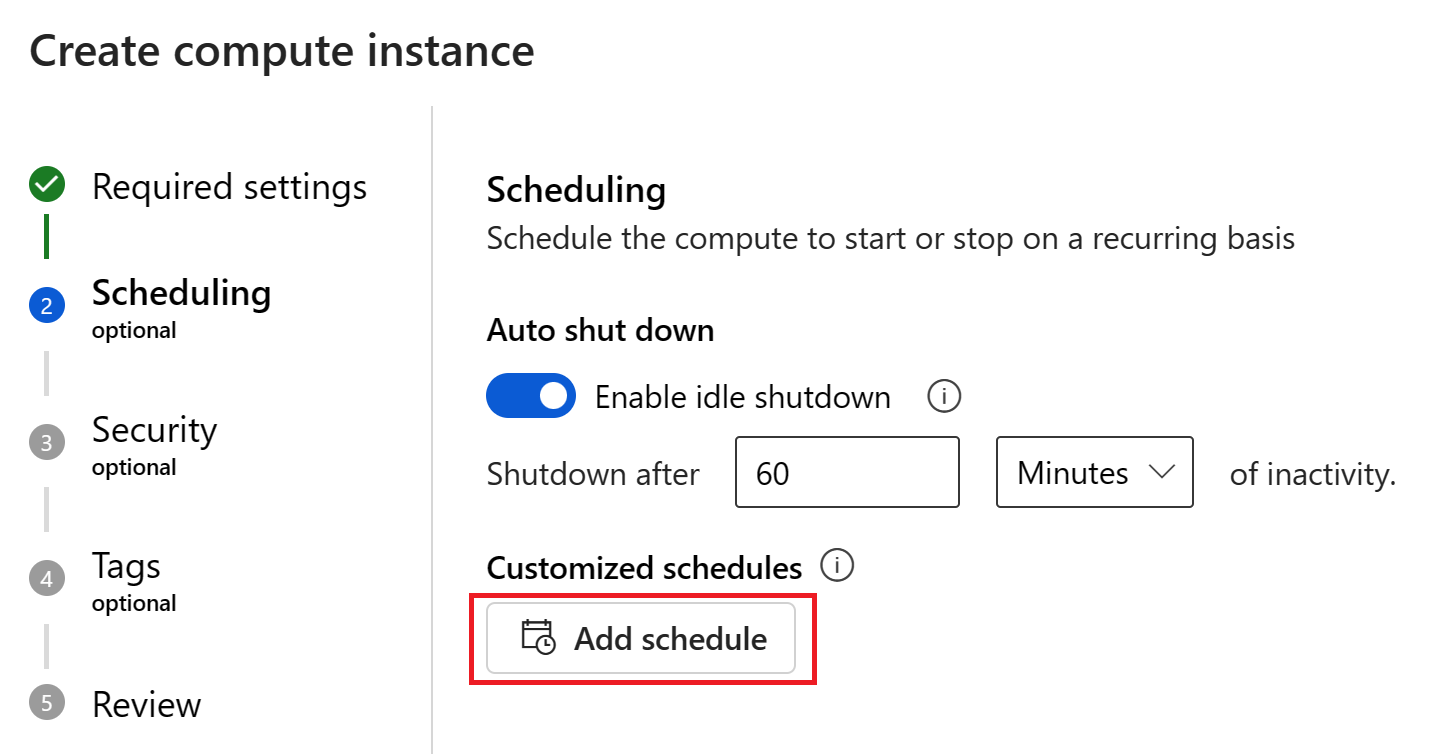
Important
The compute can't be idle if you have prompt flow runtime in Running status on the compute. You need to delete any active runtime before the compute instance can be eligible for idle shutdown. You also can't have any active VS Code (Web) sessions hosted on the compute instance.
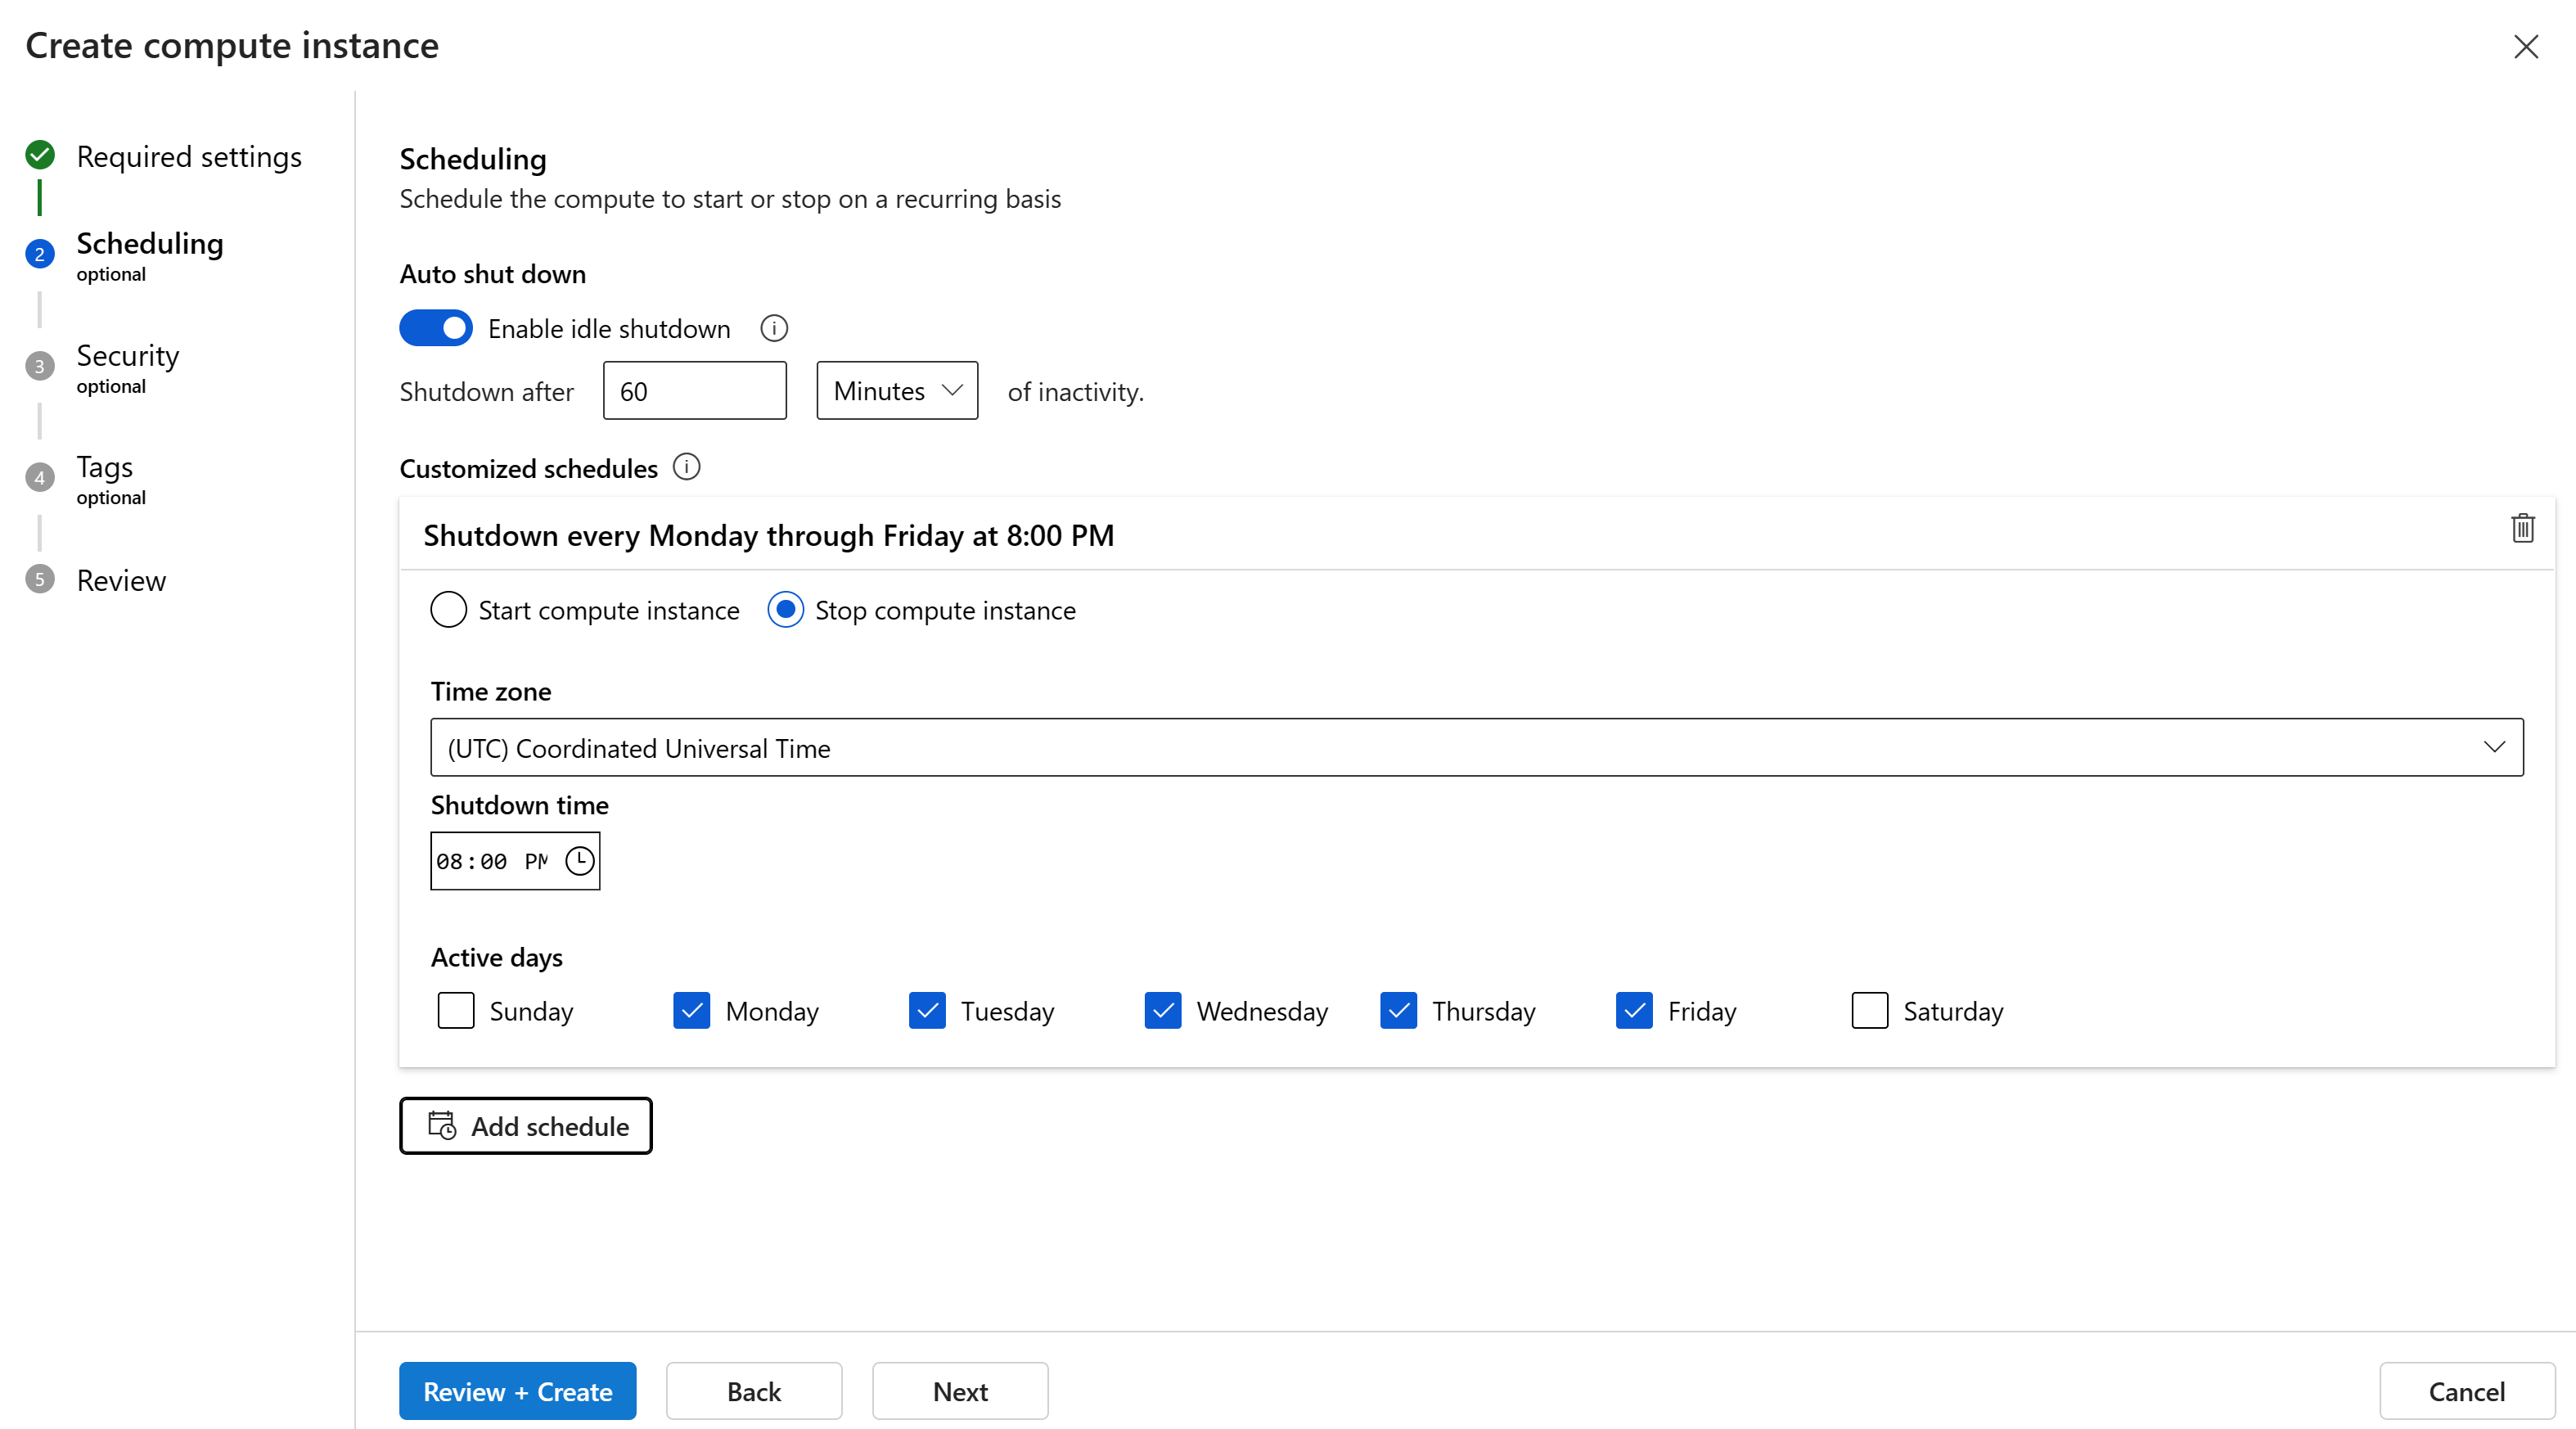
You can update the schedule days and times to meet your needs. You can also add additional schedules. For example, you can create a schedule to start at 9 AM and stop at 6 PM from Monday-Thursday, and a second schedule to start at 9 AM and stop at 4 PM for Friday. You can create a total of four schedules per compute instance.
On the Security page you can optionally configure security settings such as SSH, virtual network, root access, and managed identity for your compute instance. Use this section to:
- Assign to another user: You can create a compute instance on behalf of another user. Note that a compute instance can't be shared. It can only be used by a single assigned user. By default, it will be assigned to the creator and you can change this to a different user.
- Assign a managed identity: You can attach system assigned or user assigned managed identities to grant access to resources. The name of the created system managed identity will be in the format
/workspace-name/computes/compute-instance-namein your Microsoft Entra ID. - Enable SSH access: Enter credentials for an administrator user account that will be created on each compute node. These can be used to SSH to the compute nodes.
On the Applications page you can add custom applications to use on your compute instance, such as RStudio or Posit Workbench. Then select Next.
On the Tags page you can add additional information to categorize the resources you create. Then select Review + Create or Next to review your settings.
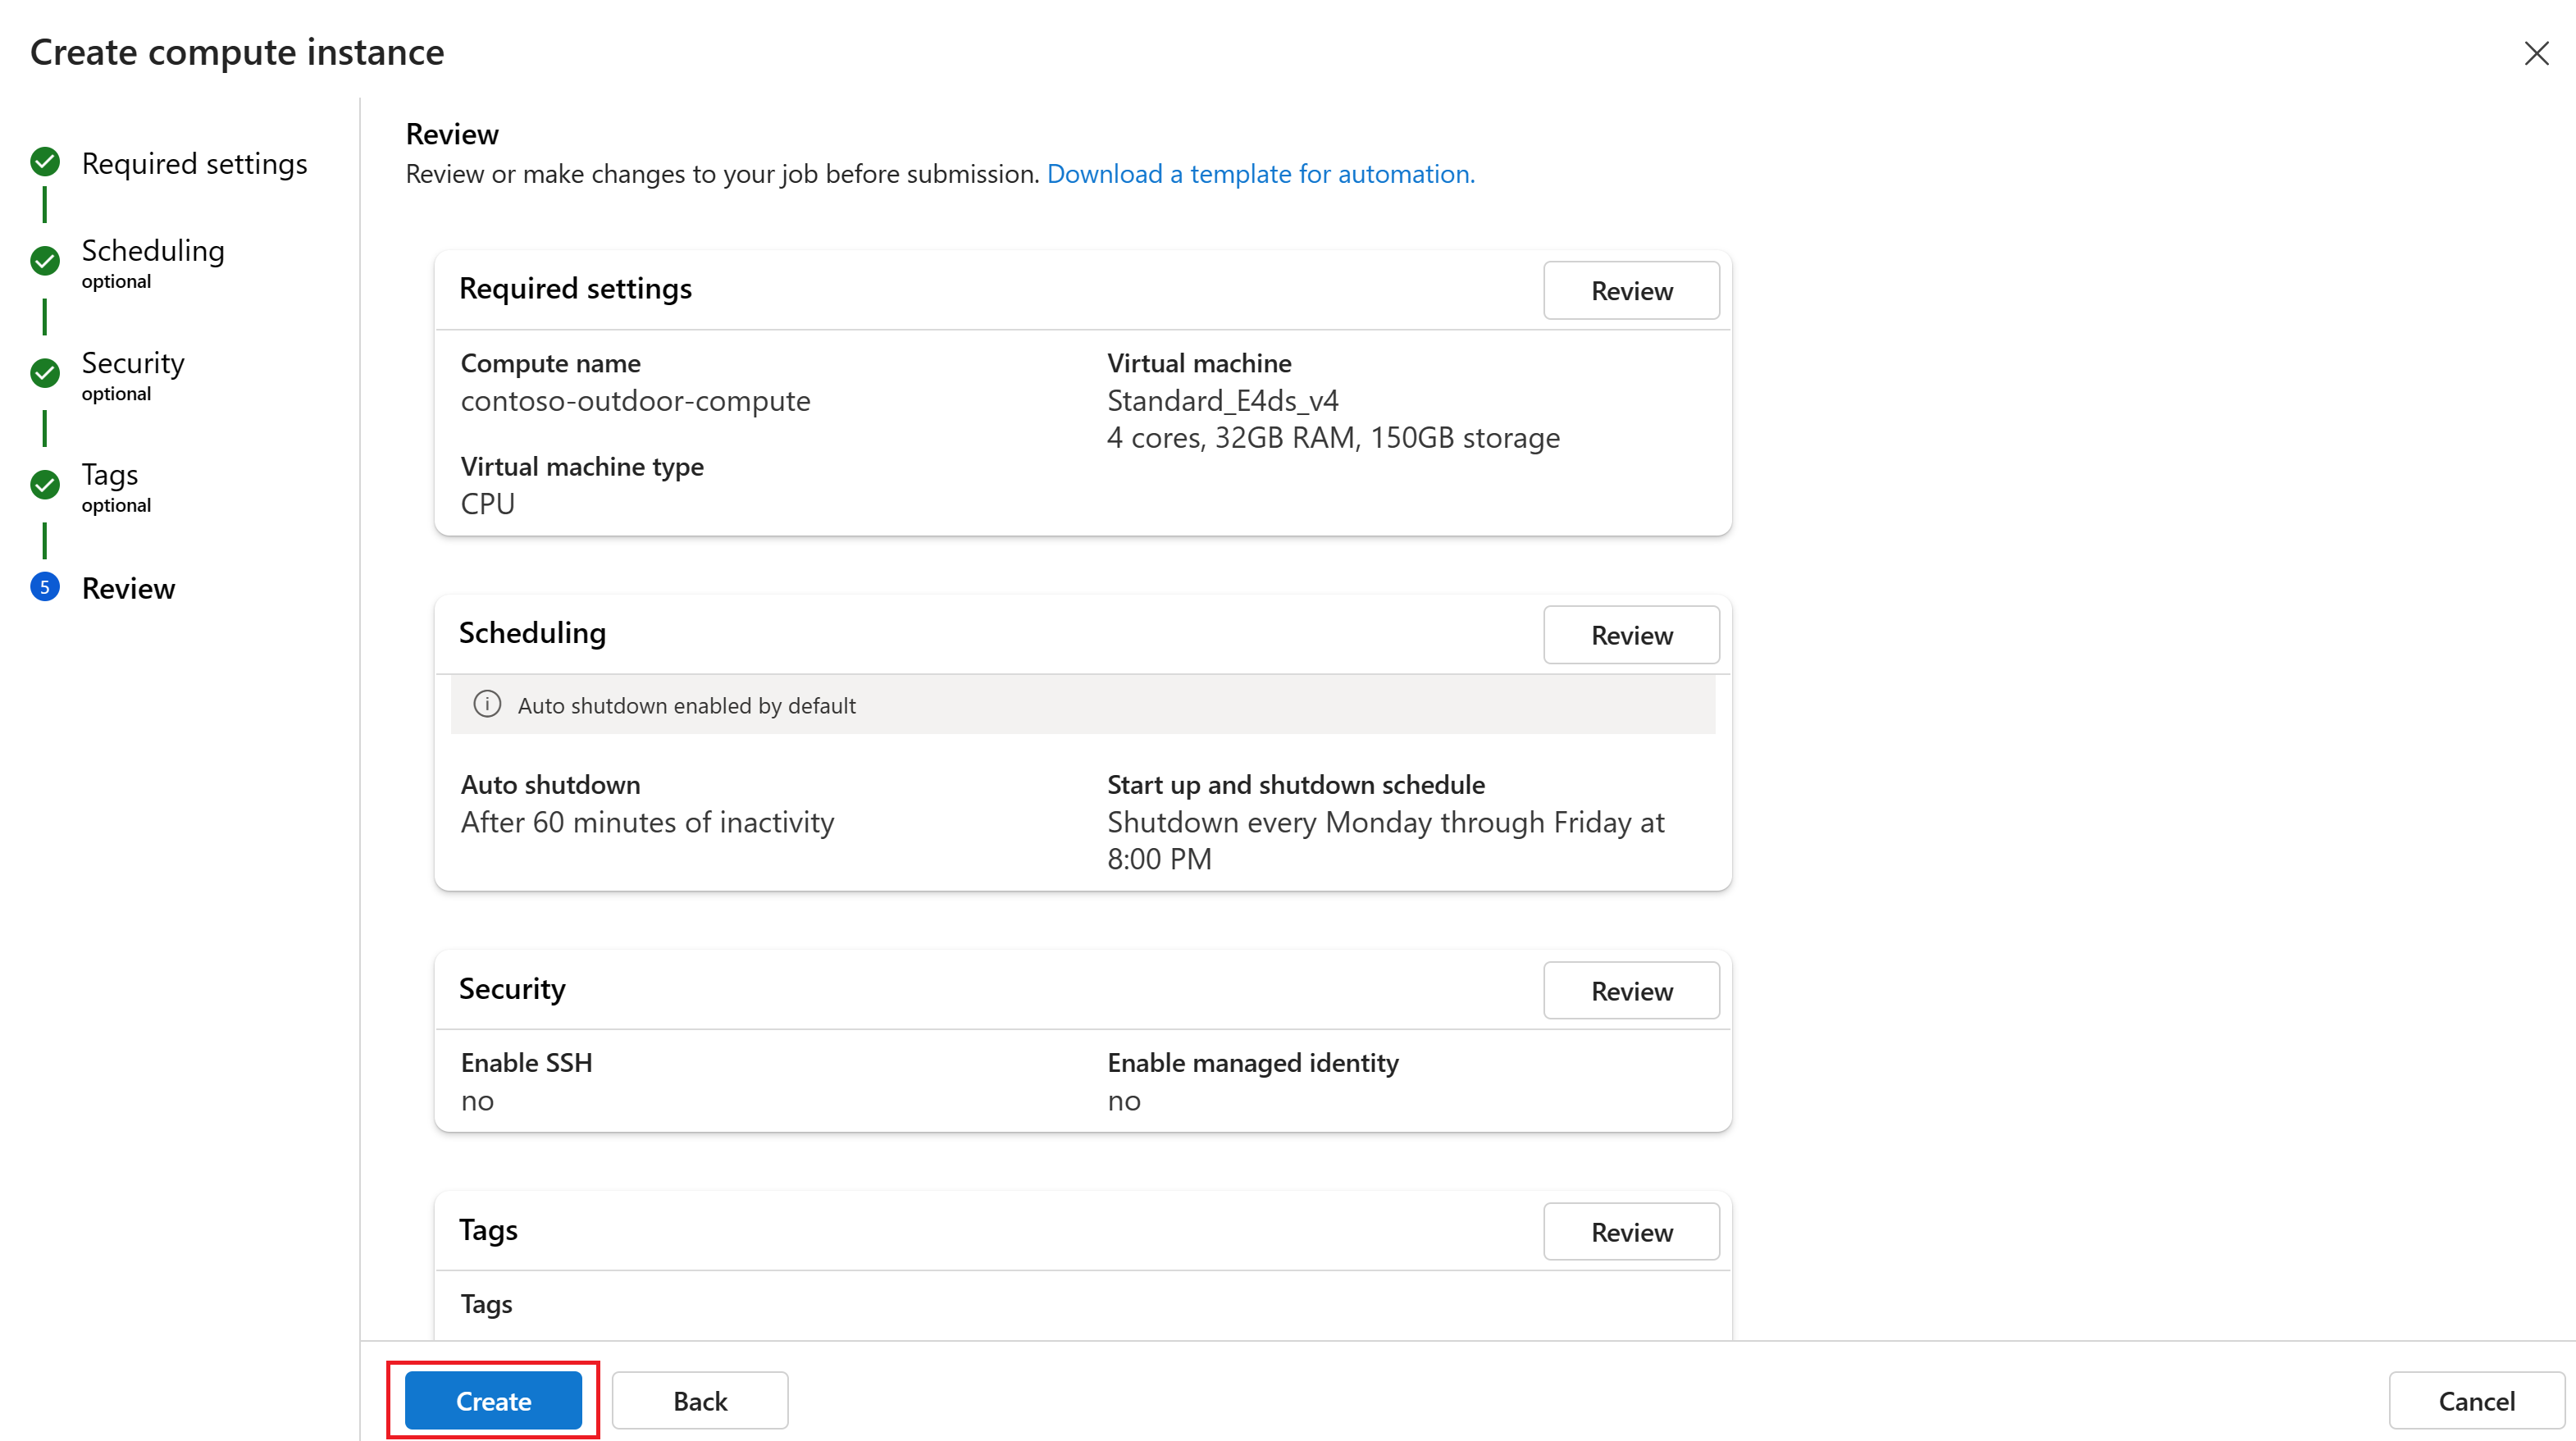
After reviewing the settings, select Create to create the compute instance.


Configure idle shutdown
To avoid getting charged for a compute instance that is switched on but inactive, you can configure when to shut down your compute instance due to inactivity.
Important
The compute can't be idle if you have prompt flow runtime in Running status on the compute. You need to delete any active runtime before the compute instance can be eligible for idle shutdown. You also can't have any active VS Code (Web) sessions hosted on the compute instance.
The setting can be configured during compute instance creation or for existing compute instances.
For new compute instances, you can configure idle shutdown during compute instance creation. For more information, see Create a compute instance earlier in this article.
To configure idle shutdown for existing compute instances follow these steps:
From the top menu, select Manage > Compute instances.
In the list, select the compute instance that you want to configure.
Select Schedule and idle shutdown.

Update or add to the schedule. You can have a total of four schedules per compute instance. Then select Update to save your changes.

Start or stop a compute instance
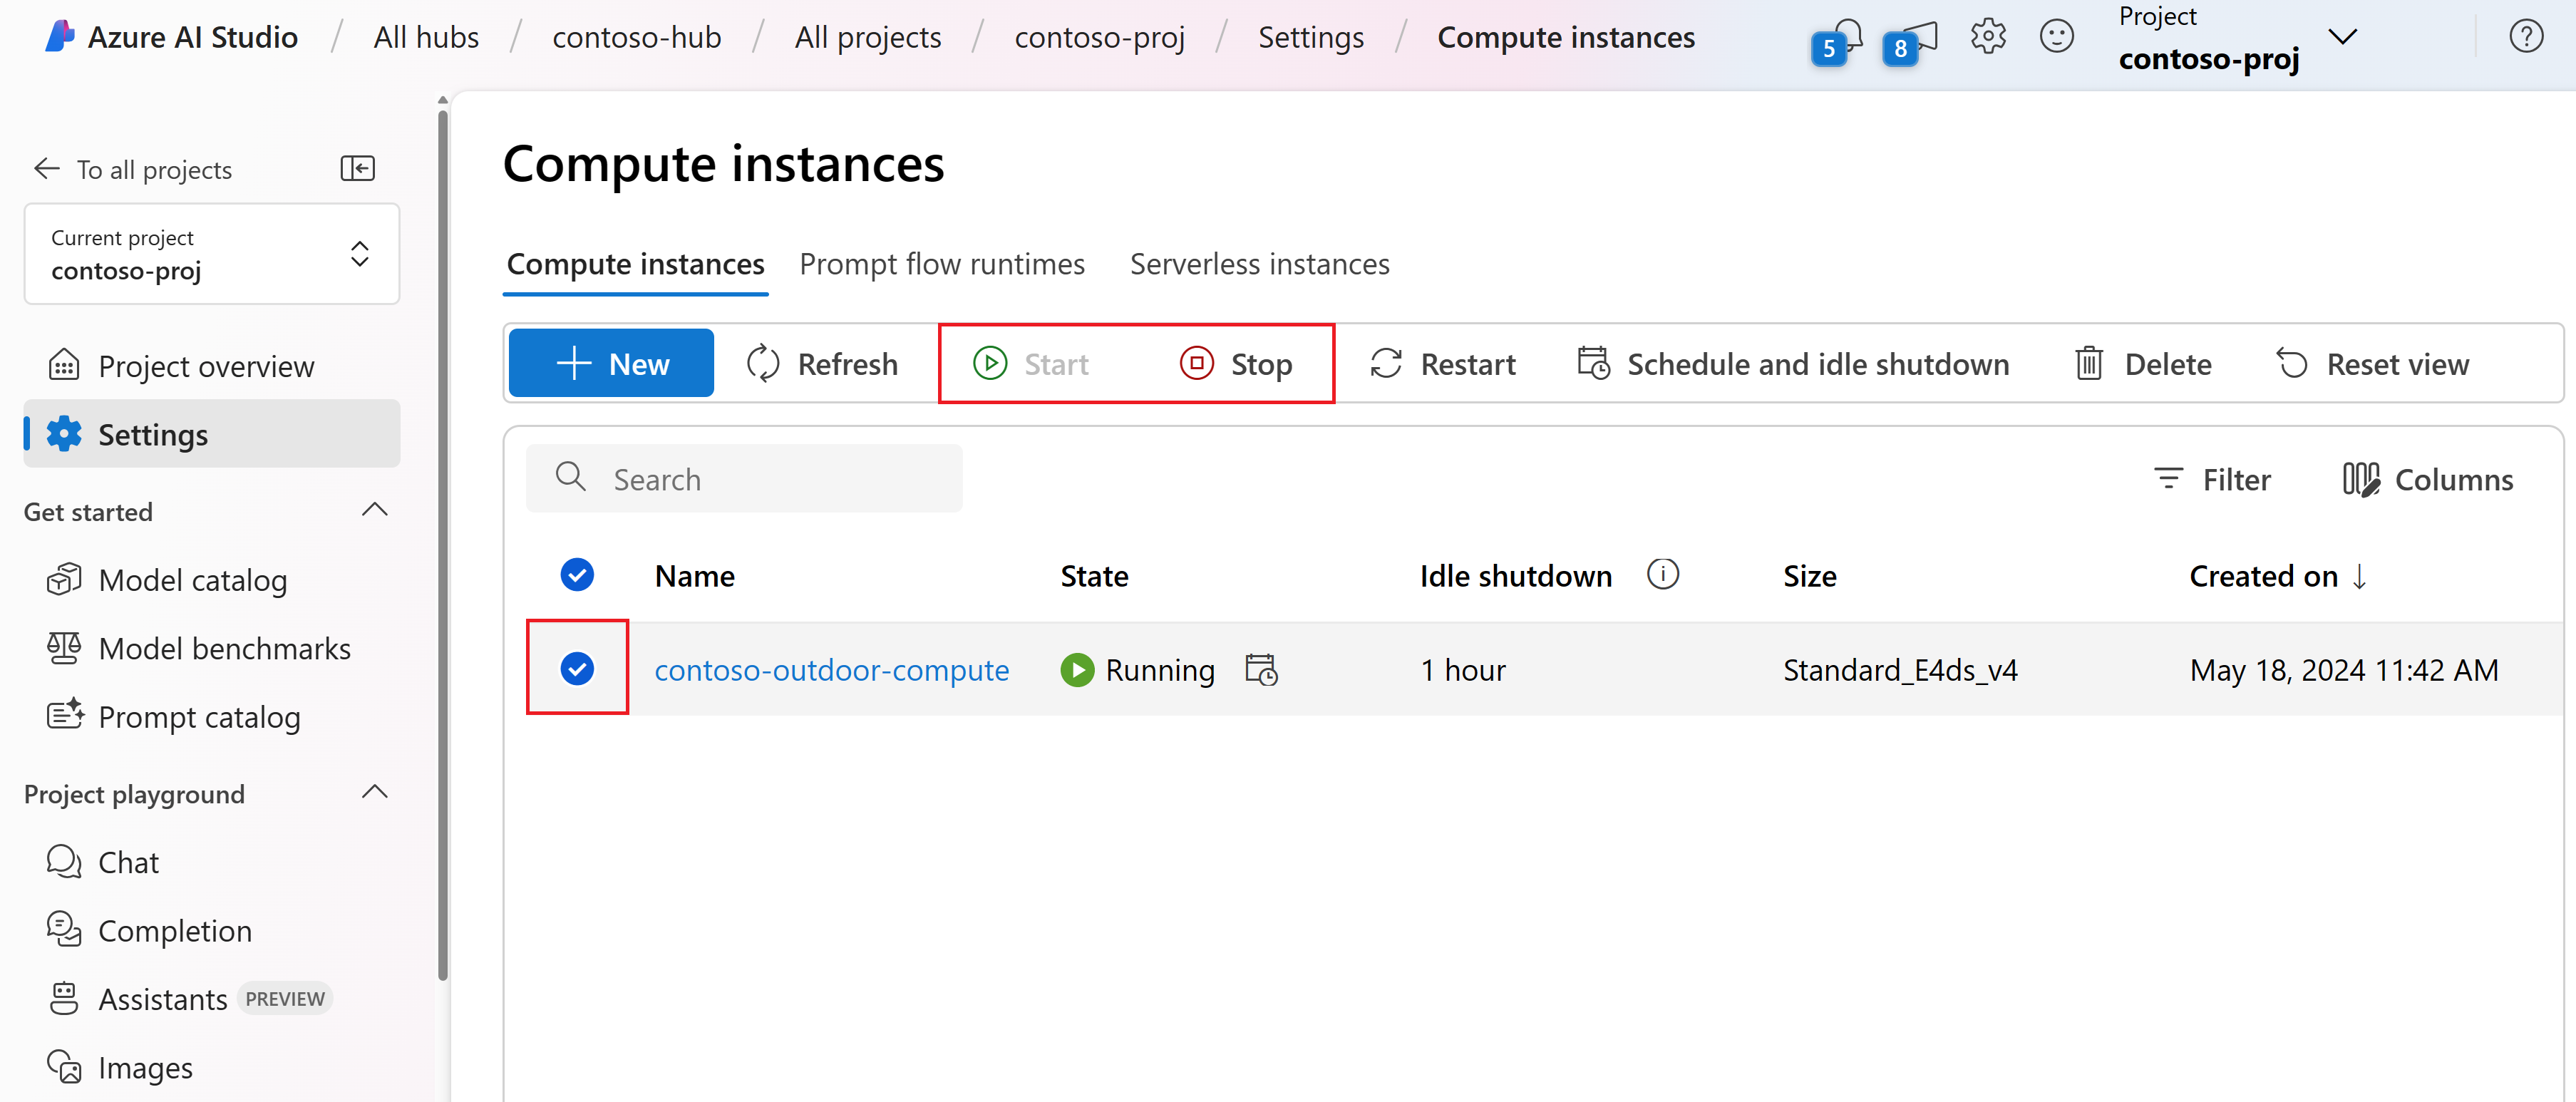
You can start or stop a compute instance from the Azure AI Studio.
From the top menu, select Manage > Compute instances.
In the list, select the compute instance that you want to configure.
Select Stop to stop the compute instance. Select Start to start the compute instance. Only stopped compute instances can be started and only started compute instances can be stopped.

Next steps
Feedback
Coming soon: Throughout 2024 we will be phasing out GitHub Issues as the feedback mechanism for content and replacing it with a new feedback system. For more information see: https://aka.ms/ContentUserFeedback.
Submit and view feedback for