Configure Azure CNI networking in Azure Kubernetes Service (AKS)
This article shows you how to use Azure CNI networking to create and use a virtual network subnet for an AKS cluster. For more information on network options and considerations, see Network concepts for Kubernetes and AKS.
Prerequisites
- An Azure account with an active subscription. Create an account for free.
Configure networking
For information on planning IP addressing for your AKS cluster, see Plan IP addressing for your cluster.
Sign in to the Azure portal.
In the search box at the top of the portal enter Kubernetes services, select Kubernetes services from the search results.
Select + Create then Create a Kubernetes cluster.
In Create Kubernetes cluster enter or select the following information:
Setting Value Project details Subscription Select your subscription. Resource group Select test-rg. Cluster details Cluster preset configuration Leave the default of Production Standard. Kubernetes cluster name Enter aks-cluster. Region Select (US) East US 2. Availability zones Leave the default of Zones 1,2,3. AKS pricing tier Leave the default of Standard. Kubernetes version Leave the default of 1.26.6. Automatic upgrade Leave the default of Enabled with patch (recommended). Authentication and Authorization Leave the default of Local accounts with Kubernetes RBAC. Select Next: Node pools >, then Next: Networking >.
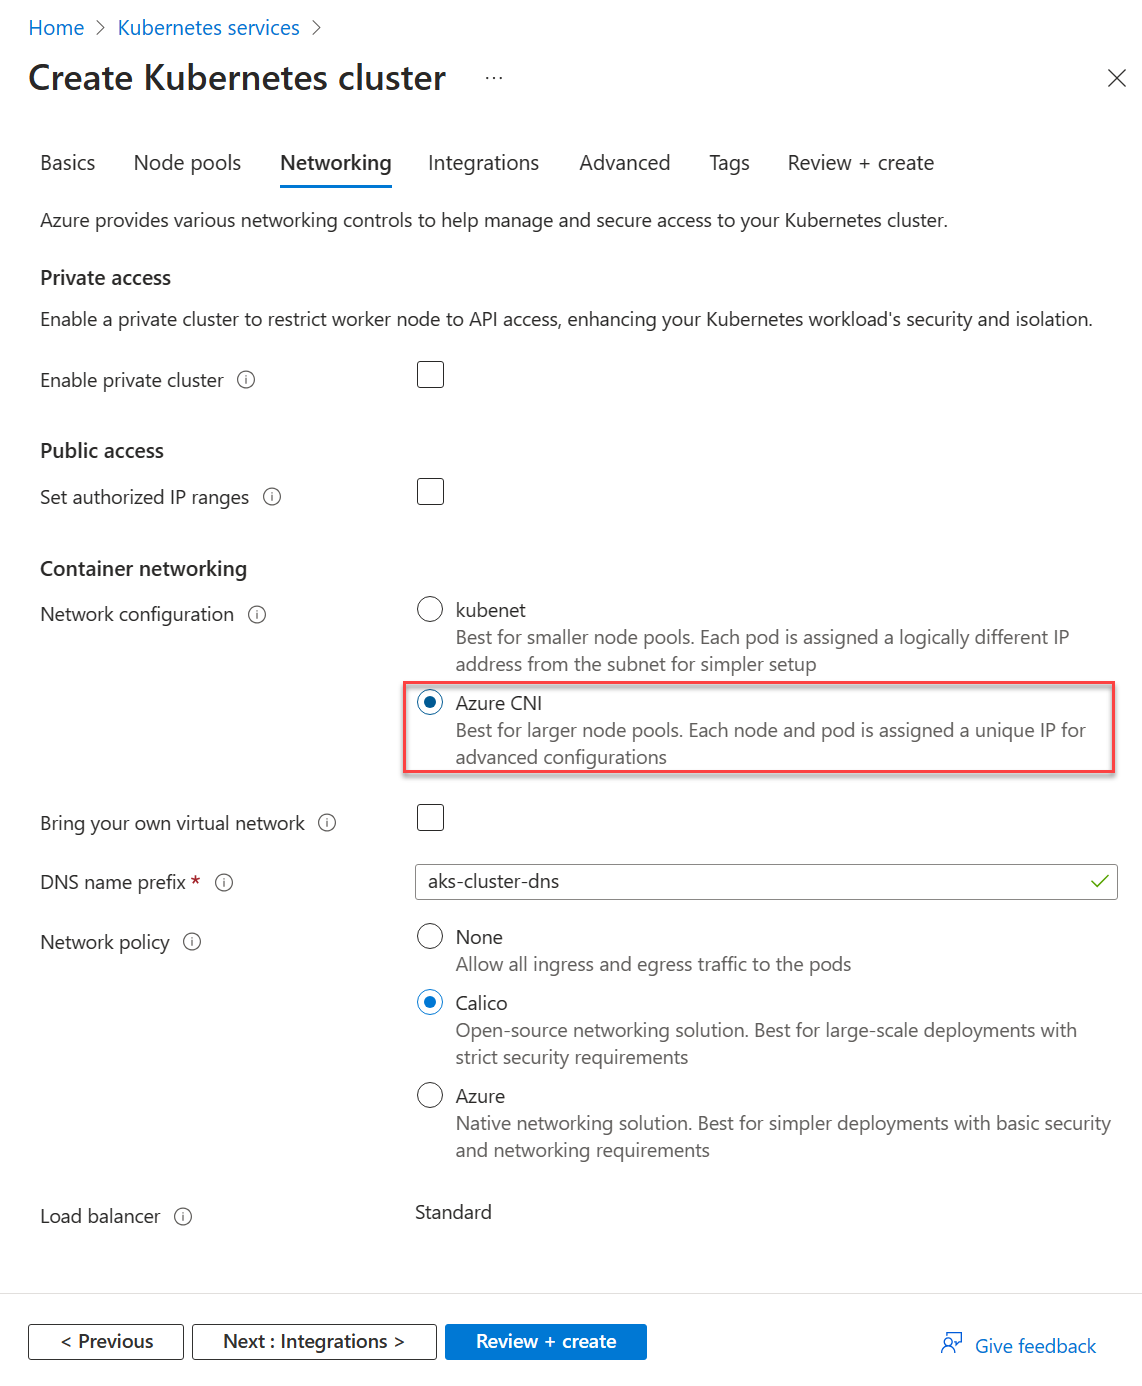
In Container networking in the Networking tab, verify that Azure CNI is selected.

Select Review + create.
Select Create.
Next steps
To configure Azure CNI networking with dynamic IP allocation and enhanced subnet support, see Configure Azure CNI networking for dynamic allocation of IPs and enhanced subnet support in AKS.
Feedback
Coming soon: Throughout 2024 we will be phasing out GitHub Issues as the feedback mechanism for content and replacing it with a new feedback system. For more information see: https://aka.ms/ContentUserFeedback.
Submit and view feedback for
