Control outbound traffic with Azure Firewall
This article shows you how to lock down the outbound traffic from your App Service app to back-end Azure resources or other network resources with Azure Firewall. This configuration helps prevent data exfiltration or the risk of malicious program implantation.
By default, an App Service app can make outbound requests to the public internet (for example, when installing required Node.js packages from NPM.org.). If your app is integrated with an Azure virtual network, you can control outbound traffic with network security groups to a limited extent, such as the target IP address, port, and protocol. Azure Firewall lets you control outbound traffic at a much more granular level and filter traffic based on real-time threat intelligence from Microsoft Cyber Security. You can centrally create, enforce, and log application and network connectivity policies across subscriptions and virtual networks (see Azure Firewall features).
For detailed network concepts and security enhancements in App Service, see Networking features and Zero to Hero with App Service, Part 6: Securing your web app.
Prerequisites
- Enable regional virtual network integration for your app.
- Verify that Route All is enabled. This setting is enabled by default, which tells App Service to route all outbound traffic through the integrated virtual network. If you disable it, only traffic to private IP addresses will be routed through the virtual network.
- If you want to route access to back-end Azure services through Azure Firewall as well, disable all service endpoints on the App Service subnet in the integrated virtual network. After Azure Firewall is configured, outbound traffic to Azure Services will be routed through the firewall instead of the service endpoints.
1. Create the required firewall subnet
To deploy a firewall into the integrated virtual network, you need a subnet called AzureFirewallSubnet.
- In the Azure portal, navigate to the virtual network that's integrated with your app.
- From the left navigation, select Subnets > + Subnet.
- In Name, type AzureFirewallSubnet.
- Subnet address range, accept the default or specify a range that's at least /26 in size.
- Select Save.
2. Deploy the firewall and get its IP
On the Azure portal menu or from the Home page, select Create a resource.
Type firewall in the search box and press Enter.
Select Firewall and then select Create.
On the Create a Firewall page, configure the firewall as shown in the following table:
Setting Value Resource group Same resource group as the integrated virtual network. Name Name of your choice Region Same region as the integrated virtual network. Firewall policy Create one by selecting Add new. Virtual network Select the integrated virtual network. Public IP address Select an existing address or create one by selecting Add new. 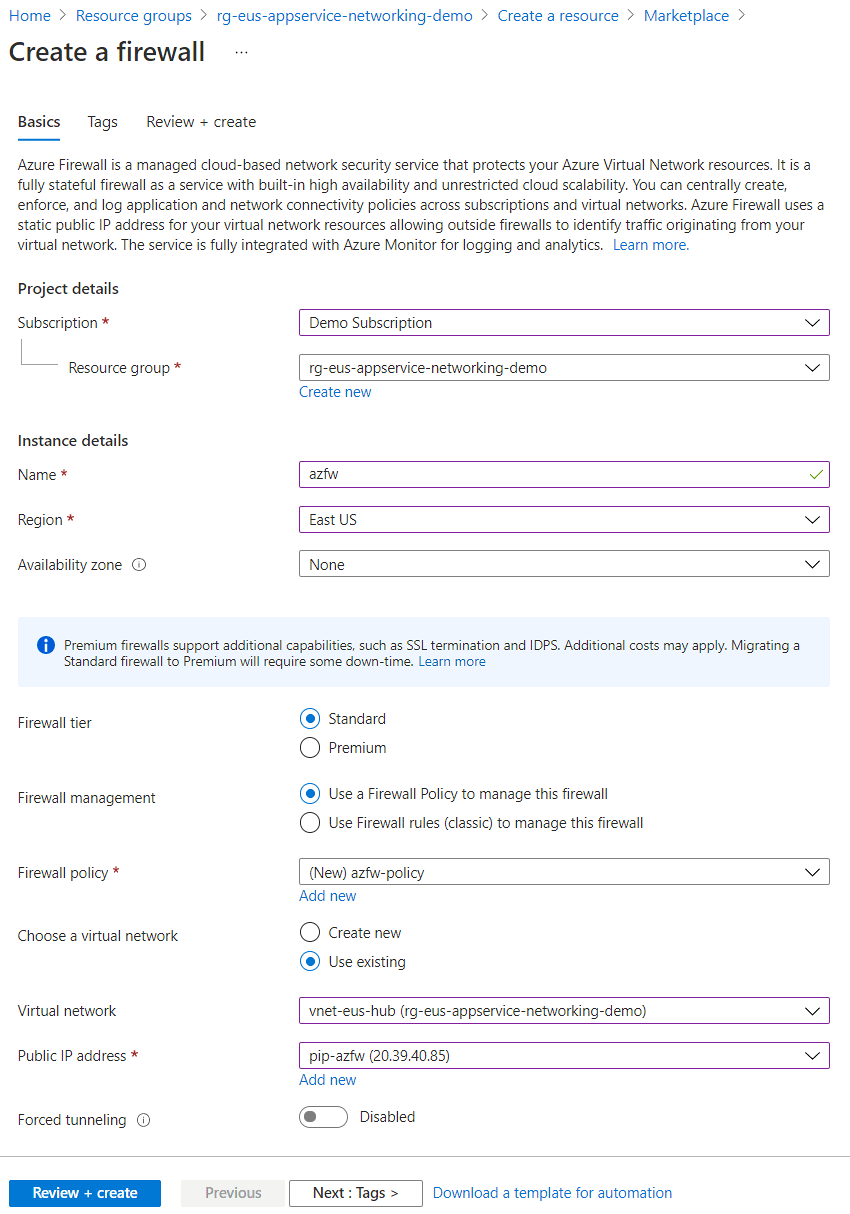
Click Review + create.
Select Create again.
This will take a few minutes to deploy.
After deployment completes, go to your resource group, and select the firewall.
In the firewall's Overview page, copy private IP address. The private IP address will be used as next hop address in the routing rule for the virtual network.

3. Route all traffic to the firewall
When you create a virtual network, Azure automatically creates a default route table for each of its subnets and adds system default routes to the table. In this step, you create a user-defined route table that routes all traffic to the firewall, and then associate it with the App Service subnet in the integrated virtual network.
On the Azure portal menu, select All services or search for and select All services from any page.
Under Networking, select Route tables.
Select Add.
Configure the route table like the following example:
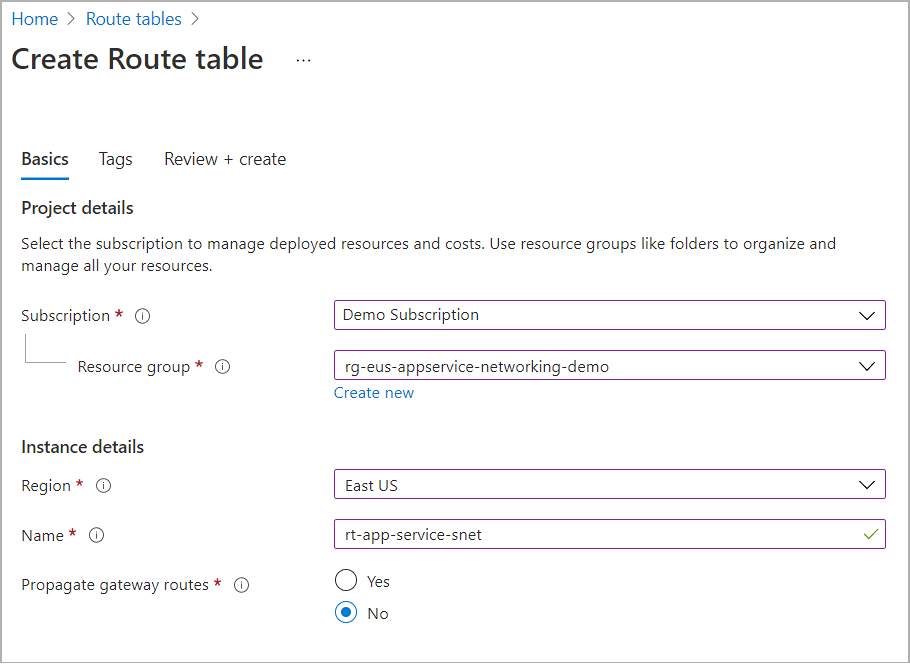
Make sure you select the same region as the firewall you created.
Select Review + create.
Select Create.
After deployment completes, select Go to resource.
From the left navigation, select Routes > Add.
Configure the new route as shown in the following table:
Setting Value Address prefix 0.0.0.0/0 Next hop type Virtual appliance Next hop address The private IP address for the firewall that you copied in 2. Deploy the firewall and get its IP. From the left navigation, select Subnets > Associate.
In Virtual network, select your integrated virtual network.
In Subnet, select the App Service subnet.
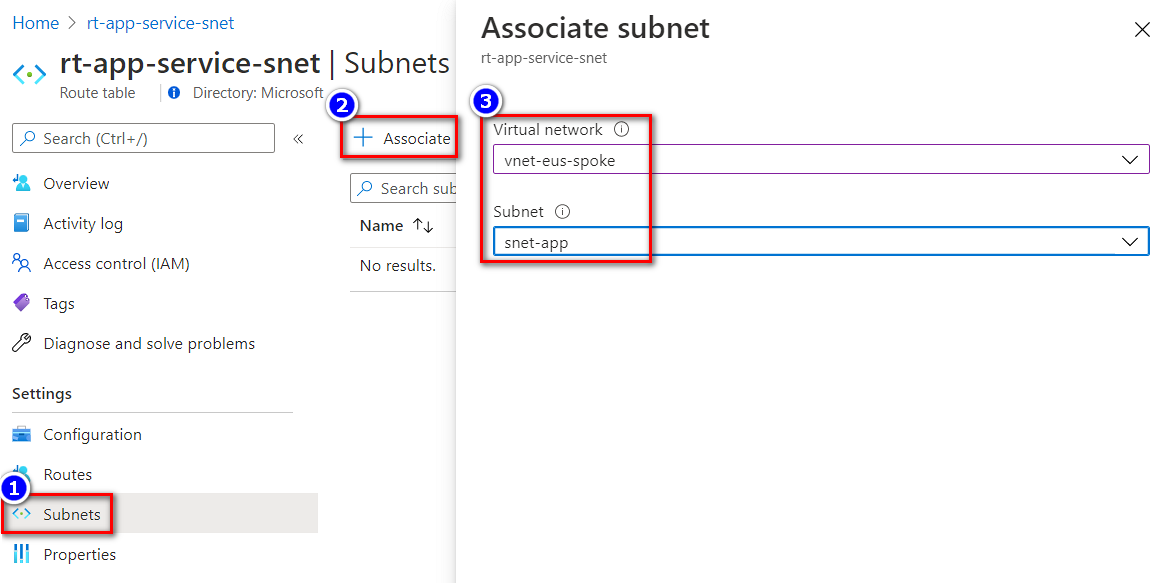
Select OK.
4. Configure firewall policies
Outbound traffic from your app is now routed through the integrated virtual network to the firewall. To control App Service outbound traffic, add an application rule to firewall policy.
Navigate to the firewall's overview page and select its firewall policy.
In the firewall policy page, from the left navigation, select Application Rules > Add a rule collection.
In Rules, add a network rule with the App Service subnet as the source address, and specify an FQDN destination. In the screenshot below, the destination FQDN is set to
api.my-ip.io.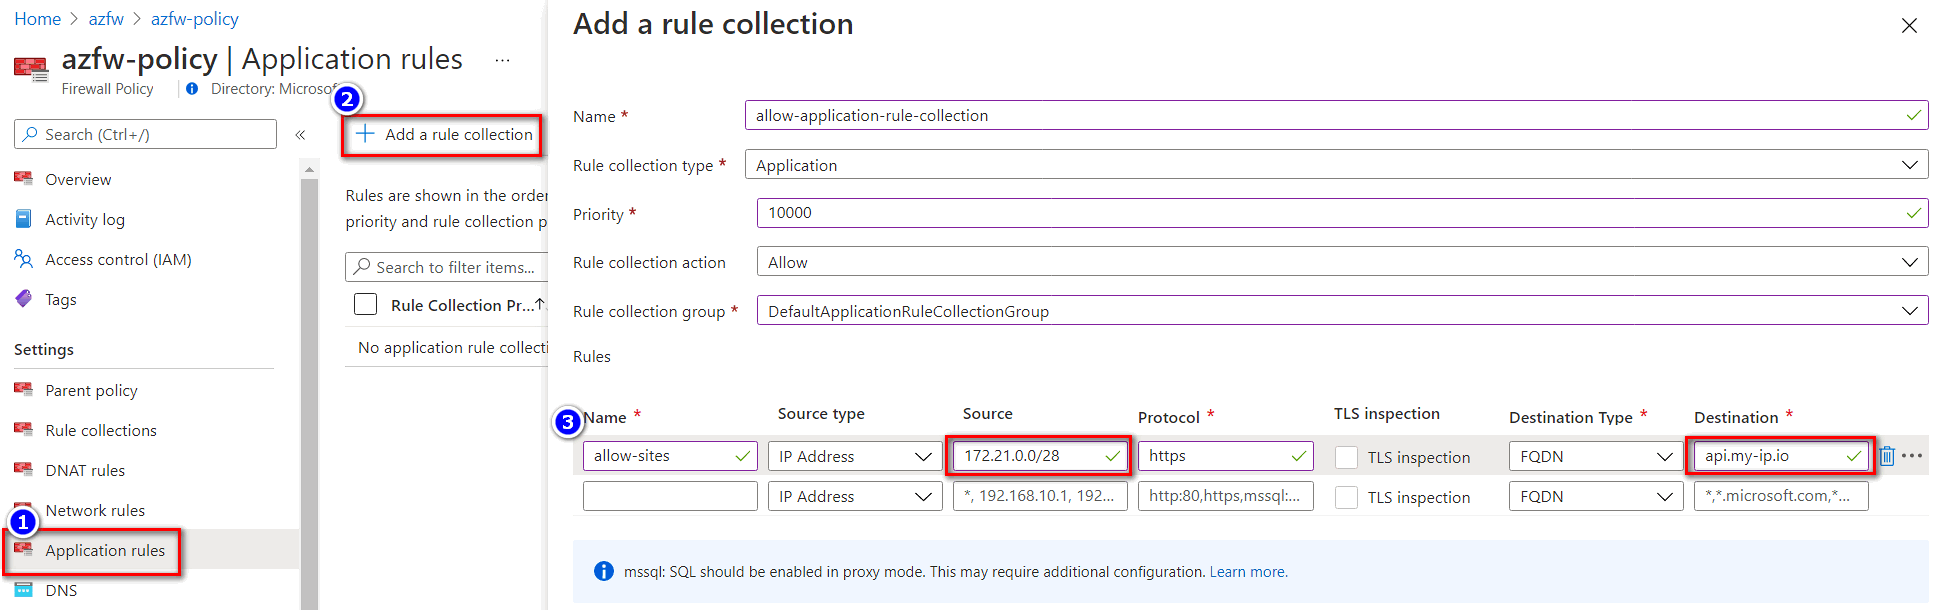
Note
Instead of specifying the App Service subnet as the source address, you can also use the private IP address of the app in the subnet directly. You can find your app's private IP address in the subnet by using the
WEBSITE_PRIVATE_IPenvironment variable.Select Add.
5. Verify the outbound traffic
An easy way to verify your configuration is to use the curl command from your app's SCM debug console to verify the outbound connection.
In a browser, navigate to
https://<app-name>.scm.azurewebsites.net/DebugConsole.In the console, run
curl -s <protocol>://<fqdn-address>with a URL that matches the application rule you configured, To continue example in the previous screenshot, you can use curl -s https://api.my-ip.io/ip. The following screenshot shows a successful response from the API, showing the public IP address of your App Service app.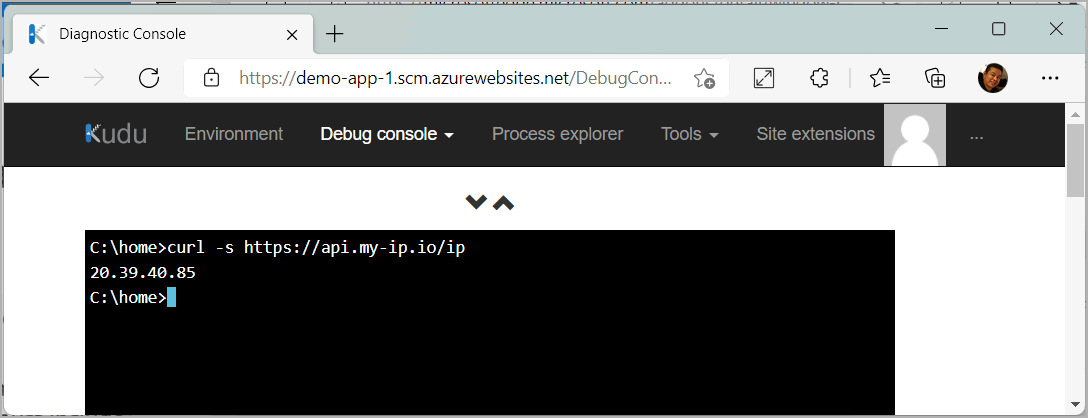
Run
curl -s <protocol>://<fqdn-address>again with a URL that doesn't match the application rule you configured. In the following screenshot, you get no response, which indicates that your firewall has blocked the outbound request from the app.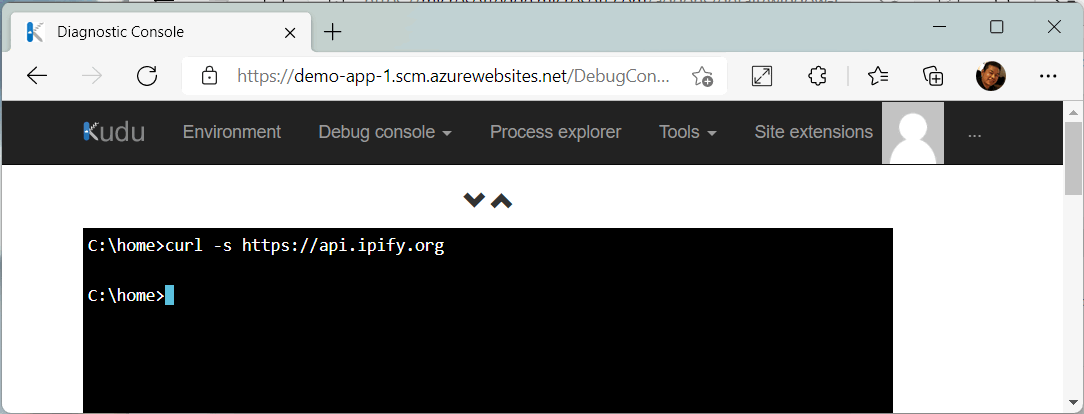
Tip
Because these outbound requests are going through the firewall, you can capture them in the firewall logs by enabling diagnostic logging for the firewall (enable the AzureFirewallApplicationRule).
If you run the curl commands with diagnostic logs enabled, you can find them in the firewall logs.
In the Azure portal, navigate to your firewall.
From the left navigation, select Logs.
Close the welcome message by selecting X.
From All Queries, select Firewall Logs > Application rule log data.
Click Run. You can see these two access logs in query result.


More resources
Feedback
Coming soon: Throughout 2024 we will be phasing out GitHub Issues as the feedback mechanism for content and replacing it with a new feedback system. For more information see: https://aka.ms/ContentUserFeedback.
Submit and view feedback for