Configure Azure server management services at scale
You must complete these two tasks to onboard Azure server management services to your servers:
- Deploy service agents to your servers.
- Enable the management solutions.
This article covers the three processes that are necessary to complete these tasks:
- Deploy the required agents to Azure VMs by using Azure Policy.
- Deploy the required agents to on-premises servers.
- Enable and configuring the solutions.
Note
Create the required Log Analytics workspace and Azure Automation account before you onboard virtual machines to Azure server management services.
Use Azure Policy to deploy extensions to Azure VMs
All the management solutions that are discussed in Azure management tools and services require that the Log Analytics agent is installed on virtual machines in Azure as well as on-premises servers. You can onboard your Azure VMs at scale by using Azure Policy. Assign policy to ensure that the agent is installed on your Azure VMs and connected to the correct Log Analytics workspace.
Azure Policy has a built-in policy initiative that includes the Log Analytics agent and the Microsoft Dependency Agent, which is required by Azure Monitor for VMs.
Note
For more information about various agents for monitoring Azure, see Overview of the Azure monitoring agents.
Assign policies
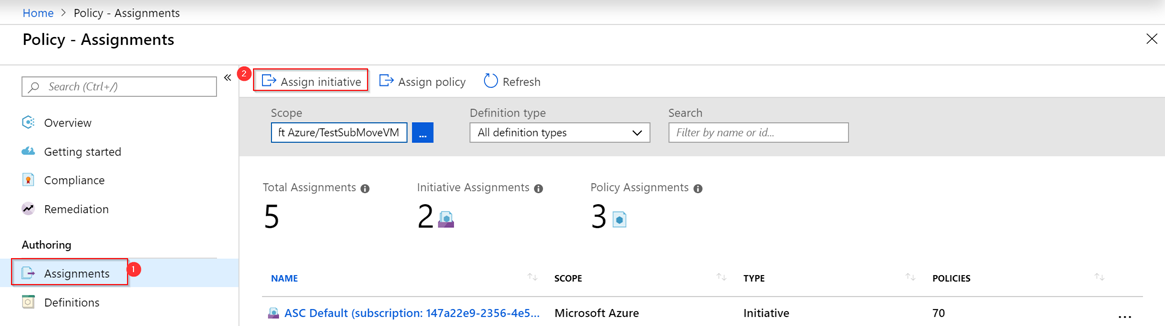
To assign the policies that described in the previous section:
In the Azure portal, go to Policy > Assignments > Assign initiative.
On the Assign policy page, set the Scope by selecting the ellipsis (...) and then selecting either a management group or subscription. Optionally, select a resource group. Then choose Select at the bottom of the Scope page. The scope determines which resources or group of resources the policy is assigned to.
Select the ellipsis (...) next to Policy definition to open the list of available definitions. To filter the initiative definitions, enter Azure Monitor in the Search box:

The Assignment name is automatically populated with the policy name that you selected, but you can change it. You can also add an optional description to provide more information about this policy assignment. The Assigned by field is automatically filled based on who is signed in. This field is optional, and it supports custom values.
For this policy, select Log Analytics workspace for the Log Analytics agent to associate.

Select the Managed Identity location checkbox. If this policy is of the type
DeployIfNotExists, a managed identity will be required to deploy the policy. In the portal, the account will be created as indicated by the checkbox selection.Select Assign.
After you complete the wizard, the policy assignment will be deployed to the environment. It can take up to 30 minutes for the policy to take effect. To test it, create new VMs after 30 minutes, and check if the Log Analytics agent is enabled on the VM by default.
Install agents on on-premises servers
Note
Create the required Log Analytics workspace and Azure Automation account before you onboard Azure server management services to servers.
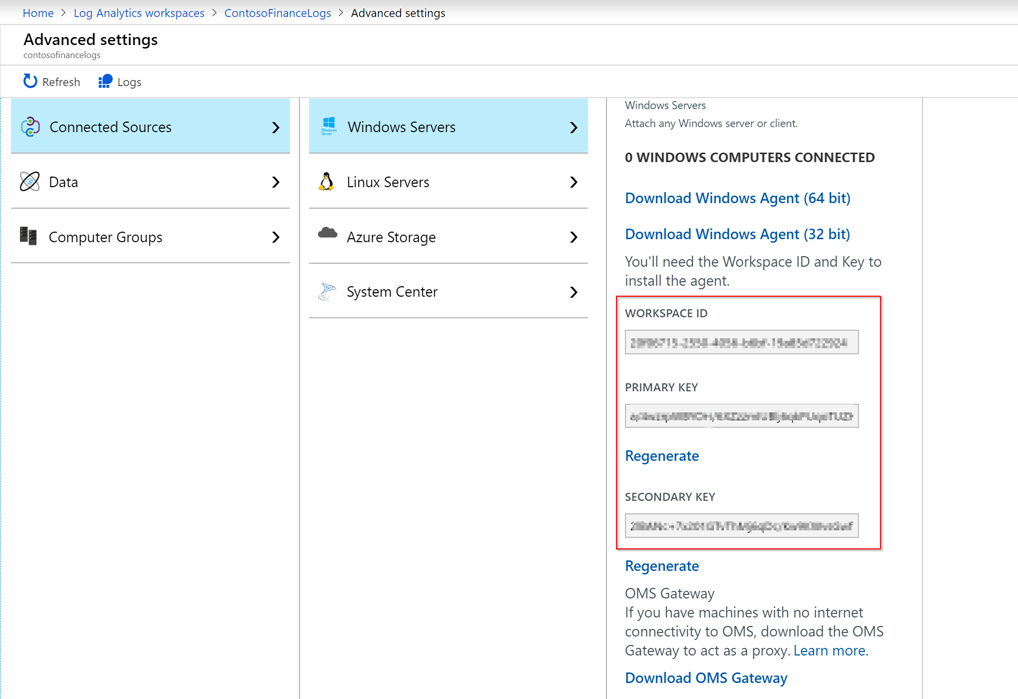
For on-premises servers, you need to download and install the Log Analytics agent and the Microsoft Dependency Agent manually and configure them to connect to the correct workspace. You must specify the workspace ID and key information. To get that information, go to your Log Analytics workspace in the Azure portal, then select Settings > Advanced settings.
Enable and configure solutions
To enable solutions, you need to configure the Log Analytics workspace. Onboarded Azure VMs and on-premises servers will get the solutions from the Log Analytics workspaces that they're connected to.
Update Management
The Update Management solution and the Change Tracking and Inventory solution require both a Log Analytics workspace and an Azure Automation account. To ensure that these resources are properly configured, we recommend that you onboard through your Automation account. For more information, see Onboard the Update Management solution and the Change Tracking and Inventory solution.
We recommend that you enable the Update Management solution for all servers. Update Management is free for Azure VMs and on-premises servers. If you enable Update Management through your Automation account, a scope configuration is created in the workspace. Manually update the scope to include machines that are covered by the Update Management solution.
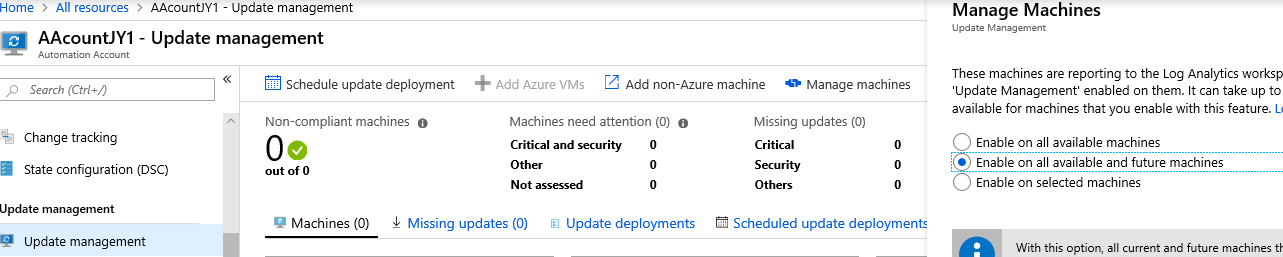
To cover your existing servers as well as future servers, you need to remove the scope configuration. To do this, view your Automation account in the Azure portal. Select Update Management > Manage machine > Enable on all available and future machines. This setting allows all Azure VMs that are connected to the workspace to use Update Management.
Change Tracking and Inventory solutions
To onboard the Change Tracking and Inventory solutions, follow the same steps as for Update Management. For more information about how to onboard these solutions from your Automation account, see Onboard the Update Management solution and the Change Tracking and Inventory solution.
The Change Tracking and Inventory solution is free for Azure VMs and costs $6 per node per month for on-premises servers. This cost covers change tracking, inventory, and Desired State Configuration. If you want to enroll only specific on-premises servers, you can opt in those servers. We recommend that you onboard all your production servers.
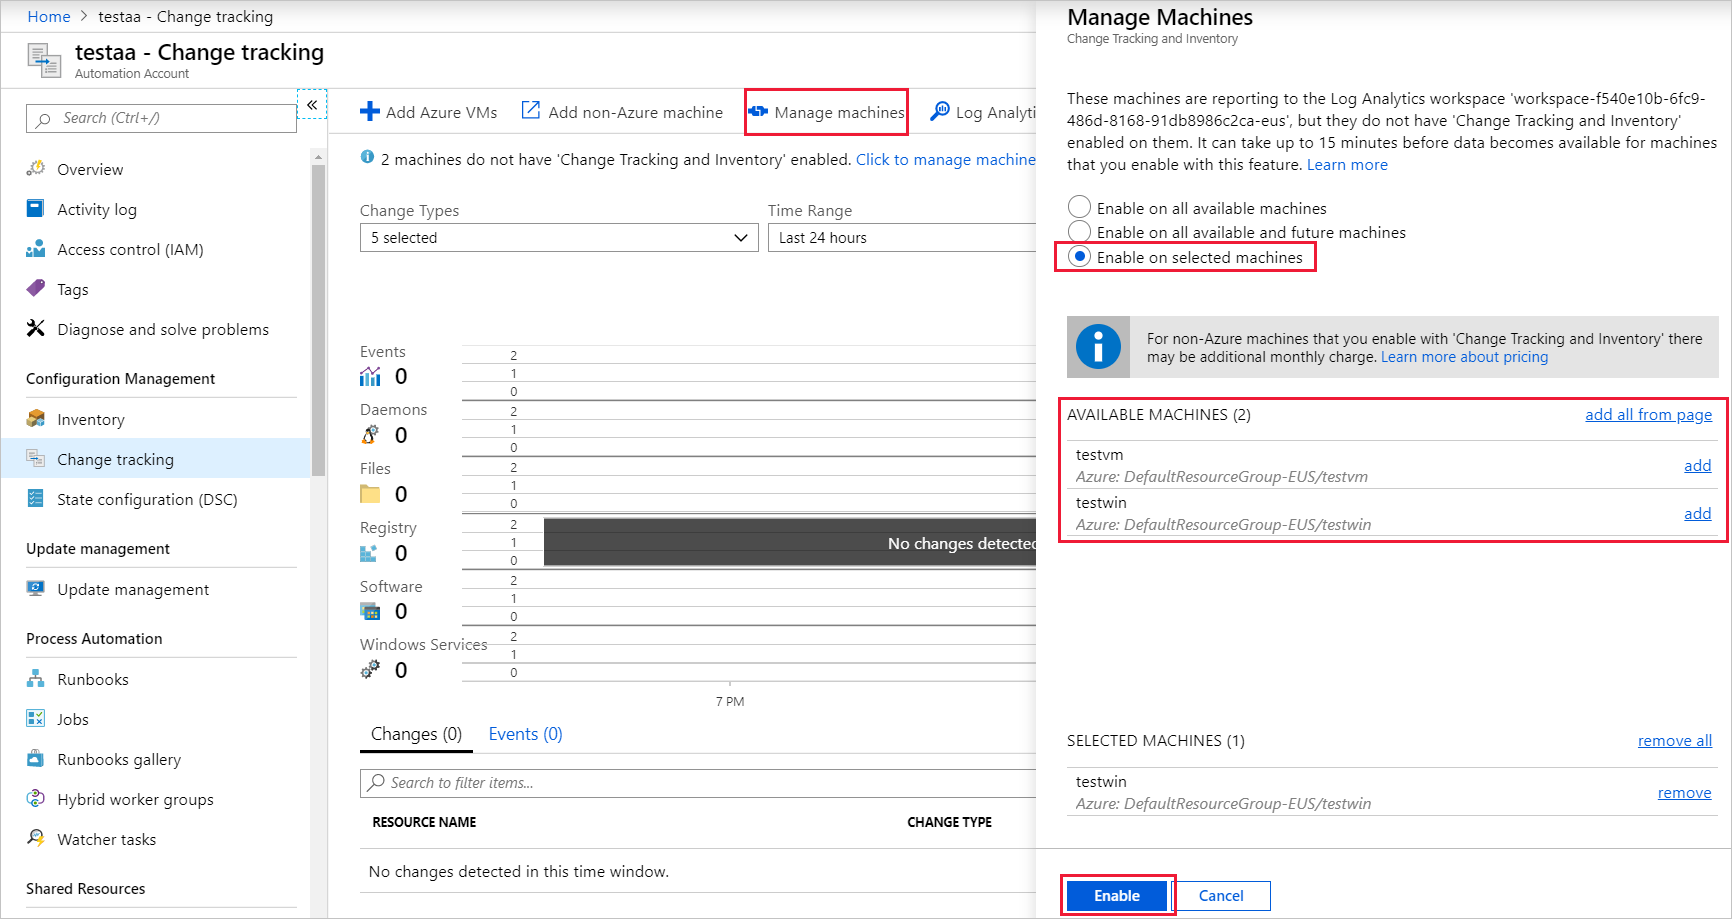
Opt in via the Azure portal
- Go to the Automation account that has Change Tracking and Inventory enabled.
- Select Change tracking.
- Select Manage machines in the upper-right pane.
- Select Enable on selected machines. Then select Add next to the machine name.
- Select Enable to enable the solution for those machines.
Opt in by using saved searches
Alternatively, you can configure the scope configuration to opt in on-premises servers. Scope configuration uses saved searches.
To create or modify the saved search, follow these steps:
Go to the Log Analytics workspace that is linked to the Automation account that you configured in the preceding steps.
Under General, select Saved searches.
In the Filter box, enter Change Tracking to filter the list of saved searches. In the results, select MicrosoftDefaultComputerGroup.
Enter the computer name or the VMUUID to include the computers that you want to opt in for Change Tracking and Inventory.
Heartbeat
| where AzureEnvironment=~"Azure" or Computer in~ ("list of the on-premises server names", "server1")
| distinct Computer
Note
The server name must exactly match the value in the expression, and it shouldn't contain a domain name suffix.
- Select Save. By default, the scope configuration is linked to the MicrosoftDefaultComputerGroup saved search. It will be automatically updated.
Azure activity log
Azure activity log is also part of Azure Monitor. It provides insight into subscription-level events that occur in Azure.
To implement this solution:
- In the Azure portal, open All services, then select Management + Governance > Solutions.
- In the Solutions view, select Add.
- Search for Activity Log Analytics and select it.
- Select Create.
You need to specify the Workspace name of the workspace that you created in the previous section where the solution is enabled.
Azure Log Analytics Agent Health
The Azure Log Analytics Agent Health solution reports on the health, performance, and availability of your Windows and Linux servers.
To implement this solution:
- In the Azure portal, open All services, then select Management + Governance > Solutions.
- In the Solutions view, select Add.
- Search for Azure Log Analytics agent health and select it.
- Select Create.
You need to specify the Workspace name of the workspace that you created in the previous section where the solution is enabled.
After creation is complete, the workspace resource instance displays AgentHealthAssessment when you select View > Solutions.
Antimalware assessment
The antimalware assessment solution helps you identify servers that are infected or at increased risk of infection by malware.
To implement this solution:
- In the Azure portal, open All services, select Management + Governance > Solutions.
- In the Solutions view, select Add.
- Search for and then select Antimalware Assessment.
- Select Create.
You need to specify the Workspace name of the workspace that you created in the previous section where the solution is enabled.
After creation is complete, the workspace resource instance displays AntiMalware when you select View > Solutions.
Azure Monitor for VMs
You can enable Azure Monitor for VMs through the view page for the VM instance, as described in Enable management services on a single VM for evaluation. You shouldn't enable solutions directly from the Solutions page as you do for the other solutions that are described in this article. For large-scale deployments, it may be easier to use automation to enable the correct solutions in the workspace.
Microsoft Defender for Cloud
We recommend that you onboard all your servers at least to the Free tier of Microsoft Defender for Cloud. This option provides basic security assessments and actionable security recommendations for your environment. The Standard tier provides additional benefits. For more information, see Microsoft Defender for Cloud pricing.
To enable the Free tier of Microsoft Defender for Cloud, follow these steps:
- Go to the Defender for Cloud portal page.
- Under POLICY & COMPLIANCE, select Security policy.
- Find the Log Analytics workspace resource that you created in the pane on the right side.
- Select Edit settings for that workspace.
- Select Pricing tier.
- Choose the Free option.
- Select Save.
Next steps
Learn how to use automation to onboard servers and create alerts.
Feedback
Coming soon: Throughout 2024 we will be phasing out GitHub Issues as the feedback mechanism for content and replacing it with a new feedback system. For more information see: https://aka.ms/ContentUserFeedback.
Submit and view feedback for