Manage databases in Azure SQL database using Azure Automation
This article describes the procedure to connect and manage databases in Azure SQL database using Azure Automation's system-assigned managed identity. With Azure Automation, you can manage databases in Azure SQL Database by using the latest Az PowerShell cmdlets that are available in Azure Az PowerShell.
Azure Automation has these Azure Az PowerShell cmdlets available out of the box, so that you can perform all the SQL database management tasks within the service. You can also pair these cmdlets in Azure Automation with the cmdlets of other Azure services to automate complex tasks across Azure services and across third-party systems.
Azure Automation can also issue T-SQL (Transact SQL) commands against the SQL servers using PowerShell.
To run the commands against the database, you need to do the following:
- Ensure that Automation account has a system-assigned managed identity.
- Provide the appropriate permissions to the Automation managed identity.
- Configure the SQL server to utilize Microsoft Entra authentication.
- Create a user on the SQL server that maps to the Automation account managed identity.
- Create a runbook to connect and execute the commands.
- (Optional) If the SQL server is protected by a firewall, create a Hybrid Runbook Worker (HRW), install the SQL modules on that server, and add the HRW IP address to the allowlist on the firewall.
Connect to Azure SQL database using System-assigned Managed identity
To allow access from the Automation system managed identity to the Azure SQL database, follow these steps:
If the Automation system managed identity is OFF, do the following:
Sign in to the Azure portal.
Go to your Automation account.
In the Automation account page, under Account Settings, select Identity.
Under the System assigned tab, select the Status as ON.
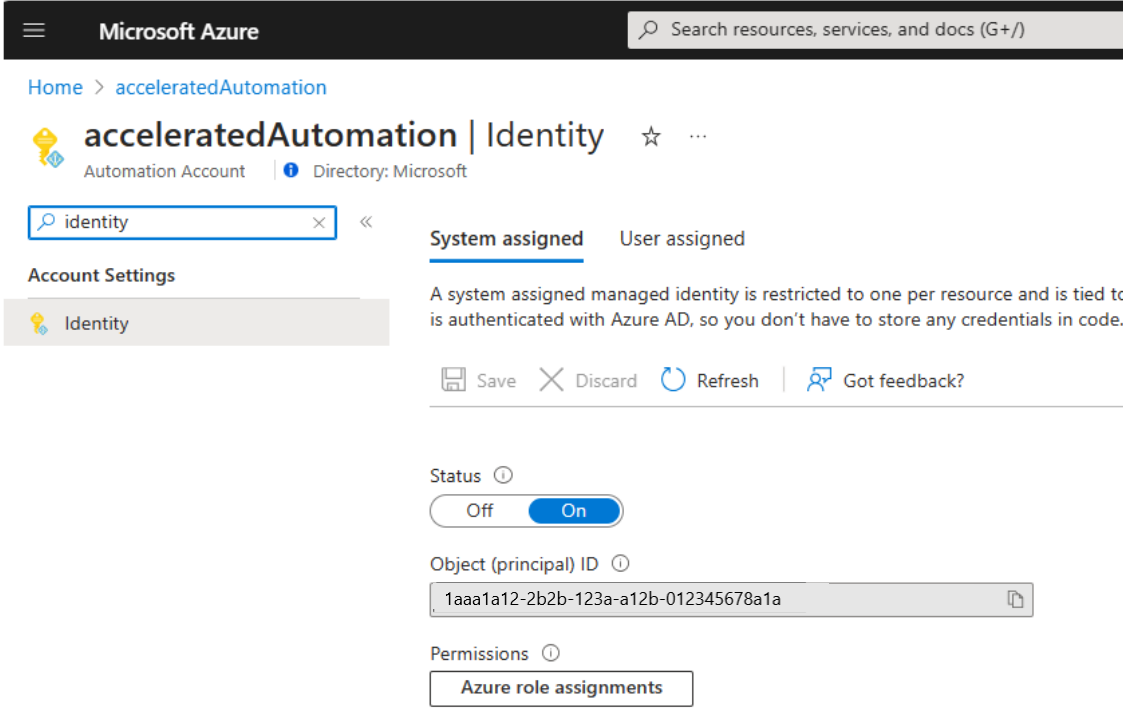
After the System Managed Identity is ON, you must provide the account the required access using these steps:
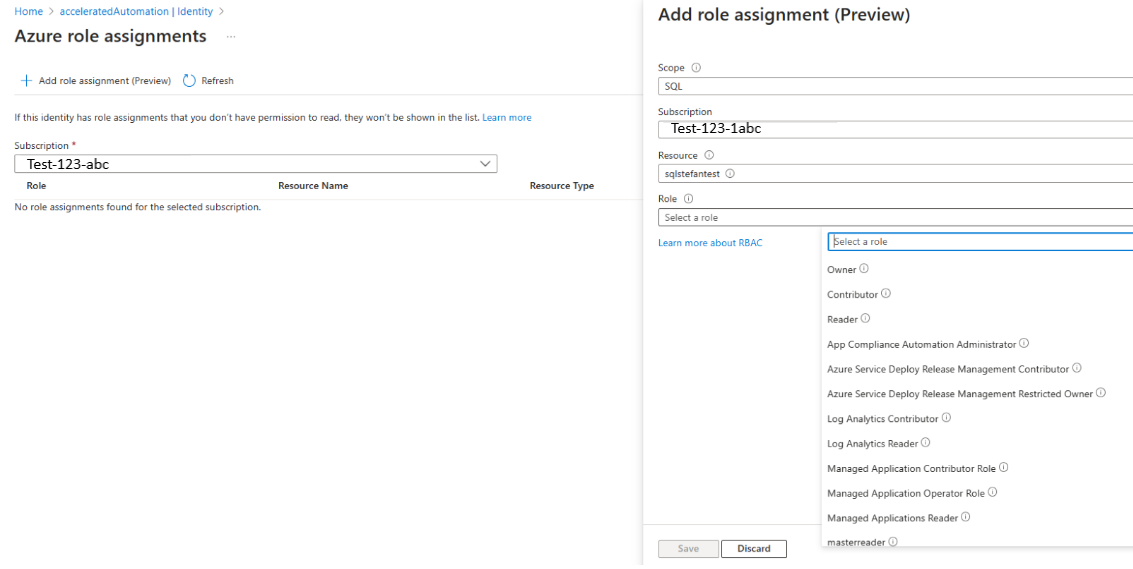
- In the Automation account | Identity page, System assigned tab, under permissions, select Azure role assignments.
- In the Azure role assignments page, select +Add role assignment (preview).
- In the Add role assignment (preview), select the Scope as SQL, select the Subscription, Resource from the drop-down and Role according to minimum required permissions, and then select Save.
Configure the SQL server for Active Directory authentication by using these steps:
- Go to Azure portal home page and select SQL servers.
- In the SQL server page, under Settings, select Microsoft Entra ID.
- Select Set admin to configure SQL server for AD authentication.
Add authentication on the SQL side by using these steps:
- Go to Azure portal home page and select SQL servers.
- In the SQL server page, under Settings, select SQL Databases.
- Select your database to go to the SQL database page and select Query editor (preview) and execute the following two queries:
- CREATE USER "AutomationAccount" FROM EXTERNAL PROVIDER WITH OBJECT_ID=
ObjectID - EXEC sp_addrolemember
db_owner, "AutomationAccount"- Automation account - replace with your Automation account's name
- Object ID - replace with object (principal) ID for your system managed identity principal from step 1.
- CREATE USER "AutomationAccount" FROM EXTERNAL PROVIDER WITH OBJECT_ID=


Sample code
Connection to Azure SQL Server
if ($($env:computerName) -eq "Client") {"Runbook running on Azure Client sandbox"} else {"Runbook running on " + $env:computerName}
Disable-AzContextAutosave -Scope Process
Connect-AzAccount -Identity
$Token = (Get-AZAccessToken -ResourceUrl https://database.windows.net).Token
Invoke-Sqlcmd -ServerInstance azuresqlserverxyz.database.windows.net -Database MyDBxyz -AccessToken $token -query 'select * from TableXYZ'
Check account permissions on the SQL side
SELECT roles.[name] as role_name, members.name as [user_name]
from sys.database_role_members
Join sys.database_principals roles on database_role_members.role_principal_id= roles.principal_id
join sys.database_principals members on database_role_members.member_principal_id=members.principal_id
Order By
roles.[name], members.[name]
Note
When a SQL server is running behind a firewall, you must run the Azure Automation runbook on a machine in your own network. Ensure that you configure this machine as a Hybrid Runbook Worker so that the IP address or network is not blocked by the firewall. For more information on how to configure a machine as a Hybrid Worker, see create a hybrid worker.
Use Hybrid worker
When you use a Hybrid worker, the modules that your runbook uses, must be installed locally from an elevated PowerShell prompt. For example, - Install-module Az.Accounts and Install-module SqlServer. To find the required module names, run a command on each cmdlet and then check the source. For example, to check module name for cmdlet Connect-AzAccounts which is part of the Az.Account module, run the command: get-command Connect-AzAccount
Note
We recommend that you add the following code on the top of any runbook that's intended to run on a Hybrid worker: if ($($env:computerName) -eq "CLIENT") {"Runbook running on Azure CLIENT"} else {"Runbook running on " + $env:computerName}. The code allows you to see the node it's running on and in case you accidentally run it on Azure cloud instead of the Hybrid worker, then it helps to determine the reason a runbook didn't work.
Next steps
- For details of credential use, see Manage credentials in Azure Automation.
- For information about modules, see Manage modules in Azure Automation.
- If you need to start a runbook, see Start a runbook in Azure Automation.
- For PowerShell details, see PowerShell Docs.
Feedback
Coming soon: Throughout 2024 we will be phasing out GitHub Issues as the feedback mechanism for content and replacing it with a new feedback system. For more information see: https://aka.ms/ContentUserFeedback.
Submit and view feedback for