Tutorial: Use dynamic configuration in a .NET app
The App Configuration .NET provider library supports updating configuration on demand without causing an application to restart. This tutorial shows how you can implement dynamic configuration updates in your code. It builds on the app introduced in the quickstart. You should finish Create a .NET app with App Configuration before continuing.
You can use any code editor to do the steps in this tutorial. Visual Studio Code is an excellent option that's available on the Windows, macOS, and Linux platforms.
In this tutorial, you learn how to:
- Set up your .NET app to update its configuration in response to changes in an App Configuration store.
- Consume the latest configuration in your application.
Prerequisites
If you don't have an Azure subscription, create an Azure free account before you begin.
Finish the quickstart Create a .NET app with App Configuration.
Activity-driven configuration refresh
Open Program.cs and update the file with the following code.
using Microsoft.Extensions.Configuration;
using Microsoft.Extensions.Configuration.AzureAppConfiguration;

IConfiguration _configuration = null;
IConfigurationRefresher _refresher = null;

var builder = new ConfigurationBuilder();
builder.AddAzureAppConfiguration(options =>
{
    options.Connect(Environment.GetEnvironmentVariable("ConnectionString"))
            .ConfigureRefresh(refresh =>
            {
                refresh.Register("TestApp:Settings:Message")
                       .SetCacheExpiration(TimeSpan.FromSeconds(10));
            });

    _refresher = options.GetRefresher();
});

_configuration = builder.Build();

Console.WriteLine(_configuration["TestApp:Settings:Message"] ?? "Hello world!");

// Wait for the user to press Enter
Console.ReadLine();

if (_refresher != null)
{
    await _refresher.TryRefreshAsync();
    Console.WriteLine(_configuration["TestApp:Settings:Message"] ?? "Hello world!");

}
In the ConfigureRefresh method, a key within your App Configuration store is registered for change monitoring. The Register method has an optional boolean parameter refreshAll that can be used to indicate whether all configuration values should be refreshed if the registered key changes. In this example, only the key TestApp:Settings:Message will be refreshed. The SetCacheExpiration method specifies the minimum time that must elapse before a new request is made to App Configuration to check for any configuration changes. In this example, you override the default expiration time of 30 seconds, specifying a time of 10 seconds instead for demonstration purposes.
Calling the ConfigureRefresh method alone won't cause the configuration to refresh automatically. You call the TryRefreshAsync method from the interface IConfigurationRefresher to trigger a refresh. This design is to avoid requests sent to App Configuration even when your application is idle. You'll want to include the TryRefreshAsync call where you consider your application active. For example, it can be when you process an incoming message, an order, or an iteration of a complex task. It can also be in a timer if your application is active all the time. In this example, you call TryRefreshAsync every time you press the Enter key. Even if the call TryRefreshAsync fails for any reason, your application continues to use the cached configuration. Another attempt is made when the configured cache expiration time has passed and the TryRefreshAsync call is triggered by your application activity again. Calling TryRefreshAsync is a no-op before the configured cache expiration time elapses, so its performance impact is minimal, even if it's called frequently.
Configuration refresh using dependency injection
In the previous code, you're manually saving an instance of IConfigurationRefresher to invoke TryRefreshAsync. Alternatively, if you're using dependency injection to resolve your services, you can reference the following steps.
Register the required App Configuration services by invoking
AddAzureAppConfigurationon yourIServiceCollection.Add the following code to Program.cs.
// Existing code in Program.cs
// ... ...

// Add Azure App Configuration services to IServiceCollection
builder.Services.AddAzureAppConfiguration();
Refresh your configuration by resolving an instance of
IConfigurationRefresherProviderfrom your service collection and invokingTryRefreshAsyncon each of its refreshers.class SampleConfigRefresher { private readonly IEnumerable<IConfigurationRefresher> _refreshers = null; public SampleConfigRefresher(IConfigurationRefresherProvider refresherProvider) { _refreshers = refresherProvider.Refreshers; } public async Task RefreshConfiguration() { foreach (var refresher in _refreshers) { _ = refresher.TryRefreshAsync(); } } }
Build and run the app locally
Set an environment variable named ConnectionString, and set it to the access key to your App Configuration store. If you use the Windows command prompt, run the following command and restart the command prompt to allow the change to take effect:
setx ConnectionString "connection-string-of-your-app-configuration-store"If you use Windows PowerShell, run the following command:
$Env:ConnectionString = "connection-string-of-your-app-configuration-store"If you use macOS or Linux, run the following command:
export ConnectionString='connection-string-of-your-app-configuration-store'Run the following command to build the console app:
dotnet buildAfter the build successfully completes, run the following command to run the app locally:
dotnet run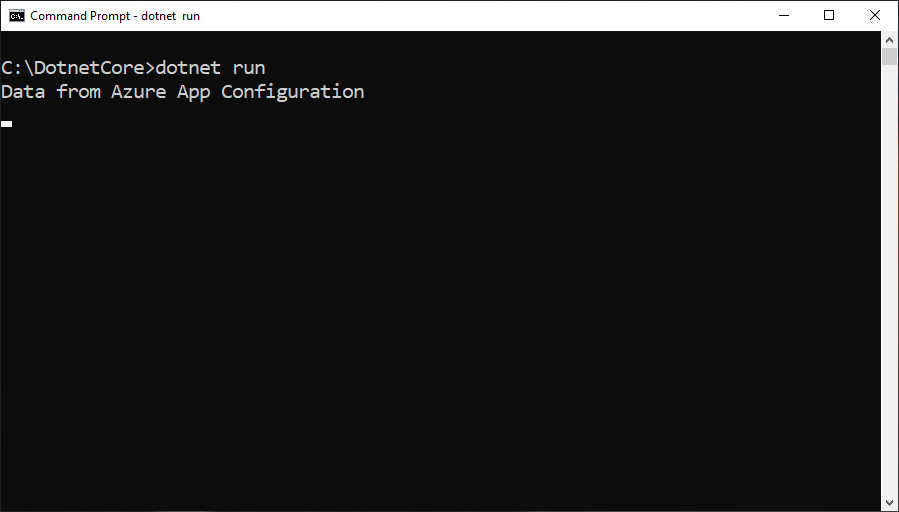
Sign in to the Azure portal. Select All resources, and select the App Configuration store instance that you created in the quickstart.
Select Configuration Explorer, and update the values of the following keys:
Key Value TestApp:Settings:Message Data from Azure App Configuration - Updated Press the Enter key to trigger a refresh and print the updated value in the Command Prompt or PowerShell window.

Note
Since the cache expiration time was set to 10 seconds using the
SetCacheExpirationmethod while specifying the configuration for the refresh operation, the value for the configuration setting will only be updated if at least 10 seconds have elapsed since the last refresh for that setting.
Logging and monitoring
Logs are output upon configuration refresh and contain detailed information on key-values retrieved from your App Configuration store and configuration changes made to your application. If you have an ASP.NET Core application, see these instructions for Logging and Monitoring in ASP.NET Core. Otherwise, you can enable logging using the instructions for logging with the Azure SDK.
Logs are output at different event levels. The default level is
Informational.Event Level Description Verbose Logs include the key and label of key-values your application monitors for changes from your App Configuration store. The information also includes whether the key-value has changed compared with what your application has already loaded. Enable logs at this level to troubleshoot your application if a configuration change didn't happen as expected. Informational Logs include the keys of configuration settings updated during a configuration refresh. Values of configuration settings are omitted from the log to avoid leaking sensitive data. You can monitor logs at this level to ensure your application picks up expected configuration changes. Warning Logs include failures and exceptions that occurred during configuration refresh. Occasional occurrences can be ignored because the configuration provider will continue using the cached data and attempt to refresh the configuration next time. You can monitor logs at this level for repetitive warnings that may indicate potential issues. For example, you rotated the connection string but forgot to update your application. You can enable logging at the
Verboseevent level by specifying theEventLevel.Verboseparameter, as done in the following example. These instructions apply to all other event levels as well. This example also enables logs for only theMicrosoft-Extensions-Configuration-AzureAppConfiguration-Refreshcategory.using var listener = new AzureEventSourceListener((eventData, text) => { if (eventData.EventSource.Name == "Microsoft-Extensions-Configuration-AzureAppConfiguration-Refresh") { Console.WriteLine("[{1}] {0}: {2}", eventData.EventSource.Name, eventData.Level, text); } }, EventLevel.Verbose);The logging category is
Microsoft-Extensions-Configuration-AzureAppConfiguration-Refresh, which appears before each log. Here are some example logs at each event level:[Verbose] Microsoft-Extensions-Configuration-AzureAppConfiguration-Refresh: Key-value read from App Configuration. Change:'Modified' Key:'ExampleKey' Label:'ExampleLabel' Endpoint:'https://examplestore.azconfig.io' [Informational] Microsoft-Extensions-Configuration-AzureAppConfiguration-Refresh: Setting updated. Key:'ExampleKey' [Warning] Microsoft-Extensions-Configuration-AzureAppConfiguration-Refresh: A refresh operation failed while resolving a Key Vault reference. Key vault error. ErrorCode:'SecretNotFound' Key:'ExampleKey' Label:'ExampleLabel' Etag:'6LaqgBQM9C_Do2XyZa2gAIfj_ArpT52-xWwDSLb2hDo' SecretIdentifier:'https://examplevault.vault.azure.net/secrets/ExampleSecret'
Note
Logging is available if you use version 6.0.0 or later of any of the following packages.
Microsoft.Extensions.Configuration.AzureAppConfigurationMicrosoft.Azure.AppConfiguration.AspNetCoreMicrosoft.Azure.AppConfiguration.Functions.Worker
Clean up resources
If you don't want to continue using the resources created in this article, delete the resource group you created here to avoid charges.
Important
Deleting a resource group is irreversible. The resource group and all the resources in it are permanently deleted. Ensure that you don't accidentally delete the wrong resource group or resources. If you created the resources for this article inside a resource group that contains other resources you want to keep, delete each resource individually from its respective pane instead of deleting the resource group.
- Sign in to the Azure portal, and select Resource groups.
- In the Filter by name box, enter the name of your resource group.
- In the result list, select the resource group name to see an overview.
- Select Delete resource group.
- You're asked to confirm the deletion of the resource group. Enter the name of your resource group to confirm, and select Delete.
After a few moments, the resource group and all its resources are deleted.
Next steps
In this tutorial, you enabled your .NET app to dynamically refresh configuration settings from App Configuration. To learn how to use an Azure managed identity to streamline the access to App Configuration, continue to the next tutorial.
Feedback
Coming soon: Throughout 2024 we will be phasing out GitHub Issues as the feedback mechanism for content and replacing it with a new feedback system. For more information see: https://aka.ms/ContentUserFeedback.
Submit and view feedback for