Remove your VMware vCenter environment from Azure Arc
Caution
This article references CentOS, a Linux distribution that is nearing End Of Life (EOL) status. Please consider your use and planning accordingly. For more information, see the CentOS End Of Life guidance.
In this article, you learn how to cleanly remove your VMware vCenter environment from Azure Arc-enabled VMware vSphere. For VMware vSphere environments that you no longer want to manage with Azure Arc-enabled VMware vSphere, follow the steps in the article to:
- Remove guest management from VMware virtual machines
- Remove your VMware vCenter environment from Azure Arc
- Remove Arc resource bridge related items in your vCenter
1. Remove guest management from VMware virtual machines
To prevent continued billing of Azure management services after you remove the vSphere environment from Azure Arc, you must first cleanly remove guest management from all Arc-enabled VMware vSphere virtual machines where it was enabled. When you enable guest management on Arc-enabled VMware vSphere virtual machines, the Arc connected machine agent is installed on them.
Once guest management is enabled, you can install VM extensions on them and use Azure management services like the Log Analytics on them. To cleanly remove guest management, you must follow the steps below to remove any VM extensions from the virtual machine, disconnect the agent, and uninstall the software from your virtual machine. It's important to complete each of the three steps to fully remove all related software components from your virtual machines.
Step 1: Remove VM extensions
If you have deployed Azure VM extensions to an Azure Arc-enabled VMware vSphere VM, you must uninstall the extensions before disconnecting the agent or uninstalling the software. Uninstalling the Azure Connected Machine agent doesn't automatically remove extensions, and they won't be recognized if you later connect the VM to Azure Arc again. Uninstall extensions using the following steps:
Select VMware vCenters.
Search and select the vCenter you want to remove from Azure Arc.
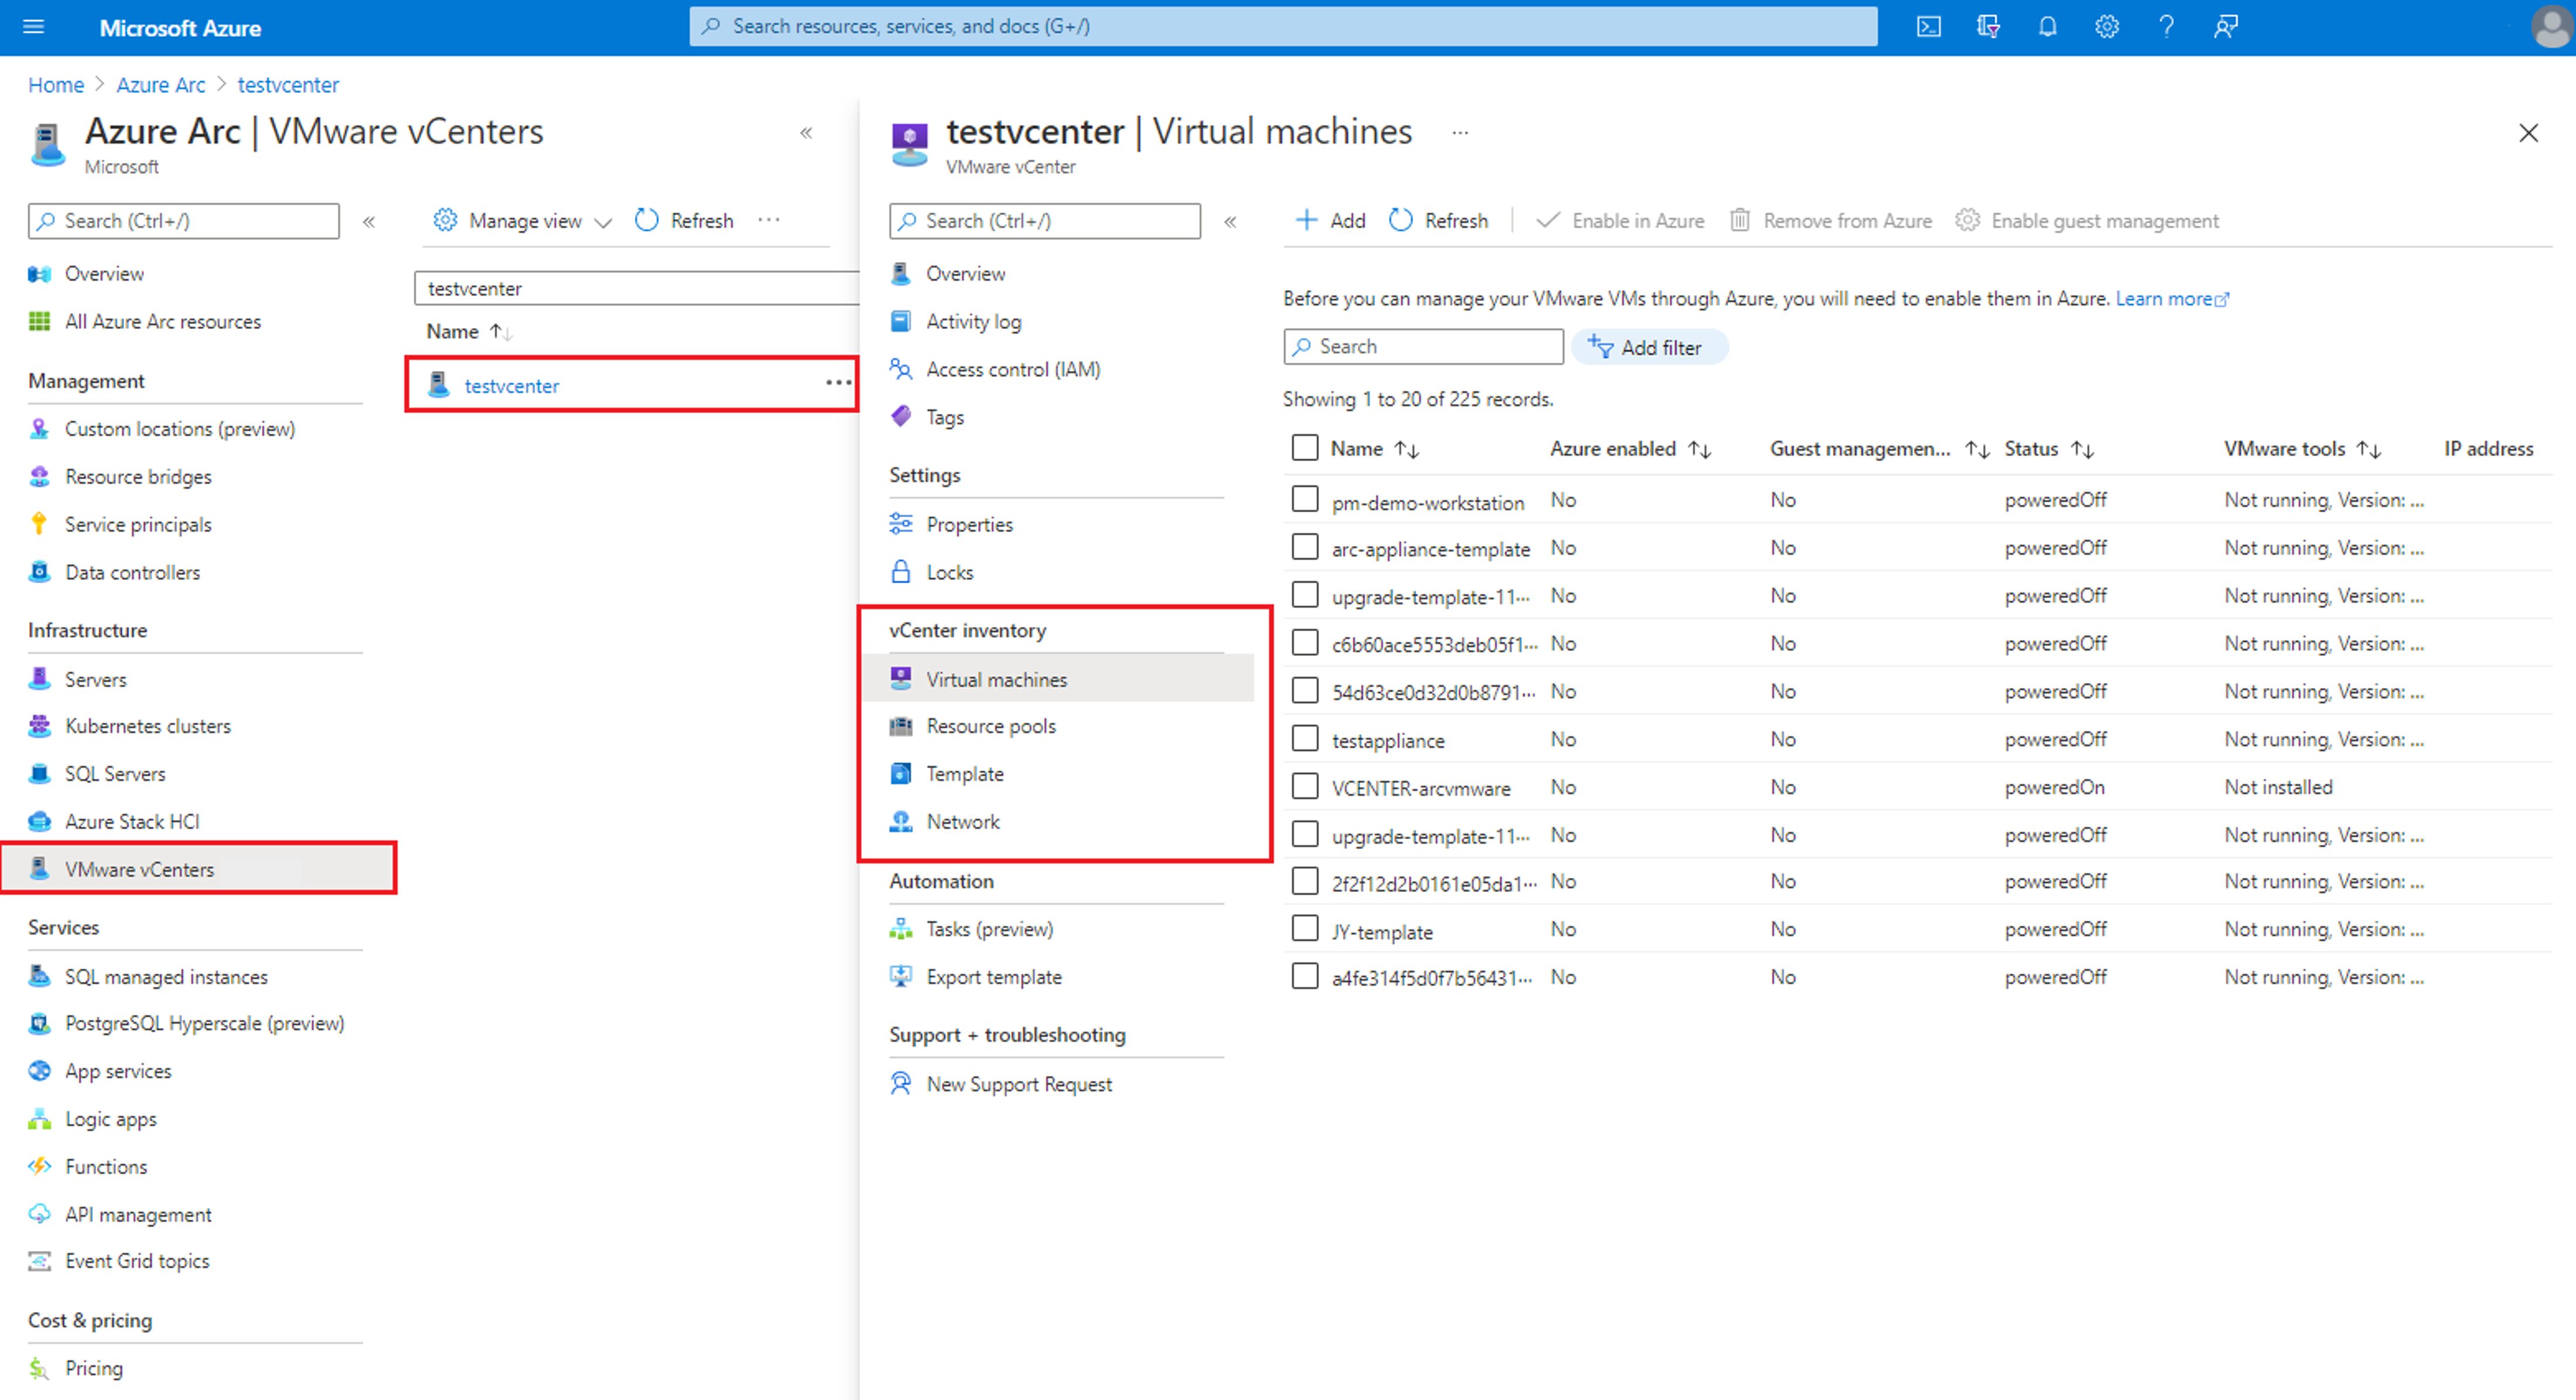
Select Virtual machines under vCenter inventory.
Search and select the virtual machine where you have Guest Management enabled.
Select Extensions.
Select the extensions and select Uninstall

Step 2: Disconnect the agent from Azure Arc
Disconnecting the agent clears the local state of the agent and removes agent information from our systems. To disconnect the agent, sign-in and run the following command as an administrator/root account on the virtual machine.
azcmagent disconnect --force-local-only
Step 3: Uninstall the agent
For Windows virtual machines
To uninstall the Windows agent from the machine, do the following:
- Sign in to the computer with an account that has administrator permissions.
- In Control Panel, select Programs and Features.
- In Programs and Features, select Azure Connected Machine Agent, select Uninstall, and then select Yes.
- Delete the
C:\Program Files\AzureConnectedMachineAgentfolder
For Linux virtual machines
To uninstall the Linux agent, the command to use depends on the Linux operating system. You must have root access permissions or your account must have elevated rights using sudo.
For Ubuntu, run the following command:
sudo apt purge azcmagentFor RHEL, CentOS, Oracle Linux run the following command:
sudo yum remove azcmagentFor SLES, run the following command:
sudo zypper remove azcmagent
2. Remove your VMware vCenter environment from Azure Arc
You can remove your VMware vSphere resources from Azure Arc using either the deboarding script or manually.
Remove VMware vSphere resources from Azure Arc using deboarding script
Download the deboarding script to do a full cleanup of all the Arc-enabled VMware resources. The script removes all the Azure resources, including vCenter, custom location, virtual machines, virtual templates, hosts, clusters, resource pools, datastores, virtual networks, Azure Resource Manager (ARM) resource of Appliance, and the appliance VM running on vCenter.
Run the script
To run the deboarding script, follow these steps:
Windows
Open a PowerShell window as an Administrator and go to the folder where you've downloaded the PowerShell script.
Note
On Windows workstations, the script must be run in PowerShell window and not in PowerShell Integrated Script Editor (ISE), as PowerShell ISE doesn't display the input prompts from Azure CLI commands. If the script is run on PowerShell ISE, it can appear as though the script is stuck while it's waiting for input.
Run the following command to allow the script to run because it's an unsigned script. (If you close the session before you complete all the steps, run this command again for the new session.)
Set-ExecutionPolicy -Scope Process -ExecutionPolicy BypassRun the script.
./arcvmware-deboard.ps1
Inputs for the script
vCenterId: The Azure resource ID of the VMware vCenter resource.
For example: /subscriptions/204898ee-cd13-4332-1111-88ca5c11111c/resourceGroups/Synthetics/providers/Microsoft.ConnectedVMwarevSphere/VCenters/vcenterresourceAVSId: The Azure resource ID of the AVS instance. Specifying vCenterId or AVSId is mandatory.
ApplianceConfigFilePath (optional): Path to kubeconfig, output from deploy command. Providing applianceconfigfilepath also deletes the appliance VM running on the vCenter.
Force: Using the Force flag deletes all the Azure resources without reaching resource bridge. Use this option if resource bridge VM isn't in running state.
Remove VMware vSphere resources from Azure manually
If you aren't using the deboarding script, follow these steps to remove the VMware vSphere resources manually:
Note
When you enable VMware vSphere resources in Azure, an Azure resource representing them is created. Before you can delete the vCenter resource in Azure, you must delete all the Azure resources that represent your related vSphere resources.
Select VMware vCenters.
Search and select the vCenter you remove from Azure Arc.
Select Virtual machines under vCenter inventory.
Select all the VMs that have Virtual hardware management value as Enabled.
Select Remove from Azure.
This action only removes these resource representations from Azure. The resources continue to remain in your vCenter.
Do the steps 4, 5, and 6 for Clouds, VM networks, and VM templates by performing Remove from Azure operation for resources with Azure Enabled value as Yes.
Once the deletion is complete, select Overview.
Note the Custom location and the Azure Arc Resource bridge resource in the Essentials section.
Select Remove from Azure to remove the vCenter resource from Azure.
Go to the Custom location resource and select Delete.
Go to the Azure Arc Resource bridge resource and select Delete.
At this point, all your Arc-enabled VMware vSphere resources are removed from Azure.
3. Remove Arc resource bridge related items in your vCenter
During onboarding, to create a connection between your VMware vCenter and Azure, an Azure Arc resource bridge is deployed in your VMware vSphere environment. As the last step, you must delete the resource bridge VM and the VM template created during the onboarding.
You can find both the virtual machine and the template on the resource pool/cluster/host that you provided during Azure Arc-enabled VMware vSphere onboarding.
Next steps
Feedback
Coming soon: Throughout 2024 we will be phasing out GitHub Issues as the feedback mechanism for content and replacing it with a new feedback system. For more information see: https://aka.ms/ContentUserFeedback.
Submit and view feedback for