Quickstart: Use Azure Cache for Redis in Java with Redisson Redis client
In this quickstart, you incorporate Azure Cache for Redis into a Java app using the Redisson Redis client and JCP standard JCache API. These services give you access to a secure, dedicated cache that is accessible from any application within Azure. This article provides two options for selecting the Azure identity to use for the Redis connection.
Skip to the code on GitHub
This quickstart uses the Maven archetype feature to generate the scaffolding for the app. The quickstart directs you to modify the generated code to arrive at the working sample app. If you want to skip straight to the completed code, see the Java quickstart on GitHub.
Prerequisites
- Azure subscription - create one for free
- Use Microsoft Entra ID for cache authentication
- Apache Maven
Create an Azure Cache for Redis
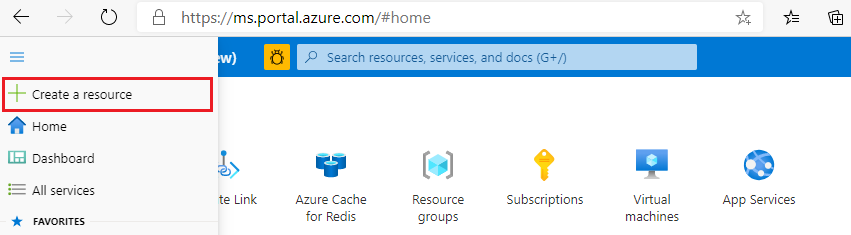
To create a cache, sign in to the Azure portal and select Create a resource.
On the New page, select Databases and then select Azure Cache for Redis.

On the New Redis Cache page, configure the settings for your new cache.
Setting Choose a value Description Subscription Drop down and select your subscription. The subscription under which to create this new Azure Cache for Redis instance. Resource group Drop down and select a resource group, or select Create new and enter a new resource group name. Name for the resource group in which to create your cache and other resources. By putting all your app resources in one resource group, you can easily manage or delete them together. DNS name Enter a unique name. The cache name must be a string between 1 and 63 characters that contain only numbers, letters, or hyphens. The name must start and end with a number or letter, and can't contain consecutive hyphens. Your cache instance's host name is <DNS name>.redis.cache.windows.net. Location Drop down and select a location. Select a region near other services that use your cache. Cache type Drop down and select a tier. The tier determines the size, performance, and features that are available for the cache. For more information, see Azure Cache for Redis Overview. Select the Networking tab or select the Networking button at the bottom of the page.
In the Networking tab, select your connectivity method.
Select the Next: Advanced tab or select the Next: Advanced button on the bottom of the page to see the Advanced tab.

- For Basic or Standard caches, toggle the selection for a non-TLS port. You can also select if you want to enable Microsoft Entra Authentication.
- For a Premium cache, configure the settings for non-TLS port, clustering, managed identity, and data persistence. You can also select if you want to enable Microsoft Entra Authentication.
Select the Next: Tags tab or select the Next: Tags button at the bottom of the page.
Optionally, in the Tags tab, enter the name and value if you wish to categorize the resource.
Select Review + create. You're taken to the Review + create tab where Azure validates your configuration.
After the green Validation passed message appears, select Create.
It takes a while for a cache to create. You can monitor progress on the Azure Cache for Redis Overview page. When Status shows as Running, the cache is ready to use.
Retrieve host name, ports, and access keys from the Azure portal
To connect your Azure Cache for Redis server, the cache client needs the host name, ports, and a key for the cache. Some clients might refer to these items by slightly different names. You can get the host name, ports, and keys from the Azure portal.
To get the access keys, select Authentication from the Resource menu. Then, select the Access keys tab.

To get the host name and ports for your cache, select Overview from the Resource menu. The host name is of the form <DNS name>.redis.cache.windows.net.

Set up the working environment
The steps in this section show you two options for how to select the Azure identity used for the Redis connection. The sample code looks at the value of the AUTH_TYPE environment variable and takes action depending on the value.
Identity option 1: Authentication with Redis Key
Depending on your operating system, add environment variables for your cache's host name and primary access key. Open a command prompt, or a terminal window, and set up the following values:
export REDIS_CACHE_HOSTNAME=<your-host-name>.redis.cache.windows.net
export REDIS_CACHE_KEY=<your-primary-access-key>
export AUTH_TYPE=RedisKey
Replace the placeholders with the following values:
<your-host-name>: The DNS host name, obtained from the Properties section of your Azure Cache for Redis resource in the Azure portal.<your-primary-access-key>: The primary access key, obtained from the Access keys section of your Azure Cache for Redis resource in the Azure portal.
Identity option 2: Authentication with Microsoft Entra ID
Depending on your operating system, add environment variables for your cache's host name and user name. Open a command prompt, or a terminal window, and set up the following values:
export REDIS_CACHE_HOSTNAME=<your-host-name>.redis.cache.windows.net
export USER_NAME=<user-name>
export AUTH_TYPE=MicrosoftEntraID
Replace the placeholders with the following values:
<your-host-name>: The DNS host name, obtained from the Properties section of your Azure Cache for Redis resource in the Azure portal.<user-name>: Object ID of your managed identity or service principal.You can get the user name by using the following steps:
In the Azure portal, navigate to your Azure Cache for Redis instance.
On the navigation pane, select Data Access Configuration.
On the Redis Users tab, find the Username column.


Create a new Java app
Using Maven, generate a new quickstart app:
mvn archetype:generate \
    -DarchetypeGroupId=org.apache.maven.archetypes \
    -DarchetypeArtifactId=maven-archetype-quickstart \
    -DarchetypeVersion=1.3 \
    -DinteractiveMode=false \
    -DgroupId=example.demo \
    -DartifactId=redis-redisson-test \
    -Dversion=1.0
Change to the new redis-redisson-test project directory.
Open the pom.xml file and add a dependency for Redisson:
    <dependency>
        <groupId>com.azure</groupId>
        <artifactId>azure-identity</artifactId>
        <version>1.8.2</version>
    </dependency>

    <dependency>
        <groupId>org.redisson</groupId>
        <artifactId>redisson</artifactId>
        <version>3.24.3</version>
    </dependency>
Save the pom.xml file.
Open App.java and replace the code with the following code:
package example.demo;

import com.azure.core.credential.TokenRequestContext;
import com.azure.identity.DefaultAzureCredential;
import com.azure.identity.DefaultAzureCredentialBuilder;
import org.redisson.Redisson;
import org.redisson.api.RedissonClient;
import org.redisson.config.Config;
import org.redisson.jcache.configuration.RedissonConfiguration;

import javax.cache.Cache;
import javax.cache.CacheManager;
import javax.cache.Caching;
import javax.cache.configuration.Configuration;
import javax.cache.configuration.MutableConfiguration;
import java.time.LocalDateTime;


/**
 * Redis test
 *
 */
public class App {
    public static void main(String[] args) {

        Config redissonconfig = getConfig();

        RedissonClient redissonClient = Redisson.create(redissonconfig);

        MutableConfiguration<String, String> jcacheConfig = new MutableConfiguration<>();
        Configuration<String, String> config = RedissonConfiguration.fromInstance(redissonClient, jcacheConfig);

        // Perform cache operations using JCache
        CacheManager manager = Caching.getCachingProvider().getCacheManager();
        Cache<String, String> map = manager.createCache("test", config);

        // Simple get and put of string data into the cache
        System.out.println("\nCache Command  : GET Message");
        System.out.println("Cache Response : " + map.get("Message"));

        System.out.println("\nCache Command  : SET Message");
        map.put("Message",
            String.format("Hello! The cache is working from Java! %s", LocalDateTime.now()));

        // Demonstrate "SET Message" executed as expected
        System.out.println("\nCache Command  : GET Message");
        System.out.println("Cache Response : " + map.get("Message"));

        redissonClient.shutdown();
    }

    private static Config getConfig(){
        if ("MicrosoftEntraID".equals(System.getenv("AUTH_TYPE"))) {
            System.out.println("Auth with Microsoft Entra ID");
            return getConfigAuthWithAAD();
        } else if ("RedisKey".equals(System.getenv("AUTH_TYPE"))) {
            System.out.println("Auth with Redis key");
            return getConfigAuthWithKey();
        }
        System.out.println("Auth with Redis key");
        return getConfigAuthWithKey();
    }

    private static Config getConfigAuthWithKey() {
        // Connect to the Azure Cache for Redis over the TLS/SSL port using the key
        Config redissonconfig = new Config();
        redissonconfig.useSingleServer().setPassword(System.getenv("REDIS_CACHE_KEY"))
            .setAddress(String.format("rediss://%s:6380", System.getenv("REDIS_CACHE_HOSTNAME")));
        return redissonconfig;
    }

    private static Config getConfigAuthWithAAD() {
        //Construct a Token Credential from Identity library, e.g. DefaultAzureCredential / ClientSecretCredential / Client CertificateCredential / ManagedIdentityCredential etc.
        DefaultAzureCredential defaultAzureCredential = new DefaultAzureCredentialBuilder().build();

        // Fetch a Microsoft Entra token to be used for authentication.
        String token = defaultAzureCredential
            .getToken(new TokenRequestContext()
                .addScopes("acca5fbb-b7e4-4009-81f1-37e38fd66d78/.default")).block().getToken();

        // Connect to the Azure Cache for Redis over the TLS/SSL port using the key
        Config redissonconfig = new Config();
        redissonconfig.useSingleServer()
            .setAddress(String.format("rediss://%s:6380", System.getenv("REDIS_CACHE_HOSTNAME")))
            .setUsername(System.getenv("USER_NAME")) // (Required) Username is Object ID of your managed identity or service principal
            .setPassword(token); // Microsoft Entra access token as password is required.
        return redissonconfig;
    }

}
This code shows you how to connect to an Azure Cache for Redis instance using Microsoft Entra ID with the JCache API support from the Redisson client library. The code also stores and retrieves a string value in the cache. For more information on JCache, see the JCache specification.
Save App.java.
Build and run the app
Execute the following Maven command to build and run the app:
In the following output, you can see that the Message key previously had a cached value, which was set in the last run. The app updated that cached value.
Cache Command  : GET Message
Cache Response : Hello! The cache is working from Java! 2023-12-05T15:13:11.398873

Cache Command  : SET Message

Cache Command  : GET Message
Cache Response : Hello! The cache is working from Java! 2023-12-05T15:45:45.748667
Clean up resources
If you plan to continue with the next tutorial, you can keep the resources created in this quickstart and reuse them.
Otherwise, if you're finished with the quickstart sample application, you can delete the Azure resources created in this quickstart to avoid charges.
Important
Deleting a resource group is irreversible and that the resource group and all the resources in it are permanently deleted. Make sure that you do not accidentally delete the wrong resource group or resources. If you created the resources for hosting this sample inside an existing resource group that contains resources you want to keep, you can delete each resource individually instead of deleting the resource group.
Sign in to the Azure portal and select Resource groups.
In the Filter by name textbox, type the name of your resource group. The instructions for this article used a resource group named
TestResources. On your resource group in the result list, select Test Resources then Delete resource group.
Type the name of your resource group to confirm deletion and then select Delete.

After a few moments, the resource group and all of its contained resources are deleted.
Next steps
In this quickstart, you learned how to use Azure Cache for Redis from a Java application with Redisson Redis client and JCache. Continue to the next quickstart to use Azure Cache for Redis with an ASP.NET web app.
Feedback
Coming soon: Throughout 2024 we will be phasing out GitHub Issues as the feedback mechanism for content and replacing it with a new feedback system. For more information see: https://aka.ms/ContentUserFeedback.
Submit and view feedback for