Create a function in the Azure portal that runs on a schedule
Learn how to use the Azure portal to create a function that runs serverless on Azure based on a schedule that you define.
Note
In-portal editing is only supported for JavaScript, PowerShell, and C# Script functions. Python in-portal editing is supported only when running in the Consumption plan. When possible, you should develop your functions locally.
To learn more about the limitations on editing function code in the Azure portal, see Development limitations in the Azure portal.
Prerequisites
To complete this tutorial:
Ensure that you have an Azure subscription. If you don't have an Azure subscription, create a free account before you begin.
Create a function app
From the Azure portal menu or the Home page, select Create a resource.
In the New page, select Compute > Function App.
Under Select a hosting option, select Consumption > Select to create your app in the default Consumption plan. In this serverless hosting option, you pay only for the time your functions run. Premium plan also offers dynamic scaling. When you run in an App Service plan, you must manage the scaling of your function app.
On the Basics page, use the function app settings as specified in the following table:
Setting Suggested value Description Subscription Your subscription The subscription under which you create your new function app. Resource Group myResourceGroup Name for the new resource group in which you create your function app. You should create a new resource group because there are known limitations when creating new function apps in an existing resource group. Function App name Globally unique name Name that identifies your new function app. Valid characters are a-z(case insensitive),0-9, and-.Runtime stack Preferred language Choose a runtime that supports your favorite function programming language. In-portal editing is only available for JavaScript, PowerShell, Python, TypeScript, and C# script. C# class library and Java functions must be developed locally. Version Version number Choose the version of your installed runtime. Region Preferred region Select a region that's near you or near other services that your functions can access. Operating system Windows An operating system is preselected for you based on your runtime stack selection, but you can change the setting if necessary. In-portal editing is only supported on Windows. Accept the default options in the remaining tabs, including the default behavior of creating a new storage account on the Storage tab and a new Application Insight instance on the Monitoring tab. You can also choose to use an existing storage account or Application Insights instance.
Select Review + create to review the app configuration you chose, and then select Create to provision and deploy the function app.
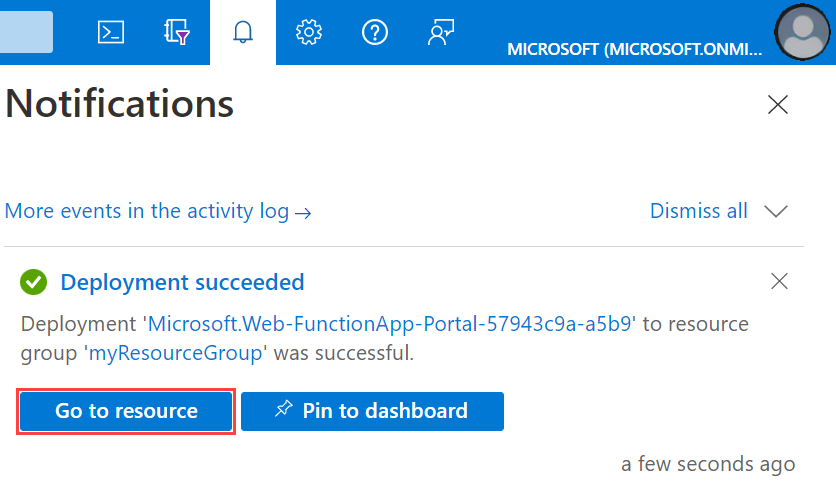
Select the Notifications icon in the upper-right corner of the portal and watch for the Deployment succeeded message.
Select Go to resource to view your new function app. You can also select Pin to dashboard. Pinning makes it easier to return to this function app resource from your dashboard.
Your new function app is ready to use. Next, you'll create a function in the new function app.
Create a timer triggered function
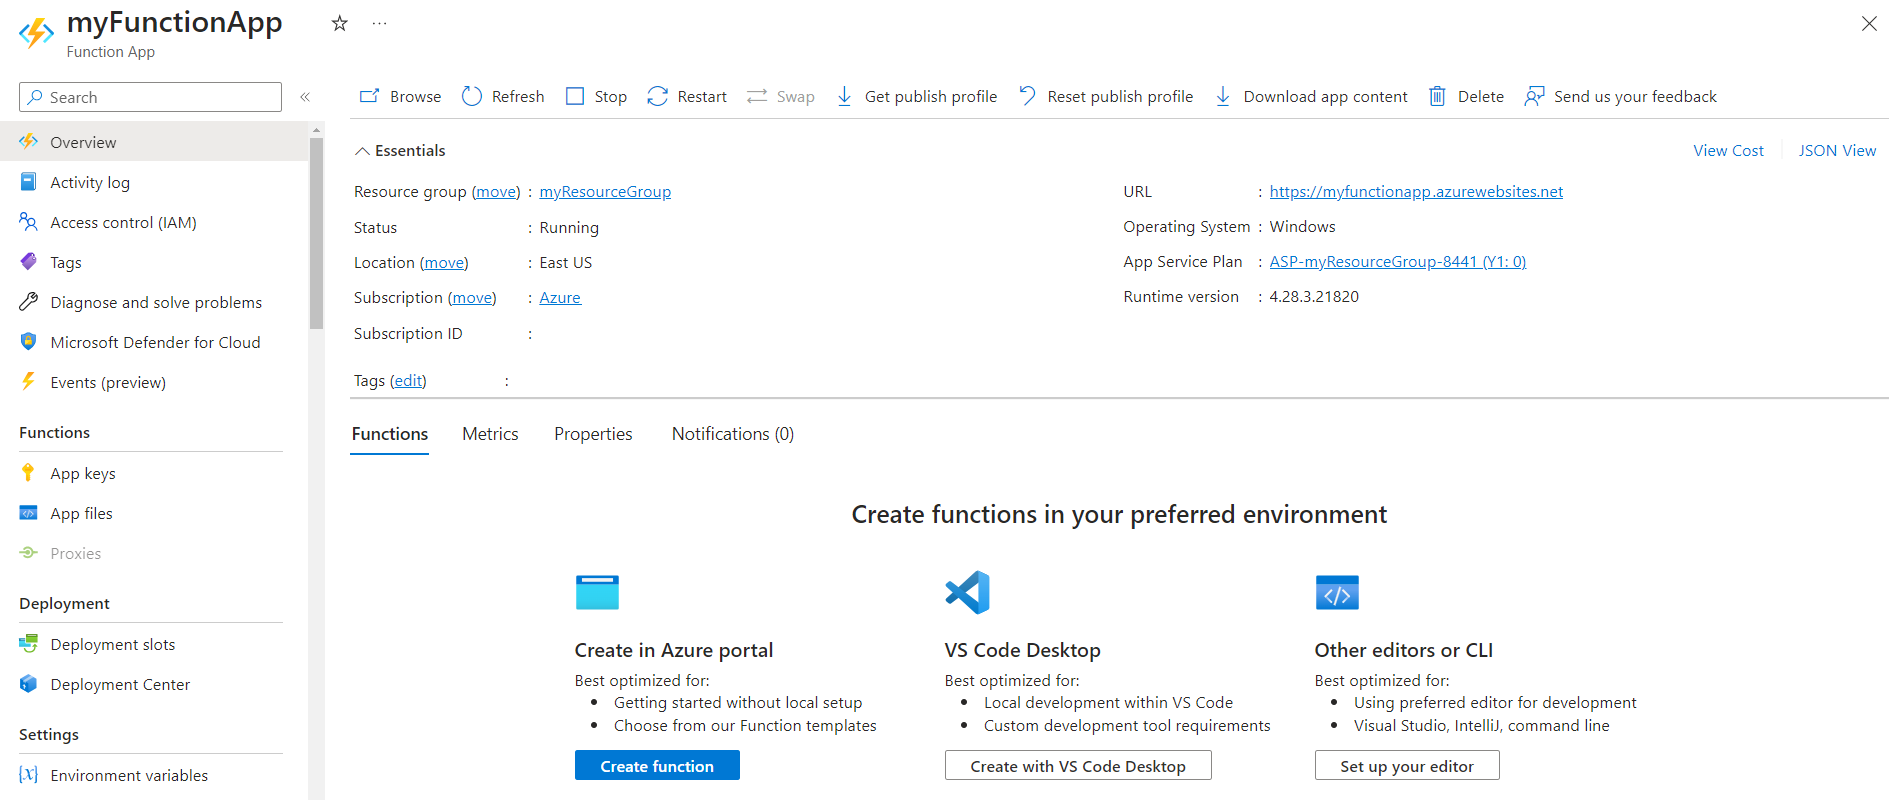
In your function app, select Overview, and then select + Create under Functions.

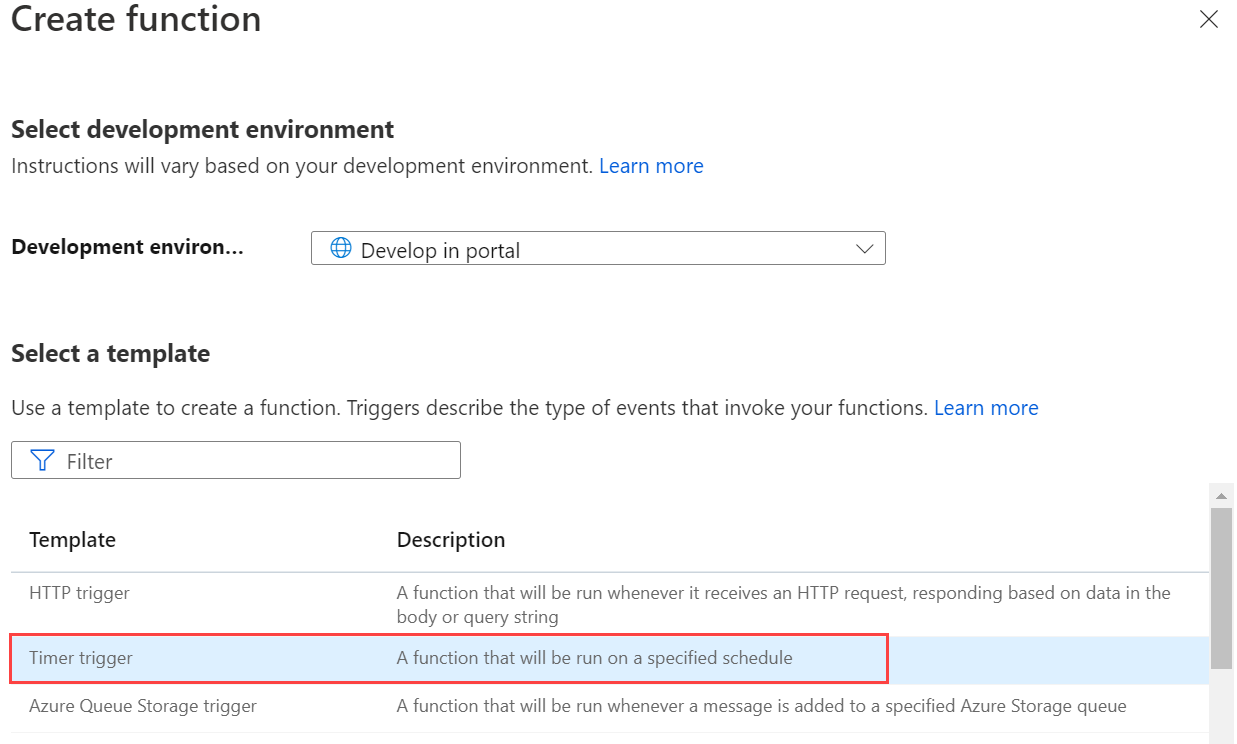
Under Select a template, scroll down and choose the Timer trigger template.
In Template details, configure the new trigger with the settings as specified in the table below the image, and then select Create.
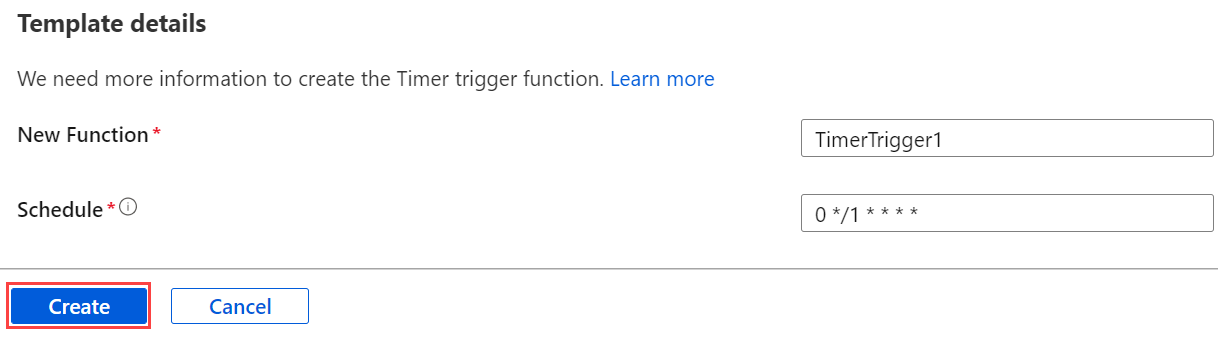
Setting Suggested value Description Name Default Defines the name of your timer triggered function. Schedule 0 */1 * * * * A six field CRON expression that schedules your function to run every minute.
Test the function
In your function, select Code + Test and expand the Logs.
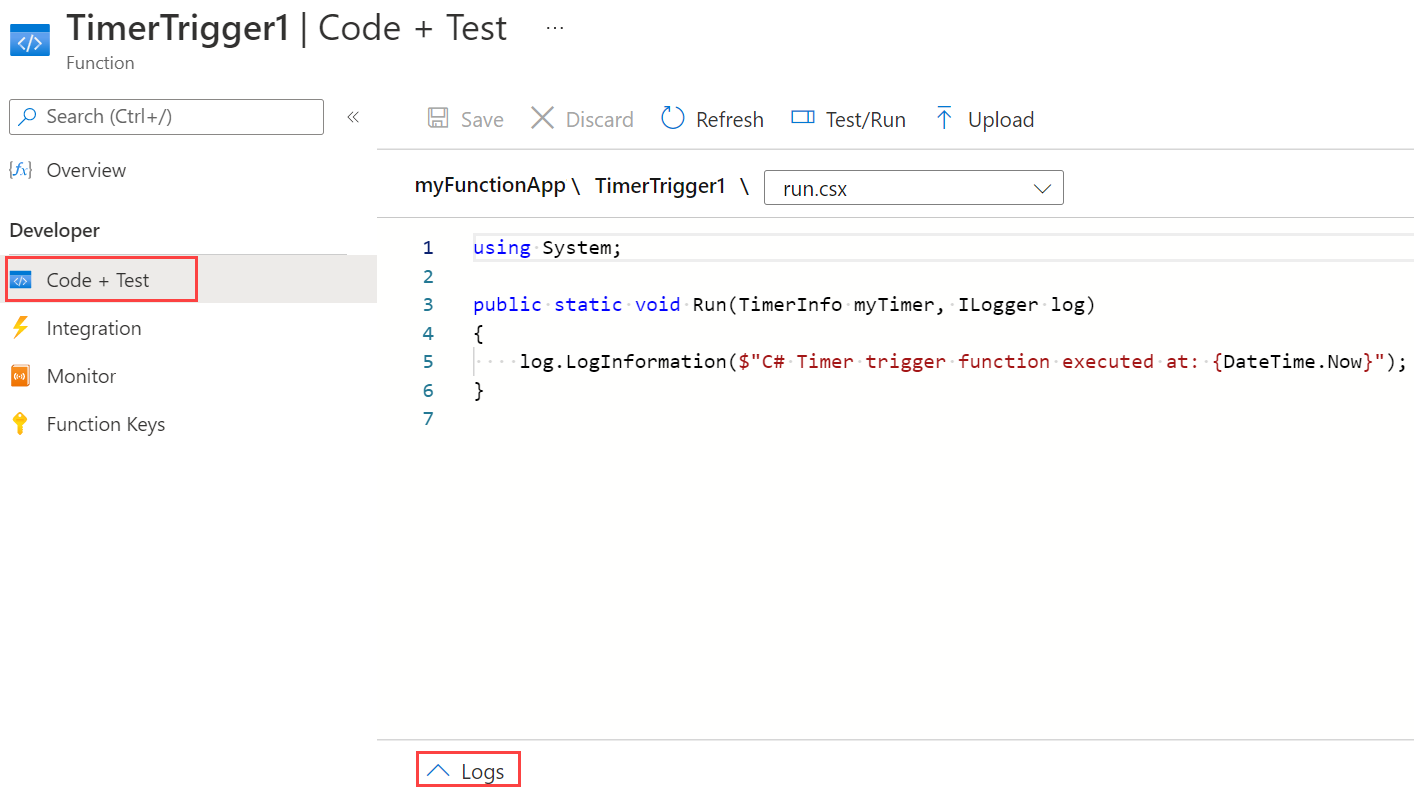
Verify execution by viewing the information written to the logs.

Now, you change the function's schedule so that it runs once every hour instead of every minute.
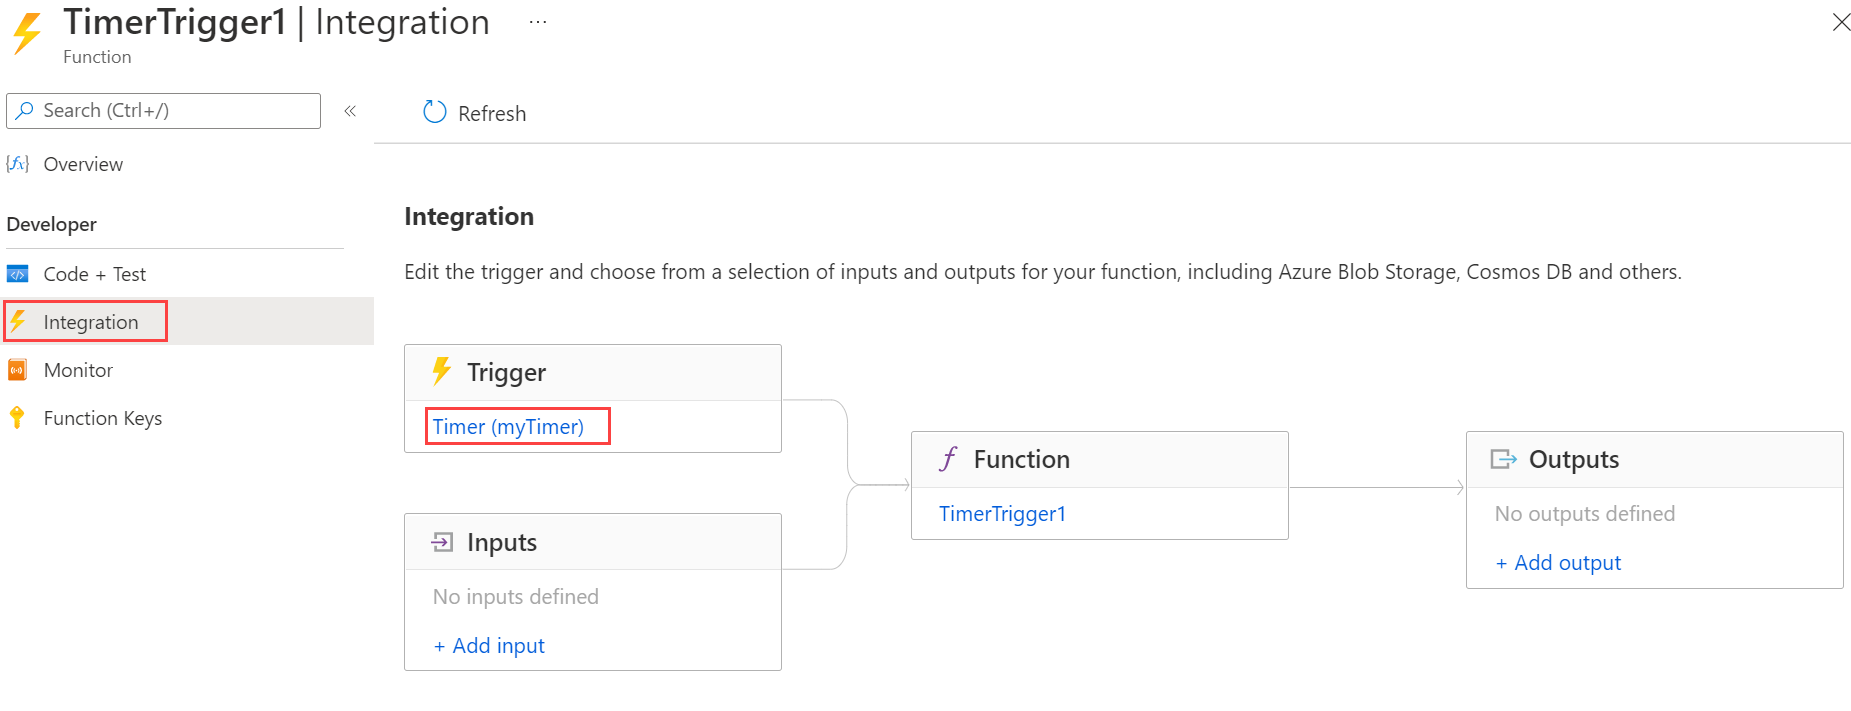
Update the timer schedule
In your function, select Integration. Here, you define the input and output bindings for your function and also set the schedule.
Select Timer (myTimer).
Update the Schedule value to
0 0 */1 * * *, and then select Save.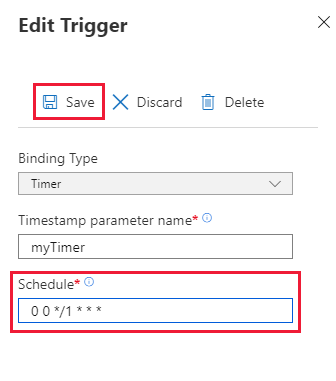
You now have a function that runs once every hour, on the hour.
Clean up resources
Other quickstarts in this collection build upon this quickstart. If you plan to work with subsequent quickstarts, tutorials, or with any of the services you've created in this quickstart, don't clean up the resources.
Resources in Azure refer to function apps, functions, storage accounts, and so forth. They're grouped into resource groups, and you can delete everything in a group by deleting the group.
You've created resources to complete these quickstarts. You might be billed for these resources, depending on your account status and service pricing. If you don't need the resources anymore, here's how to delete them:
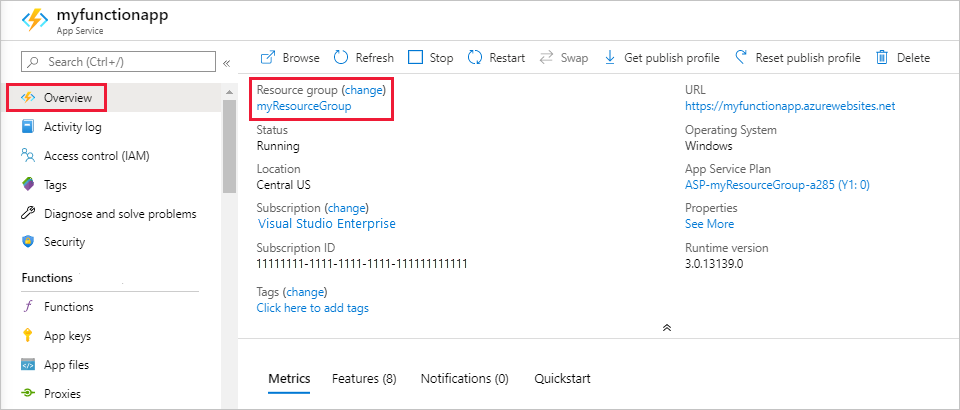
In the Azure portal, go to the Resource group page.
To get to that page from the function app page, select the Overview tab, and then select the link under Resource group.
To get to that page from the dashboard, select Resource groups, and then select the resource group that you used for this article.
In the Resource group page, review the list of included resources, and verify that they're the ones you want to delete.
Select Delete resource group and follow the instructions.
Deletion might take a couple of minutes. When it's done, a notification appears for a few seconds. You can also select the bell icon at the top of the page to view the notification.
Next steps
You've created a function that runs based on a schedule. For more information about timer triggers, see Schedule code execution with Azure Functions.
Now that you've created your first function, let's add an output binding to the function that writes a message to a Storage queue.
Feedback
Coming soon: Throughout 2024 we will be phasing out GitHub Issues as the feedback mechanism for content and replacing it with a new feedback system. For more information see: https://aka.ms/ContentUserFeedback.
Submit and view feedback for