Configure a network security group for Azure Managed Lustre file systems
Network security groups can be configured to filter inbound and outbound network traffic to and from Azure resources in an Azure virtual network. A network security group can contain security rules that filter network traffic by IP address, port, and protocol. When a network security group is associated with a subnet, security rules are applied to resources deployed in that subnet.
This article describes how to configure network security group rules to secure access to an Azure Managed Lustre file system cluster as part of a Zero Trust strategy.
Prerequisites
- An Azure subscription. If you don't have an Azure subscription, create a free account before you begin.
- A virtual network with a subnet configured to allow Azure Managed Lustre file system support. To learn more, see Networking prerequisites.
- An Azure Managed Lustre file system deployed in your Azure subscription. To learn more, see Create an Azure Managed Lustre file system.
Create and configure a network security group
You can use an Azure network security group to filter network traffic between Azure resources in an Azure virtual network. A network security group contains security rules that allow or deny inbound network traffic to, or outbound network traffic from, several types of Azure resources. For each rule, you can specify source and destination, port, and protocol.
To create a network security group in the Azure portal, follow these steps:
In the search box at the top of the portal, enter Network security group. Select Network security groups in the search results.
Select + Create.
In the Create network security group page, under the Basics tab, enter or select the following values:
Setting Action Project details Subscription Select your Azure subscription. Resource group Select an existing resource group, or create a new one by selecting Create new. This example uses the sample-rg resource group. Instance details Network security group name Enter a name for the network security group you're creating. Region Select the region you want. 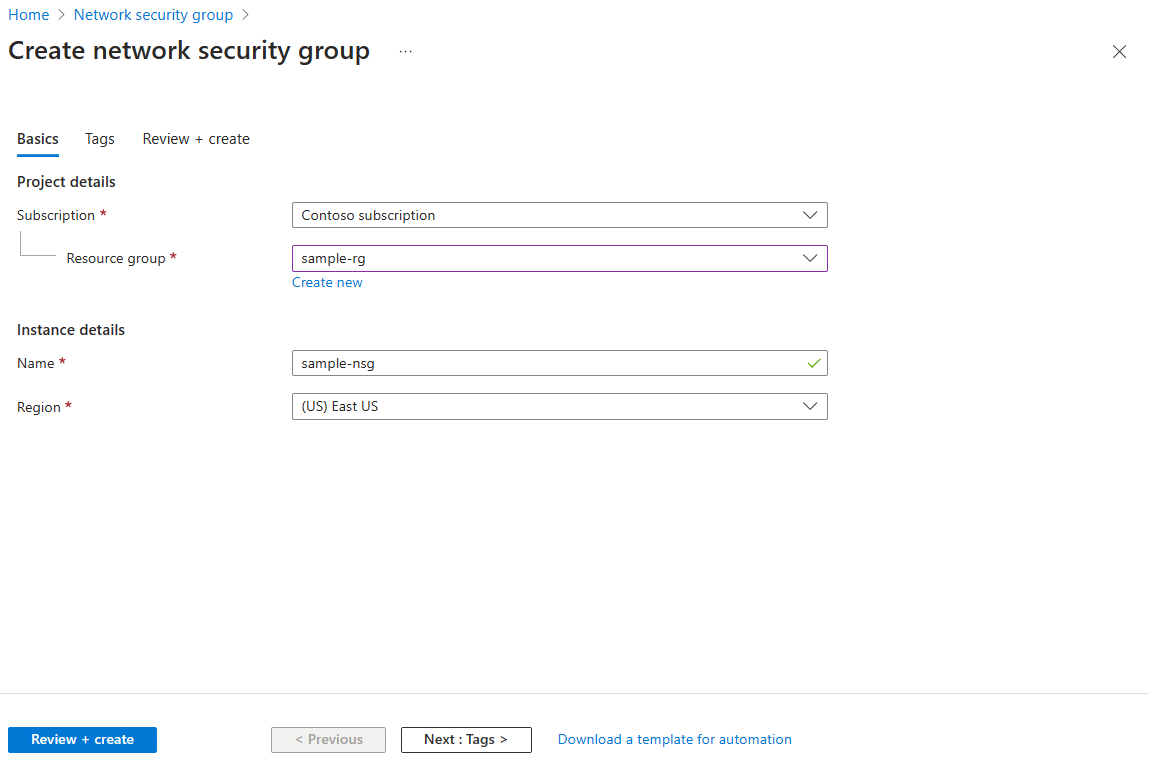
Select Review + create.
After you see the Validation passed message, select Create.

Associate the network security group to a subnet
Once the network security group is created, you can associate it to the unique subnet in your virtual network where the Azure Managed Lustre file system exists. To associate the network security group to a subnet using the Azure portal, follow these steps:
In the search box at the top of the portal, enter Network security group and select Network security groups in the search results.
Select the name of your network security group, then select Subnets.
To associate a network security group to the subnet, select + Associate, then select your virtual network and the subnet that you want to associate the network security group to. Select OK.

Configure network security group rules
To configure network security group rules for Azure Managed Lustre file system support, you can add inbound and outbound security rules to the network security group associated to the subnet where your Azure Managed Lustre file system is deployed. The following sections describe how to create and configure the inbound and outbound security rules that allow Azure Managed Lustre file system support.
Note
The security rules shown in this section are configured based on an Azure Managed Lustre file system test deployment in the East US region, with Blob Storage integration enabled. You'll need to adjust the rules based on your deployment region, virtual network subnet IP address, and other configuration settings for the Azure Managed Lustre file system.
Create inbound security rules
You can create inbound security rules in the Azure portal. The following example shows how to create and configure a new inbound security rule:
- In the Azure portal, open the network security group resource you created in the previous step.
- Select Inbound security rules under Settings.
- Select + Add.
- In the Add inbound security rule pane, configure the settings for the rule and select Add.

Add the following inbound rules to the network security group:
| Priority | Name | Port | Protocol | Source | Destination | Action | Description |
|---|---|---|---|---|---|---|---|
| 110 | rule-name | Any | Any | IP address/CIDR range for Azure Managed Lustre file system subnet | IP address/CIDR range for Azure Managed Lustre file system subnet | Allow | Permit protocol or port flows between hosts on the Azure Managed Lustre file system subnet. |
| 111 | rule-name | 988 | TCP | IP address/CIDR range for Lustre client subnet | IP address/CIDR range for Azure Managed Lustre file system subnet | Allow | Permit communication between the Lustre client subnet and the Azure Managed Lustre file system subnet. Allows only source TCP ports 1020-1023 and destination port 988. |
| 112 | rule-name | Any | TCP | AzureMonitor |
VirtualNetwork |
Allow | Permit inbound flows from the AzureMonitor service tag. Allow TCP source port 443 only. |
| 120 | rule-name | Any | Any | Any | Any | Deny | Deny all other inbound flows. |
The inbound security rules in the Azure portal should look similar to the following screenshot. You should adjust the subnet IP address/CIDR range and other settings based on your deployment:

Create outbound security rules
You can create outbound security rules in the Azure portal. The following example shows how to create and configure a new outbound security rule:
- In the Azure portal, open the network security group resource you created in an earlier step.
- Select Outbound security rules under Settings.
- Select + Add.
- In the Add outbound security rule pane, configure the settings for the rule and select Add.

Add the following outbound rules to the network security group:
| Priority | Name | Port | Protocol | Source | Destination | Action | Description |
|---|---|---|---|---|---|---|---|
| 100 | rule-name | 443 | TCP | VirtualNetwork |
AzureMonitor |
Allow | Permit outbound flows to the AzureMonitor service tag. TCP destination port 443 only. |
| 101 | rule-name | 443 | TCP | VirtualNetwork |
AzureKeyVault.EastUS |
Allow | Permit outbound flows to the AzureKeyVault.EastUS service tag. TCP destination port 443 only. |
| 102 | rule-name | 443 | TCP | VirtualNetwork |
AzureActiveDirectory |
Allow | Permit outbound flows to the AzureActiveDirectory service tag. TCP destination port 443 only. |
| 103 | rule-name | 443 | TCP | VirtualNetwork |
Storage.EastUS |
Allow | Permit outbound flows to the Storage.EastUS service tag. TCP destination port 443 only. |
| 104 | rule-name | 443 | TCP | VirtualNetwork |
GuestAndHybridManagement |
Allow | Permits outbound flows to the GuestAndHybridManagement service tag. TCP destination port 443 only. |
| 105 | rule-name | 443 | TCP | VirtualNetwork |
ApiManagement.EastUS |
Allow | Permit outbound flows to the ApiManagement.EastUS service tag. TCP destination port 443 only. |
| 106 | rule-name | 443 | TCP | VirtualNetwork |
AzureDataLake |
Allow | Permit outbound flows to the AzureDataLake service tag. TCP destination port 443 only. |
| 107 | rule-name | 443 | TCP | VirtualNetwork |
AzureResourceManager |
Allow | Permits outbound flows to the AzureResourceManager service tag. TCP destination port 443 only. |
| 108 | rule-name | 1020-1023 | TCP | IP address/CIDR range for Azure Managed Lustre file system subnet | IP address/CIDR range for Lustre client subnet | Allow | Permit outbound flows for Azure Managed Lustre file system to Lustre client. TCP source port 988, destination ports 1020-1023 only. |
| 109 | rule-name | 123 | UDP | IP address/CIDR range for Azure Managed Lustre file system subnet | 168.61.215.74/32 | Allow | Permit outbound flows to MS NTP server (168.61.215.74). UDP destination port 123 only. |
| 110 | rule-name | 443 | TCP | VirtualNetwork |
20.34.120.0/21 | Allow | Permit outbound flows to Azure Managed Lustre telemetry (20.45.120.0/21). TCP destination port 443 only. |
| 111 | rule-name | Any | Any | IP address/CIDR range for Azure Managed Lustre file system subnet | IP address/CIDR range for Azure Managed Lustre file system subnet | Allow | Permit protocol or port flows between hosts on the Azure Managed Lustre file system subnet. |
| 1000 | rule-name | Any | Any | VirtualNetwork |
Internet |
Deny | Deny outbound flows to the internet. |
| 1010 | rule-name | Any | Any | Any | Any | Deny | Deny all other outbound flows. |
The outbound security rules in the Azure portal should look similar to the following screenshot. You should adjust the subnet IP address/CIDR range and other settings based on your deployment:

Next steps
To learn more about Azure Managed Lustre, see the following articles:
To learn more about Azure network security groups, see the following articles:
Feedback
Coming soon: Throughout 2024 we will be phasing out GitHub Issues as the feedback mechanism for content and replacing it with a new feedback system. For more information see: https://aka.ms/ContentUserFeedback.
Submit and view feedback for