Add an image layer to a map in the iOS SDK (Preview)
Note
Azure Maps iOS SDK retirement
The Azure Maps Native SDK for iOS is now deprecated and will be retired on 3/31/25. To avoid service disruptions, migrate to the Azure Maps Web SDK by 3/31/25. For more information, see The Azure Maps iOS SDK migration guide.
This article shows you how to overlay an image to a fixed set of coordinates. Here are a few examples of different images types that can be overlaid on maps:
- Images captured from drones
- Building floor plans
- Historical or other specialized map images
- Blueprints of job sites
Tip
An image layer is an easy way to overlay an image on a map. Note that large images can consume a lot of memory and potentially cause performance issues. In this case, consider breaking your image up into tiles, and loading them into the map as a tile layer.
Add an image layer
The following code overlays an image of a map of Newark, New Jersey, from 1922 on the map. This image is added to the Assets folder of the project. An image layer is created by setting the image and coordinates for the four corners in the format [Top Left Corner, Bottom Left Corner, Bottom Right Corner, Top Right Corner]. Adding image layers below the label layer is often desirable.
// Create an image layer.
let layer = ImageLayer(options: [
    .imageCoordinates(
        CoordinateQuad(
            topLeft: CLLocationCoordinate2D(latitude: 40.773941, longitude: -74.22655),
            bottomLeft: CLLocationCoordinate2D(latitude: 40.712216, longitude: -74.22655),
            bottomRight: CLLocationCoordinate2D(latitude: 40.712216, longitude: -74.12544),
            topRight: CLLocationCoordinate2D(latitude: 40.773941, longitude: -74.12544)
        )
    ),
    .image(UIImage(named: "newark_nj_1922")!)
])

// Add the image layer to the map, below the label layer.
map.layers.insertLayer(layer, below: "labels")
Alternatively, a URL to an image hosted on the online can be specified. However, if your scenario allows, add the image to your project's Assets folder, that loads faster since the image is locally available with no need to be downloaded.
// Create an image layer.
let layer = ImageLayer(options: [
    .imageCoordinates(
        CoordinateQuad(
            topLeft: CLLocationCoordinate2D(latitude: 40.773941, longitude: -74.22655),
            bottomLeft: CLLocationCoordinate2D(latitude: 40.712216, longitude: -74.22655),
            bottomRight: CLLocationCoordinate2D(latitude: 40.712216, longitude: -74.12544),
            topRight: CLLocationCoordinate2D(latitude: 40.773941, longitude: -74.12544)
        )
    ),
    .url(URL(string: "https://www.lib.utexas.edu/maps/historical/newark_nj_1922.jpg"))
])

// Add the image layer to the map, below the label layer.
map.layers.insertLayer(layer, below: "labels")
The following screenshot shows a map of Newark, New Jersey, from 1922 overlaid using an image layer.

Import a KML file as ground overlay
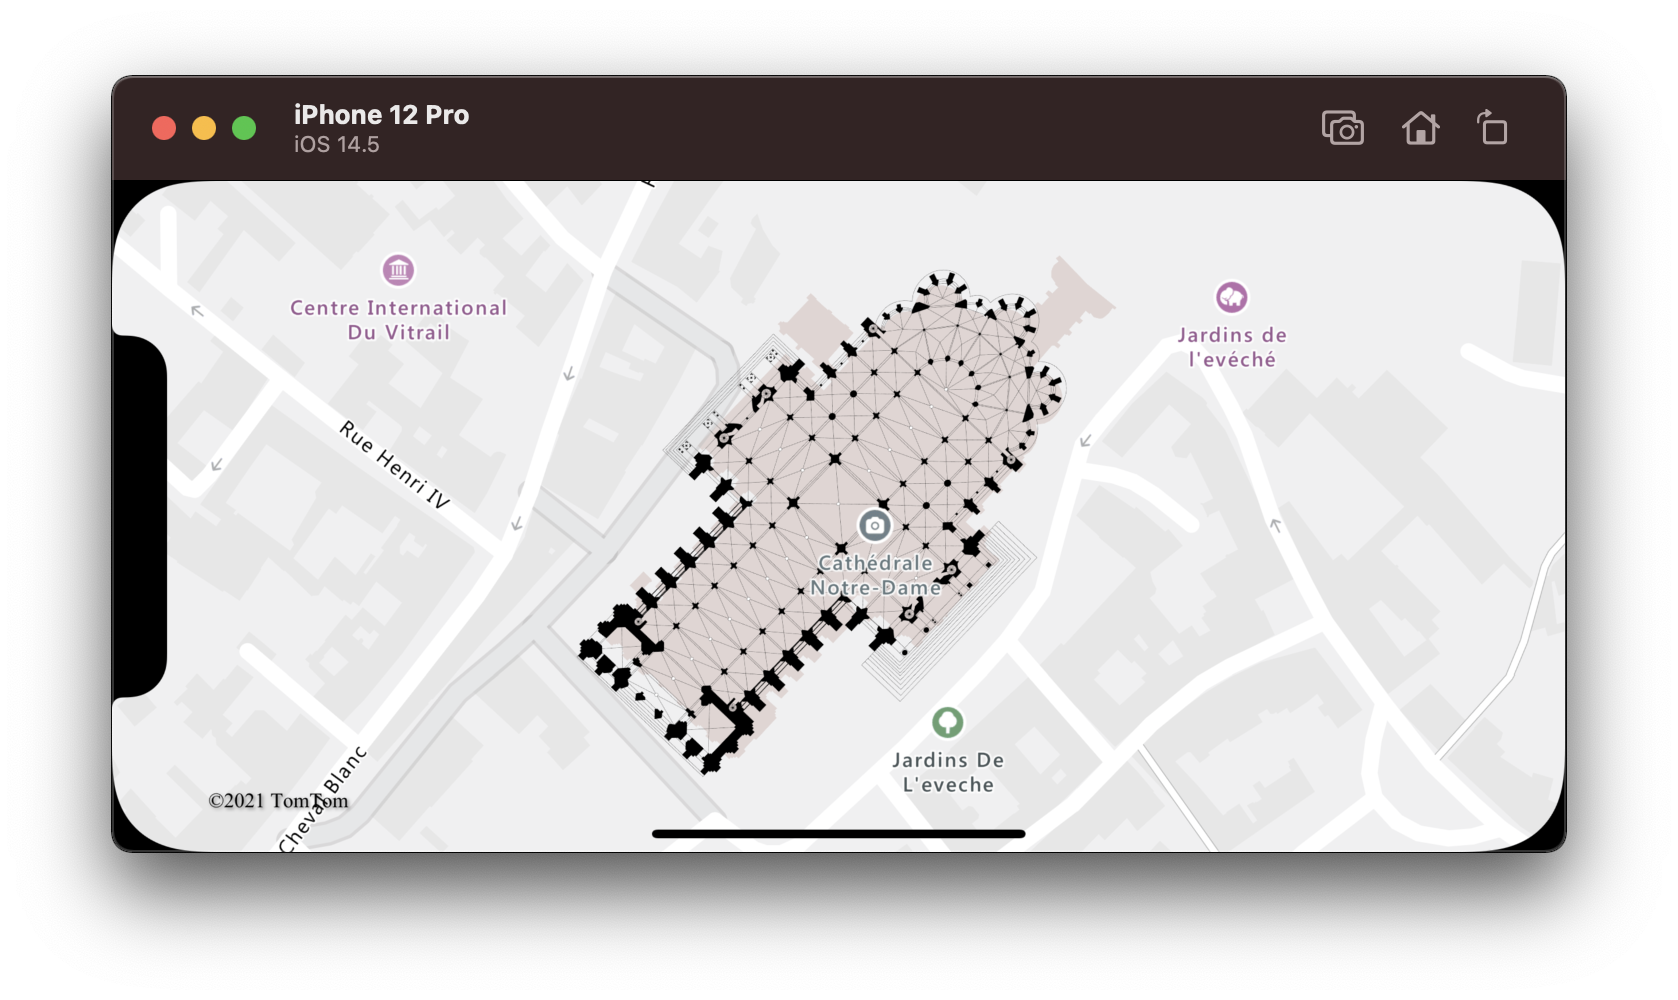
This sample demonstrates how to add KML ground overlay information as an image layer on the map. KML ground overlays provide north, south, east, and west coordinates, and a counter-clockwise rotation. But, the image layer expects coordinates for each corner of the image. The KML ground overlay in this sample is for the Chartres cathedral, and it's sourced from Wikimedia.
<?xml version="1.0" encoding="UTF-8"?>
<kml xmlns="http://www.opengis.net/kml/2.2" xmlns:gx="http://www.google.com/kml/ext/2.2" xmlns:kml="http://www.opengis.net/kml/2.2" xmlns:atom="http://www.w3.org/2005/Atom">
<GroundOverlay>
    <name>Map of Chartres cathedral</name>
    <Icon>
        <href>https://upload.wikimedia.org/wikipedia/commons/thumb/e/e3/Chartres.svg/1600px-Chartres.svg.png</href>
        <viewBoundScale>0.75</viewBoundScale>
    </Icon>
    <LatLonBox>
        <north>48.44820923628113</north>
        <south>48.44737203258976</south>
        <east>1.488833825534365</east>
        <west>1.486788581643038</west>
        <rotation>46.44067597839695</rotation>
    </LatLonBox>
</GroundOverlay>
</kml>
The code uses the static fromEdges method from the CoordinateQuad class. This method calculates the four corners of the image using the north, south, east, west, and rotation information of the KML ground overlay.
// Calculate the corner coordinates of the ground overlay.
let coordinates = CoordinateQuad.fromEdges(
    north: 48.44820923628113,
    south: 48.44737203258976,
    east: 1.488833825534365,
    west: 1.486788581643038,
    // KML rotations are counter-clockwise, subtract from 360 to make them clockwise.
    rotation: 360 - 46.44067597839695
)

// Create an image layer.
let url = URL(string: "https://upload.wikimedia.org/wikipedia/commons/thumb/e/e3/Chartres.svg/1600px-Chartres.svg.png")
let layer = ImageLayer(options: [
    .imageCoordinates(coordinates),
    .url(url)
])

// Add the image layer to the map, below the label layer.
map.layers.insertLayer(layer, below: "labels")
The following screenshot shows a map with a KML ground overlay overlaid using an image layer.
Additional information
See the following article to learn more about ways to overlay imagery on a map.
Feedback
Coming soon: Throughout 2024 we will be phasing out GitHub Issues as the feedback mechanism for content and replacing it with a new feedback system. For more information see: https://aka.ms/ContentUserFeedback.
Submit and view feedback for