Collect logs from a text or JSON file with Azure Monitor Agent
Many applications log information to text or JSON files instead of standard logging services such as Windows Event log or Syslog. This article explains how to collect log data from text and JSON files on monitored machines using Azure Monitor Agent by creating a data collection rule (DCR).
Note
The JSON ingestion is in Preview at this time.
Prerequisites
To complete this procedure, you need:
Log Analytics workspace where you have at least contributor rights.
One or two data collection endpoints, depending on whether your virtual machine and Log Analytics workspace are in the same region.
For more information, see How to set up data collection endpoints based on your deployment.
Permissions to create Data Collection Rule objects in the workspace.
JSON text must be contained in a single row for proper ingestion. The JSON body (file) format is not supported.
A Virtual Machine, Virtual Machine Scale Set, Arc-enabled server on-premises or Azure Monitoring Agent on a Windows on-premises client that writes logs to a text or JSON file.
Text and JSON file requirements and best practices:
- Do store files on the local drive of the machine on which Azure Monitor Agent is running and in the directory that is being monitored.
- Do delineate the end of a record with an end of line.
- Do use ASCII or UTF-8 encoding. Other formats such as UTF-16 aren't supported.
- Do create a new log file every day so that you can remove old files easily.
- Do clean up all log files in the monitored directory. Tracking many log files can drive up agent CPU and Memory usage. Wait for at least 2 days to allow ample time for all logs to be processed.
- Do Not overwrite an existing file with new records. You should only append new records to the end of the file. Overwriting will cause data loss.
- Do Not rename a file to a new name and then open a new file with the same name. This could cause data loss.
- Do Not rename or copy large log files that match the file scan pattern in to the monitored directory. If you must, do not exceed 50MB per minute.
- Do Not rename a file that matches the file scan pattern to a new name that also matches the file scan pattern. This will cause duplicate data to be ingested.
Create a custom table
The table created in the script has two columns:
TimeGenerated(datetime) [Required]RawData(string) [Optional if table schema provided]- 'FilePath' (string) [Optional]
YourOptionalColumn(string) [Optional]
The default table schema for log data collected from text files is 'TimeGenerated' and 'RawData'. Adding the 'FilePath' to either team is optional. If you know your final schema or your source is a JSON log, you can add the final columns in the script before creating the table. You can always add columns using the Log Analytics table UI later.
Your column names and JSON attributes must exactly match to automatically parse into the table. Both columns and JSON attributes are case sensitive. For example Rawdata will not collect the event data. It must be RawData. Ingestion will drop JSON attributes that do not have a corresponding column.
The easiest way to make the REST call is from an Azure Cloud PowerShell command line (CLI). To open the shell, go to the Azure portal, press the Cloud Shell button, and select PowerShell. If this is your first time using Azure Cloud PowerShell, you'll need to walk through the one-time configuration wizard.
Copy and paste this script into PowerShell to create the table in your workspace:
$tableParams = @'
{
    "properties": {
        "schema": {
               "name": "{TableName}_CL",
               "columns": [
        {
                                "name": "TimeGenerated",
                                "type": "DateTime"
                        },
                       {
                                "name": "RawData",
                                "type": "String"
                       },
                       {
                                "name": "FilePath",
                                "type": "String"
                       },
                      {
                                "name": `"YourOptionalColumn",
                                "type": "String"
                     }
              ]
        }
    }
}
'@

Invoke-AzRestMethod -Path "/subscriptions/{subscription}/resourcegroups/{resourcegroup}/providers/microsoft.operationalinsights/workspaces/{WorkspaceName}/tables/{TableName}_CL?api-version=2021-12-01-preview" -Method PUT -payload $tableParams
You should receive a 200 response and details about the table you just created.
Create a data collection rule for a text or JSON file
The data collection rule defines:
- Which source log files Azure Monitor Agent scans for new events.
- How Azure Monitor transforms events during ingestion.
- The destination Log Analytics workspace and table to which Azure Monitor sends the data.
You can define a data collection rule to send data from multiple machines to multiple Log Analytics workspaces, including workspaces in a different region or tenant. Create the data collection rule in the same region as your Log Analytics workspace.
Note
To send data across tenants, you must first enable Azure Lighthouse.
To automatically parse your JSON log file into a custom table, follow the Resource Manager template steps. Text data can be transformed into columns using ingestion-time transformation.
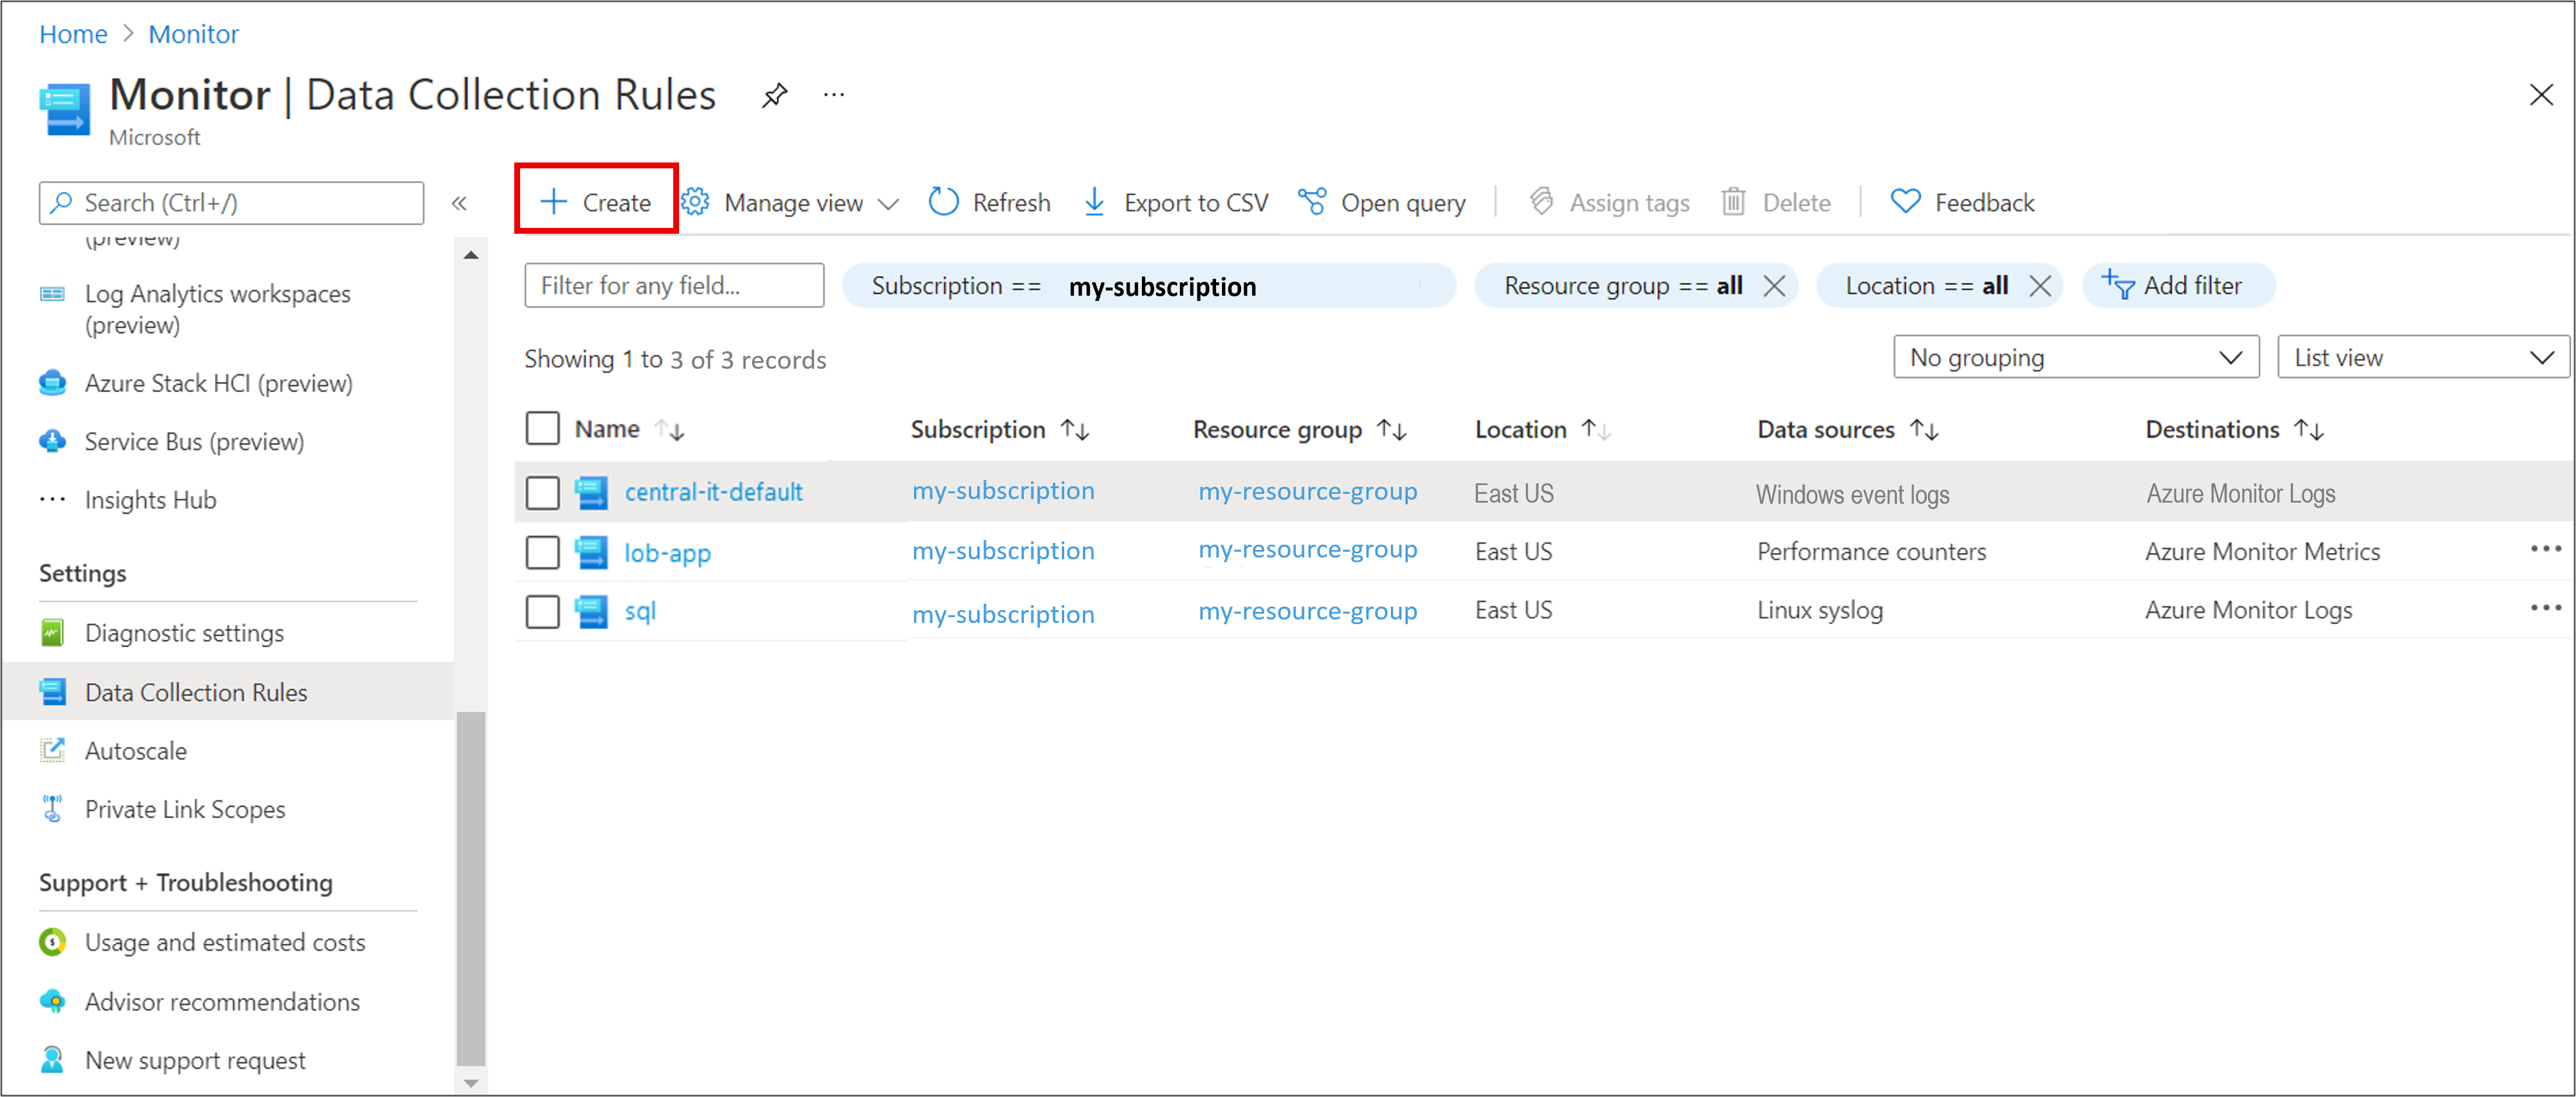
To create the data collection rule in the Azure portal:
On the Monitor menu, select Data Collection Rules.
Select Create to create a new data collection rule and associations.
Enter a Rule name and specify a Subscription, Resource Group, Region, Platform Type, and Data collection endpoint:
- Region specifies where the DCR will be created. The virtual machines and their associations can be in any subscription or resource group in the tenant.
- Platform Type specifies the type of resources this rule can apply to. The Custom option allows for both Windows and Linux types.
- Data Collection Endpoint specifies the data collection endpoint to which Azure Monitor Agent sends collected data. This data collection endpoint must be in the same region as the Log Analytics workspace. For more information, see How to set up data collection endpoints based on your deployment.

On the Resources tab:
Select + Add resources and associate resources to the data collection rule. Resources can be virtual machines, Virtual Machine Scale Sets, and Azure Arc for servers. The Azure portal installs Azure Monitor Agent on resources that don't already have it installed.
Important
The portal enables system-assigned managed identity on the target resources, along with existing user-assigned identities, if there are any. For existing applications, unless you specify the user-assigned identity in the request, the machine defaults to using system-assigned identity instead.
Select Enable Data Collection Endpoints.
Optionally, you can select a data collection endpoint for each of the virtual machines associate to the data collection rule. Most of the time you should just use the defaults.
This data collection endpoint sends configuration files to the virtual machine and must be in the same region as the virtual machine. For more information, see How to set up data collection endpoints based on your deployment.

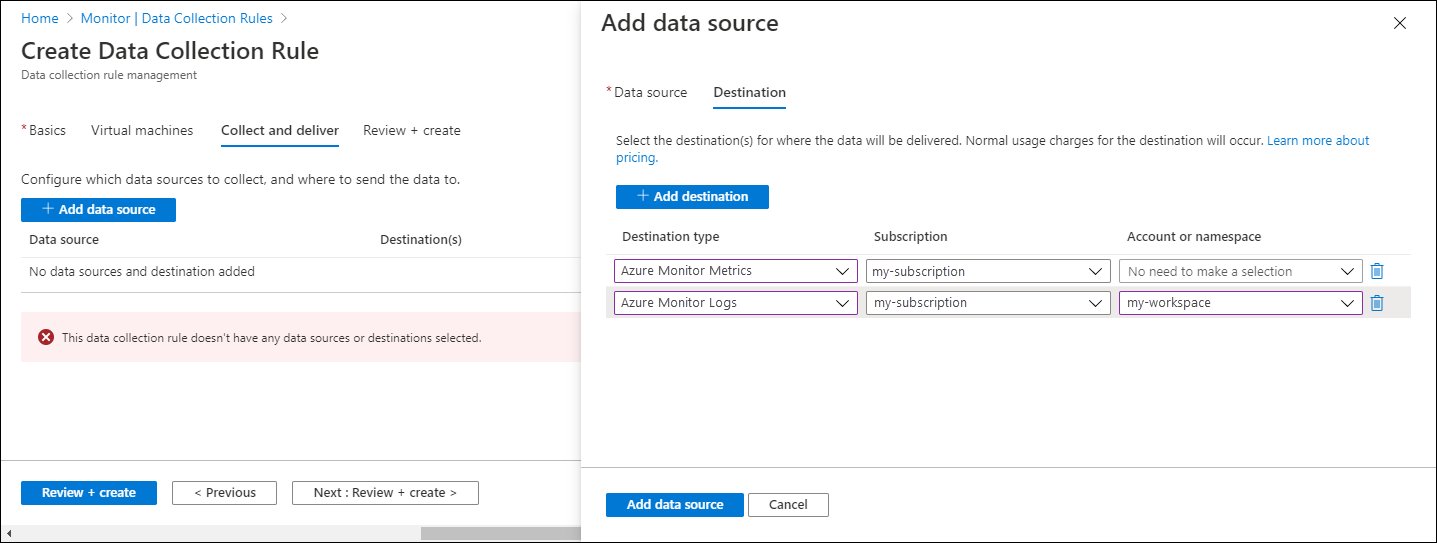
On the Collect and deliver tab, select Add data source to add a data source and set a destination.
From the Data source type dropdown, select Custom Text Logs or JSON Logs.
Specify the following information:
File Pattern - Identifies where the log files are located on the local disk. You can enter multiple file patterns separated by commas (on Linux, AMA version 1.26 or higher is required to collect from a comma-separated list of file patterns).
Examples of valid inputs:
- 20220122-MyLog.txt
- ProcessA_MyLog.txt
- ErrorsOnly_MyLog.txt, WarningOnly_MyLog.txt
Note
Multiple log files of the same type commonly exist in the same directory. For example, a machine might create a new file every day to prevent the log file from growing too large. To collect log data in this scenario, you can use a file wildcard. Use the format
C:\directoryA\directoryB\*MyLog.txtfor Windows and/var/*.logfor Linux. There is no support for directory wildcards.Table name - The name of the destination table you created in your Log Analytics Workspace. For more information, see Create a custom table.
Record delimiter - Will be used in the future to allow delimiters other than the currently supported end of line (
/r/n).Transform - Add an ingestion-time transformation or leave as source if you don't need to transform the collected data.
On the Destination tab, add one or more destinations for the data source. You can select multiple destinations of the same or different types. For instance, you can select multiple Log Analytics workspaces, which is also known as multihoming.
Select Review + create to review the details of the data collection rule and association with the set of virtual machines.
Select Create to create the data collection rule.


Note
It can take up to 10 minutes for data to be sent to the destinations after you create the data collection rule.
Sample log queries
The column names used here are for example only. The column names for your log will most likely be different.
Count the number of events by code.
MyApp_CL
| summarize count() by code
Sample alert rule
Create an alert rule on any error event.
MyApp_CL
| where status == "Error"
| summarize AggregatedValue = count() by Computer, bin(TimeGenerated, 15m)
Troubleshoot
Use the following steps to troubleshoot collection of logs from text and JSON files.
Check if you've ingested data to your custom table
Start by checking if any records have been ingested into your custom log table by running the following query in Log Analytics:
<YourCustomTable>_CL
| where TimeGenerated > ago(48h)
| order by TimeGenerated desc
If records aren't returned, check the other sections for possible causes. This query looks for entries in the last two days, but you can modify for another time range. It can take 5-7 minutes for new data to appear in your table. The Azure Monitor Agent only collects data written to the text or JSON file after you associate the data collection rule with the virtual machine.
Verify that you created a custom table
You must create a custom log table in your Log Analytics workspace before you can send data to it.
Verify that the agent is sending heartbeats successfully
Verify that Azure Monitor agent is communicating properly by running the following query in Log Analytics to check if there are any records in the Heartbeat table.
Heartbeat
| where TimeGenerated > ago(24h)
| where Computer has "<computer name>"
| project TimeGenerated, Category, Version
| order by TimeGenerated desc
Verify that you specified the correct log location in the data collection rule
The data collection rule will have a section similar to the following. The filePatterns element specifies the path to the log file to collect from the agent computer. Check the agent computer to verify that this is correct.
"dataSources": [{
            "configuration": {
                "filePatterns": ["C:\\JavaLogs\\*.log"],
                "format": "text",
                "settings": {
                    "text": {
                        "recordStartTimestampFormat": "yyyy-MM-ddTHH:mm:ssK"
                    }
                }
            },
            "id": "myTabularLogDataSource",
            "kind": "logFile",
            "streams": [{
                    "stream": "Custom-TabularData-ABC"
                }
            ],
            "sendToChannels": ["gigl-dce-00000000000000000000000000000000"]
        }
    ]
This file pattern should correspond to the logs on the agent machine.

Use the Azure Monitor Agent Troubleshooter
Use the Azure Monitor Agent Troubleshooter to look for common issues and share results with Microsoft.
Verify that logs are being populated
The agent will only collect new content written to the log file being collected. If you're experimenting with the collection logs from a text or JSON file, you can use the following script to generate sample logs.
# This script writes a new log entry at the specified interval indefinitely.
# Usage:
# .\GenerateCustomLogs.ps1 [interval to sleep]
#
# Press Ctrl+C to terminate script.
#
# Example:
# .\ GenerateCustomLogs.ps1 5

param (
    [Parameter(Mandatory=$true)][int]$sleepSeconds
)

$logFolder = "c:\\JavaLogs"
if (!(Test-Path -Path $logFolder))
{
    mkdir $logFolder
}

$logFileName = "TestLog-$(Get-Date -format yyyyMMddhhmm).log"
do
{
    $count++
    $randomContent = New-Guid
    $logRecord = "$(Get-Date -format s)Z Record number $count with random content $randomContent"
    $logRecord | Out-File "$logFolder\\$logFileName" -Encoding utf8 -Append
    Start-Sleep $sleepSeconds
}
while ($true)
Next steps
Learn more about:
Feedback
Coming soon: Throughout 2024 we will be phasing out GitHub Issues as the feedback mechanism for content and replacing it with a new feedback system. For more information see: https://aka.ms/ContentUserFeedback.
Submit and view feedback for