Tutorial: Add outputs to your ARM template
In this tutorial, you learn how to return a value from your Azure Resource Manager template (ARM template). You use outputs when you need a value for a resource you deploy. This tutorial takes 7 minutes to complete.
Prerequisites
We recommend that you complete the tutorial about variables, but it's not required.
You need to have Visual Studio Code with the Resource Manager Tools extension, and either Azure PowerShell or Azure Command-Line Interface (CLI). For more information, see template tools.
Review template
At the end of the previous tutorial, your template had the following JSON:
{
  "$schema": "https://schema.management.azure.com/schemas/2019-04-01/deploymentTemplate.json#",
  "contentVersion": "1.0.0.0",
  "parameters": {
    "storagePrefix": {
      "type": "string",
      "minLength": 3,
      "maxLength": 11
    },
    "storageSKU": {
      "type": "string",
      "defaultValue": "Standard_LRS",
      "allowedValues": [
        "Standard_LRS",
        "Standard_GRS",
        "Standard_RAGRS",
        "Standard_ZRS",
        "Premium_LRS",
        "Premium_ZRS",
        "Standard_GZRS",
        "Standard_RAGZRS"
      ]
    },
    "location": {
      "type": "string",
      "defaultValue": "[resourceGroup().location]"
    }
  },
  "variables": {
    "uniqueStorageName": "[concat(parameters('storagePrefix'), uniqueString(resourceGroup().id))]"
  },
  "resources": [
    {
      "type": "Microsoft.Storage/storageAccounts",
      "apiVersion": "2021-09-01",
      "name": "[variables('uniqueStorageName')]",
      "location": "[parameters('location')]",
      "sku": {
        "name": "[parameters('storageSKU')]"
      },
      "kind": "StorageV2",
      "properties": {
        "supportsHttpsTrafficOnly": true
      }
    }
  ]
}
It deploys a storage account, but it doesn't return any information about it. You might need to capture properties from your new resource so they're available later for reference.
Add outputs
You can use outputs to return values from the template. It might be helpful, for example, to get the endpoints for your new storage account.
The following example highlights the change to your template to add an output value. Copy the whole file and replace your template with its contents.
{
  "$schema": "https://schema.management.azure.com/schemas/2019-04-01/deploymentTemplate.json#",
  "contentVersion": "1.0.0.0",
  "parameters": {
    "storagePrefix": {
      "type": "string",
      "minLength": 3,
      "maxLength": 11
    },
    "storageSKU": {
      "type": "string",
      "defaultValue": "Standard_LRS",
      "allowedValues": [
        "Standard_LRS",
        "Standard_GRS",
        "Standard_RAGRS",
        "Standard_ZRS",
        "Premium_LRS",
        "Premium_ZRS",
        "Standard_GZRS",
        "Standard_RAGZRS"
      ]
    },
    "location": {
      "type": "string",
      "defaultValue": "[resourceGroup().location]"
    }
  },
  "variables": {
    "uniqueStorageName": "[concat(parameters('storagePrefix'), uniqueString(resourceGroup().id))]"
  },
  "resources": [
    {
      "type": "Microsoft.Storage/storageAccounts",
      "apiVersion": "2021-09-01",
      "name": "[variables('uniqueStorageName')]",
      "location": "[parameters('location')]",
      "sku": {
        "name": "[parameters('storageSKU')]"
      },
      "kind": "StorageV2",
      "properties": {
        "supportsHttpsTrafficOnly": true
      }
    }
  ],
  "outputs": {
    "storageEndpoint": {
      "type": "object",
      "value": "[reference(variables('uniqueStorageName')).primaryEndpoints]"
    }
  }
}
There are some important items to note about the output value you added.
The type of returned value is set to object, which means it returns a JSON object.
It uses the reference function to get the runtime state of the storage account. To get the runtime state of a resource, pass the name or ID of a resource. In this case, you use the same variable you used to create the name of the storage account.
Finally, it returns the primaryEndpoints property from the storage account.
Deploy template
You're ready to deploy the template and look at the returned value.
If you haven't created the resource group, see Create resource group. The example assumes you've set the templateFile variable to the path to the template file, as shown in the first tutorial.
New-AzResourceGroupDeployment `
  -Name addoutputs `
  -ResourceGroupName myResourceGroup `
  -TemplateFile $templateFile `
  -storagePrefix "store" `
  -storageSKU Standard_LRS
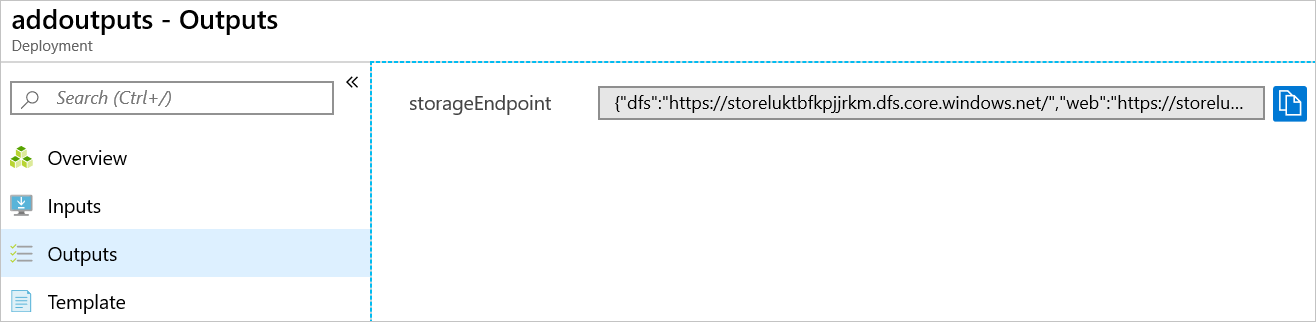
In the output for the deployment command, you see an object similar to the following example only if the output is in JSON format:
{
    "dfs": "https://storeluktbfkpjjrkm.dfs.core.windows.net/",
    "web": "https://storeluktbfkpjjrkm.z19.web.core.windows.net/",
    "blob": "https://storeluktbfkpjjrkm.blob.core.windows.net/",
    "queue": "https://storeluktbfkpjjrkm.queue.core.windows.net/",
    "table": "https://storeluktbfkpjjrkm.table.core.windows.net/",
    "file": "https://storeluktbfkpjjrkm.file.core.windows.net/"
}
Note
If the deployment fails, use the verbose switch to get information about the resources being created. Use the debug switch to get more information for debugging.
Review your work
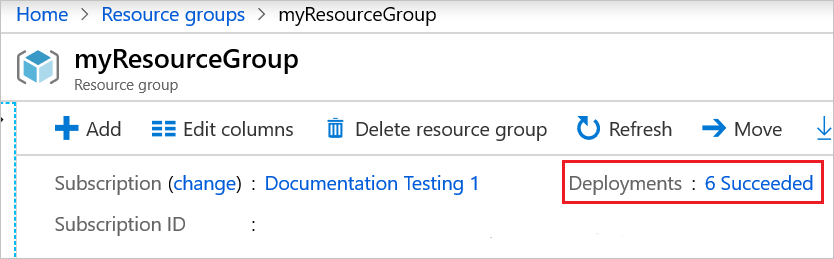
You've done a lot in the last six tutorials. Let's take a moment to review what you've done. You created a template with parameters that are easy to provide. The template is reusable in different environments because it allows for customization and dynamically creates needed values. It also returns information about the storage account that you could use in your script.
Now, let's look at the resource group and deployment history.
Sign in to the Azure portal.
From the left menu, select Resource groups.
Select the resource group you deployed to.
Depending on the steps you did, you should have at least one and perhaps several storage accounts in the resource group.
You should also have several successful deployments listed in the history. Select that link.
You see all of your deployments in the history. Select the deployment called addoutputs.
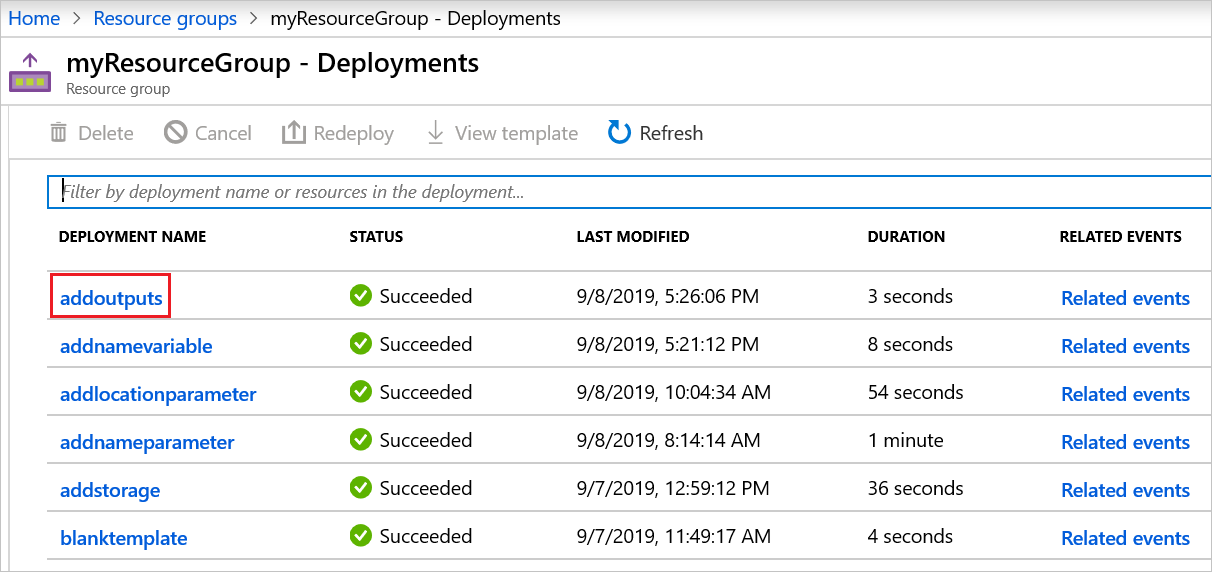
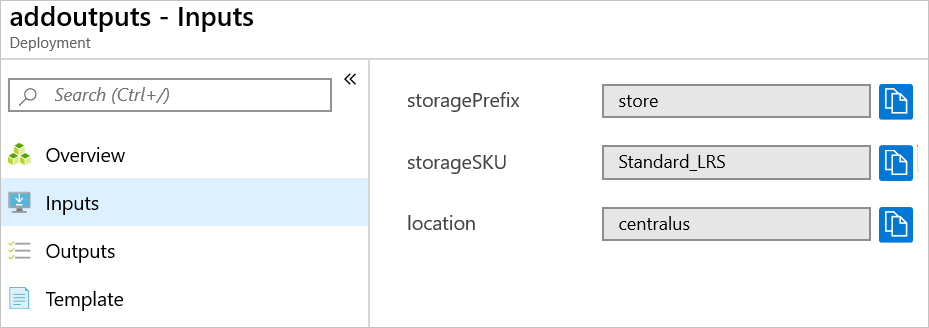
You can review the inputs.
You can review the outputs.
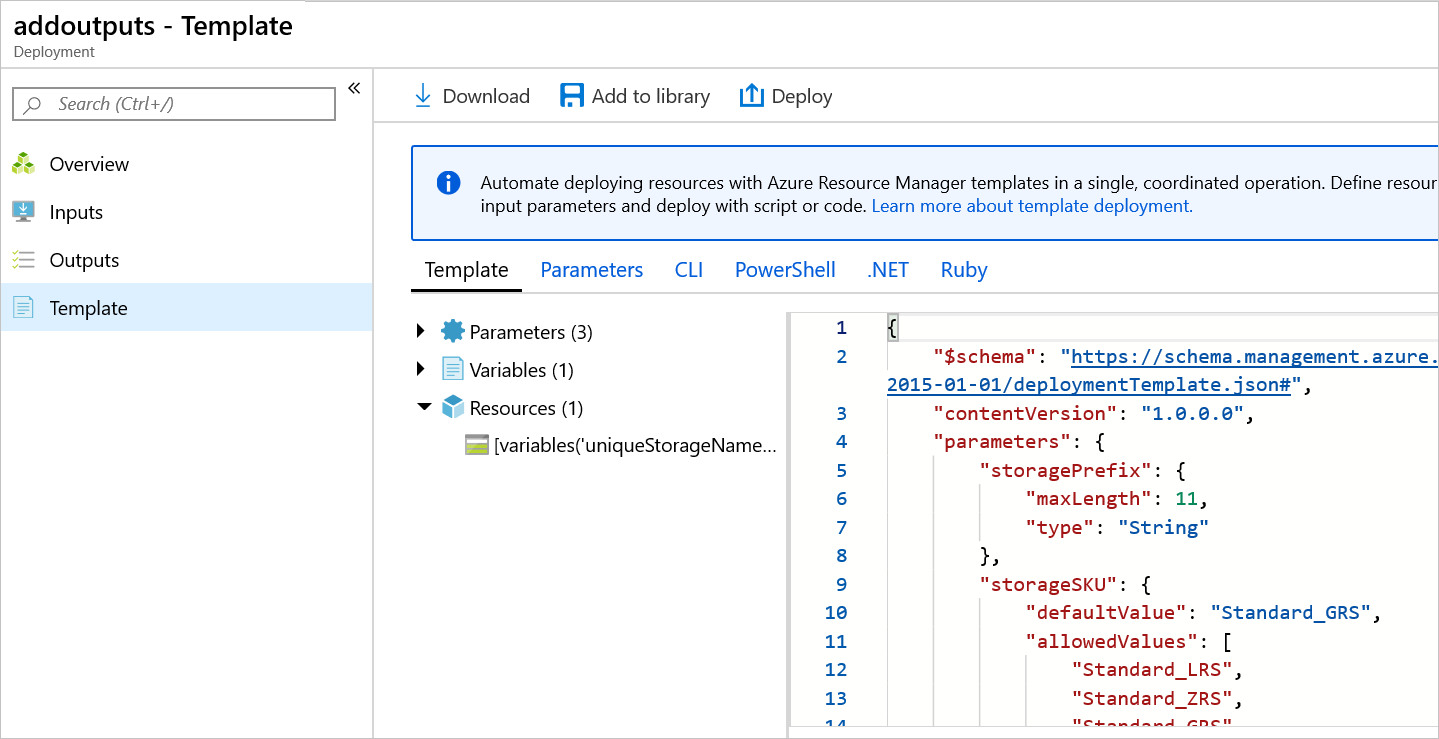
You can review the template.
Clean up resources
If you're moving on to the next tutorial, you don't need to delete the resource group.
If you're stopping now, you might want to delete the resource group.
- From the Azure portal, select Resource groups from the left menu.
- Type the resource group name in the Filter for any field... text field.
- Check the box next to myResourceGroup and select myResourceGroup or your resource group name.
- Select Delete resource group from the top menu.
Next steps
In this tutorial, you added a return value to the template. In the next tutorial, you learn how to export a template and use parts of that exported template in your template.
Feedback
Coming soon: Throughout 2024 we will be phasing out GitHub Issues as the feedback mechanism for content and replacing it with a new feedback system. For more information see: https://aka.ms/ContentUserFeedback.
Submit and view feedback for