Tutorial: Assign Directory Readers role to a Microsoft Entra group and manage role assignments
Applies to: ![]() Azure SQL Database
Azure SQL Database ![]() Azure SQL Managed Instance
Azure SQL Managed Instance ![]() Azure Synapse Analytics
Azure Synapse Analytics
This article guides you through creating a group in Microsoft Entra ID (formerly Azure Active Directory), and assigning that group the Directory Readers role. The Directory Readers permissions allow the group owners to add additional members to the group, such as a managed identity of Azure SQL Database, Azure SQL Managed Instance, and Azure Synapse Analytics. This bypasses the need for a Global Administrator or Privileged Role Administrator to assign the Directory Readers role directly for each logical server identity in the tenant.
Note
Microsoft Entra ID was previously known as Azure Active Directory (Azure AD).
This tutorial uses the feature introduced in Use Microsoft Entra groups to manage role assignments.
For more information on the benefits of assigning the Directory Readers role to a Microsoft Entra group for Azure SQL, see Directory Readers role in Microsoft Entra ID for Azure SQL.
Note
With Microsoft Graph support for Azure SQL, the Directory Readers role can be replaced with using lower level permissions. For more information, see User-assigned managed identity in Microsoft Entra ID for Azure SQL.
Prerequisites
- A Microsoft Entra tenant. For more information, see Configure and manage Microsoft Entra authentication with Azure SQL.
- A SQL Database, SQL Managed Instance, or Azure Synapse.
Directory Readers role assignment using the Azure portal
Create a new group and assign owners and role
A user with Global Administrator or Privileged Role Administrator permissions is required for this initial setup.
Have the privileged user sign into the Azure portal.
Go to the Microsoft Entra ID resource. Under Managed, go to Groups. Select New group to create a new group.
Select Security as the group type, and fill in the rest of the fields. Make sure that the setting Microsoft Entra roles can be assigned to the group is switched to Yes. Then assign the Microsoft Entra ID Directory readers role to the group.
Assign Microsoft Entra users as owner(s) to the group that was created. A group owner can be a regular AD user without any Microsoft Entra administrative role assigned. The owner should be a user that is managing your SQL Database, SQL Managed Instance, or Azure Synapse.
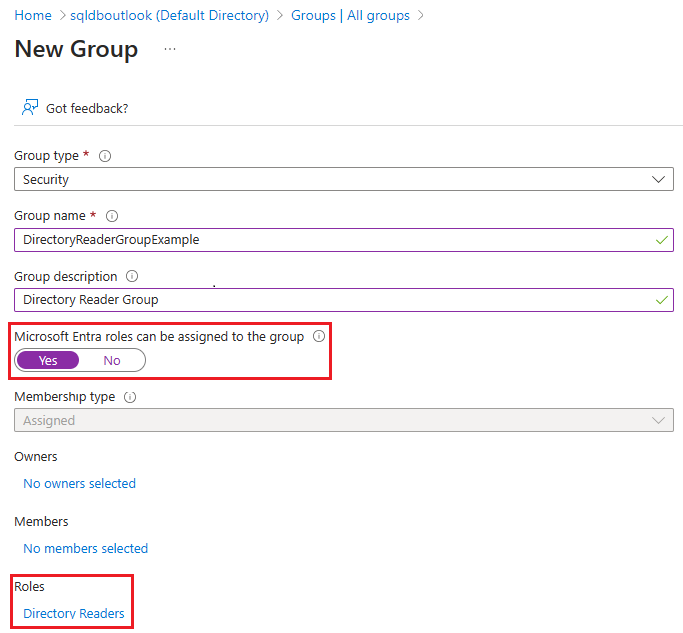
Select Create
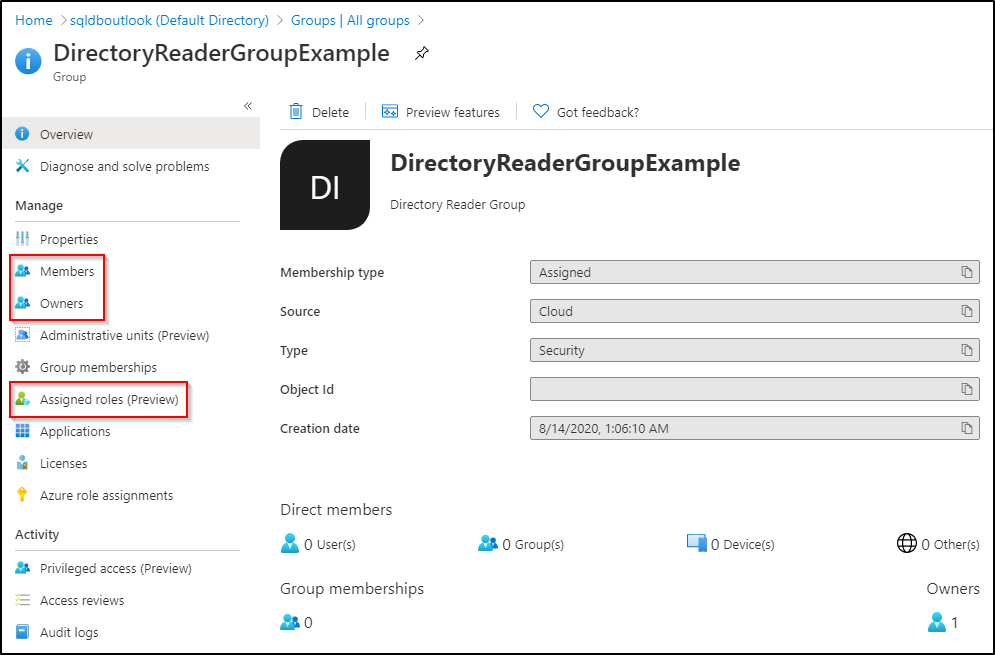
Checking the group that was created
Note
Make sure that the Group Type is Security. Microsoft 365 groups are not supported for Azure SQL.
To check and manage the group that was created, go back to the Groups pane in the Azure portal, and search for your group name. Additional owners and members can be added under the Owners and Members menu of Manage setting after selecting your group. You can also review the Assigned roles for the group.
Add Azure SQL managed identity to the group
Note
We're using SQL Managed Instance for this example, but similar steps can be applied for SQL Database or Azure Synapse to achieve the same results.
For subsequent steps, the Global Administrator or Privileged Role Administrator user is no longer needed.
Log into the Azure portal as the user managing SQL Managed Instance, and is an owner of the group created earlier.
Find the name of your SQL managed instance resource in the Azure portal.
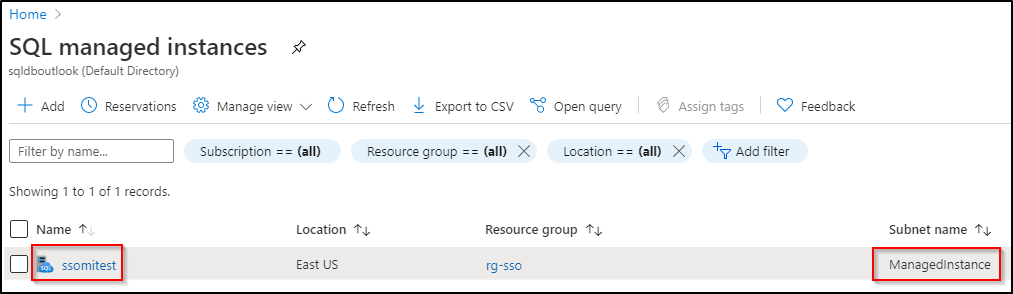
During SQL Managed Instance provisioning, a Microsoft Entra identity is created for your instance, registering it as a Microsoft Entra application. The identity has the same name as the prefix of your SQL Managed Instance name. You can find the identity (also known as the service principal) for your SQL Managed Instance by following these steps:
- Go to the Microsoft Entra ID resource. Under the Manage setting, select Enterprise applications. The Object ID is the identity of the instance.

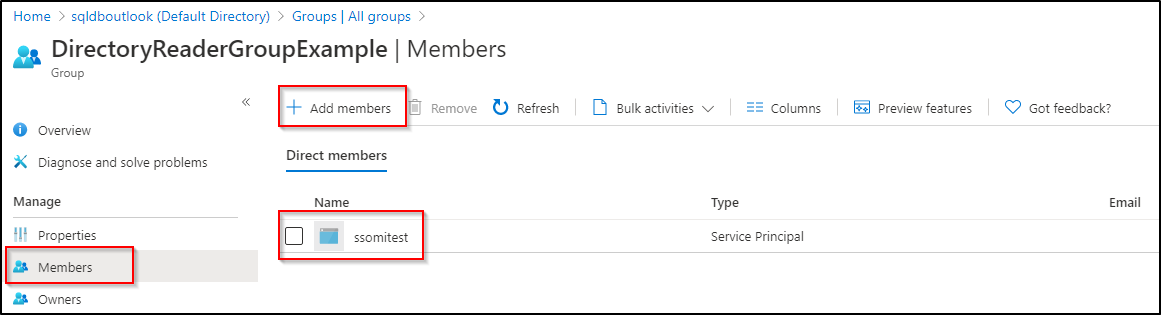
Go to the Microsoft Entra ID resource. Under Managed, go to Groups. Select the group that you created. Under the Managed setting of your group, select Members. Select Add members and add your SQL Managed Instance service principal as a member of the group by searching for the name found above.
Note
It can take a few minutes to propagate the service principal permissions through the Azure system, and allow access to Microsoft Graph API. You may have to wait a few minutes before you provision a Microsoft Entra admin for SQL Managed Instance.
Remarks
For SQL Database and Azure Synapse, the server identity can be created during logical server creation or after the server is created. For more information on how to create or set the server identity in SQL Database or Azure Synapse, see Enable service principals to create Microsoft Entra users.
For SQL Managed Instance, the Directory Readers role must be assigned to managed instance identity before you can set up a Microsoft Entra admin for the managed instance.
Assigning the Directory Readers role to the server identity isn't required for SQL Database or Azure Synapse when setting up a Microsoft Entra admin for the logical server. However, to enable Microsoft Entra object creation in SQL Database or Azure Synapse on behalf of a Microsoft Entra application, the Directory Readers role is required. If the role isn't assigned to the logical server identity, creating Microsoft Entra users in Azure SQL will fail. For more information, see Microsoft Entra service principal with Azure SQL.
Directory Readers role assignment using PowerShell
Important
A Global Administrator or Privileged Role Administrator will need to run these initial steps. In addition to PowerShell, Microsoft Entra ID offers Microsoft Graph API to Create a role-assignable group in Microsoft Entra ID.
Download the Microsoft Graph PowerShell module using the following commands. You may need to run PowerShell as an administrator.
Install-Module Microsoft.Graph.Authentication
Import-Module Microsoft.Graph.Authentication
# To verify that the module is ready to use, run the following command:
Get-Module Microsoft.Graph.Authentication
Connect to your Microsoft Entra tenant.
Connect-MgGraphCreate a security group to assign the Directory Readers role.
DirectoryReaderGroup,Directory Reader Group, andDirReadcan be changed according to your preference.
$group = New-MgGroup -DisplayName "DirectoryReaderGroup" -Description "Directory Reader Group" -SecurityEnabled:$true -IsAssignableToRole:$true -MailEnabled:$false -MailNickname "DirRead"
$group
Assign Directory Readers role to the group.
# Displays the Directory Readers role information
$roleDefinition = Get-MgRoleManagementDirectoryRoleDefinition -Filter "DisplayName eq 'Directory Readers'"
$roleDefinition
# Assigns the Directory Readers role to the group $roleAssignment = New-MgRoleManagementDirectoryRoleAssignment -DirectoryScopeId '/' -RoleDefinitionId $roleDefinition.Id -PrincipalId $group.Id $roleAssignmentAssign owners to the group.
- Replace
<username>with the user you want to own this group. Several owners can be added by repeating these steps.
$newGroupOwner = Get-MgUser -UserId "<username>"
$newGroupOwner
$GrOwner = New-MgGroupOwnerByRef -GroupId $group.Id -DirectoryObjectId $newGroupOwner.IdCheck owners of the group:
Get-MgGroupOwner -GroupId $group.IdYou can also verify owners of the group in the Azure portal. Follow the steps in Checking the group that was created.
- Replace
Assigning the service principal as a member of the group
For subsequent steps, the Global Administrator or Privileged Role Administrator user is no longer needed.
Using an owner of the group that also manages the Azure SQL resource, run the following command to connect to your Microsoft Entra ID.
Connect-MgGraphAssign the service principal as a member of the group that was created.
- Replace
<ServerName>with the name of your logical server or managed instance. For more information, see the section, Add Azure SQL service identity to the group
# Returns the service principal of your Azure SQL resource
$managedIdentity = Get-MgServicePrincipal -Filter "displayName eq '<ServerName>'"
$managedIdentity
# Adds the service principal to the group New-MgGroupMember -GroupId $group.Id -DirectoryObjectId $managedIdentity.IdThe following command will return the service principal Object ID indicating that it has been added to the group:
Get-MgGroupMember -GroupId $group.Id -Filter "Id eq '$($managedIdentity.Id)'"- Replace
Next steps
Feedback
Coming soon: Throughout 2024 we will be phasing out GitHub Issues as the feedback mechanism for content and replacing it with a new feedback system. For more information see: https://aka.ms/ContentUserFeedback.
Submit and view feedback for