Create server configured with user-assigned managed identity and customer-managed TDE
Applies to: ![]() Azure SQL Database
Azure SQL Database
This how-to guide outlines the steps to create a logical server in Azure configured with transparent data encryption (TDE) with customer-managed keys (CMK) using a user-assigned managed identity to access Azure Key Vault.
Note
Microsoft Entra ID was previously known as Azure Active Directory (Azure AD).
Prerequisites
- This how-to guide assumes that you've already created an Azure Key Vault and imported a key into it to use as the TDE protector for Azure SQL Database. For more information, see transparent data encryption with BYOK support.
- Soft-delete and Purge protection must be enabled on the key vault
- You must have created a user-assigned managed identity and provided it the required TDE permissions (Get, Wrap Key, Unwrap Key) on the above key vault. For creating a user-assigned managed identity, see Create a user-assigned managed identity.
- You must have Azure PowerShell installed and running.
- [Recommended but optional] Create the key material for the TDE protector in a hardware security module (HSM) or local key store first, and import the key material to Azure Key Vault. Follow the instructions for using a hardware security module (HSM) and Key Vault to learn more.
Create server configured with TDE with customer-managed key (CMK)
The following steps outline the process of creating a new Azure SQL Database logical server and a new database with a user-assigned managed identity assigned. The user-assigned managed identity is required for configuring a customer-managed key for TDE at server creation time.
Browse to the Select SQL deployment option page in the Azure portal.
If you aren't already signed in to Azure portal, sign in when prompted.
Under SQL databases, leave Resource type set to Single database, and select Create.
On the Basics tab of the Create SQL Database form, under Project details, select the desired Azure Subscription.
For Resource group, select Create new, enter a name for your resource group, and select OK.
For Database name enter
ContosoHR.For Server, select Create new, and fill out the New server form with the following values:
- Server name: Enter a unique server name. Server names must be globally unique for all servers in Azure, not just unique within a subscription. Enter something like
mysqlserver135, and the Azure portal will let you know if it's available or not. - Server admin login: Enter an admin login name, for example:
azureuser. - Password: Enter a password that meets the password requirements, and enter it again in the Confirm password field.
- Location: Select a location from the dropdown list
- Server name: Enter a unique server name. Server names must be globally unique for all servers in Azure, not just unique within a subscription. Enter something like
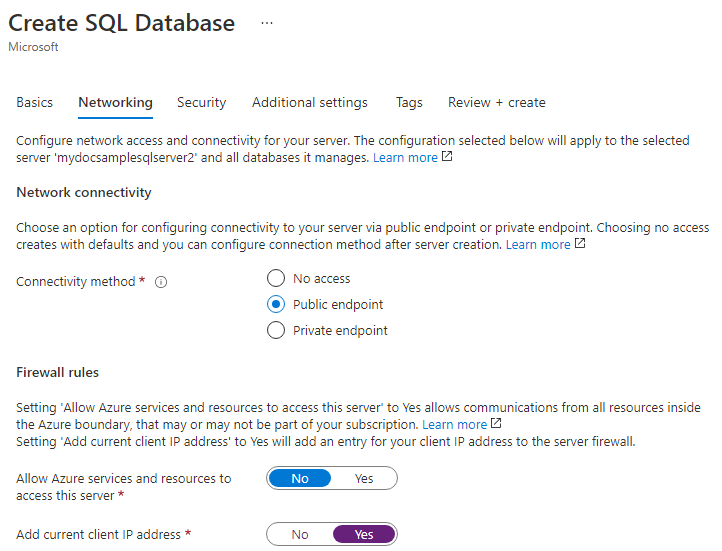
Select Next: Networking at the bottom of the page.
On the Networking tab, for Connectivity method, select Public endpoint.
For Firewall rules, set Add current client IP address to Yes. Leave Allow Azure services and resources to access this server set to No.
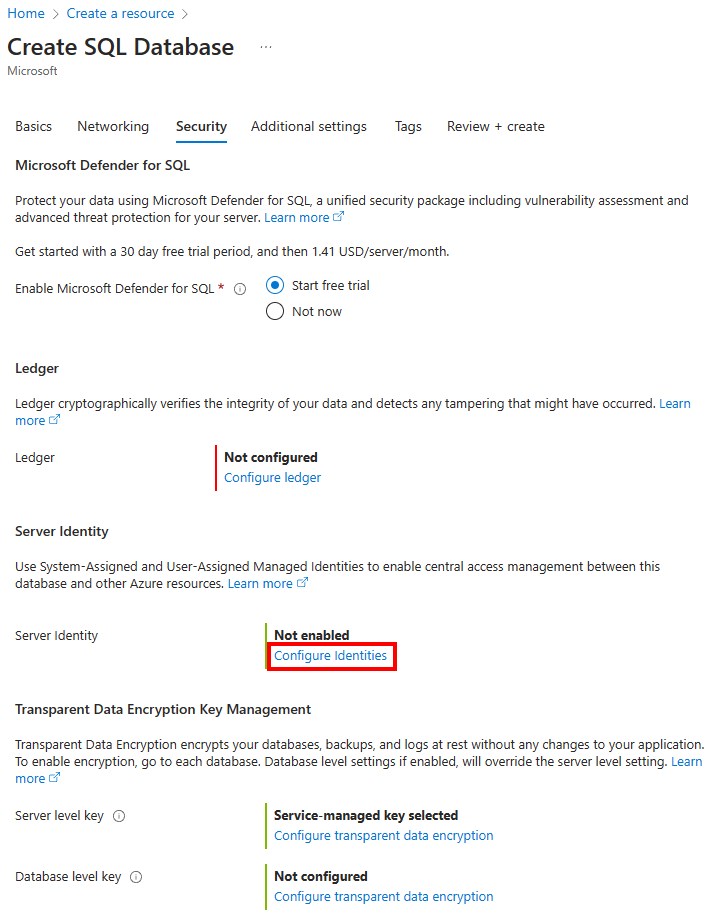
Select Next: Security at the bottom of the page.
On the Security tab, under Server Identity, select Configure Identities.
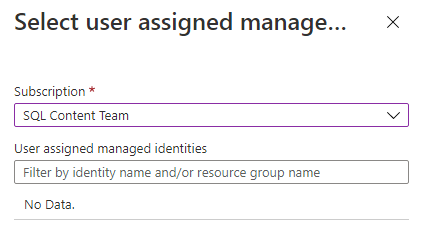
On the Identity pane, select Off for System assigned managed identity and then select Add under User assigned managed identity. Select the desired Subscription and then under User assigned managed identities, select the desired user-assigned managed identity from the selected subscription. Then select the Add button.
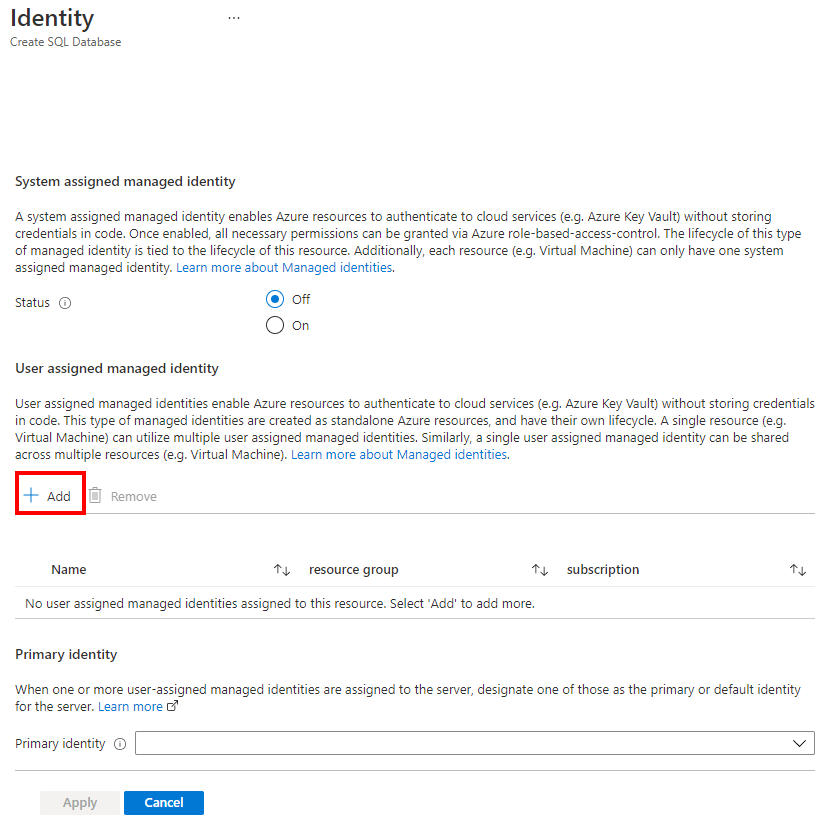
Under Primary identity, select the same user-assigned managed identity selected in the previous step.

Select Apply
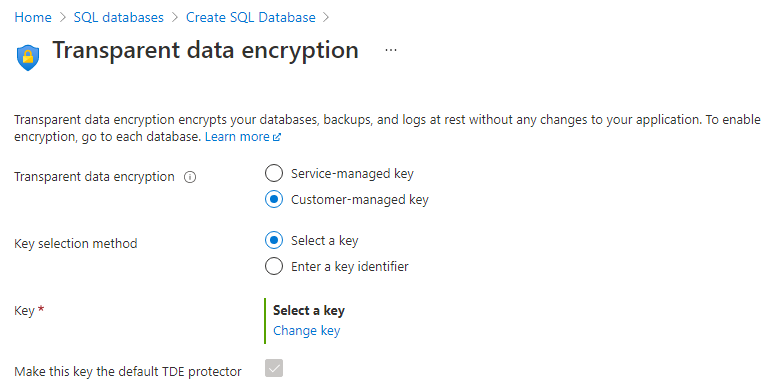
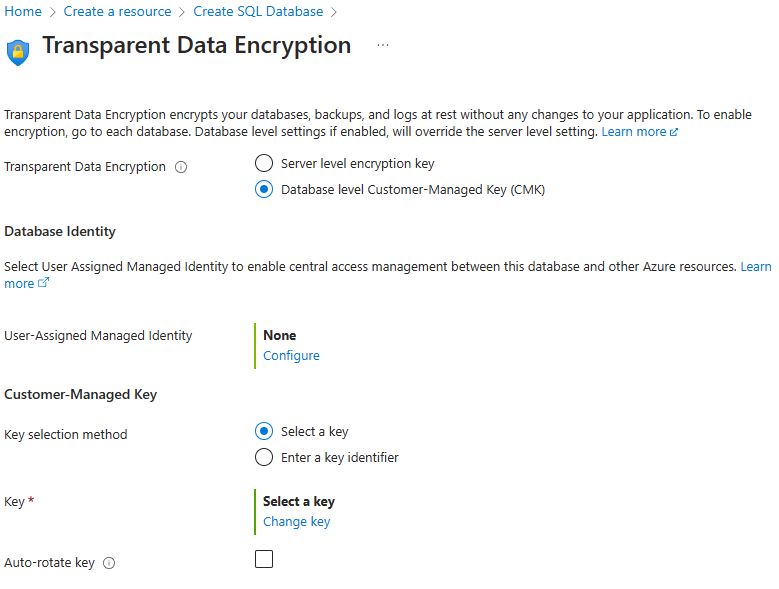
On the Security tab, under Transparent Data Encryption Key Management, you have the option to configure transparent data encryption for the server or database.
- For Server level key: Select Configure transparent data encryption. Select Customer-Managed Key, and an option to select Select a key will appear. Select Change key. Select the desired Subscription, Key vault, Key, and Version for the customer-managed key to be used for TDE. Select the Select button.
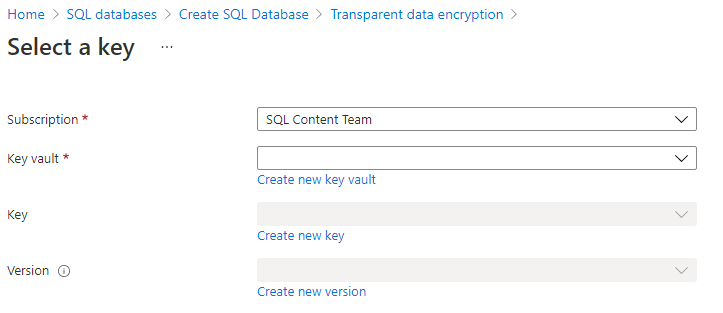
- For Database level key: Select Configure transparent data encryption. Select Database level Customer-Managed Key, and an option to configure the Database Identity and Customer-Managed Key will appear. Select Configure to configure a User-Assigned Managed Identity for the database, similar to step 13. Select Change key to configure a Customer-Managed Key. Select the desired Subscription, Key vault, Key, and Version for the customer-managed key to be used for TDE. You also have the option to enable Auto-rotate key in the Transparent Data Encryption menu. Select the Select button.
Select Apply
Select Review + create at the bottom of the page
On the Review + create page, after reviewing, select Create.
Next steps
- Get started with Azure Key Vault integration and Bring Your Own Key support for TDE: Turn on TDE using your own key from Key Vault.
Feedback
Coming soon: Throughout 2024 we will be phasing out GitHub Issues as the feedback mechanism for content and replacing it with a new feedback system. For more information see: https://aka.ms/ContentUserFeedback.
Submit and view feedback for