Use the ASDK to validate an Azure Stack backup
After deploying Azure Stack and provisioning user resources (such as offers, plans, quotas, and subscriptions), you should enable Azure Stack infrastructure backup. Scheduling and running regular infrastructure backups will ensure infrastructure management data isn't lost if there's a catastrophic hardware or service failure.
Tip
We recommended that you run an on-demand backup before beginning this procedure to ensure you have a copy of the latest infrastructure data available. Make sure to capture the backup ID after the backup successfully completes. This ID is required during cloud recovery.
Azure Stack infrastructure backups contain important data about your cloud that can be restored during redeployment of Azure Stack. You can use the ASDK to validate these backups without impacting your production cloud.
Validating backups on ASDK is supported for the following scenarios:
| Scenario | Purpose |
|---|---|
| Validate infrastructure backups from an integrated solution. | Short lived validation that the data in the backup is valid. |
| Learn the end-to-end recovery workflow. | Use ASDK to validate the entire backup and restore experience. |
The following scenario is not supported when validating backups on the ASDK:
| Scenario | Purpose |
|---|---|
| ASDK build to build backup and restore. | Restore backup data from a previous version of the ASDK to a newer version. |
Cloud recovery deployment
Infrastructure backups from your integrated systems deployment can be validated by performing a cloud recovery deployment of the ASDK. In this type of deployment, specific service data is restored from backup after the ASDK is installed on the host computer.
Cloud recovery prerequisites
Before starting a cloud recovery deployment of the ASDK, ensure that you have the following info.
Important
Starting with the 2108 release, using the ASDK for cloud recovery validation requires that you resize the ASDK VHD before you start the validation. You can use the following PowerShell example to resize the VHD:
Resize-VHD -Path c:\CloudBuilder.vhdx -SizeBytes 140GB
UI installer requirements
| Prerequisite | Description |
|---|---|
| Backup share path | The UNC file share path of the latest Azure Stack backup that will be used to recover Azure Stack infrastructure info. This local share will be created during the cloud recovery deployment process. |
| Backup ID to restore | The backup ID, in the alphanumeric form of "xxxxxxxx-xxxx-xxxx-xxxx-xxxxxxxxxxxx", that identifies the backup to be restored during cloud recovery. |
| Time server IP | A valid time server IP, such as 132.163.97.2, is required for Azure Stack deployment. |
| External certificate password | The password for the external certificate used by Azure Stack. The CA backup contains external certificates that need to be restored with this password. |
| Decryption certification password | Optional. Required only if the backup is encrypted using a certificate. The password is for the self-signed certificate's (.pfx) that contains the private key necessary to decrypt backup data. |
PowerShell installer requirements
| Prerequisite | Description |
|---|---|
| Backup share path | The UNC file share path of the latest Azure Stack backup that will be used to recover Azure Stack infrastructure info. This local share will be created during the cloud recovery deployment process. |
| Backup ID to restore | The backup ID, in the alphanumeric form of "xxxxxxxx-xxxx-xxxx-xxxx-xxxxxxxxxxxx", that identifies the backup to be restored during cloud recovery. |
| Time server IP | A valid time server IP, such as 132.163.97.2, is required for Azure Stack deployment. |
| External certificate password | The password for the external certificate used by Azure Stack. The CA backup contains external certificates that need to be restored with this password. |
| Decryption certification password | The password is for the self-signed certificate's (.pfx) that contains the private key necessary to decrypt backup data. |
Prepare the host computer
As in a normal ASDK deployment, the ASDK host system environment must be prepared for installation. When the ASDK host computer has been prepared, it will boot from the CloudBuilder.vhdx VM hard drive to begin ASDK deployment.
On the ASDK host computer, download a new cloudbuilder.vhdx corresponding to the same version of Azure Stack that was backed up, and follow the instructions for preparing the ASDK host computer.
After the host server restarts from the cloudbuilder.vhdx, you must create a file share and copy your backup data into. The file share should be accessible to the account running setup; Administrator in these example PowerShell commands:
$shares = New-Item -Path "c:\" -Name "Shares" -ItemType "directory"
$azsbackupshare = New-Item -Path $shares.FullName -Name "AzSBackups" -ItemType "directory"
New-SmbShare -Path $azsbackupshare.FullName -FullAccess ($env:computername + "\Administrator")  -Name "AzSBackups"
Next, copy your Azure Stack backup files to the newly created share. Make sure to copy the entire MASBackup folder from the backup source share to the root of the share that the restoring ASDK is accessing. E.g., the \\<ComputerName>\AzSBackups\ directory should contain a single MASBackup directory.
Finally, copy the decryption certificate (.pfx) to the certificate directory: C:\CloudDeployment\Setup\Certificates\AAD\InfrastructureBackup and rename the file to BackupDecryptionCert.pfx when Azure Stack Hub deployment is based in Microsoft Entra ID, or copy the decryption certificate (.pfx) to the certifcate directory: C:\CloudDeployment\Setup\Certificates\ADFS\InfrastructureBackup and rename the file to BackupDecryptionCert.pfx when Azure Stack Hub deployment is based in ADFS.
Deploy the ASDK in cloud recovery mode
Important
- The current installer UI only supports encryption key. You can only validate backups from systems that continue to use encryption key. If the backup was encrypted on an integrated system or ASDK using certificate, you must use the PowerShell installer (InstallAzureStackPOC.ps1).
- The PowerShell installer (InstallAzureStackPOC.ps1) supports encryption key or certificate.
- ASDK installation supports exactly one network interface card (NIC) for networking. If you have multiple NICs, make sure that only one is enabled (and all others are disabled) before running the deployment script.
Use the installer UI to deploy the ASDK in recovery mode
The steps in this section show you how to deploy the ASDK using a graphical user interface (GUI) provided by downloading and running the asdk-installer.ps1 PowerShell script.
Note
The installer user interface for the ASDK is an open-sourced script based on WCF and PowerShell.
Important
The current installer UI only supports encryption key.
After the host computer successfully boots into the CloudBuilder.vhdx image, sign in using the admin credentials specified when you prepared the ASDK host computer for ASDK installation. These credentials should be the same as the ASDK host local admin credentials.
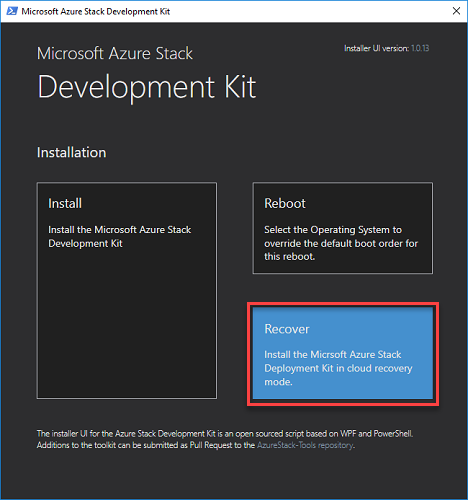
Open an elevated PowerShell console and run the <drive letter>\AzureStack_Installer\asdk-installer.ps1 PowerShell script. The script might now be on a different drive than C:\ in the CloudBuilder.vhdx image. Click Recover.
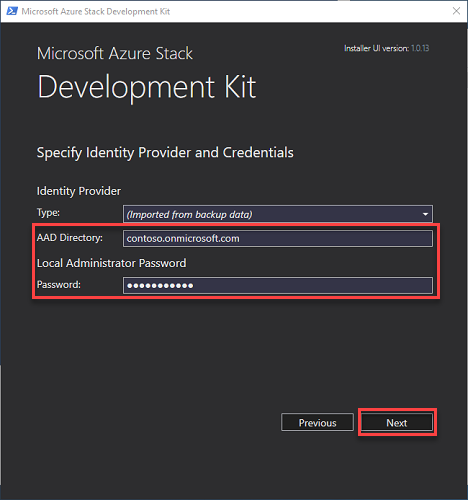
Enter your Microsoft Entra directory info (optional) and the local admin password for the ASDK host computer on the identity provider and credentials page. Click Next.
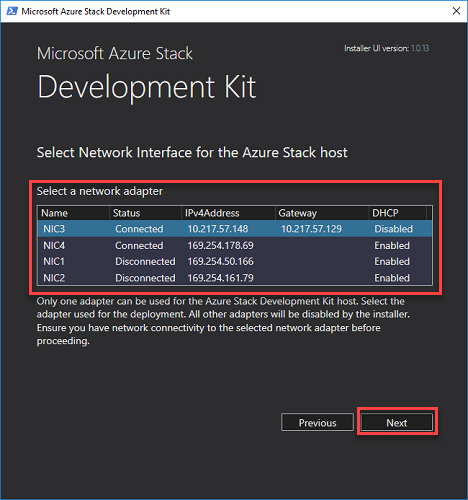
Select the network adapter to be used by the ASDK host computer and click Next. All other network interfaces will be disabled during ASDK installation.
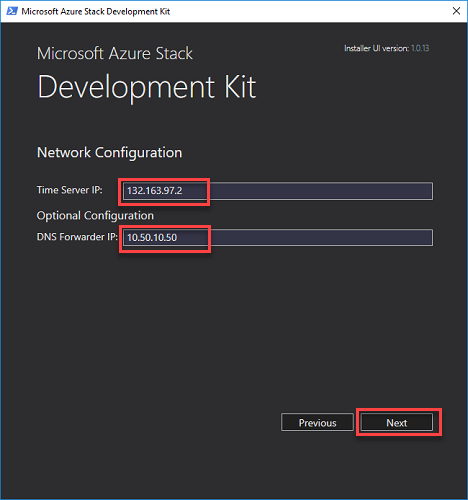
On the Network Configuration page, provide valid time server and DNS forwarder IP addresses. Click Next.
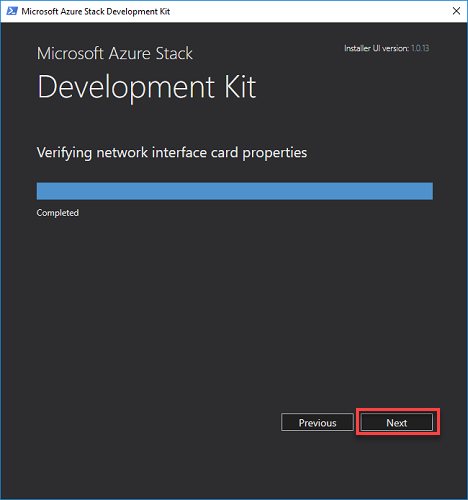
When network interface card properties have been verified, click Next.
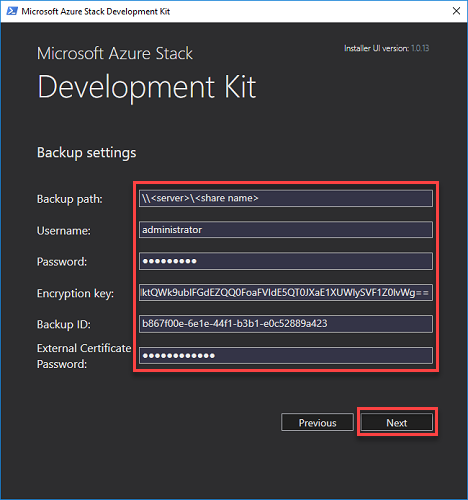
Provide the required info described in the prerequisites section on the Backup Settings page and the username and password to be used to access the share. Click Next:
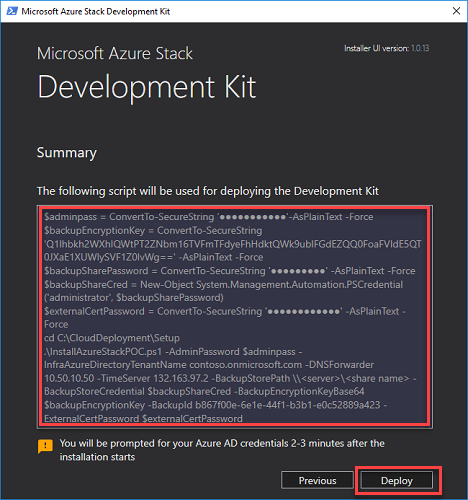
Review the deployment script to be used for deploying the ASDK on the Summary page. Click Deploy to begin deployment.
Use PowerShell to deploy the ASDK in recovery mode
Modify the following PowerShell commands for your environment and run them to deploy the ASDK in cloud recovery mode:
Important
The $adminpass on the following script must be the local administrator password, not the default "CloudAdmin" user.
Use the InstallAzureStackPOC.ps1 script to start cloud recovery with decryption certificate
cd C:\CloudDeployment\Setup
$adminpass = Read-Host -AsSecureString -Prompt "Local Administrator password"
$certPass = Read-Host -AsSecureString -Prompt "Password for the external certificate"
$backupstorecredential = Get-Credential
$decryptioncertpassword  = Read-Host -AsSecureString -Prompt "Password for the decryption certificate"

.\InstallAzureStackPOC.ps1 -AdminPassword $adminpass `
 -BackupStorePath ("\\" + $env:COMPUTERNAME + "\AzSBackups") `
 -BackupDecryptionCertPassword $decryptioncertpassword `
 -BackupStoreCredential $backupstorecredential `
 -BackupId "<Backup ID to restore>" `
 -TimeServer "<Valid time server IP>" -ExternalCertPassword $certPass
Complete cloud recovery
After a successful cloud recovery deployment, you need to complete the restore using the Restore-AzureStack cmdlet.
After logging in as the Azure Stack operator, install Azure Stack PowerShell and run the following commands to specify the certificate and password to be used when restoring from backup:
Recovery mode with certificate file
Note
Azure Stack deployment doesn't persist the decryption certificate for security reasons. You'll need to provide the decryption certificate and associated password again.
$decryptioncertpassword = Read-Host -AsSecureString -Prompt "Password for the decryption certificate"
Restore-AzsBackup -Name "<BackupID>" `
 -DecryptionCertPath "<path to decryption certificate with file name (.pfx)>" `
 -DecryptionCertPassword $decryptioncertpassword
Recovery mode with encryption key
$decryptioncertpassword = Read-Host -AsSecureString -Prompt "Password for the decryption certificate"
Restore-AzsBackup -Name "<BackupID>"
Wait 60 minutes after calling this cmdlet to start verification of backup data on the cloud recovered ASDK.
Next steps
Feedback
Coming soon: Throughout 2024 we will be phasing out GitHub Issues as the feedback mechanism for content and replacing it with a new feedback system. For more information see: https://aka.ms/ContentUserFeedback.
Submit and view feedback for