Connect a bot to Slack
APPLIES TO: SDK v3
There are two ways in which you can configure Slack messaging app:
- Use Azure Bot Service portal to connect your bot
- Use the Slack adapter
Create a Slack application for your bot
Log into Slack and then go to create a Slack application channel.
Create an app and assign a Development Slack team
Enter an App Name and select a Development Slack Team. If you are not already a member of a Development Slack Team, create or join one.
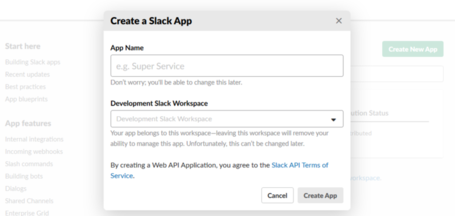
Click Create App. Slack will create your app and generate a Client ID and Client Secret.
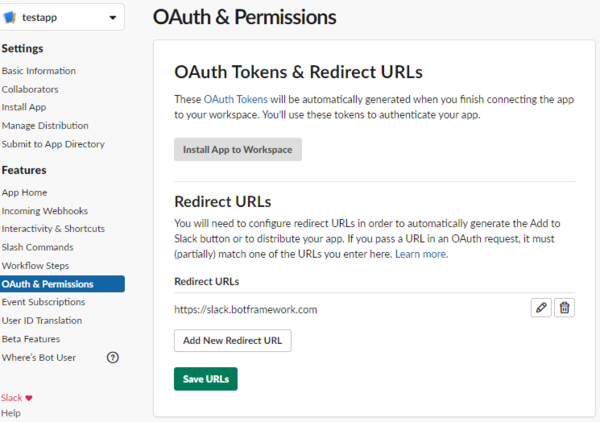
Add a new Redirect URL
Next you will add a new Redirect URL.
- Select the OAuth & Permissions tab.
- Click Add a new Redirect URL.
- Enter https://slack.botframework.com.
- Click Add.
- Click Save URLs.
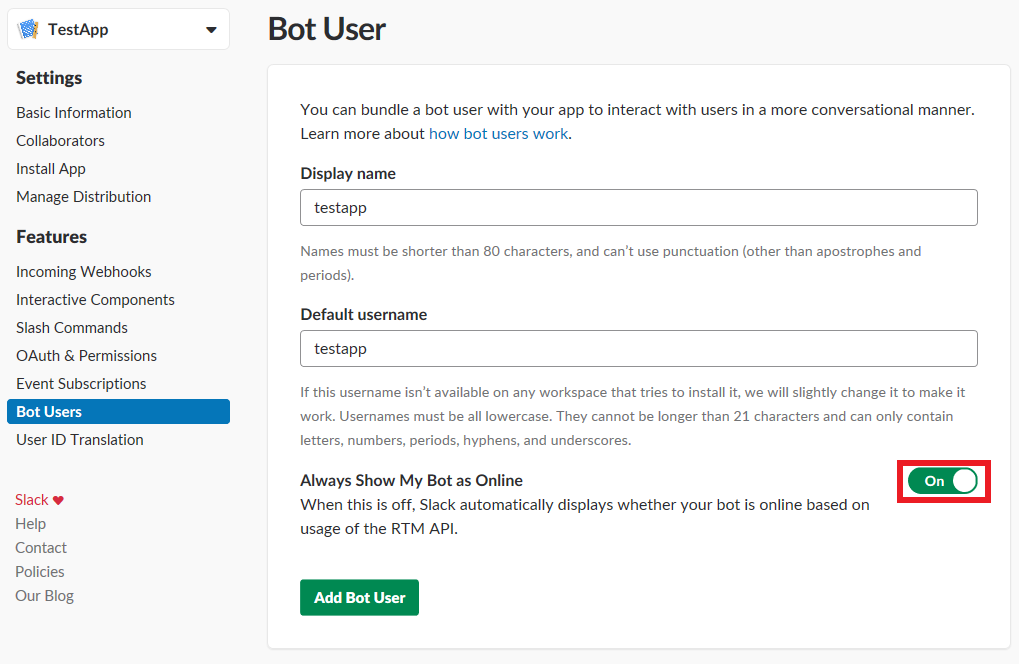
Create a Slack Bot User
Adding a Bot User allows you to assign a username for your bot and choose whether it is always shown as online.
- Select the Bot Users tab.
- Click Add a Bot User.

Click Add Bot User to validate your settings, click Always Show My Bot as Online to On, and then click Save Changes.
Subscribe to Bot Events
Follow these steps to subscribe to six particular bot events. By subscribing to bot events, your app will be notified of user activities at the URL you specify.
Tip
Your bot handle is the name of your bot. To find a bot's handle, visit https://dev.botframework.com/bots, choose a bot, and record the name of the bot.
Select the Event Subscriptions tab.
Click Enable Events to On.
In Request URL, enter
https://slack.botframework.com/api/Events/{YourBotHandle}, where{YourBotHandle}is your bot handle, without the braces. The bot handle used in this example is ContosoBot.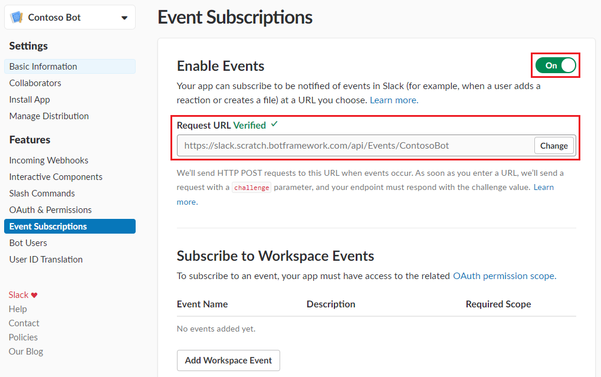
In Subscribe to Bot Events, click Add Bot User Event.
In the list of events, select these six event types:
member_joined_channelmember_left_channelmessage.channelsmessage.groupsmessage.immessage.mpim
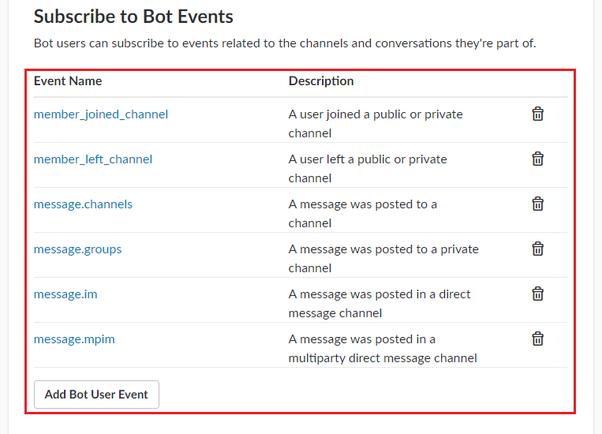
Click Save Changes.

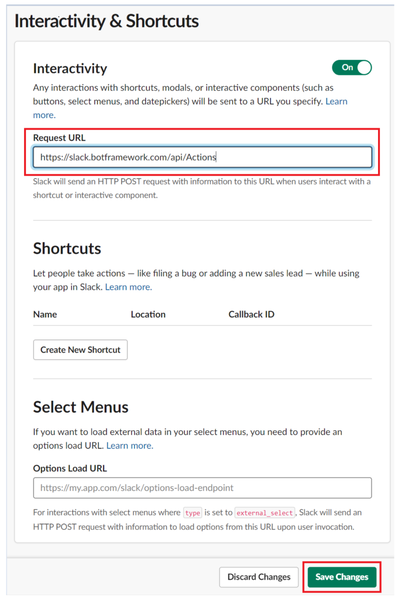
Add and Configure Interactive Messages (optional)
If your bot will use Slack-specific functionality such as buttons, follow these steps:
- Select the Interactivity & Shortcuts tab and enable Interactivity.
- Enter
https://slack.botframework.com/api/Actionsas the Request URL. - Click the Save changes button.
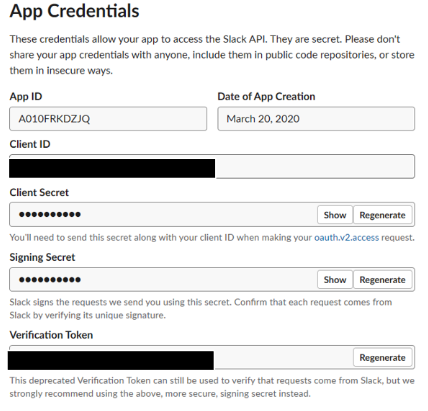
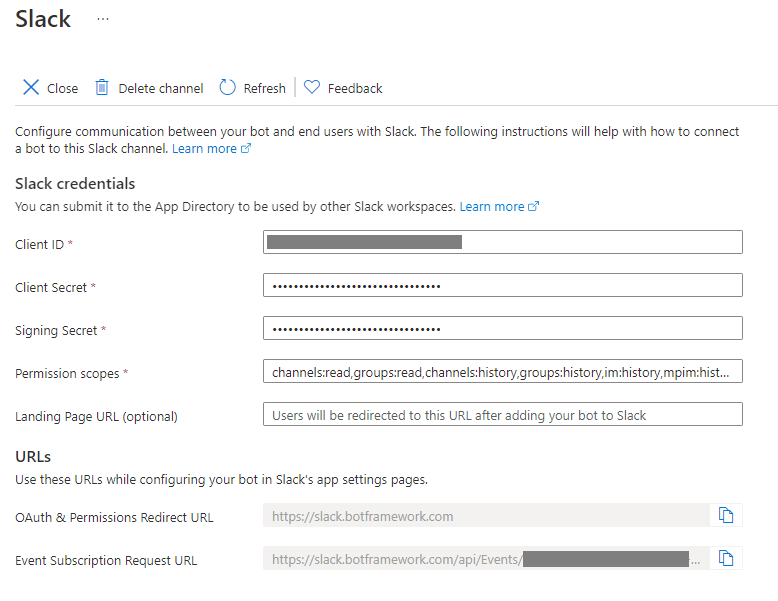
Gather credentials
Select the Basic Information tab and scroll to the App Credentials section. The Client ID, Client Secret, and Verification Token required for configuration of your Slack bot are displayed.
Submit credentials
In a separate browser window, return to the Bot Framework site at https://dev.botframework.com/.
- Select My bots and choose the Bot that you want to connect to Slack.
- In the Channels section, click the Slack icon.
- In the Enter your Slack credentials section, paste the App Credentials from the Slack website into the appropriate fields.
- The Landing Page URL is optional. You may omit or change it.
- Click Save.
Follow the instructions to authorize your Slack app's access to your Development Slack Team.
Enable the bot
On the Configure Slack page, confirm the slider by the Save button is set to Enabled. Your bot is configured to communicate with users in Slack.
Create an Add to Slack button
Slack provides HTML you can use to help Slack users find your bot in the
Add the Slack button section of this page.
To use this HTML with your bot, replace the href value (begins with https://) with the URL found in your bot's Slack channel settings.
Follow these steps to get the replacement URL.
- On https://dev.botframework.com/bots, click your bot.
- Click Channels, right-click the entry named Slack, and click Copy link. This URL is now in your clipboard.
- Paste this URL from your clipboard into the HTML provided for the Slack button. This URL replaces the href value provided by Slack for this bot.
Authorized users can click the Add to Slack button provided by this modified HTML to reach your bot on Slack.
Note
As of June 2020 Slack channel supports Slack V2 permission scopes which allow the bot to specify its capabilities and permissions in a more granular way. All newly configured Slack channels will use the V2 scopes. To switch your bot to the V2 scopes, delete and recreate the Slack channel configuration in the Channels blade. The link you pasted into the href value of the HTML contains scopes that can be refined as needed. Consult https://api.slack.com/scopes for the full list of available scopes.