Create an Azure Content Delivery Network endpoint
This article describes all the settings for creating an Azure Content Delivery Network endpoint in an existing content delivery network profile. After you've created a profile and an endpoint, you can start delivering content to your customers. For a quickstart on creating a profile and endpoint, see Quickstart: Create an Azure Content Delivery Network profile and endpoint.
Prerequisites
Before you can create a content delivery network endpoint, you must have created at least one content delivery network profile, which can contain one or more content delivery network endpoints. To organize your content delivery network endpoints by internet domain, web application, or some other criteria, you can use multiple profiles. Because content delivery network pricing is applied at the content delivery network profile level, you must create multiple content delivery network profiles if you want to use a mix of Azure Content Delivery Network pricing tiers. To create a content delivery network profile, see Create a new content delivery network profile.
Sign in to the Azure portal
Sign in to the Azure portal with your Azure account.
Create a new content delivery network endpoint
In the Azure portal, navigate to your content delivery network profile. You might have pinned it to the dashboard in the previous step. If not, you can find it by selecting All services, then selecting CDN profiles. In the CDN profiles pane, select the profile to which you plan to add your endpoint.
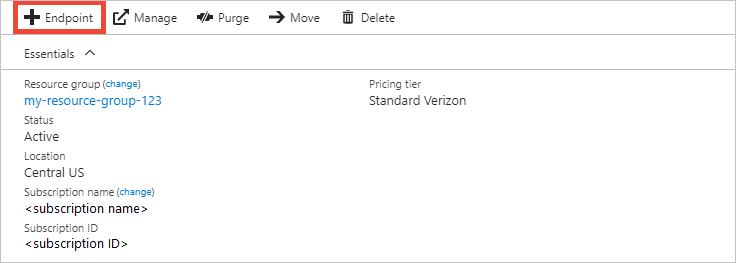
The content delivery network profile pane appears.
Select Endpoint.
The Add an endpoint page appears.

For Name, enter a unique name for the new content delivery network endpoint. This name is used to access your cached resources at the domain <endpointname>.azureedge.net.
For Origin type, choose one of the following origin types:
- Storage for Azure Storage
- Cloud service for Azure Cloud Services
- Web App for Azure Web Apps
- Custom origin for any other publicly accessible origin web server (hosted in Azure or elsewhere)
For Origin hostname, select or enter your origin server domain. The dropdown lists all available origin servers of the type you specified in step 4. If you selected Custom origin as your origin type, enter the domain of your custom origin server.
For Origin path, enter the path to the resources that you want to cache. To allow caching of any resource at the domain you specified in step 5, leave this setting blank.
For Origin host header, enter the host header you want Azure Content Delivery Network to send with each request, or leave the default.
Note
Some types of origins, such as Azure Storage and Web Apps, require the host header to match the domain of the origin. Unless you have an origin that requires a host header different from its domain, you should leave the default value.
For Protocol and Origin port, specify the protocols and ports to use to access your resources at the origin server. At least one protocol (HTTP or HTTPS) must be selected. Use the content delivery network-provided domain (<endpointname>.azureedge.net) to access HTTPS content.
Note
The Origin port value determines only the port the endpoint uses to retrieve information from the origin server. The endpoint itself is available only to end clients on the default HTTP and HTTPS ports (80 and 443), regardless of the Origin port value.
For Optimized for, select an optimization type that best matches the scenario and type of content that you want the endpoint to deliver. For more information, see Optimize Azure Content Delivery Network for the type of content delivery.
The following optimization type settings are supported, according to profile type:
Azure CDN Standard from Microsoft profiles:
Azure CDN Standard from Edgio and Azure CDN Premium from Edgio profiles:
Select Add to create the new endpoint.
After the endpoint is created, it appears in the list of endpoints for the profile.

Because it takes time for the registration to propagate, the endpoint isn't immediately available for use:
- For Azure CDN Standard from Microsoft profiles, propagation usually completes in 10 minutes.
- For Azure CDN Standard from Edgio and Azure CDN Premium from Edgio profiles, propagation usually completes within 30 minutes.
If you attempt to use the content delivery network domain name before the endpoint configuration has propagated to the point of presence (POP) servers, you might receive an HTTP 404 response status. If it has been several hours since you created your endpoint and you're still receiving a 404 response status, see Troubleshooting Azure Content Delivery Network endpoints that return a 404 status code.
Note
For Edgio CDN endpoints, when an endpoint is disabled or stopped for any reason, all resources configured through the Edgio supplemental portal will be cleaned up. These configurations can't be restored automatically by restarting the endpoint. You will need to make those configuration changes again.
Clean up resources
To delete an endpoint when it's no longer needed, select it and then select Delete.
Next steps
To learn about custom domains, continue to the tutorial for adding a custom domain to your content delivery network endpoint.
Feedback
Coming soon: Throughout 2024 we will be phasing out GitHub Issues as the feedback mechanism for content and replacing it with a new feedback system. For more information see: https://aka.ms/ContentUserFeedback.
Submit and view feedback for