Create a text translation flow (preview)
Important
- The Translator connector is currently available in public preview. Features, approaches and processes may change, prior to General Availability (GA), based on user feedback.
This article guides you through configuring a Microsoft Translator V3 connector cloud flow that supports text translation and transliteration. The Translator V3 connector creates a connection between your Translator Service instance and Microsoft Power Automate enabling you to use one or more prebuilt operations as steps in your apps and workflows.
Text translation is a cloud-based REST API feature of the Azure AI Translator service. The Text Translation API enables quick and accurate source-to-target text translations in real time.
Prerequisites
To get started, you need an active Azure subscription. If you don't have an Azure subscription, you can create one for free.
Once you have your Azure subscription, create a single-service Translator resource (not a multi-service Azure AI services resource):
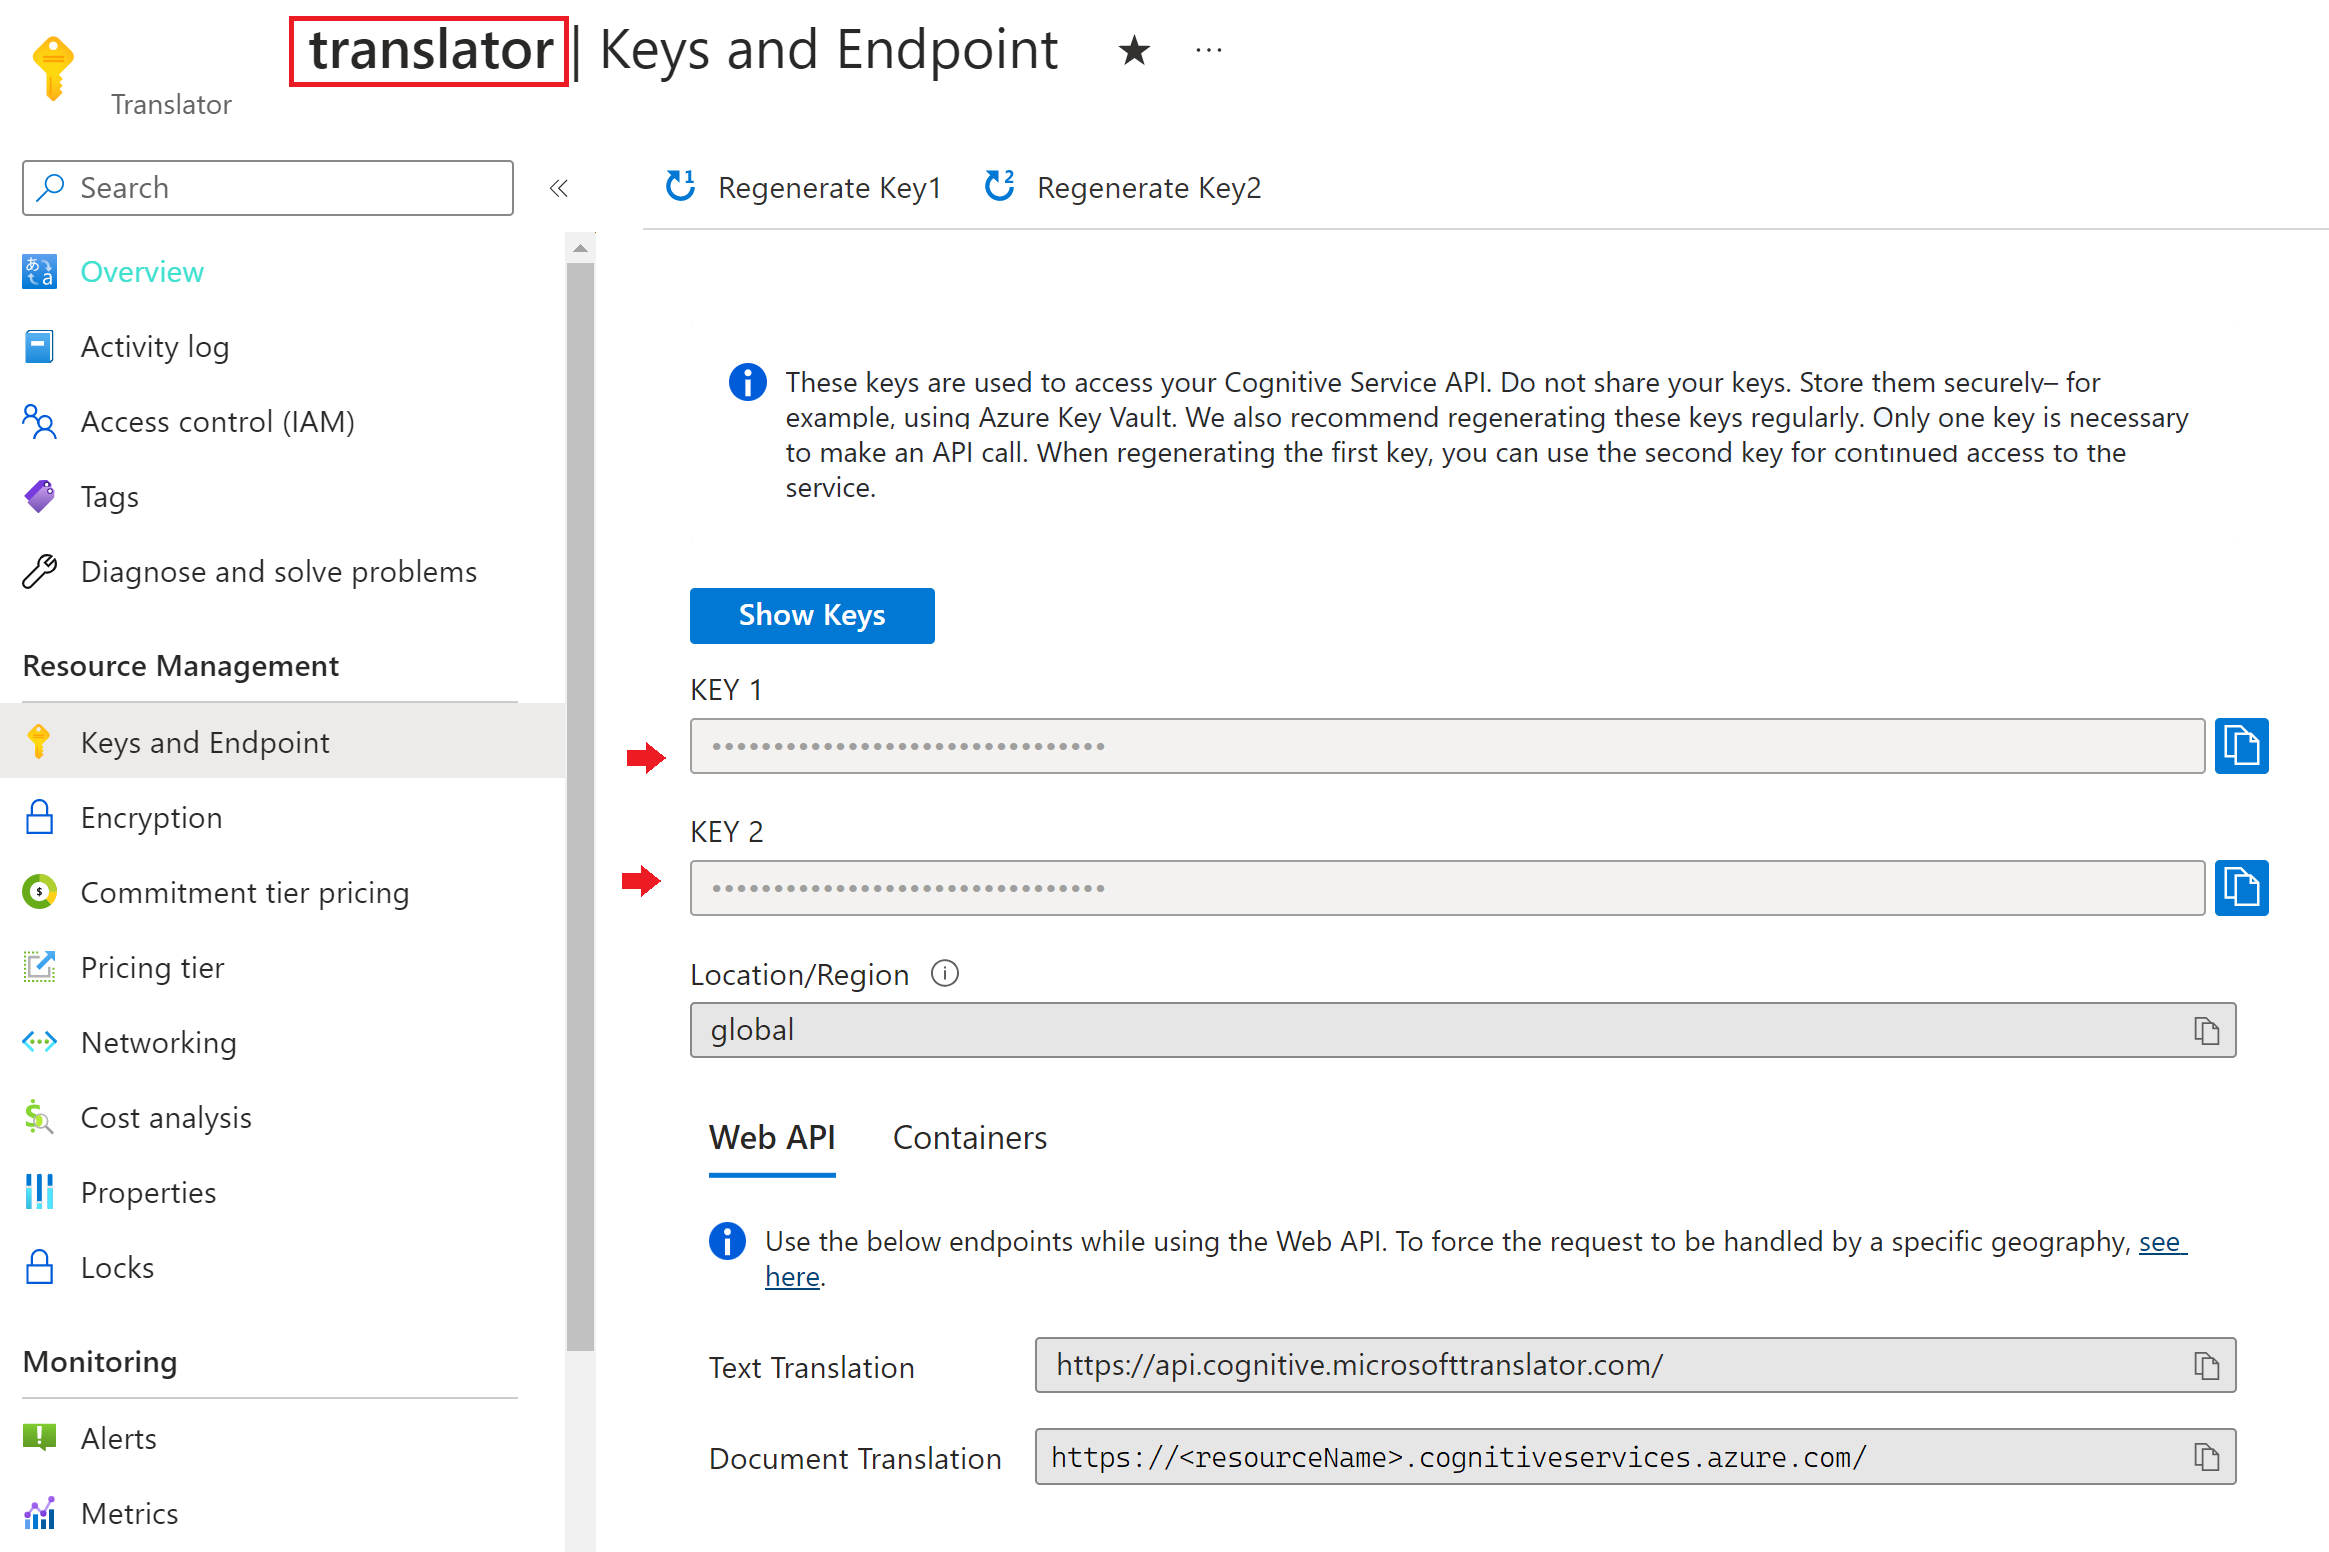
You need the key and name from your resource to connect your application to Power Automate. Your Translator resource keys are found under the Resource Management section in the Azure portal and your resource name is located at the top of the page. Copy and paste your key and resource name in a convenient location, such as Microsoft Notepad.
Configure the Translator V3 connector
Now that you've completed the prerequisites, let's get started.
Sign in to Power Automate.
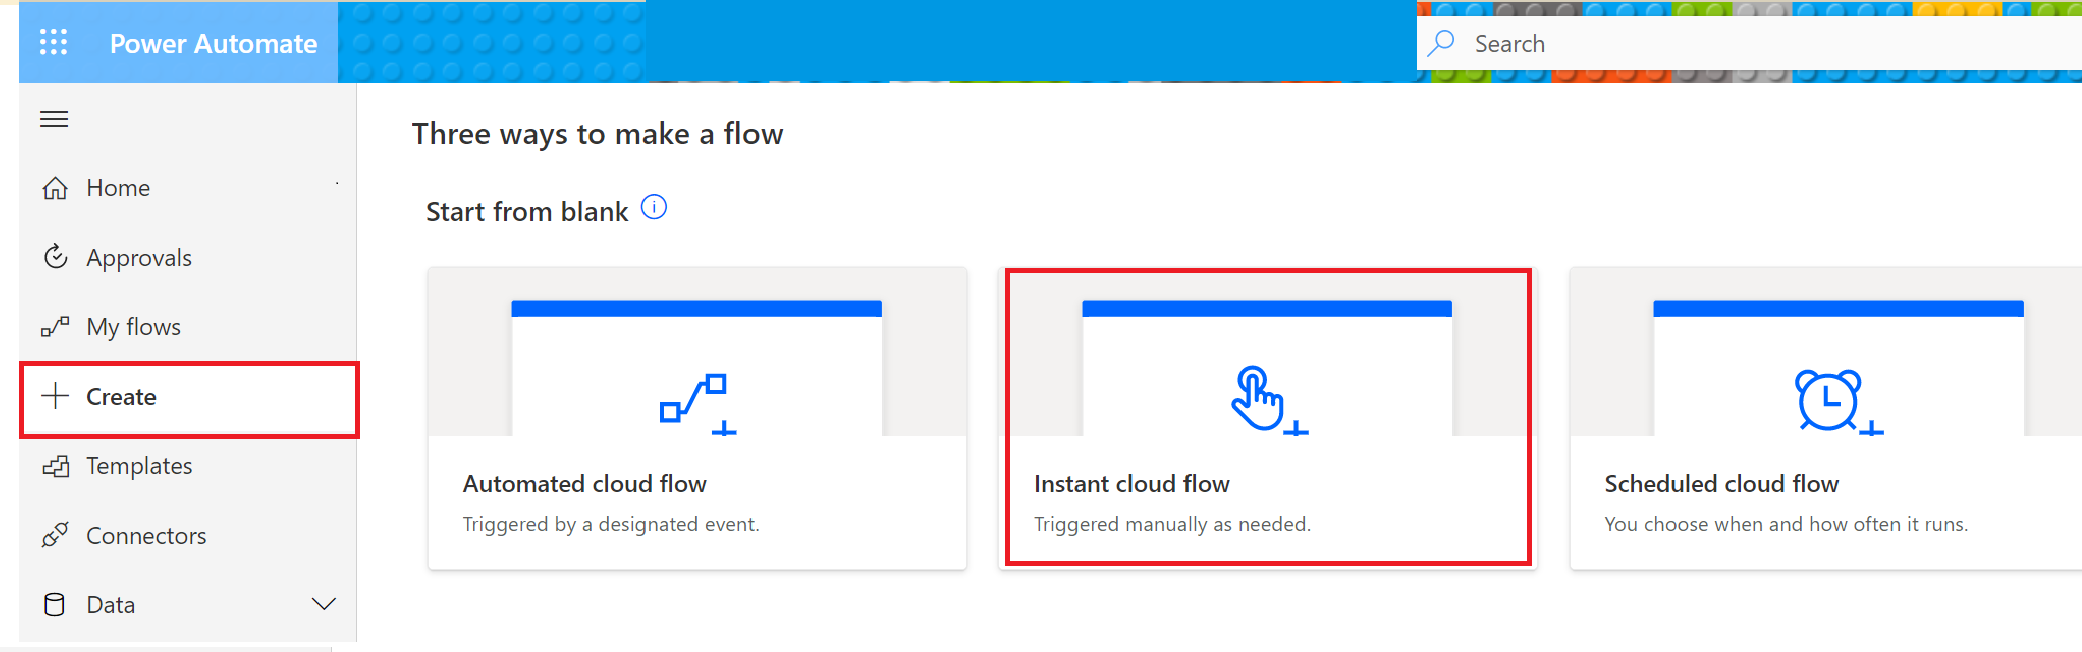
Select Create from the left sidebar menu.
Select Instant cloud flow from the main content area.
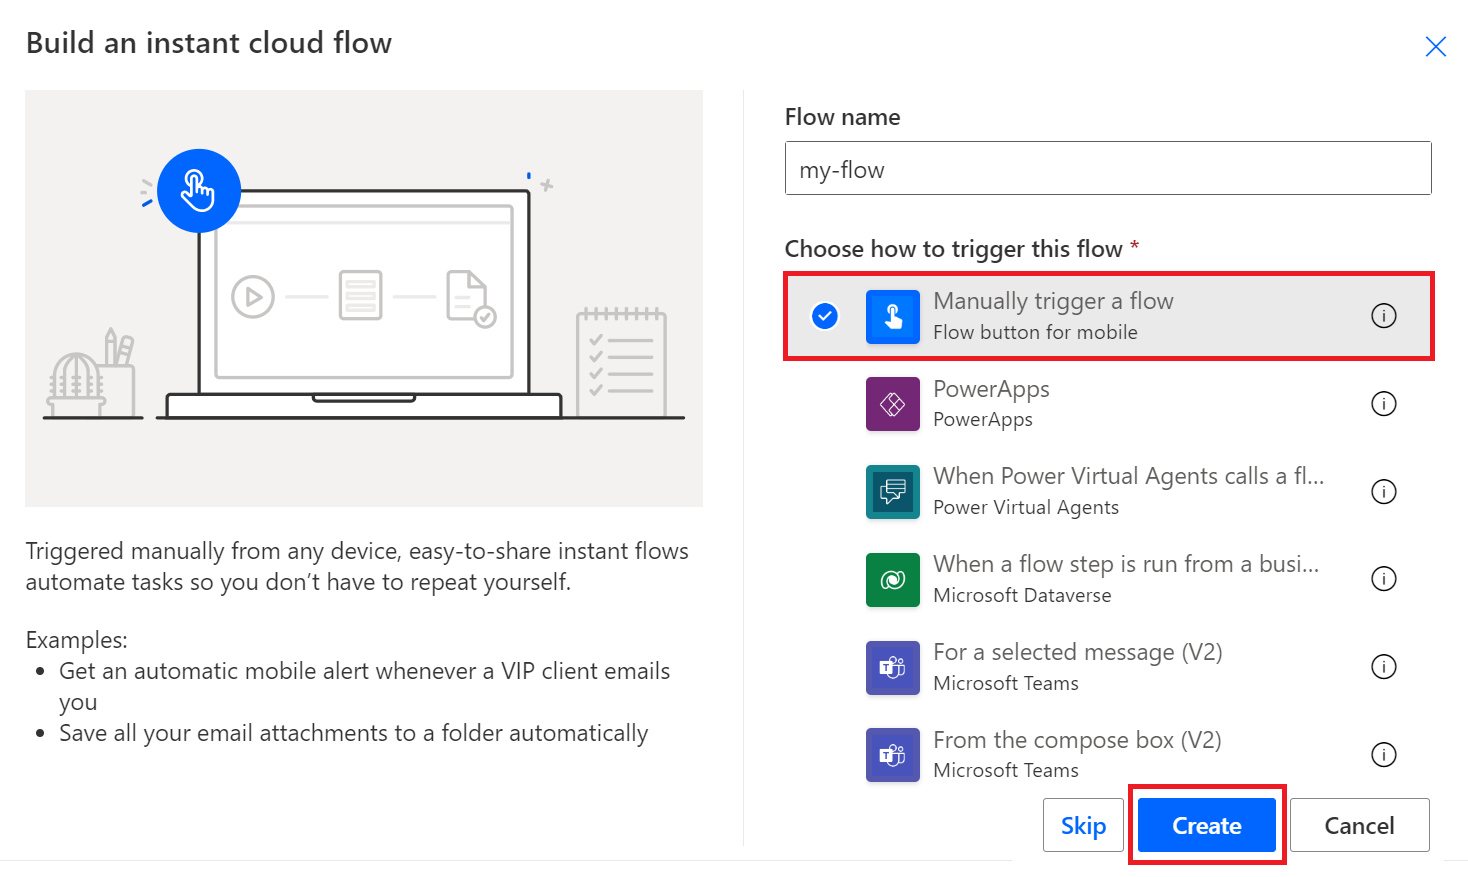
In the popup window, name your flow, choose Manually trigger a flow then, select Create.
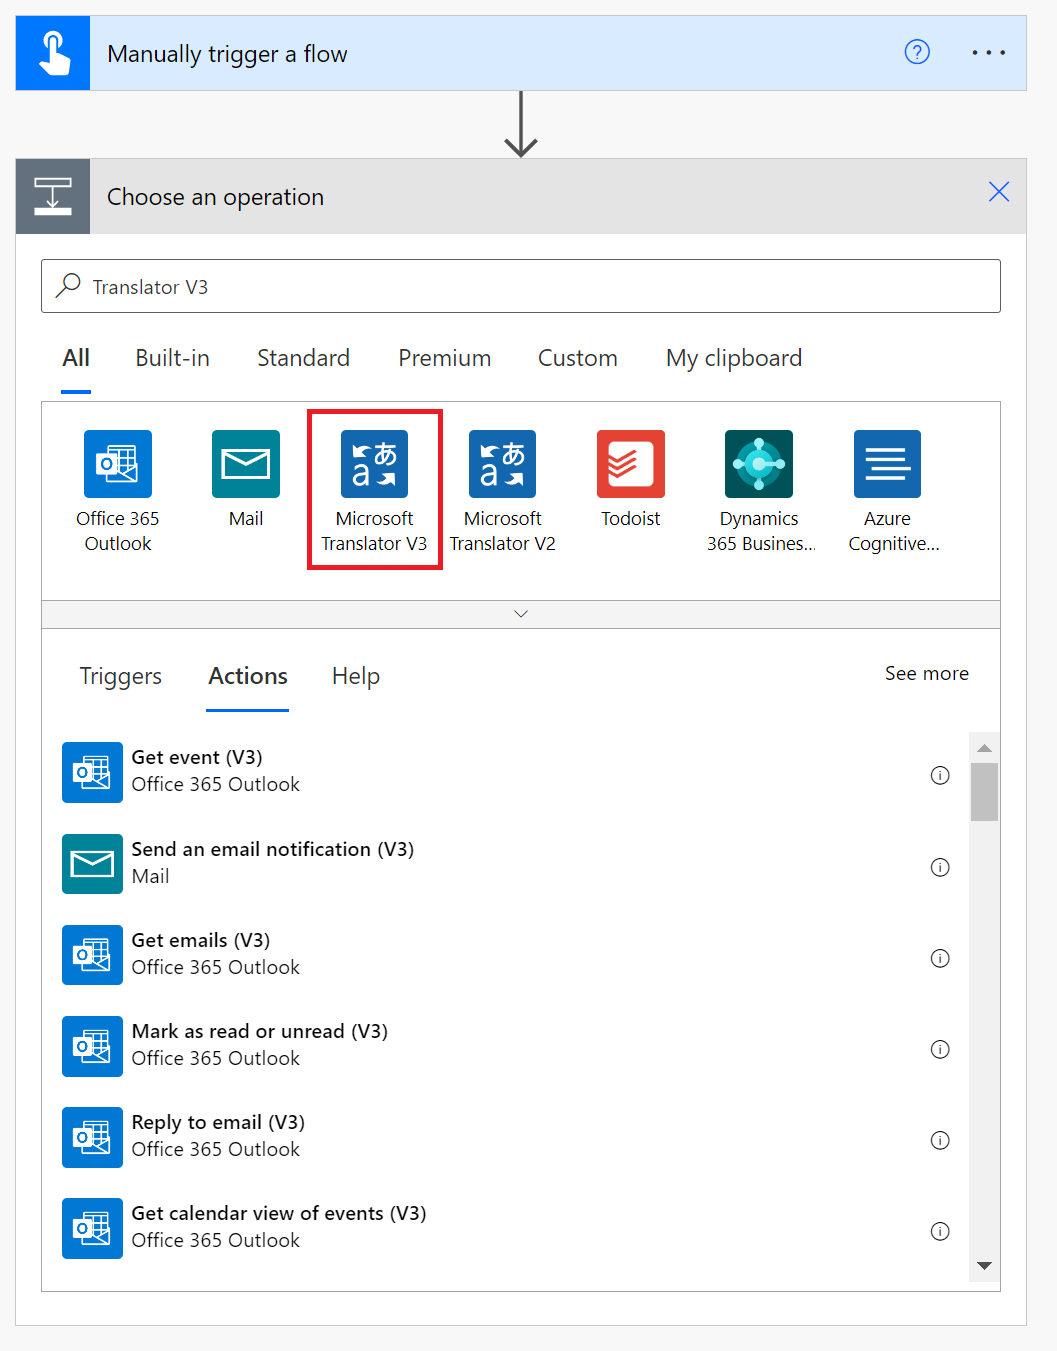
The first step for your instant flow—Manually trigger a flow—appears on screen. Select New step.

A choose an operation pop-up window appears. Enter Translator V3 in the Search connectors and actions search bar then select the Microsoft Translator V3 icon.
Structure your cloud flow
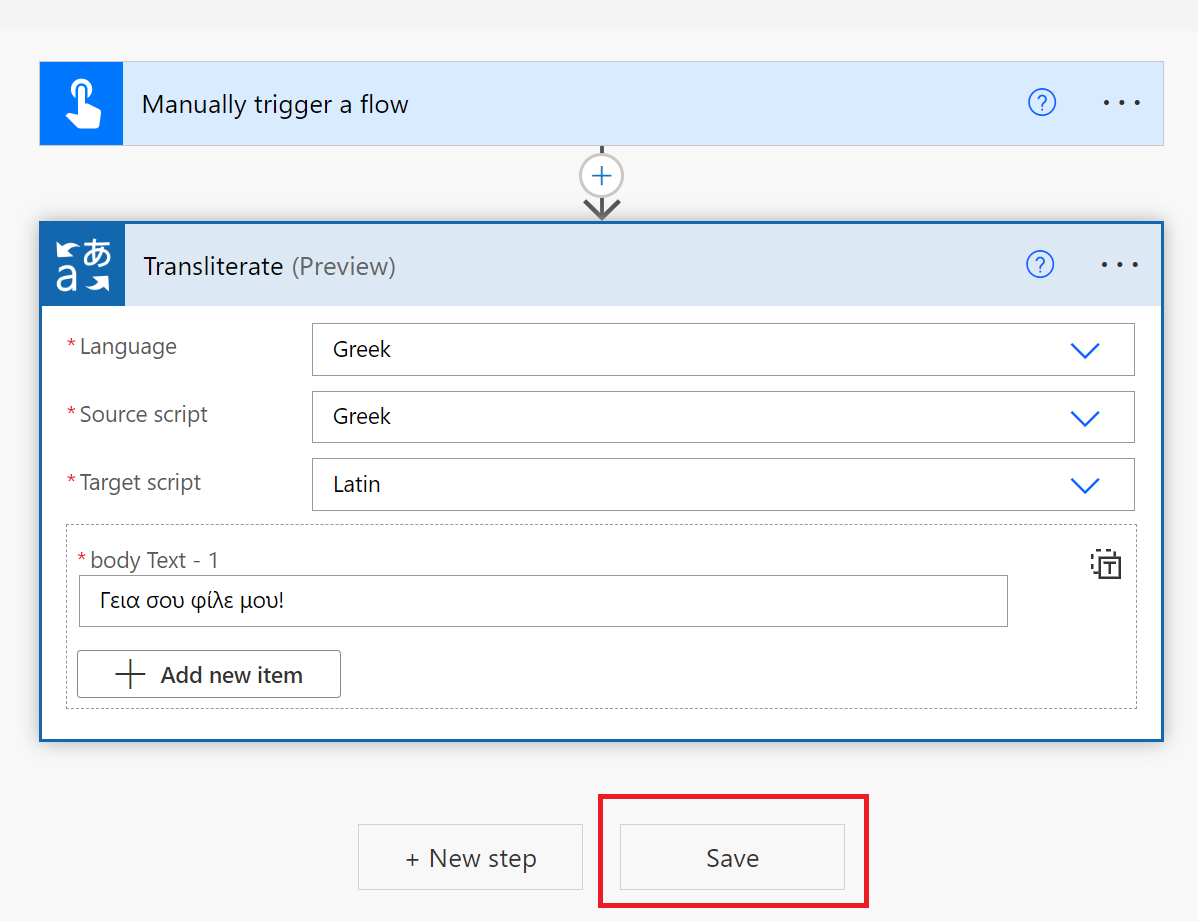
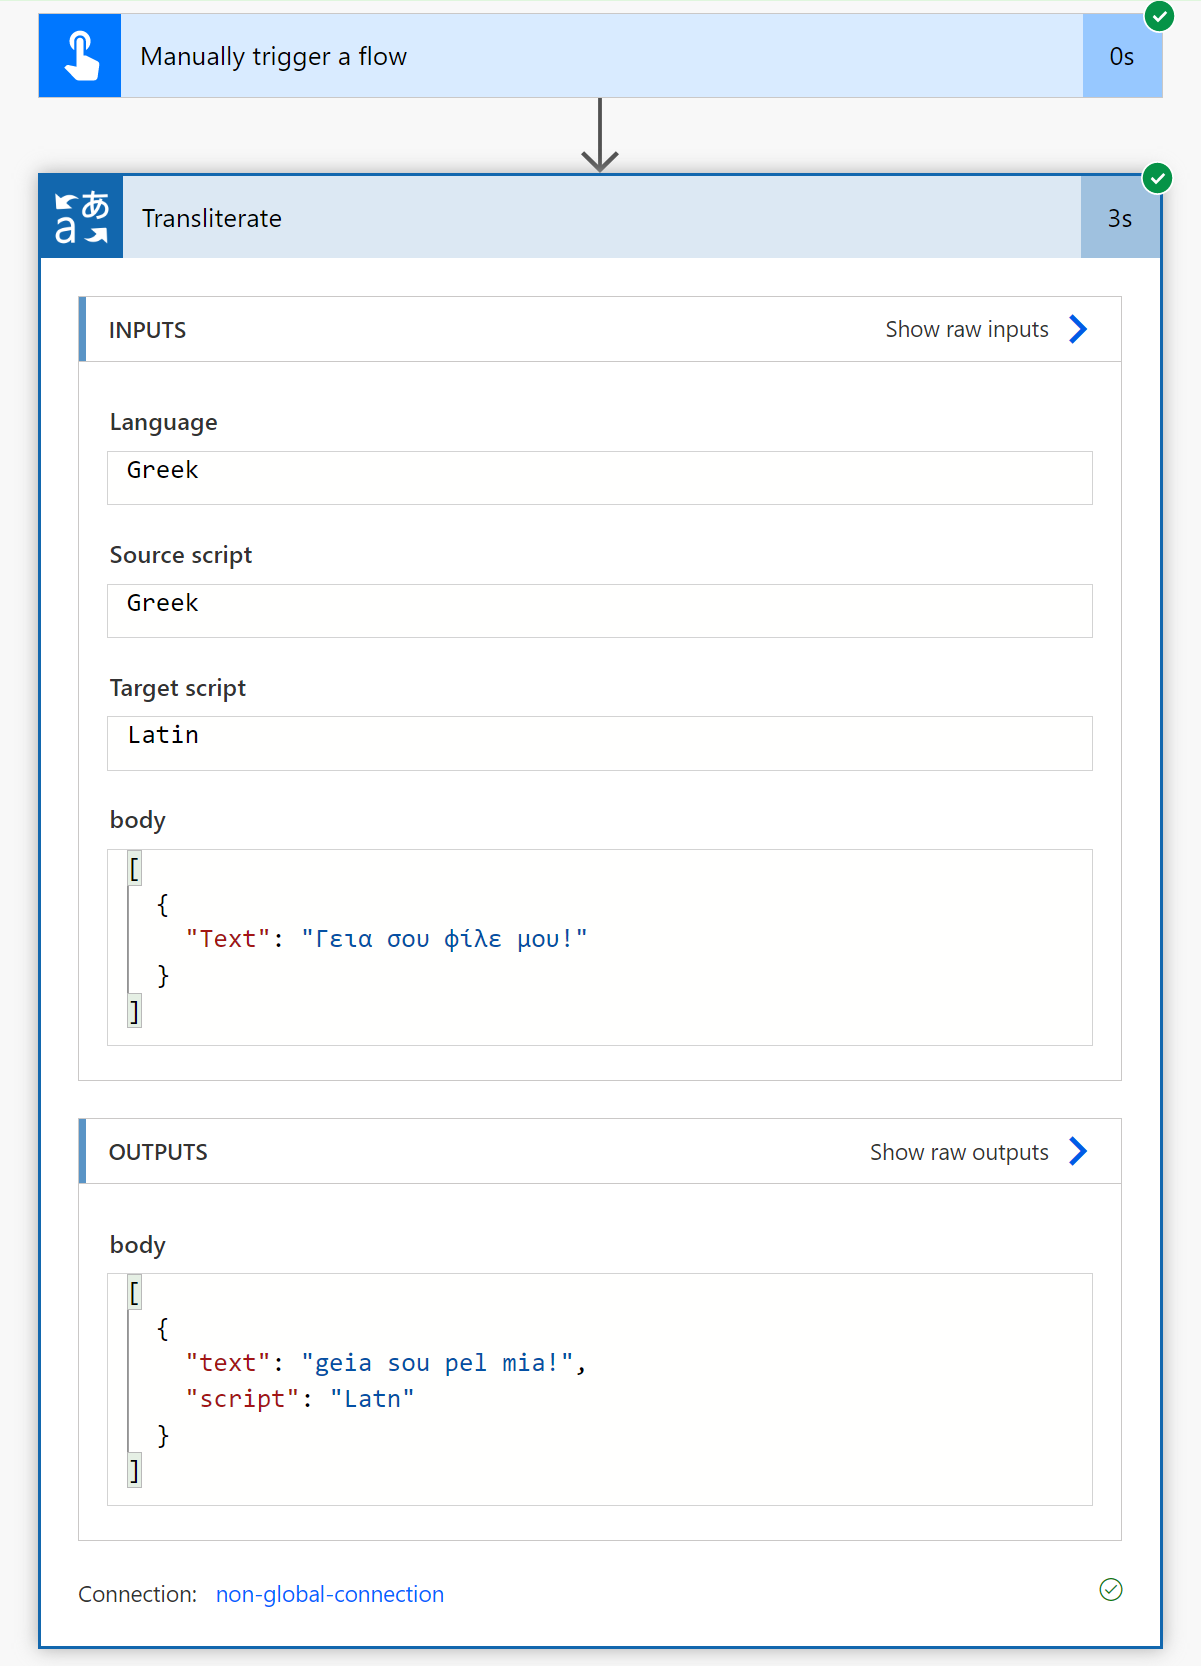
Let's select an action. Choose to translate or transliterate text.
Translate
Select the Translate text action.
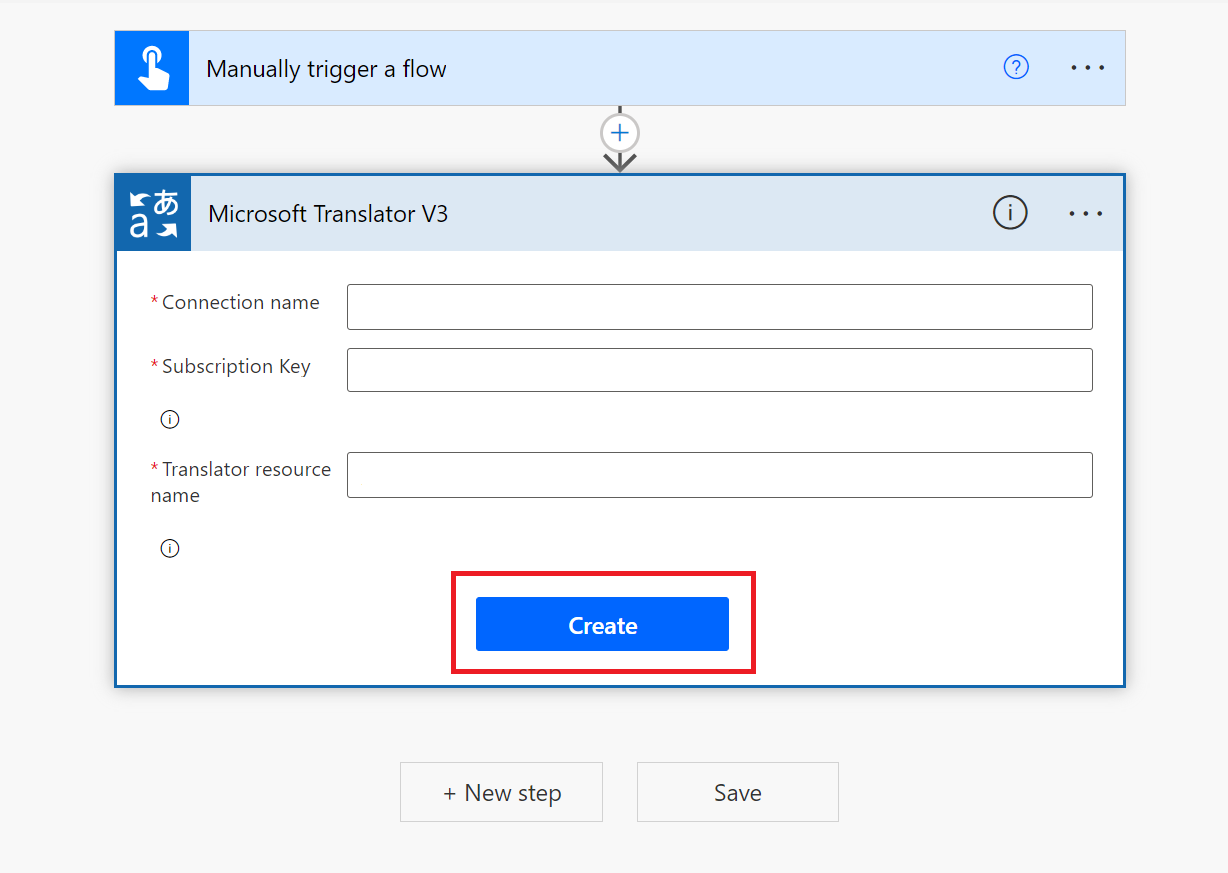
If you're using the Translator V3 connector for the first time, you need to enter your resource credentials:
Connection name. Enter a name for your connection.
Subscription Key. Enter one of your keys that you copied from the Azure portal.
Translator resource name. Enter the name of your Translator resource found at the top of your resource page in the Azure portal. Select Create.
Note
After you've setup your connection, you won't be required to reenter your credentials for subsequent Translator flows.
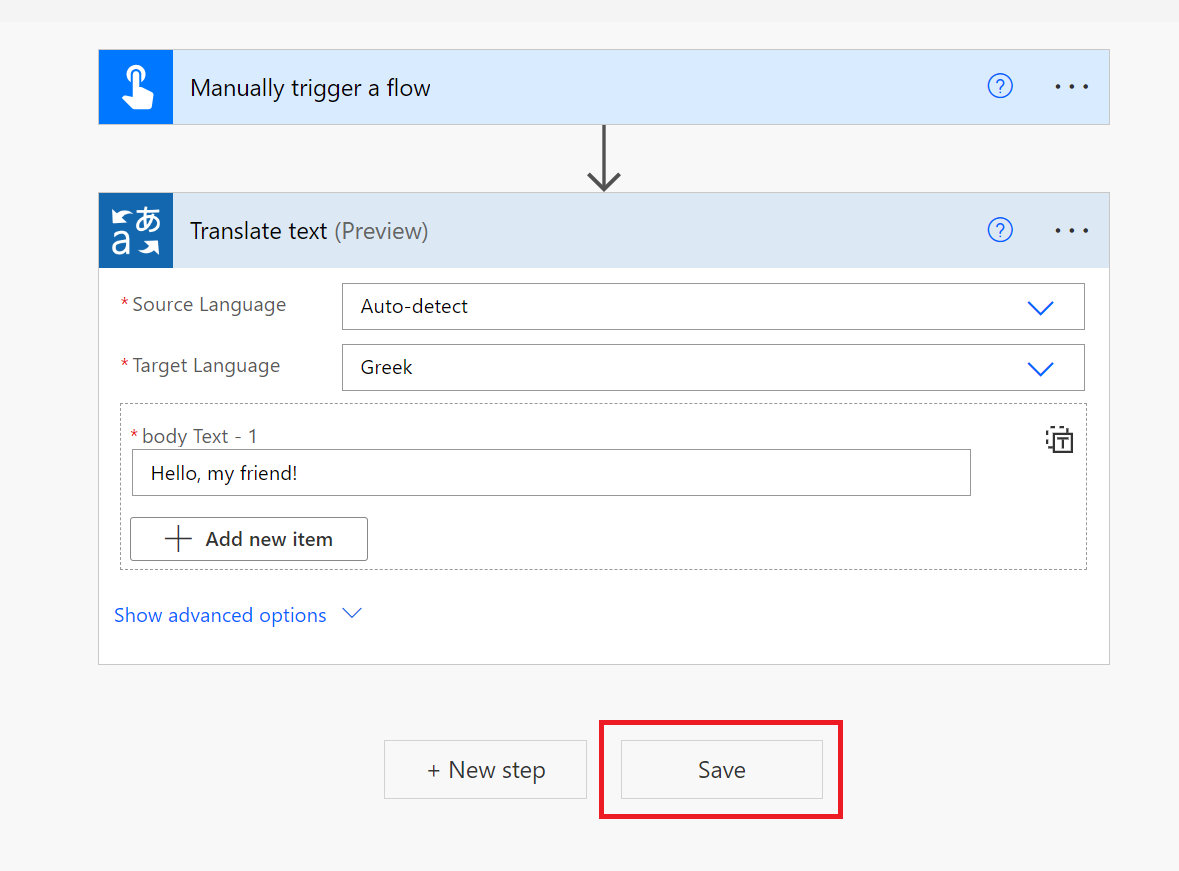
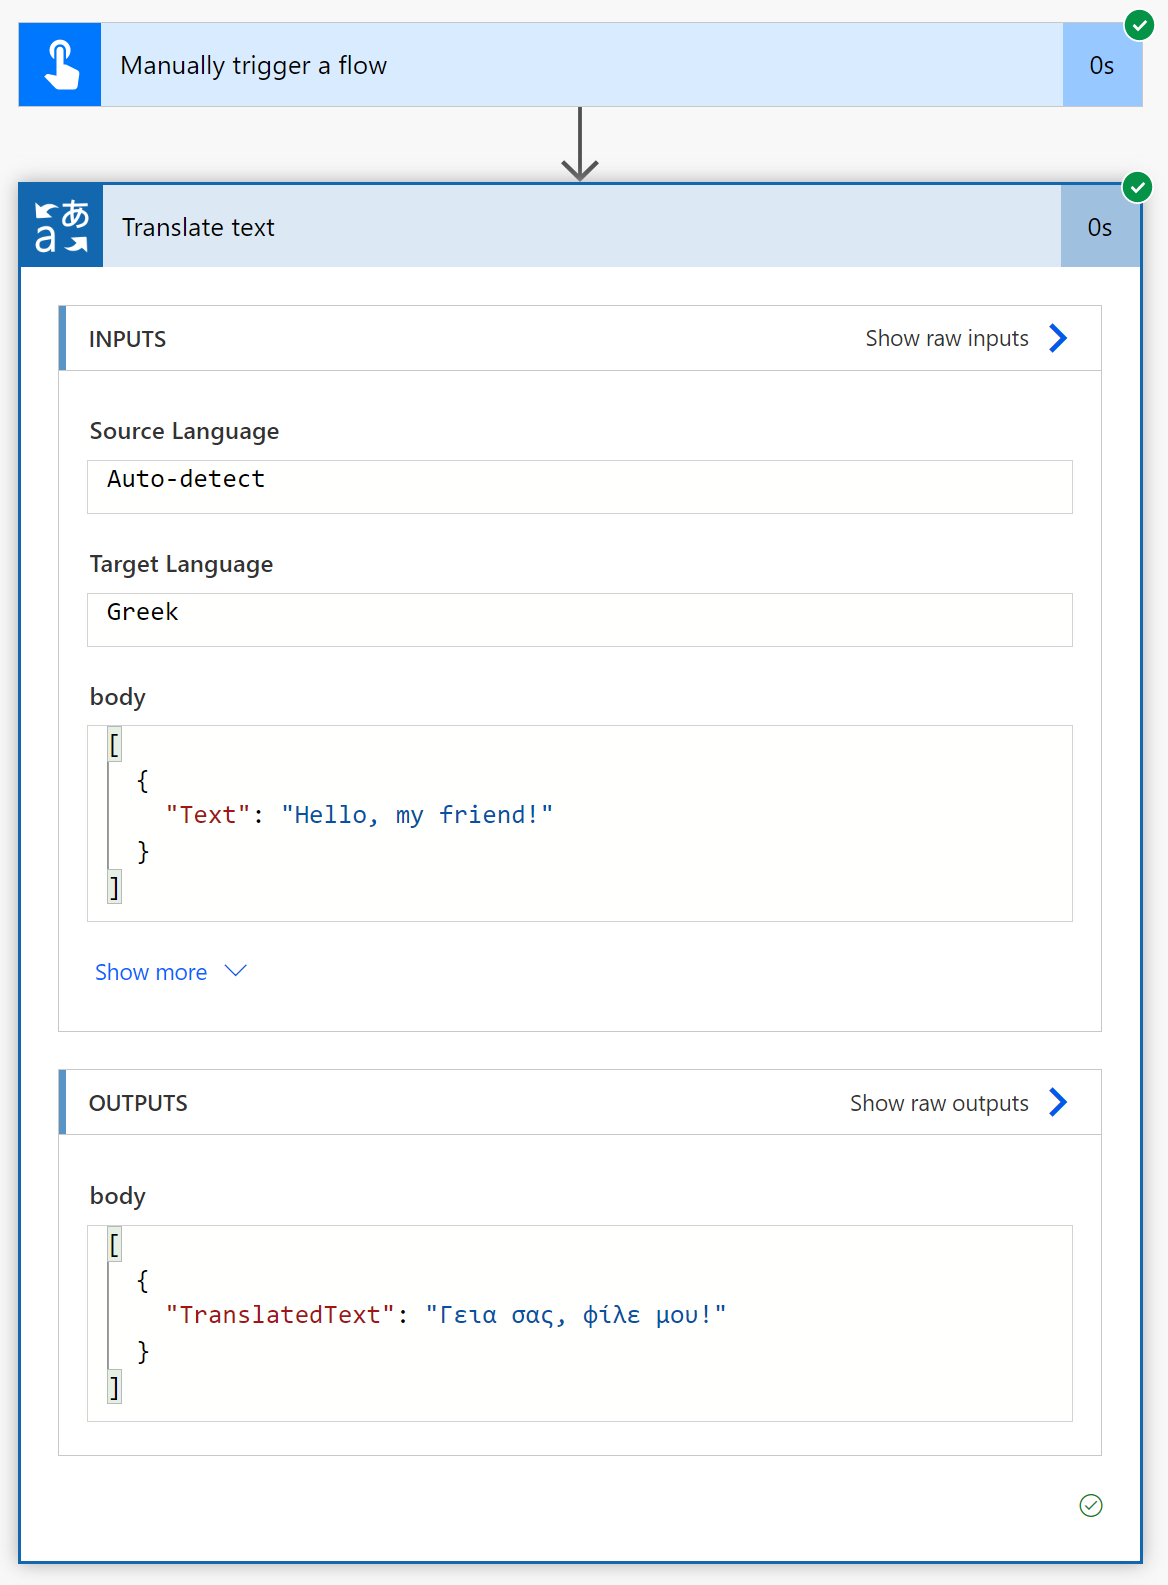
The Translate text action window appears next.
Select a Source Language from the dropdown menu or keep the default Auto-detect option.
Select a Target Language from the dropdown window.
Enter the Body Text.
Select Save.
Test your connector flow
Let's test the cloud flow and view the translated text.
There's a green bar at the top of the page indicating that Your flow is ready to go..
Select Test from the upper-right corner of the page.

Select Test Flow → Manually → Test from the right-side window.
In the next window, select the Run flow button.
Finally, select the Done button.
You should receive a "Your flow ran successfully" message and green check marks align with each successful step.
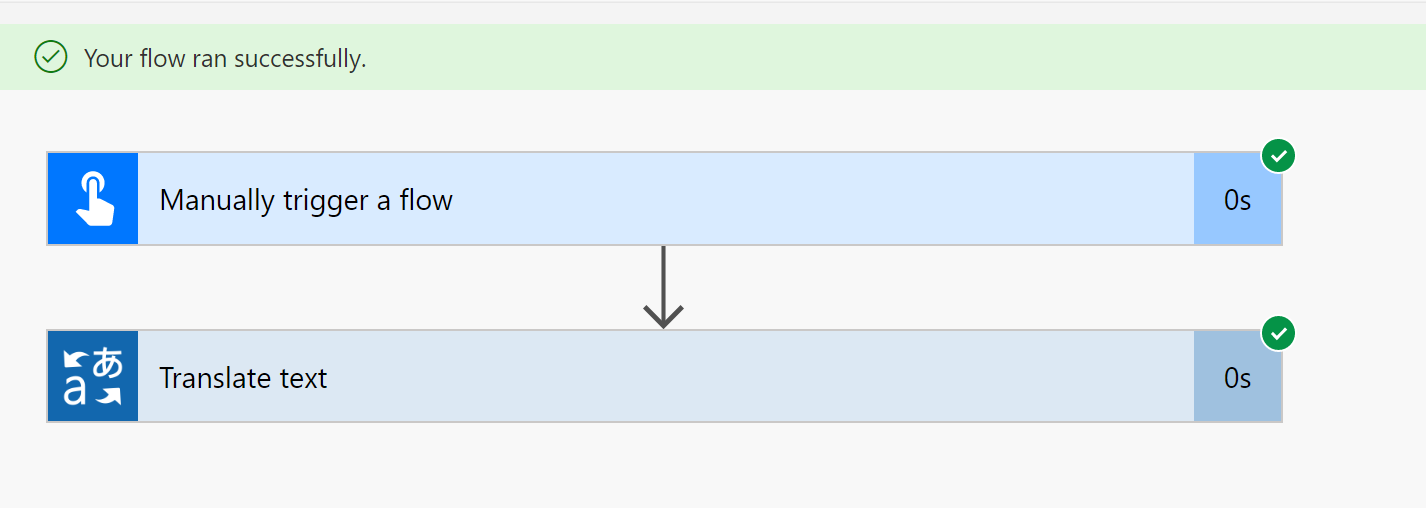
Select the Translate text step to view the translated text (output):
Tip
- Check on the status of your flow by selecting My flows tab on the navigation sidebar.
- Edit or update your connection by selecting Connections under the Data tab on the navigation sidebar.
That's it! You now know how to automate text translation processes using the Microsoft Translator V3 connector and Power Automate.
Next steps
Feedback
Coming soon: Throughout 2024 we will be phasing out GitHub Issues as the feedback mechanism for content and replacing it with a new feedback system. For more information see: https://aka.ms/ContentUserFeedback.
Submit and view feedback for