Call the prediction API
After you've trained your model, you can test it programmatically by submitting images to the prediction API endpoint. In this guide, you'll learn how to call the prediction API to score an image. You'll learn the different ways you can configure the behavior of this API to meet your needs.
Note
This document demonstrates use of the .NET client library for C# to submit an image to the Prediction API. For more information and examples, see the Prediction API reference.
Setup
Publish your trained iteration
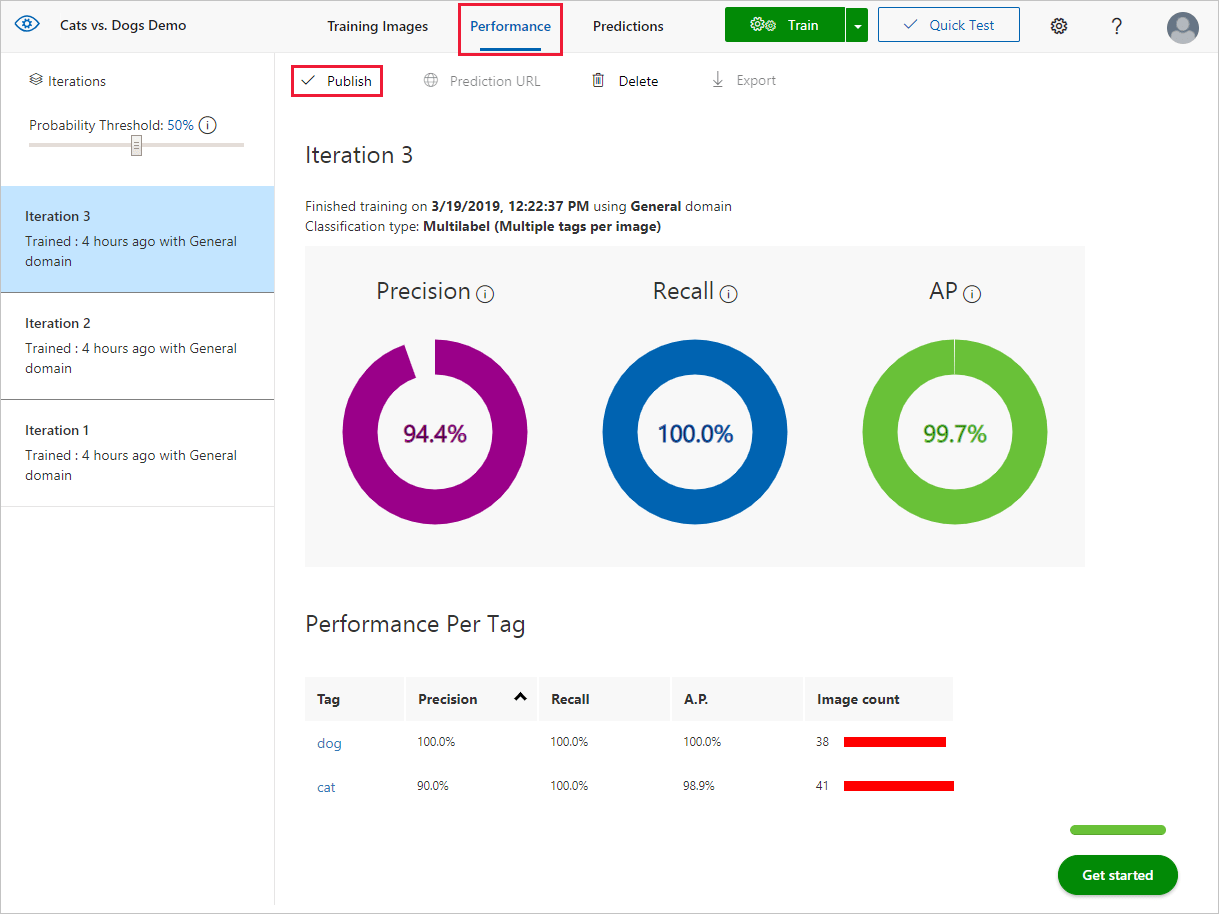
From the Custom Vision web page, select your project and then select the Performance tab.
To submit images to the Prediction API, you'll first need to publish your iteration for prediction, which can be done by selecting Publish and specifying a name for the published iteration. This will make your model accessible to the Prediction API of your Custom Vision Azure resource.
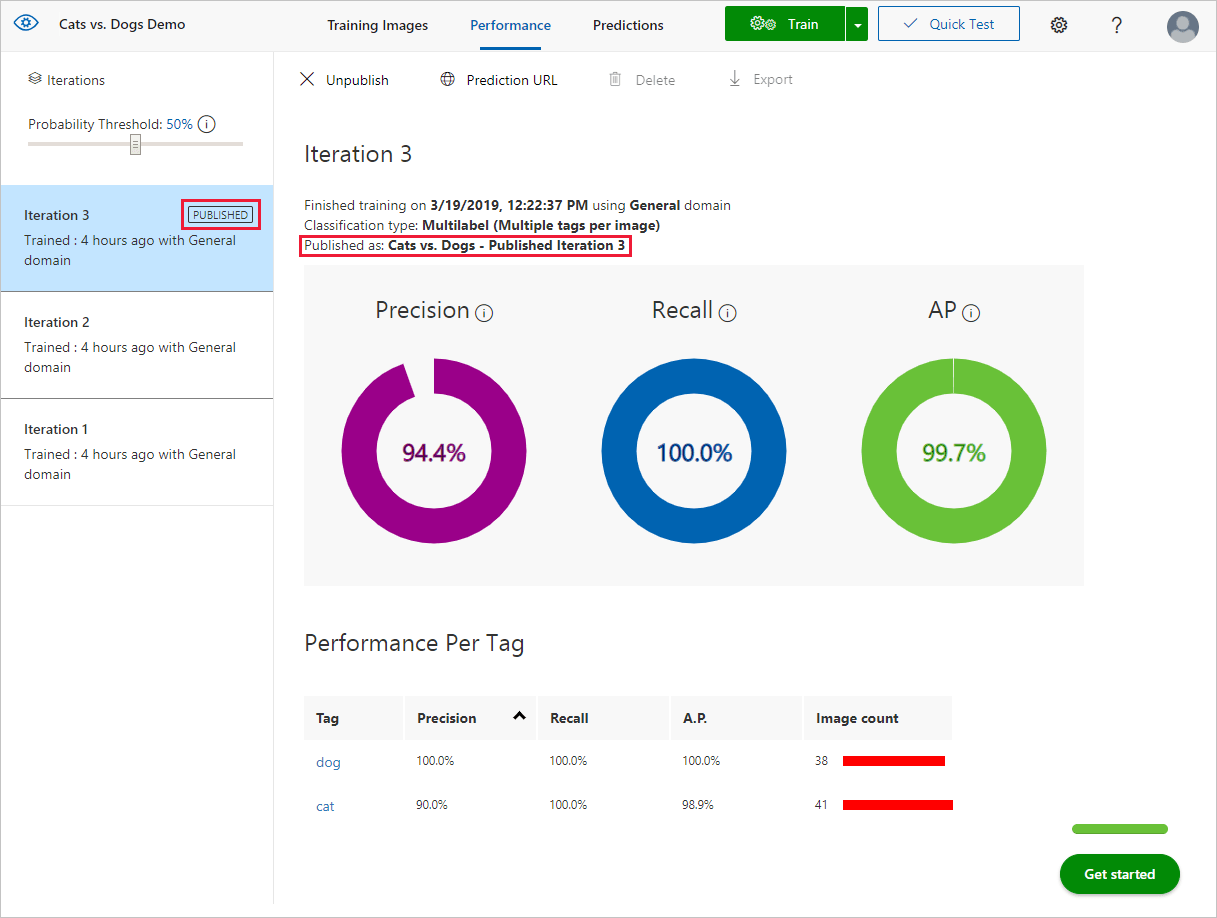
Once your model has been successfully published, you'll see a "Published" label appear next to your iteration in the left-hand sidebar, and its name will appear in the description of the iteration.
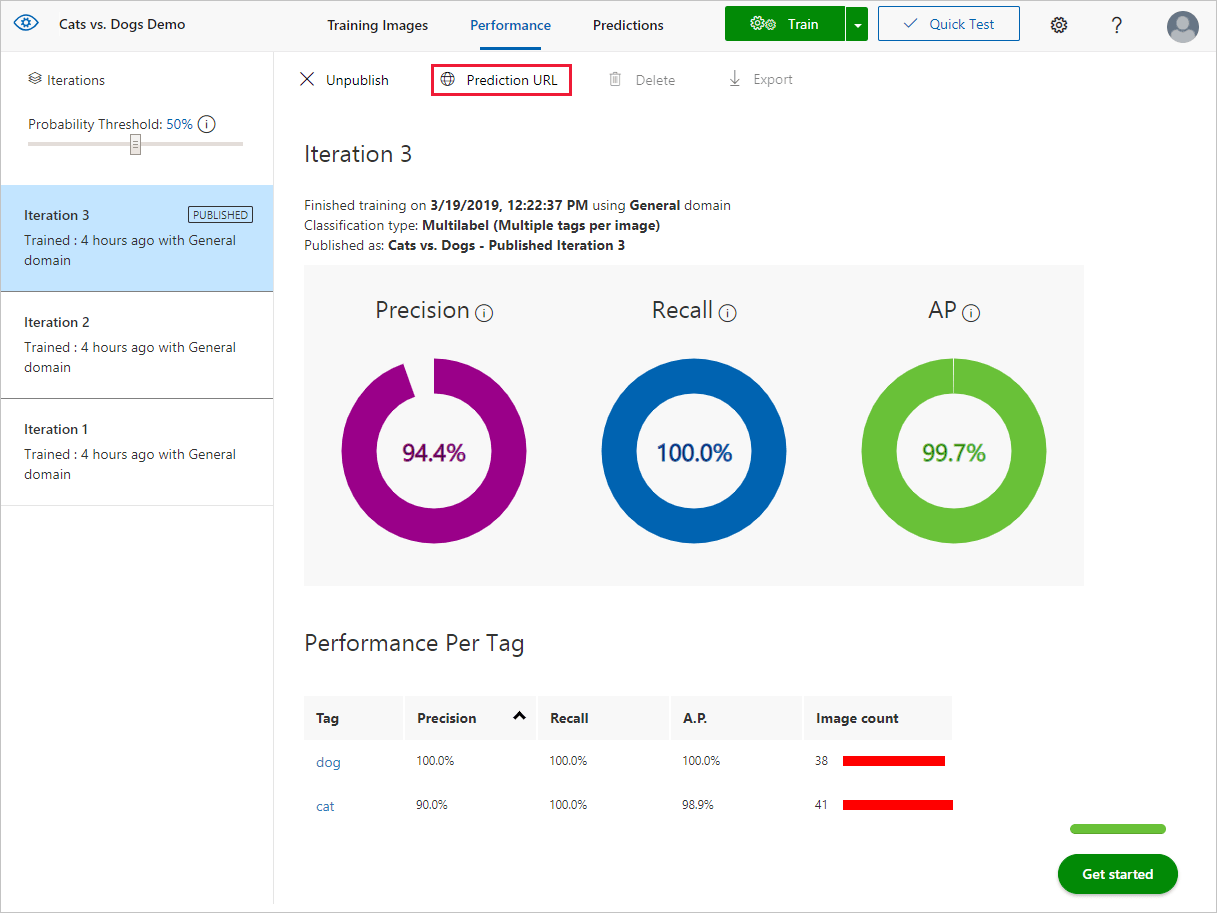
Get the URL and prediction key
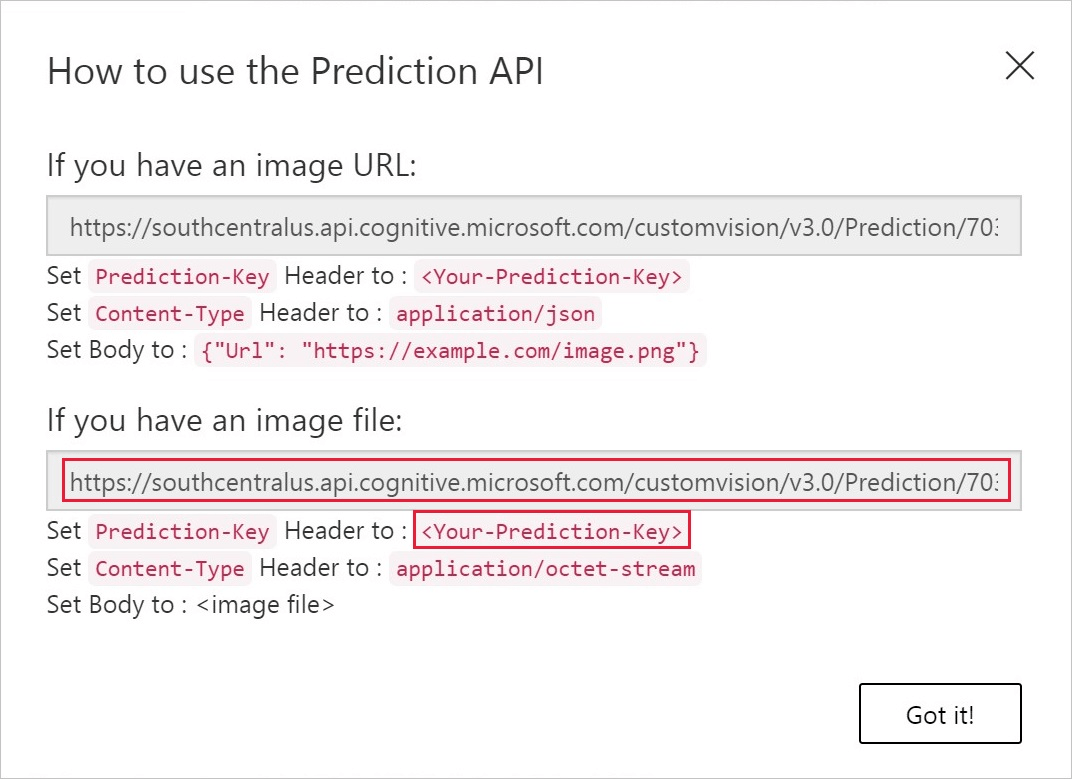
Once your model has been published, you can retrieve the required information by selecting Prediction URL. This will open up a dialog with information for using the Prediction API, including the Prediction URL and Prediction-Key.
Submit data to the service
This guide assumes that you already constructed a CustomVisionPredictionClient object, named predictionClient, with your Custom Vision prediction key and endpoint URL. For instructions on how to set up this feature, follow one of the quickstarts.
In this guide, you'll use a local image, so download an image you'd like to submit to your trained model. The following code prompts the user to specify a local path and gets the bytestream of the file at that path.
Console.Write("Enter image file path: ");
string imageFilePath = Console.ReadLine();
byte[] byteData = GetImageAsByteArray(imageFilePath);
Include the following helper method:
private static byte[] GetImageAsByteArray(string imageFilePath)
{
    FileStream fileStream = new FileStream(imageFilePath, FileMode.Open, FileAccess.Read);
    BinaryReader binaryReader = new BinaryReader(fileStream);
    return binaryReader.ReadBytes((int)fileStream.Length);
}
The ClassifyImageAsync method takes the project ID and the locally stored image, and scores the image against the given model.
// Make a prediction against the new project
Console.WriteLine("Making a prediction:");
var result = predictionApi.ClassifyImageAsync(project.Id, publishedModelName, byteData);
Determine how to process the data
You can optionally configure how the service does the scoring operation by choosing alternate methods (see the methods of the CustomVisionPredictionClient class).
You can use a non-async version of the method above for simplicity, but it may cause the program to lock up for a noticeable amount of time.
The -WithNoStore methods require that the service does not retain the prediction image after prediction is complete. Normally, the service retains these images so you have the option of adding them as training data for future iterations of your model.
The -WithHttpMessages methods return the raw HTTP response of the API call.
Get results from the service
The service returns results in the form of an ImagePrediction object. The Predictions property contains a list of PredictionModel objects, which each represents a single object prediction. They include the name of the label and the bounding box coordinates where the object was detected in the image. Your app can then parse this data to, for example, display the image with labeled object fields on a screen.
Next steps
In this guide, you learned how to submit images to your custom image classifier/detector and receive a response programmatically with the C# SDK. Next, learn how to complete end-to-end scenarios with C#, or get started using a different language SDK.
Feedback
Coming soon: Throughout 2024 we will be phasing out GitHub Issues as the feedback mechanism for content and replacing it with a new feedback system. For more information see: https://aka.ms/ContentUserFeedback.
Submit and view feedback for