Tutorial: Connect to a Qdrant vector database in Azure Container Apps (preview)
Azure Container Apps uses add-ons to make it easy to connect to various development-grade cloud services. Rather than creating instances of services ahead of time to establish connections with complex configuration settings, you can use an add-on to connect your container app to a database like Qdrant.
For a full list of supported services, see Connect to services in Azure Container Apps.
The sample application deployed in this tutorial allows you to interface with a music recommendation engine based on the Qdrant vector database. The container image hosts a Jupyter Notebook that contains the code that you can run against the database to:
- Interface with song data
- Generate embeddings for each song
- View song recommendations
Once deployed, you have the opportunity to run code in the Jupyter Notebook to interface with song data in the database.
In this tutorial you:
- Create a container app
- Use a Container Apps add-on to connect to a Qdrant database
- Interact with a Jupyter Notebook to explore the data
Important
This tutorial uses services that can affect your Azure bill. If you decide to follow along step-by-step, make sure you deactivate or delete the resources featured in this article to avoid unexpected billing.
Prerequisites
To complete this project, you need the following items:
| Requirement | Instructions |
|---|---|
| Azure account | If you don't have one, create an account for free. You need the Contributor or Owner permission on the Azure subscription to proceed. Refer to Assign Azure roles using the Azure portal for details. |
| Azure CLI | Install the Azure CLI. |
Setup
Before you begin to work with the Qdrant database, you first need to create your container app and the required resources.
Execute the following commands to create your resource group, container apps environment, and workload profile.
Set up application name and resource group variables. You can change these values to your preference.
export APP_NAME=music-recommendations-demo-app
export RESOURCE_GROUP=playground
Create variables to support your application configuration. These values are provided for you for the purposes of this lesson. Don't change these values.
export SERVICE_NAME=qdrantdb
export LOCATION=southcentralus
export ENVIRONMENT=music-recommendations-demo-environment
export WORKLOAD_PROFILE_TYPE=D32
export CPU_SIZE=8.0
export MEMORY_SIZE=16.0Gi
export IMAGE=simonj.azurecr.io/aca-ephemeral-music-recommendation-image
Variable Description SERVICE_NAMEThe name of the add-on service created for your container app. In this case, you create a development-grade instance of a Qdrant database. LOCATIONThe Azure region location where you create your container app and add-on. ENVIRONMENTThe Azure Container Apps environment name for your demo application. WORKLOAD_PROFILE_TYPEThe workload profile type used for your container app. This example uses a general purpose workload profile with 32 cores 128 GiB of memory. CPU_SIZEThe allocated size of the CPU. MEMORY_SIZEThe allocated amount of memory. IMAGEThe container image used in this tutorial. This container image includes the Jupyter Notebook that allows you to interact with data in the Qdrant database. Login to Azure with the Azure CLI.
az loginCreate a resource group.
az group create --name $RESOURCE_GROUP --location $LOCATIONCreate your container apps environment.
az containerapp env create \
  --name $ENVIRONMENT \
  --resource-group $RESOURCE_GROUP \
  --location $LOCATION \
  --enable-workload-profiles
Create a dedicated workload profile with enough resources to work with a vector database.
az containerapp env workload-profile add \
  --name $ENVIRONMENT \
  --resource-group $RESOURCE_GROUP \
  --workload-profile-type $WORKLOAD_PROFILE_TYPE \
  --workload-profile-name bigProfile \
  --min-nodes 0 \
  --max-nodes 2
Use the Qdrant add-on
Now that you have an existing environment and workload profile, you can create your container app and bind it to an add-on instance of Qdrant.
Create the Qdrant add-on service.
az containerapp add-on qdrant create \
  --environment $ENVIRONMENT \
  --resource-group $RESOURCE_GROUP \
  --name $SERVICE_NAME
Create the container app.
az containerapp create \
  --name $APP_NAME \
  --resource-group $RESOURCE_GROUP \
  --environment $ENVIRONMENT \
  --workload-profile-name bigProfile \
  --cpu $CPU_SIZE \
  --memory $MEMORY_SIZE \
  --image $IMAGE \
  --min-replicas 1 \
  --max-replicas 1 \
  --env-vars RESTARTABLE=yes \
  --ingress external \
  --target-port 8888 \
  --transport auto \
  --query properties.outputs.fqdn
This command returns the fully qualified domain name (FQDN) of your container app. Copy this location to a text editor as you need it in an upcoming step.
An upcoming step instructs you to request an access token to log into the application hosted by the container app. Make sure to wait three to five minutes before you attempt to execute the request for the access token after creating the container app to give enough time to set up all required resources.
Bind the Qdrant add-on service to the container app.
az containerapp update \
  --name $APP_NAME \
  --resource-group $RESOURCE_GROUP \
  --bind qdrantdb
Configure the container app
Now that your container app is running and connected to Qdrant, you can configure your container app to accept incoming requests.
Configure CORS settings on the container app.
az containerapp ingress cors enable \
  --name $APP_NAME \
  --resource-group $RESOURCE_GROUP \
  --allowed-origins "*" \
  --allow-credentials true
Once you wait three to five minutes for the app to complete the setup operations, request an access token for the hosted Jupyter Notebook.
echo Your access token is: `az containerapp logs show -g $RESOURCE_GROUP --name $APP_NAME --tail 300 | \
  grep token |  cut -d= -f 2 | cut -d\" -f 1 | uniq`
When you run this command, your token is printed to the terminal. The message should look like the following example.
Your access token is: 348c8aed080b44f3aaab646287624c70aed080b44fCopy your token value to your text editor to use to sign-in to the Jupyter Notebook.
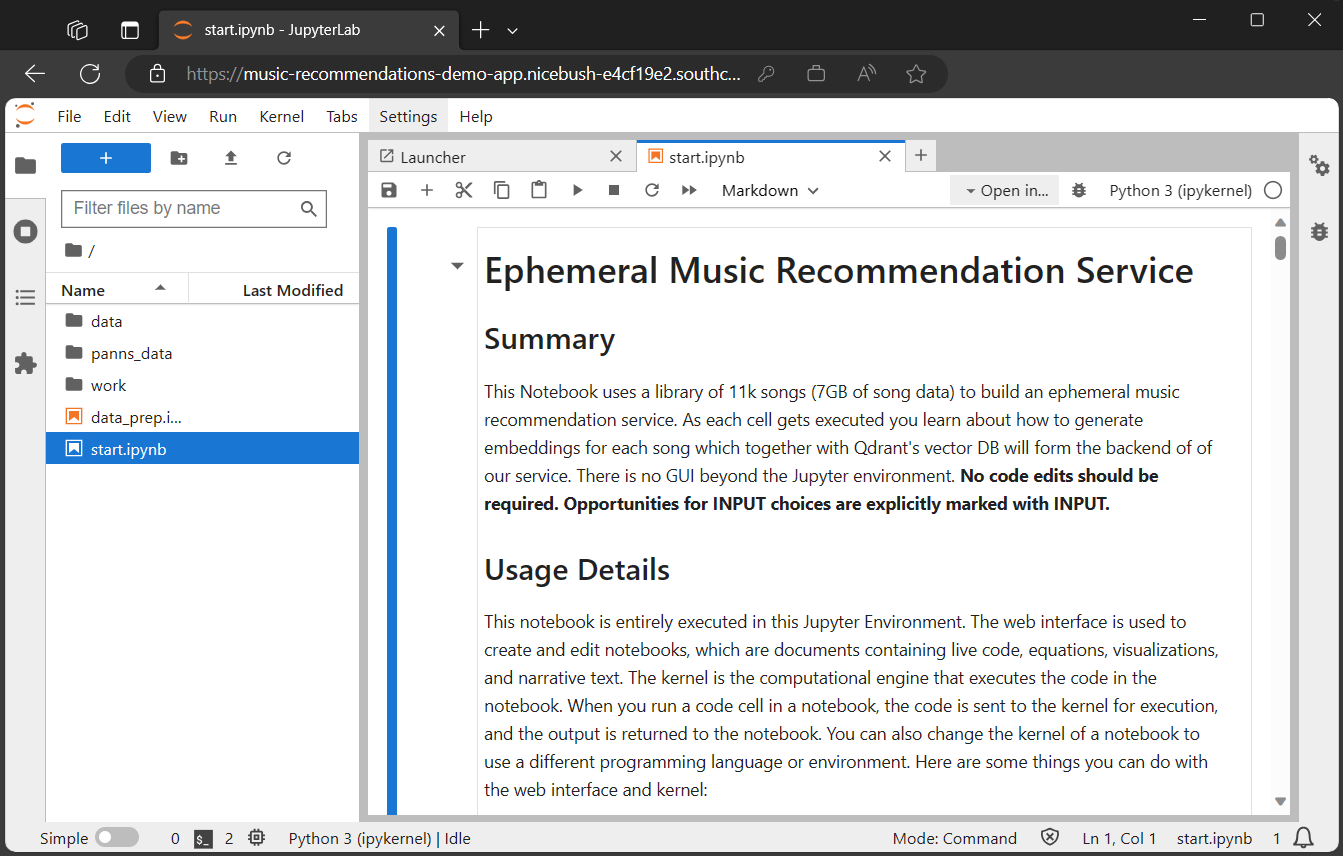
Use the Jupyter Notebook
Open a web browser and paste in the URL for your container app you set aside in a text editor.
When the page loads, you're presented with an input box to enter your access token.
Next to the Password to token label, enter your token in the input box and select Login.
Once you authenticate, you are able to interact with the code and data in the Jupyter Notebook.
With the notebook launched, follow the instructions to interact with the code and data.
Clean up resources
The resources created in this tutorial have an effect on your Azure bill. If you aren't going to use these services long-term, run the following command to remove everything created in this tutorial.
az group delete \
  --resource-group $RESOURCE_GROUP
Next steps
Feedback
Coming soon: Throughout 2024 we will be phasing out GitHub Issues as the feedback mechanism for content and replacing it with a new feedback system. For more information see: https://aka.ms/ContentUserFeedback.
Submit and view feedback for