Traffic splitting in Azure Container Apps
By default, when ingress is enabled, all traffic is routed to the latest deployed revision. When you enable multiple revision mode in your container app, you can split incoming traffic between active revisions.
Traffic splitting is useful for testing updates to your container app. You can use traffic splitting to gradually phase in a new revision in blue-green deployments or in A/B testing.
Traffic splitting is based on the weight (percentage) of traffic that is routed to each revision. The combined weight of all traffic split rules must equal 100%. You can specify revision by revision name or revision label.
This article shows you how to configure traffic splitting rules for your container app. To run the following examples, you need a container app with multiple revisions.
Configure traffic splitting
Configure traffic splitting between revisions using the az containerapp ingress traffic set command. You can specify the revisions by name with the --revision-weight parameter or by revision label with the --label-weight parameter.
The following command sets the traffic weight for each revision to 50%:
az containerapp ingress traffic set \
    --name <APP_NAME> \
    --resource-group <RESOURCE_GROUP> \
    --revision-weight <REVISION_1>=50 <REVISION_2>=50
Make sure to replace the placeholder values surrounded by <> with your own values.
This command sets the traffic weight for revision <LABEL_1> to 80% and revision <LABEL_2> to 20%:
az containerapp ingress traffic set \
    --name <APP_NAME> \
    --resource-group <RESOURCE_GROUP> \
    --label-weight <LABEL_1>=80 <LABEL_2>=20
- Go to your container app in the Azure portal.
- Select Revision management from the left side menu.
- If the revision mode is Single, set the mode to multiple.
- Select Choose revision mode.
- Select Multiple: Several revisions active simultaneously.
- Select Apply.
- Wait for the Revision Mode to update to Multiple.
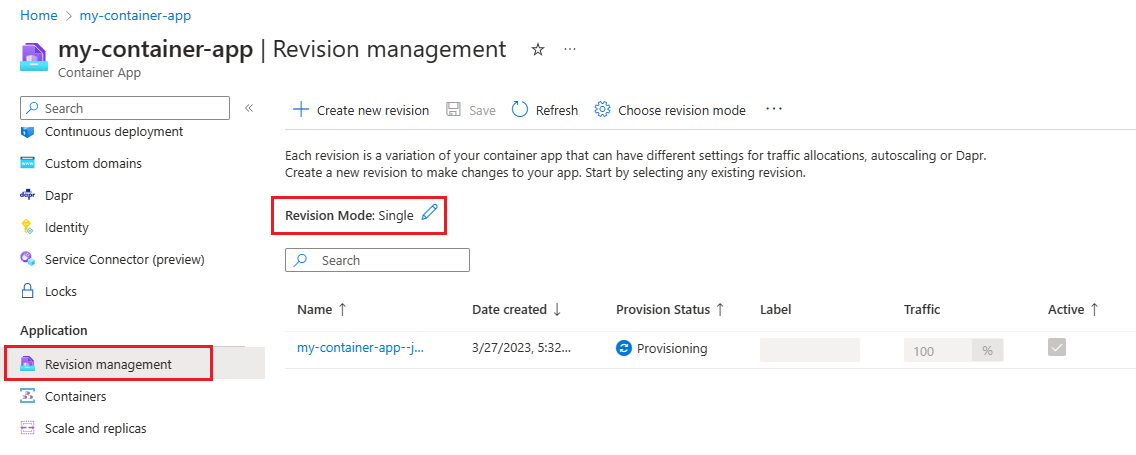
- Select Show inactive revisions.
- If you don't have multiple revisions, you can create a new revision.
- Select Create new revision.
- You can use the default settings or customize the revision.
- Enter a Name/Suffix for the revision.
- Select Create.
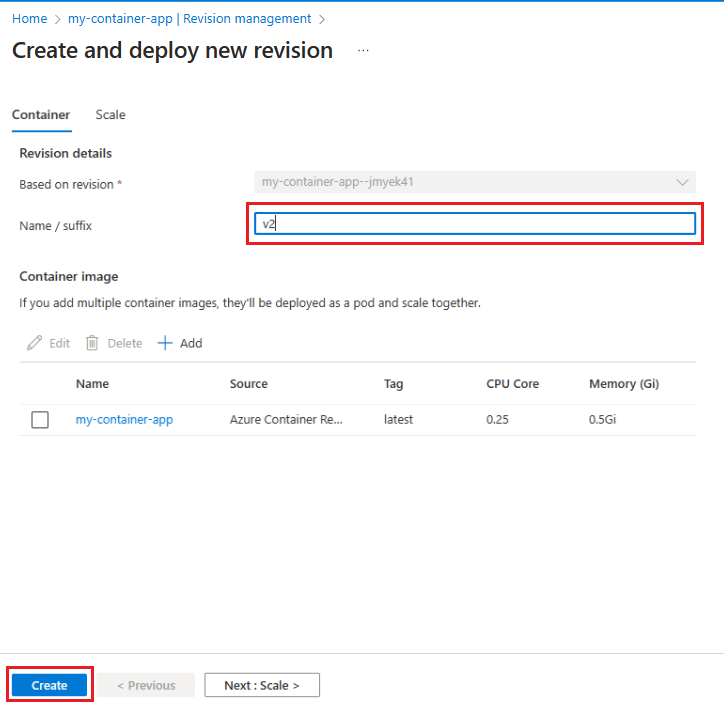
- Wait for the revision to deploy.
- Select Active for the revisions you want to route traffic to.
- Enter the percentage of traffic you want to route to each revision in the Traffic column. The combined percentage of all traffic must equal 100%.
- Select Save.

Enable traffic splitting by adding the configuration.ingress.traffic properties to the ingress section of your container app template. You can specify the revisions by name with the revisionName property or by revision label with the label property.
The following example sets 100% of traffic to the latest deployed revision:
{
  ...
  "configuration": {
    "ingress": {
      "external": true,
      "targetPort": 80,
      "allowInsecure": false,
      "traffic": [
        {
          "latestRevision": true,
          "weight": 100
        }
      ]
    },
  },
The following example shows traffic splitting between two revisions by name:
{
  ...
  "configuration": {
    "ingress": {
      "external": true,
      "targetPort": 80,
      "allowInsecure": false,
      "traffic": [
          {
              "revisionName": "my-example-app--5g3ty20",
              "weight": 50
          },
          {
              "revisionName": "my-example-app--qcfkbsv",
              "weight": 50
            }
        ],
    },
  },
The following example shows traffic splitting between two revisions by label:
{
  ...
  "configuration": {
    "ingress": {
      "external": true,
      "targetPort": 80,
      "allowInsecure": false,
      "traffic": [
          {
              "weight": 50,
              "label": "v-2"
          },
          {
              "weight": 50,
              "label": "v-1"
          }
        ],
    },
  },
Use cases
The following scenarios describe configuration settings for common use cases. The examples are shown in JSON format, but you can also use the Azure portal or Azure CLI to configure traffic splitting.
Rapid iteration
In situations where you're frequently iterating development of your container app, you can set traffic rules to always shift all traffic to the latest deployed revision.
The following example template routes all traffic to the latest deployed revision:
"ingress": {
  "traffic": [
    {
      "latestRevision": true,
      "weight": 100
    }
  ]
}
Once you're satisfied with the latest revision, you can lock traffic to that revision by updating the ingress settings to:
"ingress": {
  "traffic": [
    {
      "latestRevision": false, // optional
      "revisionName": "myapp--knowngoodrevision",
      "weight": 100
    }
  ]
}
Update existing revision
Consider a situation where you have a known good revision that's serving 100% of your traffic, but you want to issue an update to your app. You can deploy and test new revisions using their direct endpoints without affecting the main revision serving the app.
Once you're satisfied with the updated revision, you can shift a portion of traffic to the new revision for testing and verification.
The following template moves 20% of traffic over to the updated revision:
"ingress": {
  "traffic": [
    {
      "revisionName": "myapp--knowngoodrevision",
      "weight": 80
    },
    {
      "revisionName": "myapp--newerrevision",
      "weight": 20
    }
  ]
}
Staging microservices
When building microservices, you might want to maintain production and staging endpoints for the same app. Use labels to ensure that traffic doesn't switch between different revisions.
The following example template applies labels to different revisions.
"ingress": {
  "traffic": [
    {
      "revisionName": "myapp--knowngoodrevision",
      "weight": 100
    },
    {
      "revisionName": "myapp--98fdgt",
      "weight": 0,
      "label": "staging"
    }
  ]
}
Next steps
Feedback
Coming soon: Throughout 2024 we will be phasing out GitHub Issues as the feedback mechanism for content and replacing it with a new feedback system. For more information see: https://aka.ms/ContentUserFeedback.
Submit and view feedback for