Connect an Amazon Web Services account
You have two options to connect your Amazon Web Services (AWS) account to Cloudyn. You can connect with an IAM role or with a read-only IAM user account. The IAM role is recommended because it allows you to delegate access with defined permissions to trusted entities. The IAM role doesn't require you to share long-term access keys. After you connect an AWS account to Cloudyn, cost and usage data is available in Cloudyn reports. This document guides you through both options.
For more information about AWS IAM identities, see Identities (Users, Groups, and Roles).
Also, you enable AWS detailed billing reports and store the information in an AWS simple storage service (S3) bucket. Detailed billing reports include billing charges with tag and resource information on an hourly basis. Storing the reports allows Cloudyn to retrieve them from your bucket and display the information in its reports.
Note
Cloudyn was deprecated on June 30, 2021 and is no longer available.
Customers can use Azure Cost Management to view, analyze and optimize their cloud costs.
AWS role-based access
The following sections walk you through creating a read-only IAM role to provide access to Cloudyn.
Get your Cloudyn account external ID
The first step is to get the unique connection passphrase from the Cloudyn portal. It is used in AWS as the External ID.
- Open the Cloudyn portal from the Azure portal or navigate to https://azure.cloudyn.com and sign in.
- Click the cog symbol and then select Cloud Accounts.
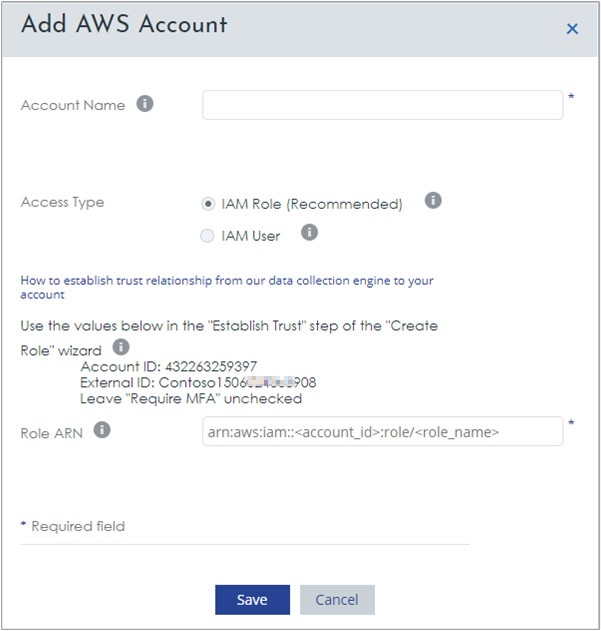
- In Accounts Management, select the AWS Accounts tab and then click Add new +.
- In the Add AWS Account dialog, copy the External ID and save the value for AWS Role creation steps in the next section. The External ID is unique to your account. In the following image, the example External ID is Contoso followed by a number. Your ID differs.
Add AWS read-only role-based access
- Sign in to the AWS console at https://console.aws.amazon.com/iam/home and select Roles.
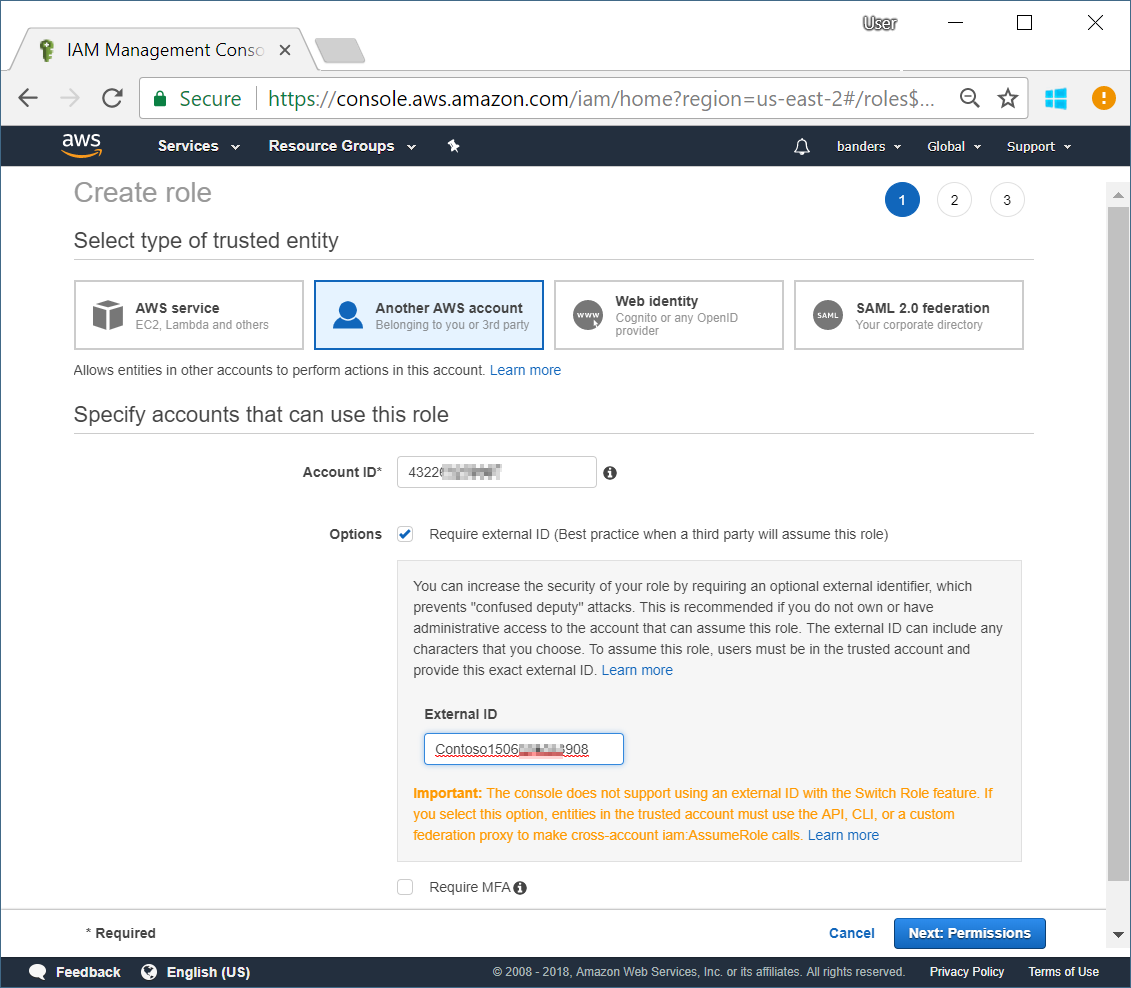
- Click Create Role and then select Another AWS account.
- In the Account ID box, paste
432263259397. This Account ID is the Cloudyn data collector account assigned by AWS to the Cloudyn service. Use the exact Account ID shown. - Next to Options, select Require external ID. Paste your unique value that copied previously from the External ID field in Cloudyn. Then click Next: Permissions.
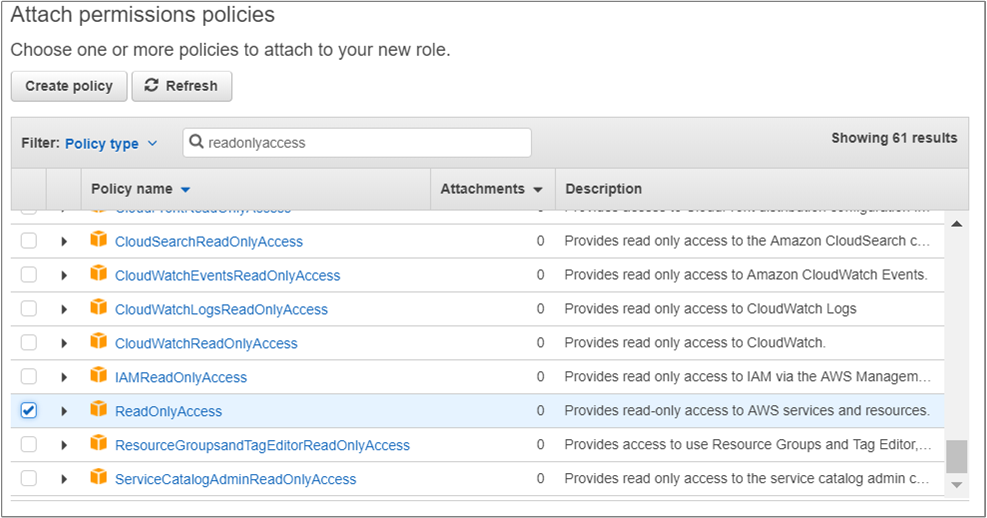
- Under Attach permissions policies, in the Policy type filter box search, type
ReadOnlyAccess, select ReadOnlyAccess, then click Next: Review.
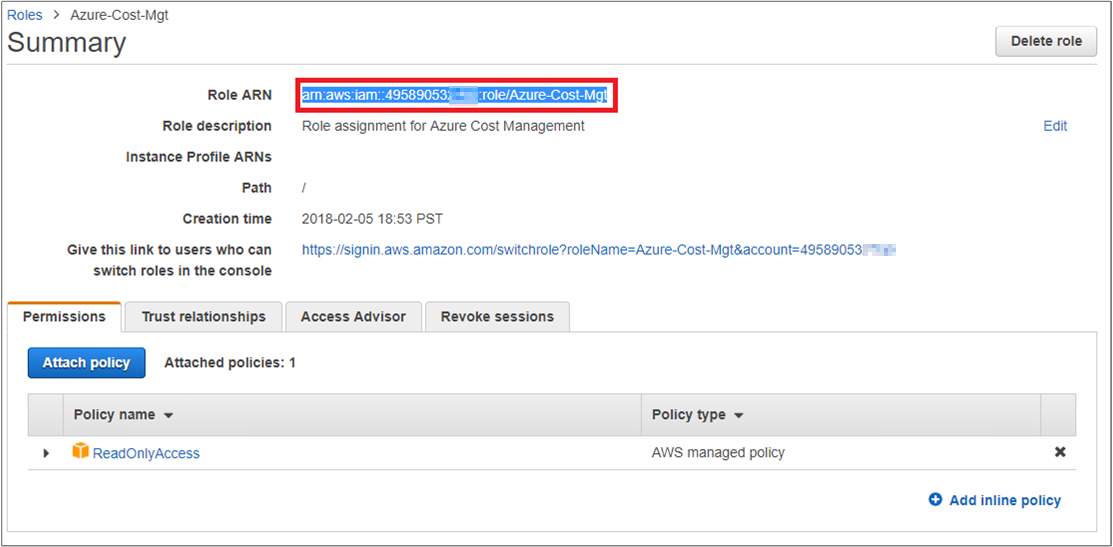
- On the Review page, ensure your selections are correct and type a Role name. For example, Azure-Cost-Mgt. Enter a Role description. For example, Role assignment for Cloudyn, then click Create role.
- In the Roles list, click the role you created and copy the Role ARN value from the Summary page. Use the Role ARN (Amazon Resource Name) value later when you register your configuration in Cloudyn.
Configure AWS IAM role access in Cloudyn
- Open the Cloudyn portal from the Azure portal or navigate to https://azure.cloudyn.com/ and sign in.
- Click the cog symbol and then select Cloud Accounts.
- In Accounts Management, select the AWS Accounts tab and then click Add new +.
- In Account Name, type a name for the account.
- Next to Access Type, select IAM Role.
- In the Role ARN field, paste the value you previously copied and then click Save.
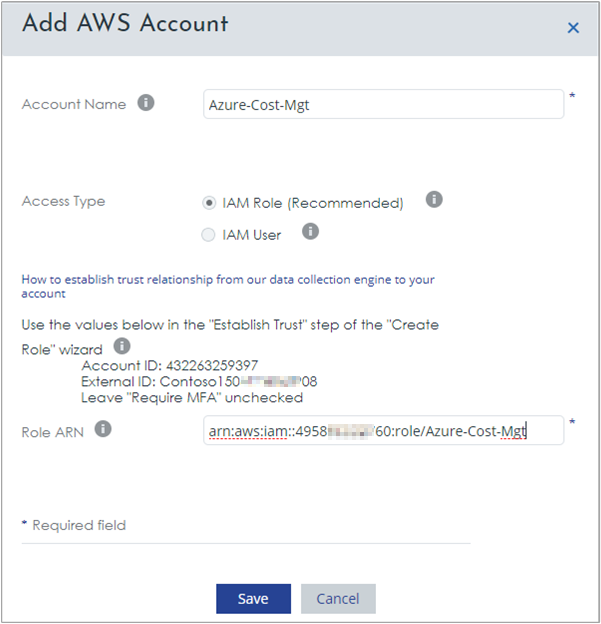
Your AWS account appears in the list of accounts. The Owner ID listed matches your Role ARN value. Your Account Status should have a green check mark symbol indicating that Cloudyn can access your AWS account. Until you enable detailed AWS billing, your consolidation status appears as Standalone.
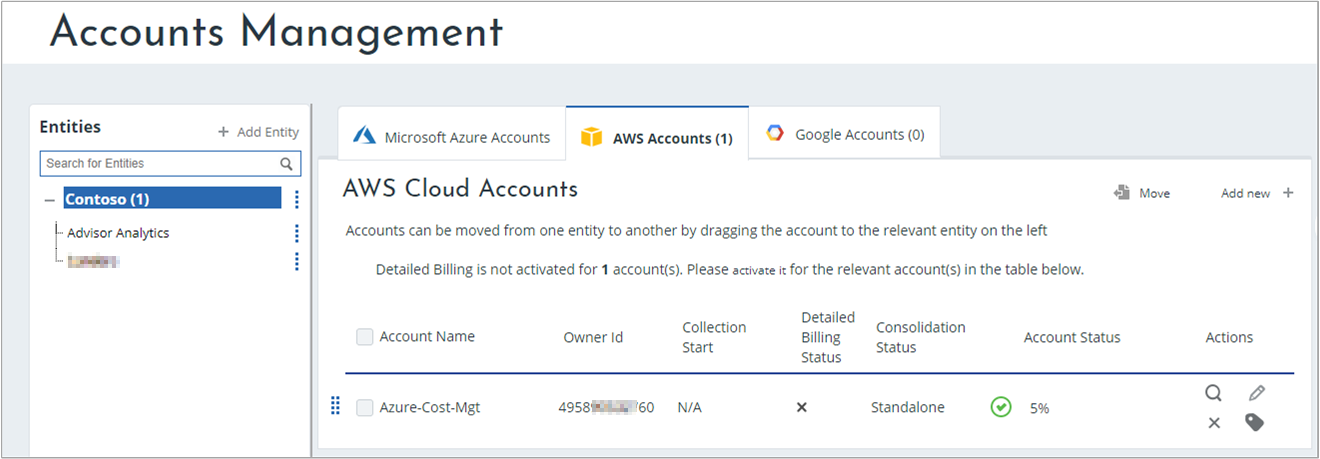
Cloudyn starts collecting the data and populating reports. Next, enable detailed AWS billing.
AWS user-based access
The following sections walk you through creating a read-only user to provide access to Cloudyn.
Add AWS read-only user-based access
- Sign in to the AWS console at https://console.aws.amazon.com/iam/home and select Users.
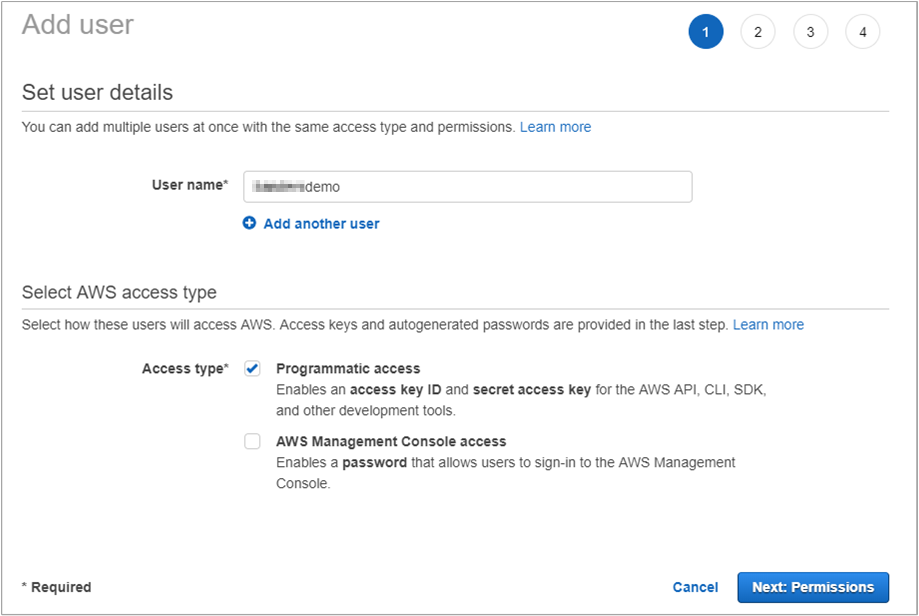
- Click Add User.
- In the User name field, type a user name.
- For Access type, select Programmatic access and click Next: Permissions.
- For permissions, select Attach existing policies directly.
- Under Attach permissions policies, in the Policy type filter box search, type
ReadOnlyAccess, select ReadOnlyAccess, and then click Next: Review.

- On the Review page, ensure your selections are correct then click Create user.
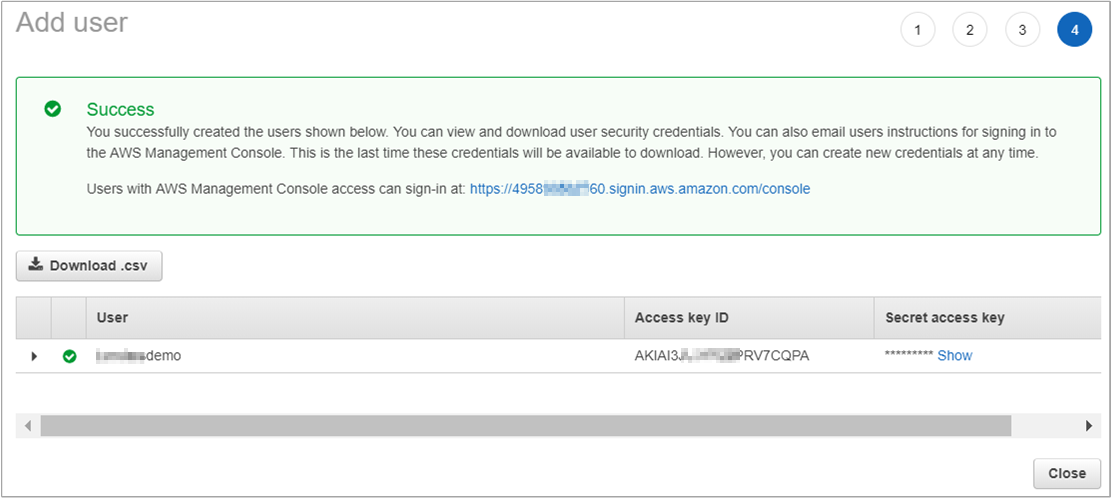
- On the Complete page, your Access key ID and Secret access key are shown. You use this information to configure registration in Cloudyn.
- Click Download .csv and save the credentials.csv file to a secure location.
Configure AWS IAM user-based access in Cloudyn
- Open the Cloudyn portal from the Azure portal or navigate to https://azure.cloudyn.com/ and sign in.
- Click the cog symbol and then select Cloud Accounts.
- In Accounts Management, select the AWS Accounts tab and then click Add new +.
- For Account Name, type an account name.
- Next to Access Type, select IAM User.
- In Access Key, paste the Access key ID value from the credentials.csv file.
- In Secret Key, paste the Secret access key value from the credentials.csv file and then click Save.
Your AWS account appears in the list of accounts. Your Account Status should have a green check mark symbol.
Cloudyn starts collecting the data and populating reports. Next, enable detailed AWS billing.
Enable detailed AWS billing
Use the following steps to get your AWS Role ARN. You use the Role ARN to grant read permissions to a billing bucket.
- Sign in to the AWS console at https://console.aws.amazon.com and select Services.
- In the Service Search box type IAM, and select that option.
- Select Roles from the left-hand menu.
- In the list of Roles, select the role that you created for Cloudyn access.
- On the Roles Summary page, click to copy the Role ARN. Keep the Role ARN handy for later steps.
Create an S3 bucket
You create an S3 bucket to store detailed billing information.
Sign in to the AWS console at https://console.aws.amazon.com and select Services.
In the Service Search box type S3, and select S3.
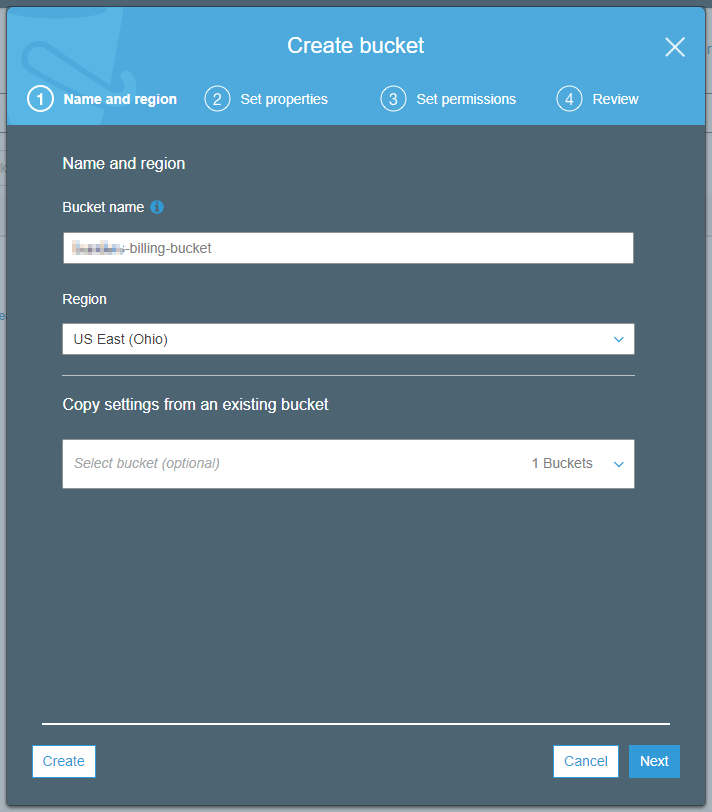
On the Amazon S3 page, click Create bucket.
In the Create bucket wizard, choose a Bucket name and Region and then click Next.
On the Set properties page, keep the default values, and then click Next.
On the Review page, click Create bucket. Your bucket list is displayed.
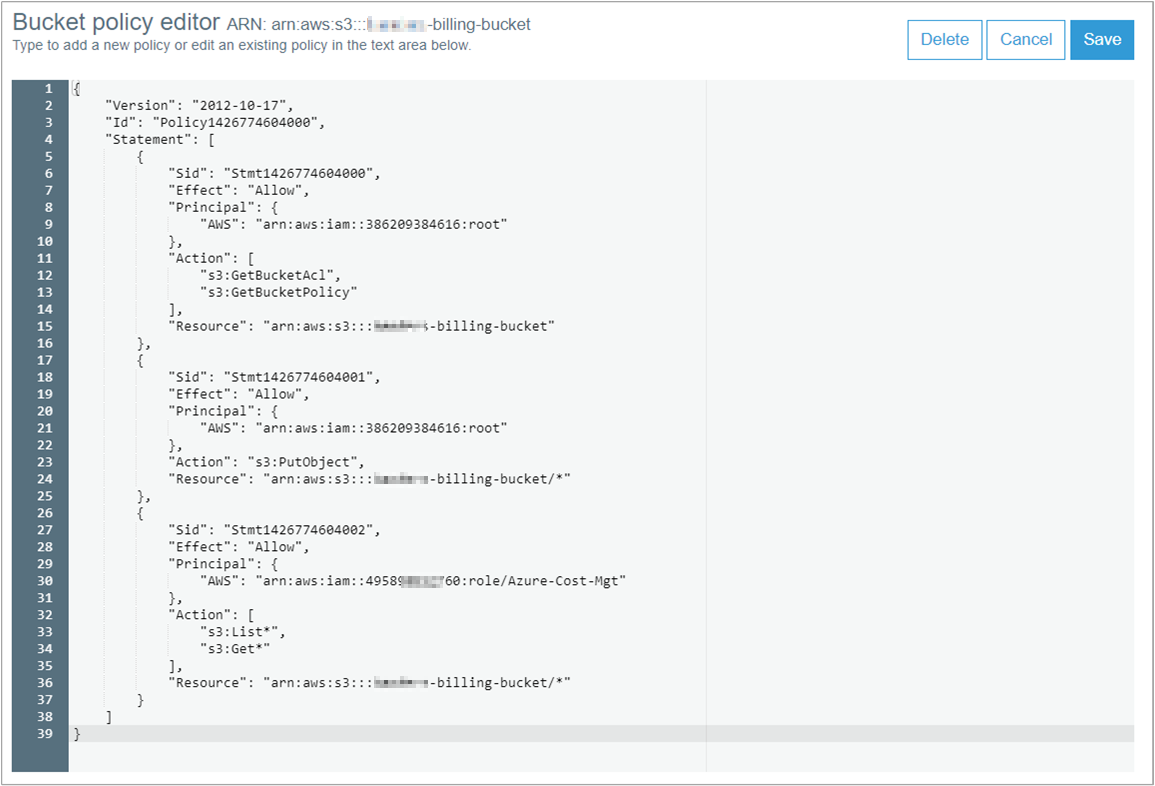
Click the bucket that you created and select the Permissions tab and then select Bucket Policy. The Bucket policy editor opens.
Copy the following JSON example and paste it in the Bucket policy editor.
- Replace
<BillingBucketName>with the name of your S3 bucket. - Replace
<ReadOnlyUserOrRole>with the Role or User ARN that you had previously copied.
{ "Version": "2012-10-17", "Id": "Policy1426774604000", "Statement": [ { "Sid": "Stmt1426774604000", "Effect": "Allow", "Principal": { "AWS": "arn:aws:iam::386209384616:root" }, "Action": [ "s3:GetBucketAcl", "s3:GetBucketPolicy" ], "Resource": "arn:aws:s3:::<BillingBucketName>" }, { "Sid": "Stmt1426774604001", "Effect": "Allow", "Principal": { "AWS": "arn:aws:iam::386209384616:root" }, "Action": "s3:PutObject", "Resource": "arn:aws:s3:::<BillingBucketName>/*" }, { "Sid": "Stmt1426774604002", "Effect": "Allow", "Principal": { "AWS": "<ReadOnlyUserOrRole>" }, "Action": [ "s3:List*", "s3:Get*" ], "Resource": "arn:aws:s3:::<BillingBucketName>/*" } ] }- Replace
Click Save.
Enable AWS billing reports
After you create and configure the S3 bucket, navigate to Billing Preferences in the AWS console.
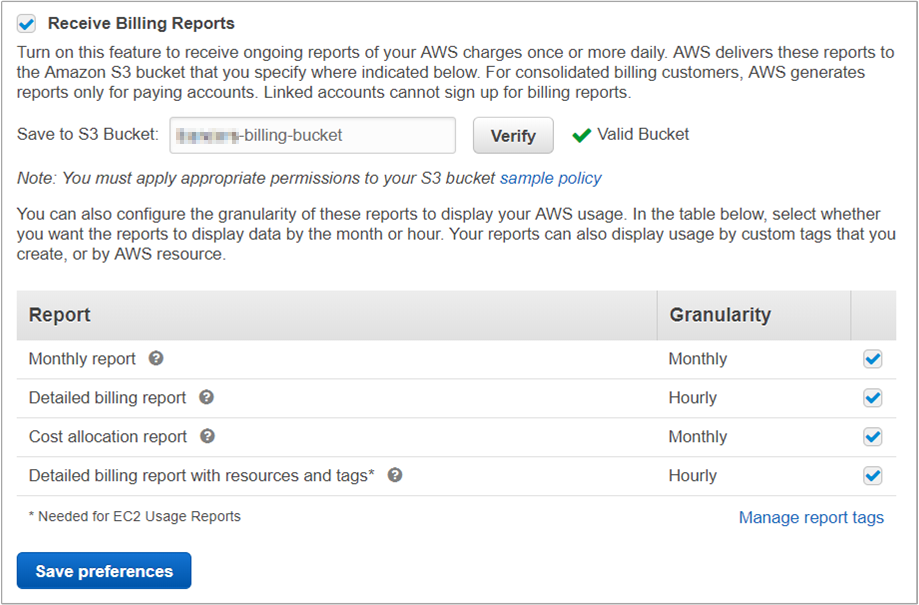
- On the Preferences page, select Receive Billing Reports.
- Under Receive Billing Reports, enter the name of the bucket that you created and then click Verify.
- Select all four report granularity options and then click Save preferences.
Cloudyn retrieves detailed billing information from your S3 bucket and populates reports after detailed billing is enabled. It can take up to 24 hours until detailed billing data appears in the Cloudyn console. When detailed billing data is available, your account consolidation status appears as Consolidated. Account status appears as Completed.

Some of the optimization reports may require a few days of data to get an adequate data sample size for accurate recommendations.
Next steps
- To learn more about Cloudyn, continue to the Review usage and costs tutorial for Cloudyn.