Tutorial: Configure compute on Azure Stack Edge Pro 2
This tutorial describes how to configure a compute role and create a Kubernetes cluster on your Azure Stack Edge Pro 2 device.
This procedure can take 20 to 30 minutes to complete.
Important
Managed IoT Edge on Azure Stack Edge uses an earlier version of the IoT Edge runtime that doesn't include the latest features and patches.
- Support for existing deployments of managed IoT Edge on Azure Stack Edge will end on March 31, 2024, and existing IoT Edge workloads will be removed. You must upgrade to the latest version of Azure Stack Edge and deploy IoT Edge on an Ubuntu VM.
- For Azure Stack Edge 2301 and later, all deployments of IoT Edge on Azure Stack Edge must be on an Ubuntu VM.
For detailed instructions, see Deploy IoT runtime on Ubuntu VM on Azure Stack Edge.
In this tutorial, you learn how to:
- Configure compute
- Get Kubernetes endpoints
Prerequisites
Before you set up a compute role on your Azure Stack Edge Pro device, make sure that:
You've activated your Azure Stack Edge Pro 2 device as described in Activate Azure Stack Edge Pro 2.
Make sure that you've followed the instructions in Enable compute network and:
- Enabled a network interface for compute.
- Assigned Kubernetes node IPs and Kubernetes external service IPs.
Note
If your datacenter firewall is restricting or filtering traffic based on source IPs or MAC addresses, make sure that the compute IPs (Kubernetes node IPs) and MAC addresses are on the allowed list. The MAC addresses can be specified by running the
Set-HcsMacAddressPoolcmdlet on the PowerShell interface of the device.
Configure compute
To configure compute on your Azure Stack Edge Pro, you create an IoT Hub resource via Azure portal.
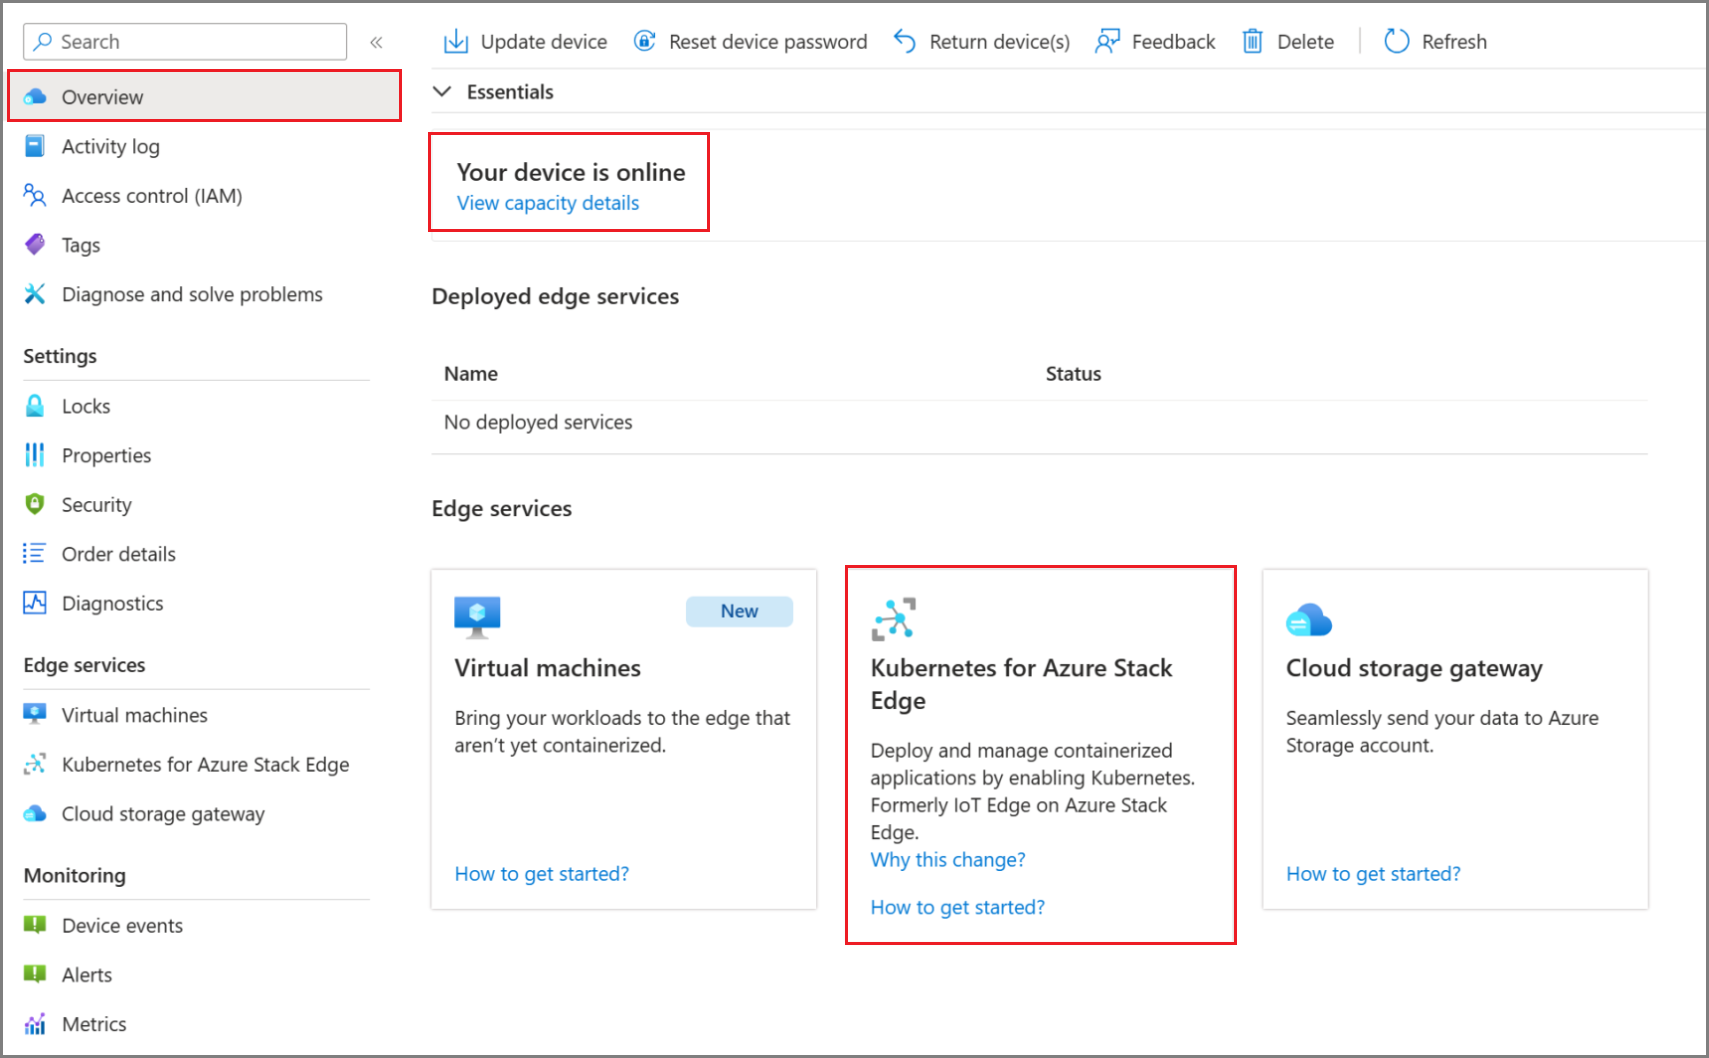
In the Azure portal of your Azure Stack Edge resource, go to Overview, and select Kubernetes for Azure Stack Edge.
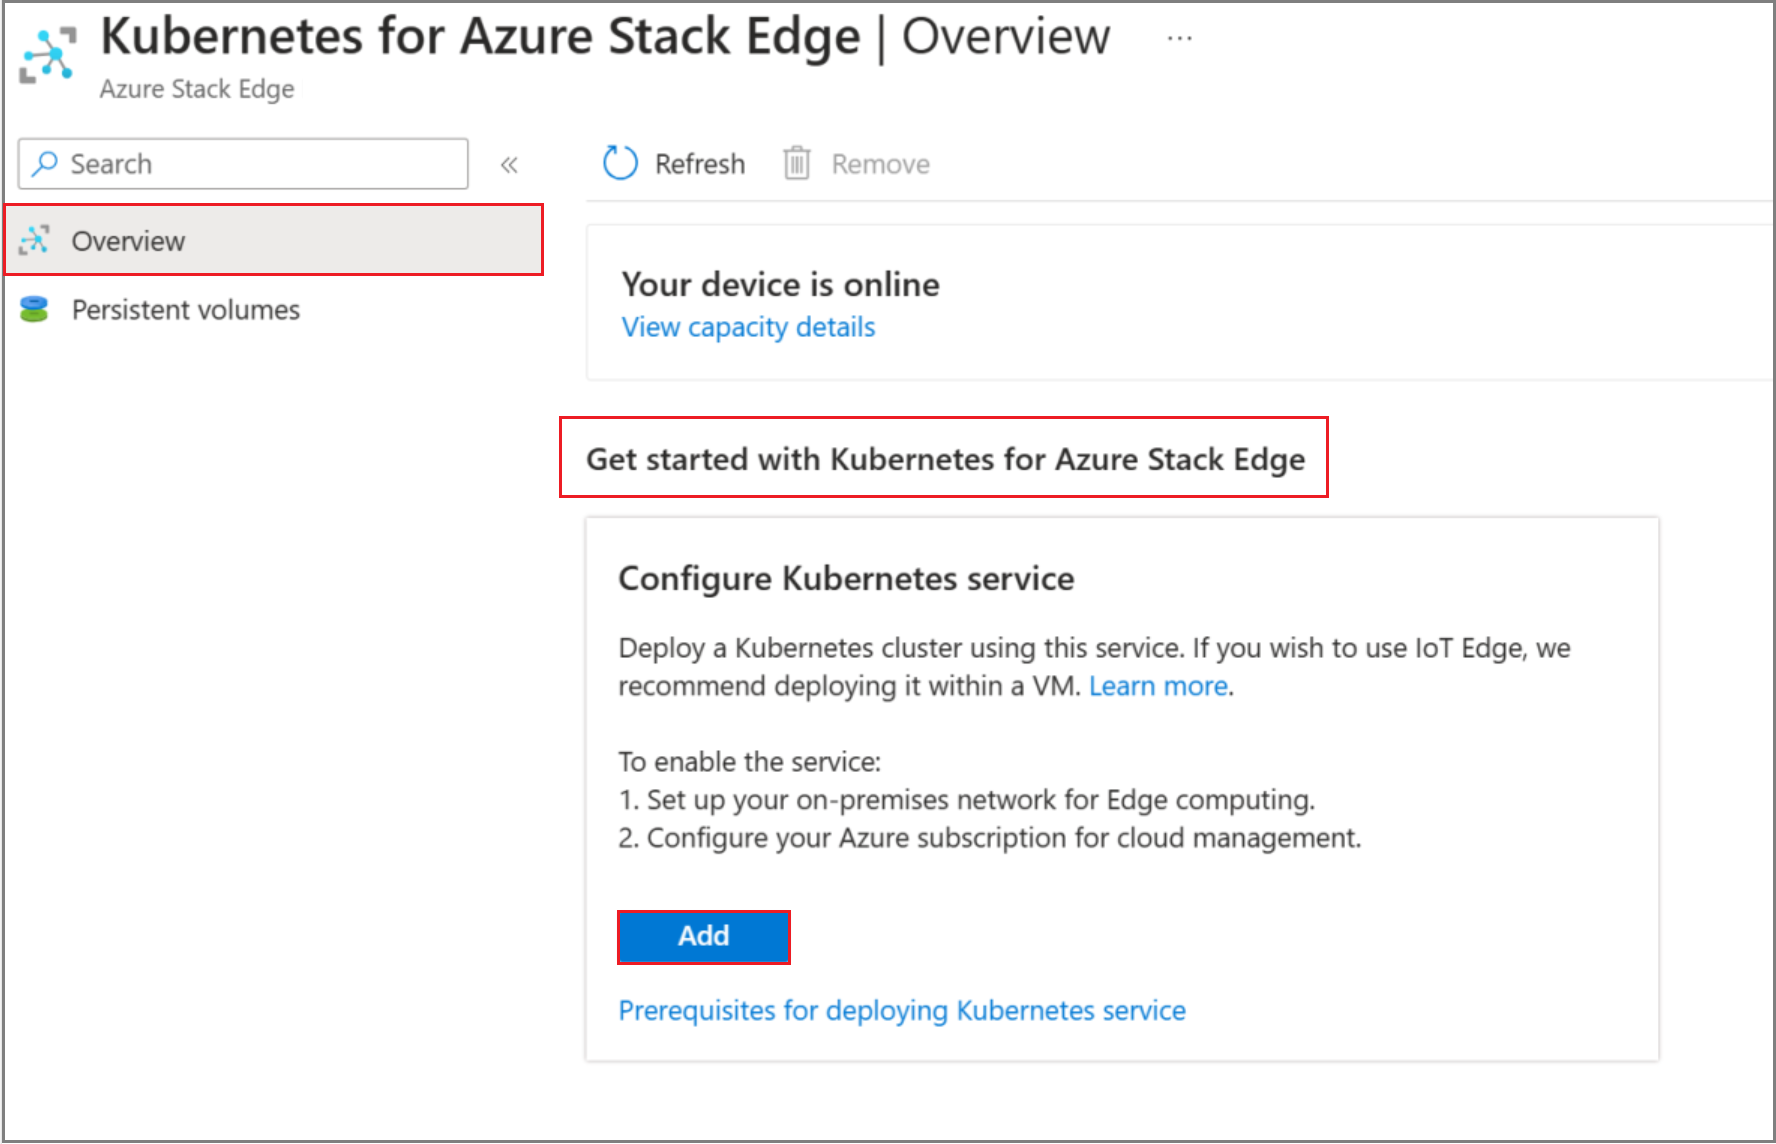
In Get started with Kubernetes service, select Add.
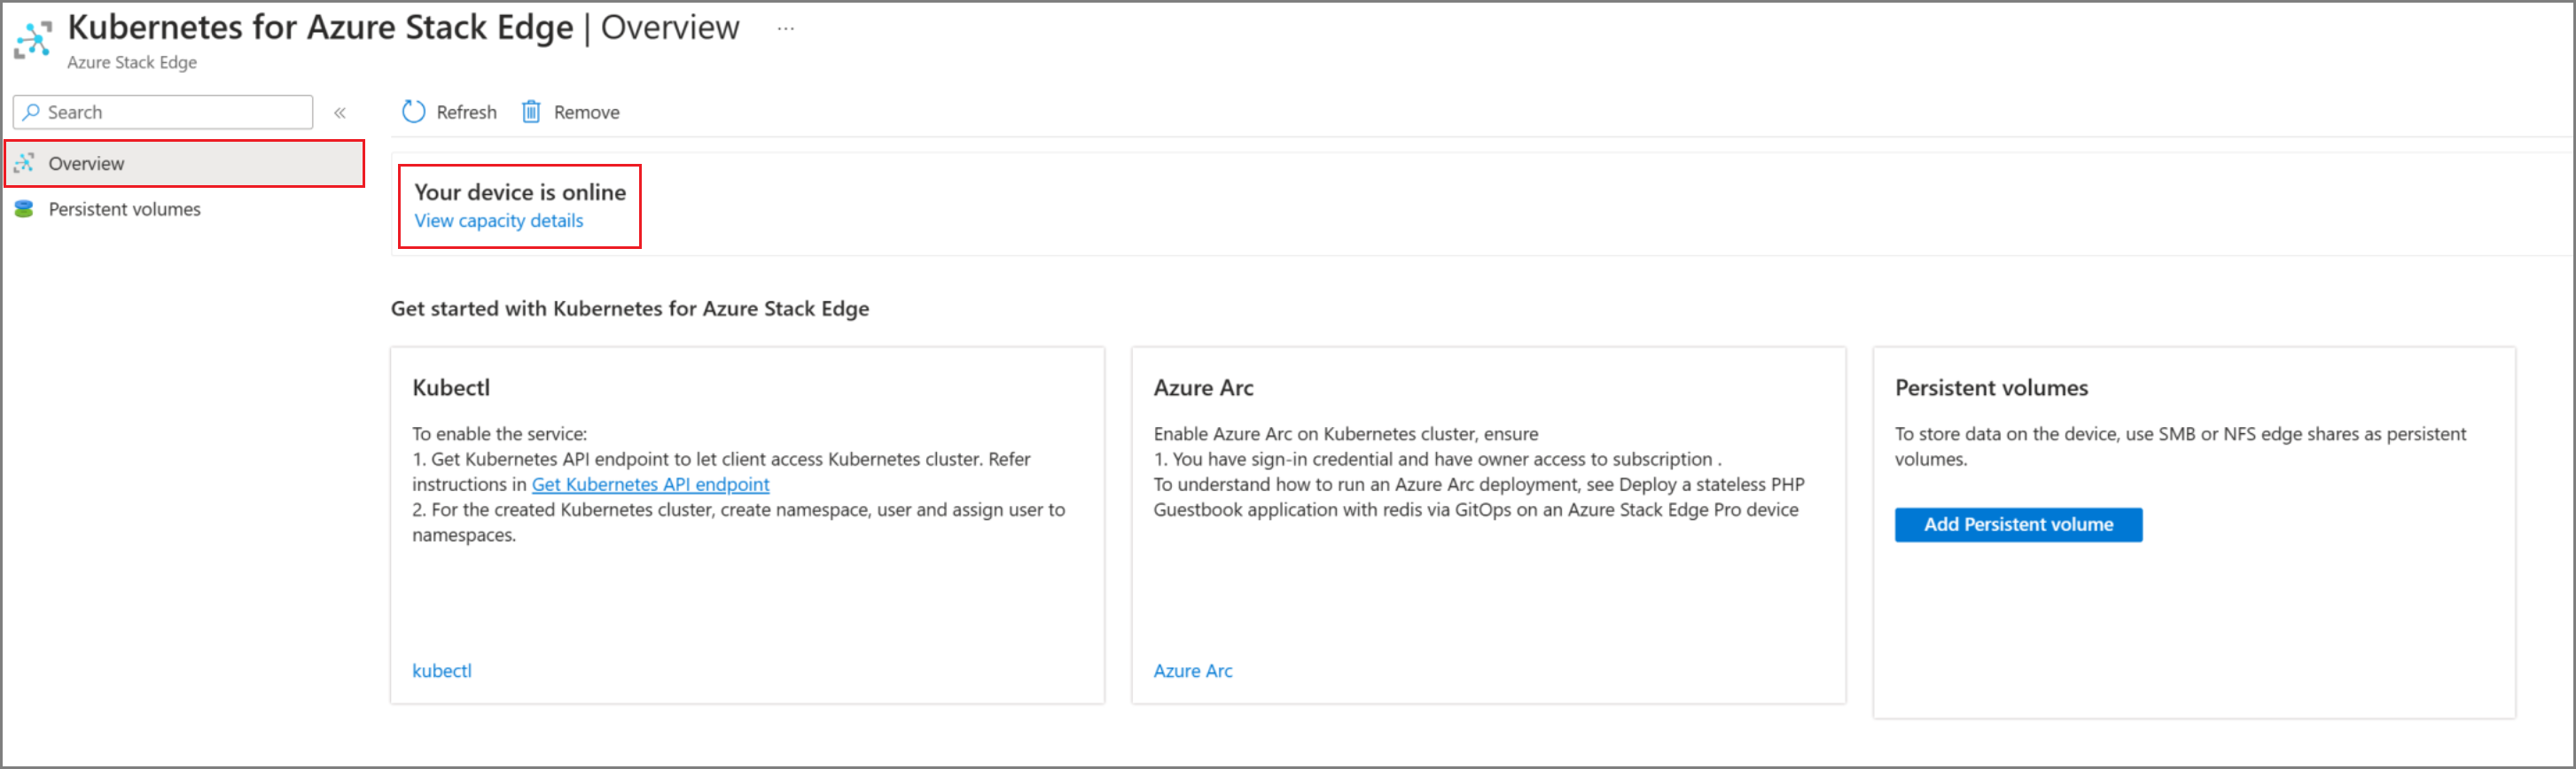
After the resource is created, the Overview indicates that the Kubernetes service is online.
It can take 20-30 minutes to configure compute because, behind the scenes, virtual machines, and a Kubernetes cluster are being created.
Get Kubernetes endpoints
To configure a client to access Kubernetes cluster, you will need the Kubernetes endpoint. Follow these steps to get Kubernetes API endpoint from the local UI of your Azure Stack Edge device.
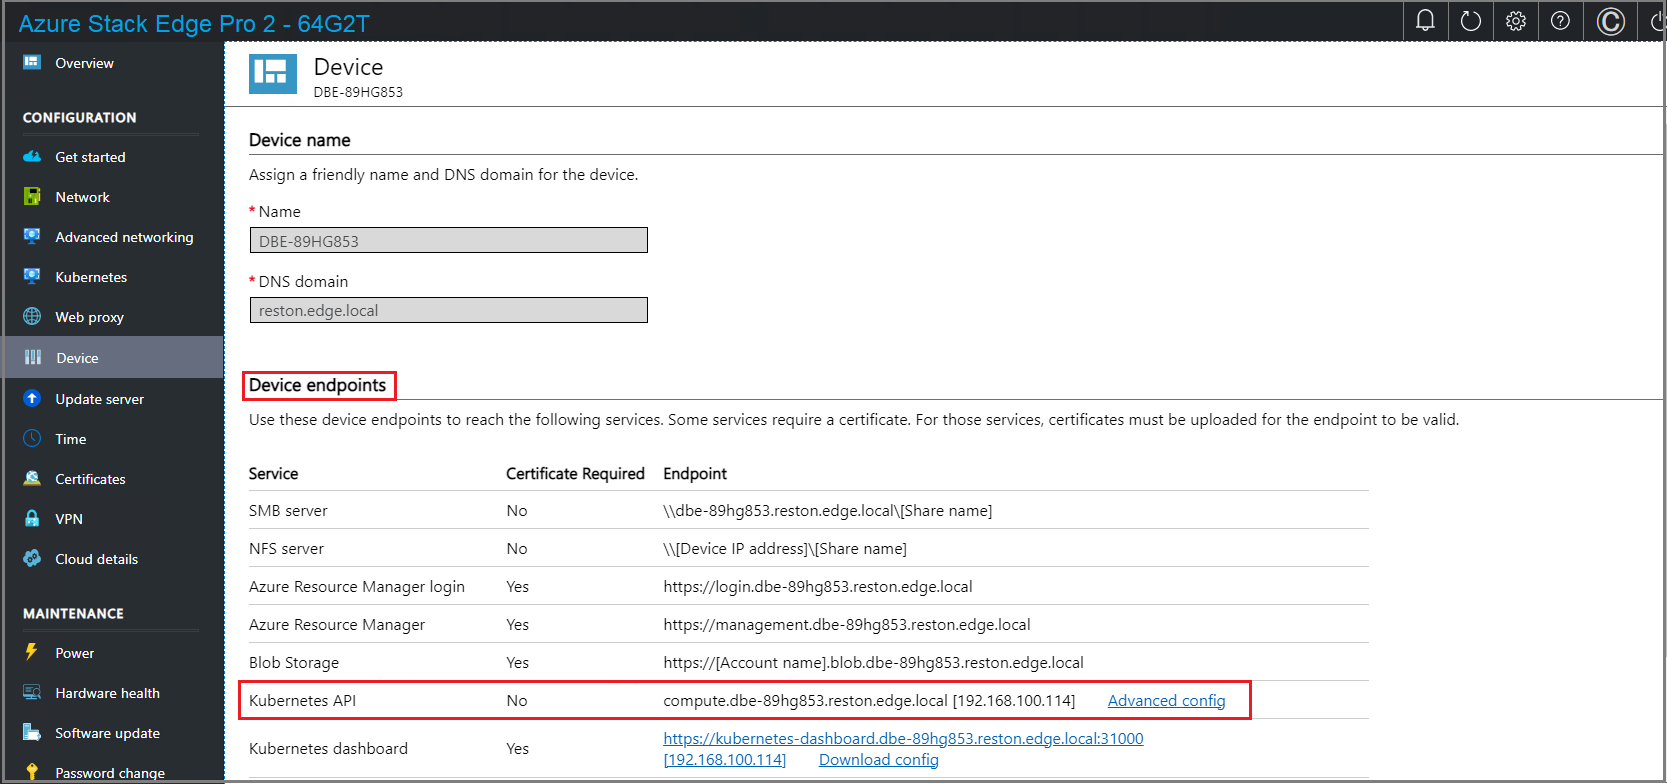
In the local web UI of your device, go to Devices page.
Under the Device endpoints, copy the Kubernetes API service endpoint. This endpoint is a string in the following format:
https://compute.<device-name>.<DNS-domain>[Kubernetes-cluster-IP-address].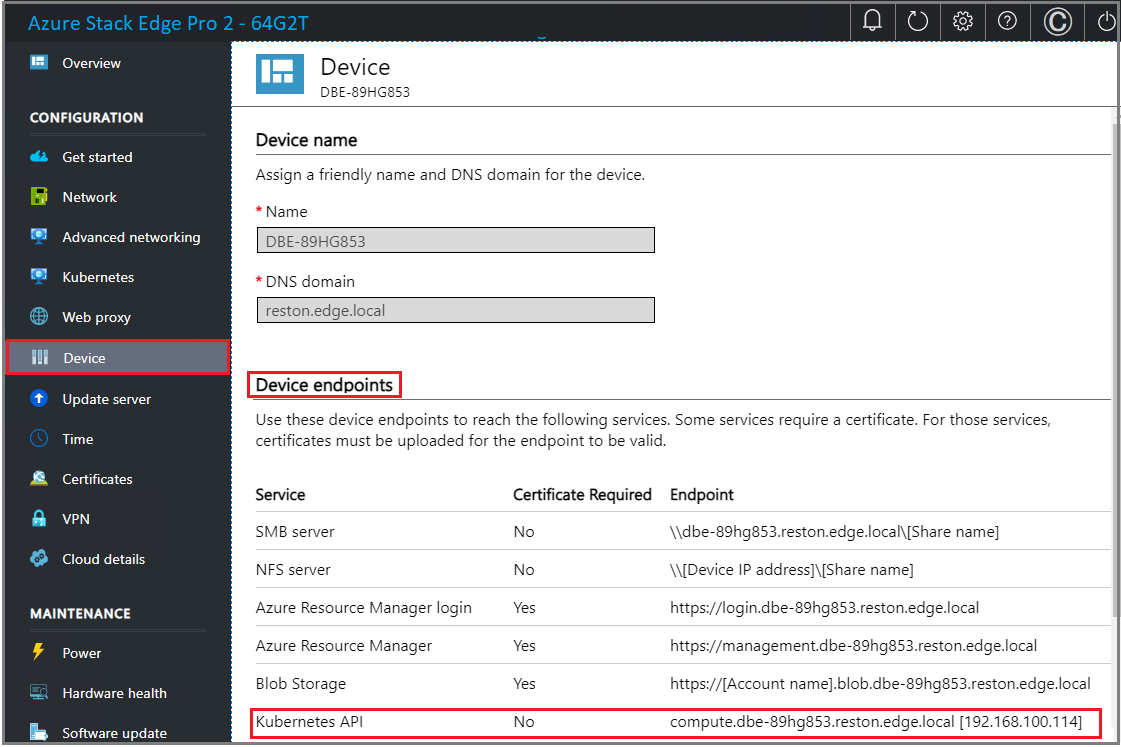
Save the endpoint string. You will use this endpoint string later when configuring a client to access the Kubernetes cluster via kubectl.
While you are in the local web UI, you can:
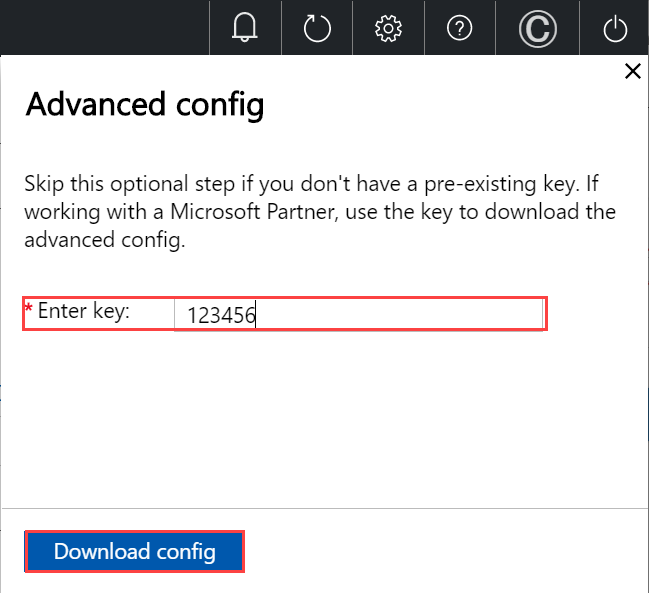
Go to Kubernetes API, select advanced settings, and download an advanced configuration file for Kubernetes.
If you have been provided a key from Microsoft (select users may have a key), then you can use this config file.
You can also go to Kubernetes dashboard endpoint and download an
aseuserconfig file.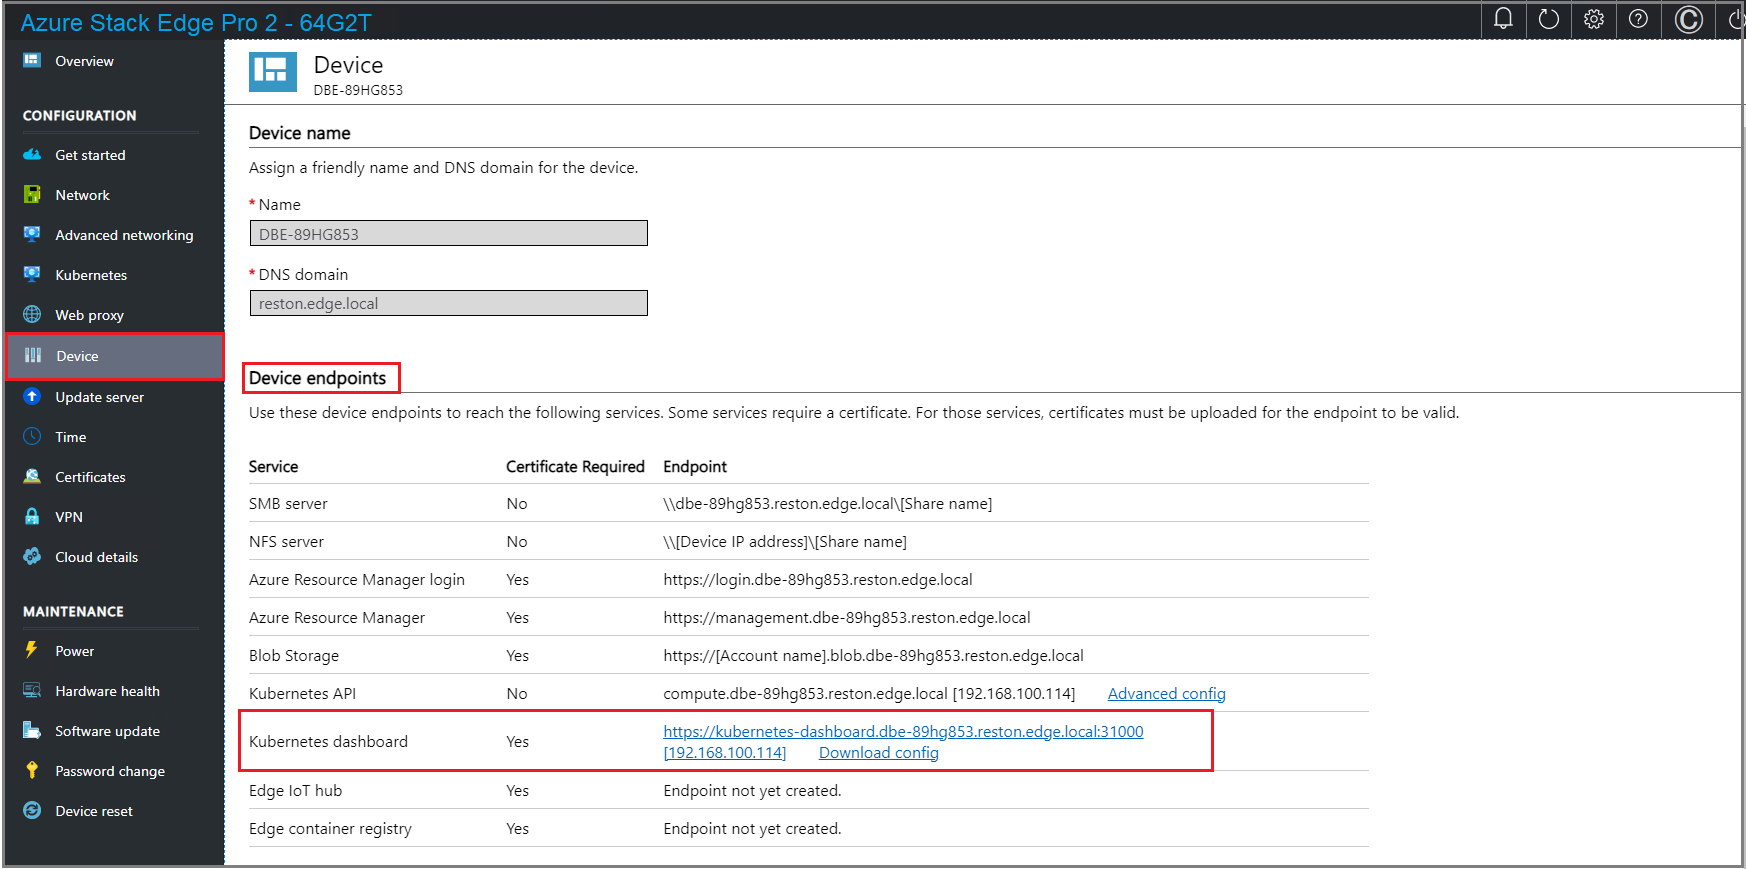
You can use this config file to sign into the Kubernetes dashboard or debug any issues in your Kubernetes cluster. For more information, see Access Kubernetes dashboard.
Next steps
In this tutorial, you learned how to:
- Configure compute
- Get Kubernetes endpoints
To learn how to administer your Azure Stack Edge Pro 2 device, see:
Feedback
Coming soon: Throughout 2024 we will be phasing out GitHub Issues as the feedback mechanism for content and replacing it with a new feedback system. For more information see: https://aka.ms/ContentUserFeedback.
Submit and view feedback for